

Bordfunker
-
Posts
1,005 -
Joined
-
Last visited
-
Days Won
17
Content Type
Profiles
Forums
Blogs
Gallery
Downloads
Store
Events
Posts posted by Bordfunker
-
-
Rather than painting the pin striping back in, couldn’t you use black pin striping tape instead?
Would probably be a lot easier.
Karl
-
The engine is looking very spic and span.
What’s the plan for the gearbox? Full rebuild?
Karl
-
As the more observant amongst you may have noticed, it has been a little breezy today!
Which combined with the heavy rain, has meant I wasn't able to roll the body tub out onto the drive, thus giving me space to work properly in the garage, which in turn has limited what I could get done today.
So I'd thought I'd have a go a sorting out a better solution for feeding grit to my media blast gun, as a length of heater hose stuck in a bucket isn't quite cutting it!
The first challenge was finding some 8mm internal diameter tubing in the Banbury area, cue 2 hours wandering around various DIY barns looking for something appropriate to no avail.
Nothing for it but to look online, which highlghted the fact that aquatic shops stock this stuff, so trip out to a very down at heel aquatics place in Banbury, which did at least have a length of the right size hose. Hooray!!!
Which allowed me to modify my media gun to this.

Originally the gun had a large plastic shroud and a long feed tube for use with a bag for spot blasting, but that was just getting in the way, so off came the shroud, and the feed tube was cut down substantially, which means it now fits into tight corners, which is what I need for the chassis.
The next bit gets really Heath Robinson, as I rigged up a feed hopper from an old lemonade bottle and funnel.

I did tell you it was very Heath Robinson! Hey, but it works, which did allow me to get some blasting done.
Having said that, I think I might have to invest in a blast cabinet as there are a myriad of small parts to clean up, and I'm currently making such a mess of the garage!
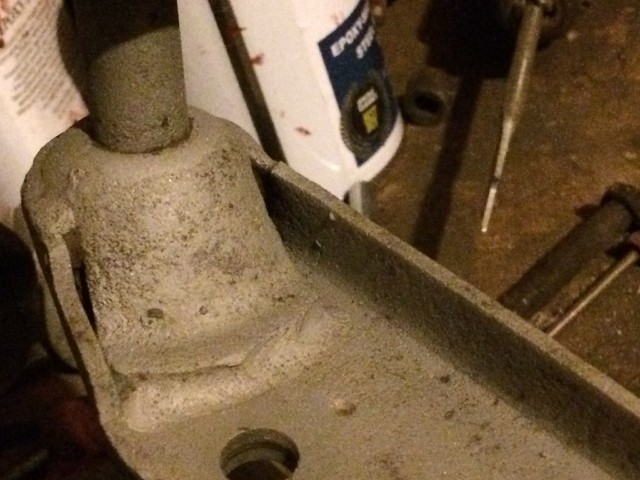
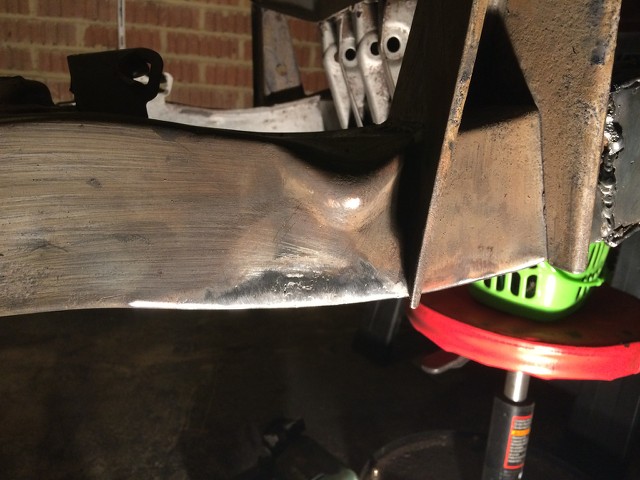
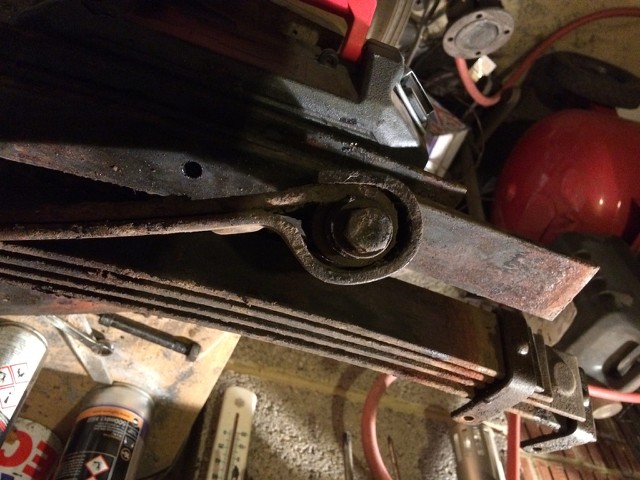
Anyway, I had another go at the vertical link that I started on last week, and gave it a scaping with a small screwdriver, which revealed that areas that I thought were solid weld, were in fact compacted crud!
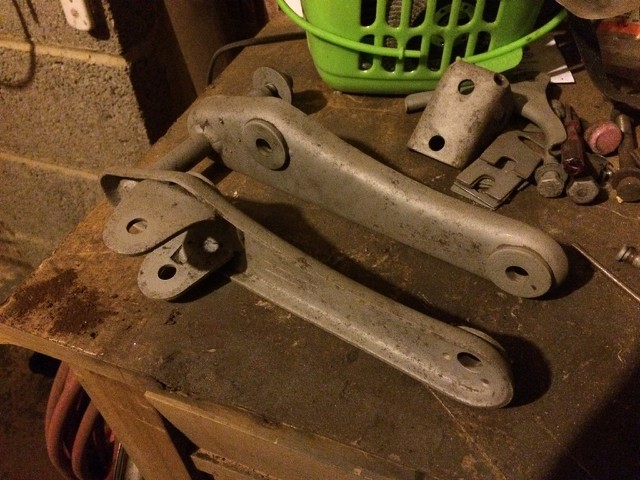
The two areas circled in the photo below were 'solid' before I attacked them with the screwdriver, and then blasted the cavity clean.
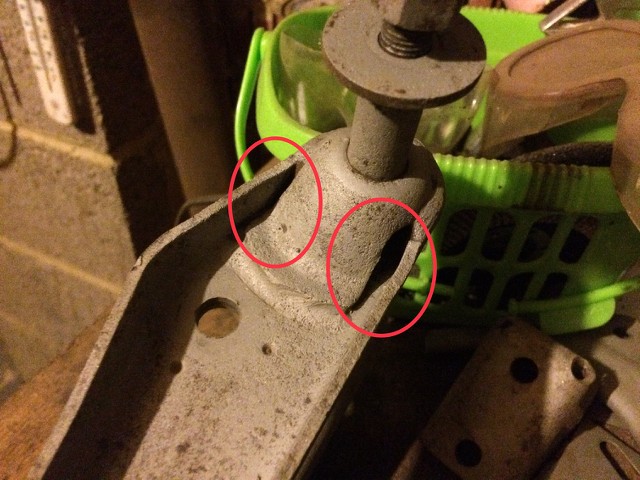
Leaving me with this!
And that folks is the sum total of my progress this weekend!
The good news is that I have Monday and Tuesday off, so weather permitting, I may get a few more hours in the garage over the next couple of days.
Karl
-
Glad you’re enjoying the thread, it’s been fun doing it, and the help and advice I have had from others on this forum has been a godsend.
With regards posting on the forum I use a laptop for anything with photos as my iPad is next to useless for it.
Karl
-
Having used the Chic Doig repair section for this area on my Herald, I would thoroughly recommend them, and I’ll be going back for another for the driver’s side on mine as well.
This is the sort of rot you might find when you start to dig around the footwell area.

Karl
-
If that’s within 30cm of a body mounting point that will proper repair to ensure the structural integrity of the bulkhead or tub.
If it’s anthing like mine the rot will extend further than you first think or hope.
Karl
-
Mark, all the studs that I have removed from the rear suspension have actually been in really good nick, and should be good to go again with a clean up and some new Nylocs.
Has your Midge spent time at sea from the look of the bolt?
Colin, I know what you know about the finish, it’s lovely and smooth, but with just the right texture to take paint.
Wire brushing just doesn’t get close, but then all the muck it removes has to go somewhere, and that typically seems to be over me!
I look like a coal miner after a blasting session! I would dearly love a blasting cabinet for the smaller components, of which there are many.
Karl
-
After last week's dramatic progress, it was back to slow and steady this weekend.
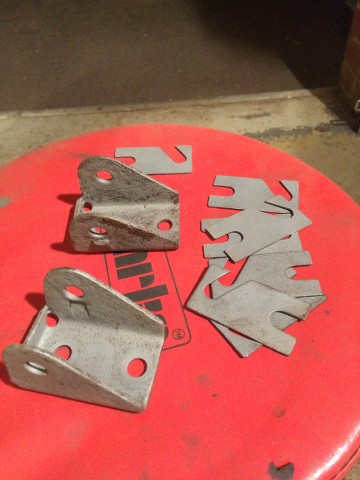
I only managed a couple of hours on Saturday, so spent some time cleaning up the chassis welds ahead of doing the next bit of painting, and stripping off the rear track control arm mounts from the rear outriggers, and yes I did make a note of the number of shims on each one:
- DS 3 shims
- PS 4 shims
I even took photos as an extra precaution.
The brackets themselves were pretty cruddy, and included a goodly coat of rust & under seal.
These were first attacked with a wire wheel in the drill to get the loose crud off, before getting media blasted.
Note the underseal still stubbornly clinging to one of the brackets. That will have to come off before I apply rust stopper.
I also had a go at the handbrake wishbone, as like everything else on the underside of this car it was covered in cack!
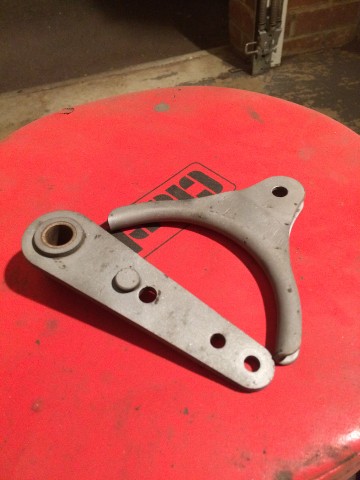
Much nicer! So onto something a little bigger, the rear passenger side upright.
This needs a bit more attention from the blaster, as some of the muck was proving resistant to both wire brushes and blast media.
And seeing as I had the blasting gear out, and I was already thoroughly covered in grit, I thought I might as well crack on with cleaning up the chassis.
First up was the interior of the top hat sections above the rear of the diff.
These are quite difficult to get a blaster into, and you can't see what you are doing either, so it's a case of point and hope.
I think I'll give them one more go, then apply the rust stopper, as I don't think I'll get them much better than that.
After that, I had another go at the driver's side front diff mount, taking it from this....
....to this....
Still more blasting to be done, but for that I'll jack the chassis up so that I can get underneath properly and see what I'm doing.
Hopefully the weather will stay fine next weekend, as I'm hoping to get the chassis blasted back to the middle outrigger so that I can then paint the chassis from there back, as well as all the other little bits like the springs which still need another coat of paint.
Karl
-
 3
3
-
Liking the fan!
Did you paint it up?
Karl
-
They are looking a lot better with a cleanup and a coat of paint.
Karl
-
Mrs B was off at a crafting event this morning, leaving me at a loose end to work on the car, but not wishing to annoy the neighbours I had to start off doing something quiet until a reasonable hour.
What to do?
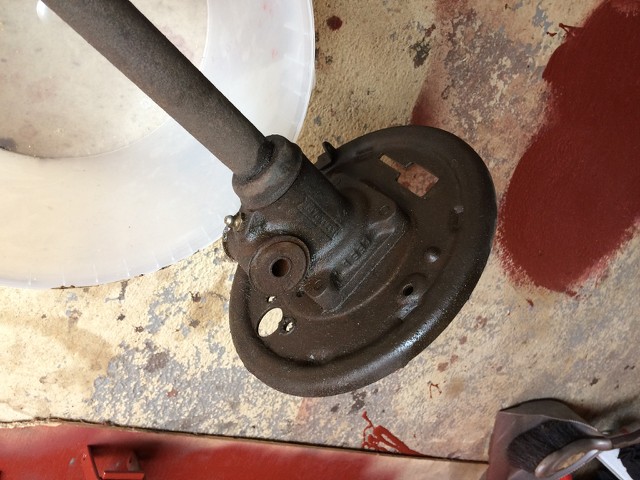
I made a start on cleaning and stripping down the driver's side rear hub and driveshaft, first giving everything a coat of Gunk, which was worked in with a brush, before being wiped off with a clean rag.
This left me with a cleaner assembly, which I could then start to strip down.
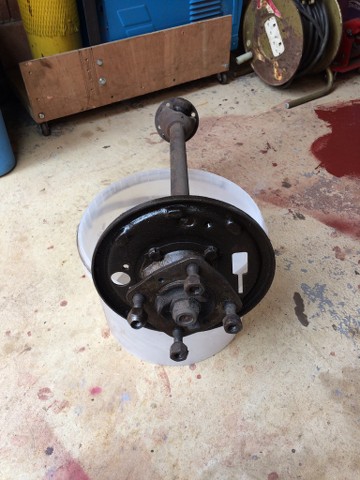
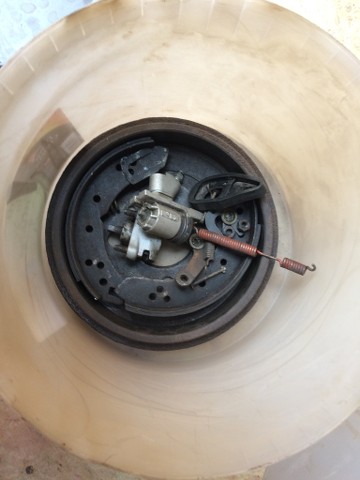
And a bucket of brake bits.
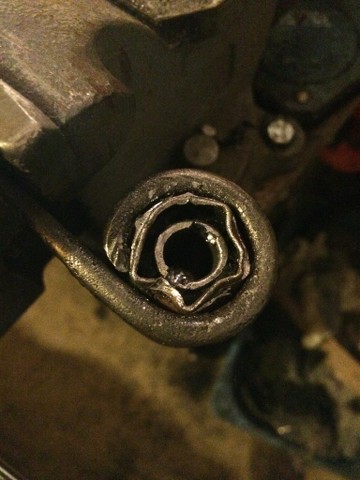
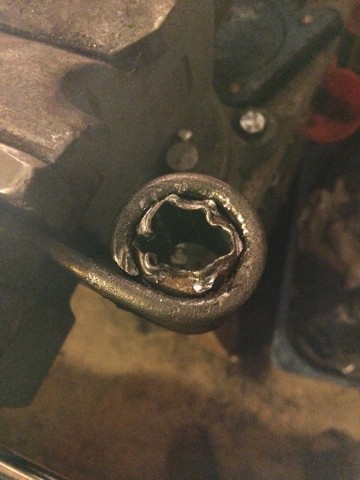
While cleaning the hub & driveshaft assembly I noticed this in the UJ.
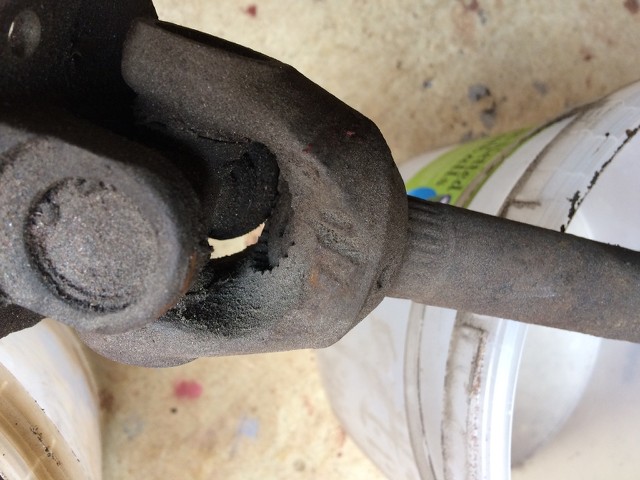
You can't see it too clearly from the pic above, but there appear to be 3 gouges in the yoke attached to the driveshaft, which are not replicated on the other side, or on the other hub assembly, therefore not sure if it's damage or a mark from where the casting was cleaned up.
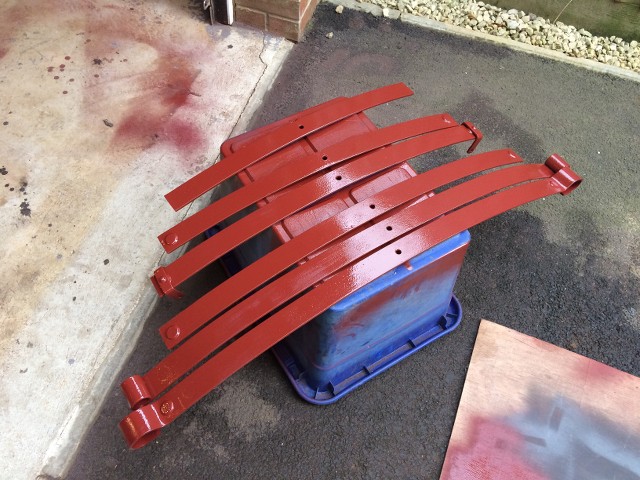
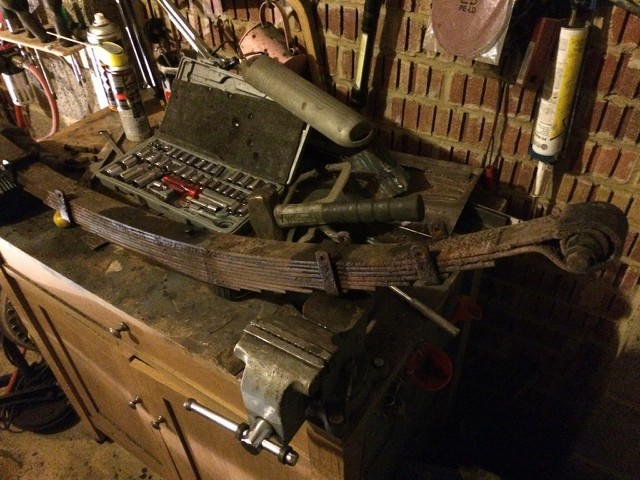
With the rear hub assembly safely stowed away, and the fact that it was now 11, I decided to fire up the compressor and continue the clean up of the leaf springs.
This is where I left them yesterday after attacking each one with an angle grinder and wire brush.
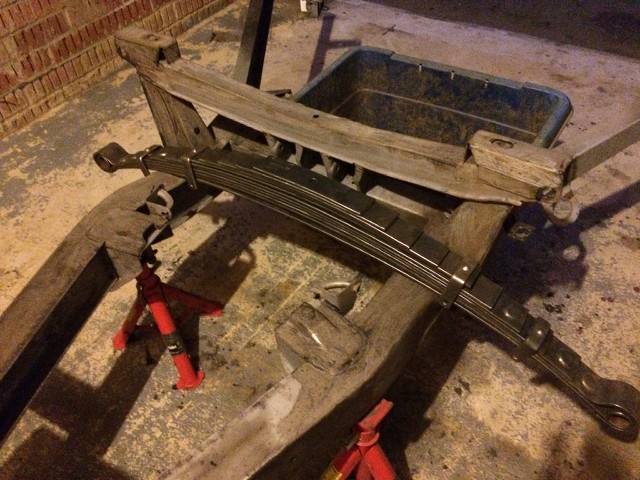
Before I packed up last night I gave them all a coat of rust stopper, which left me with them looking slightly less attractive this morning.
What I hadn't been able to do yesterday was clean up the insides of spring eyes themselves with the anglegrinder, so I broke out the media blast gun., and cleaned up the eyes and any other nooks and crannies that I had been unable to reach previously.
So with that lot cleaned up, and time on my hands, there was no excuse for not finally breaking out the epoxy mastic primer, mixing up a batch, spiling it on the floor, cleaning it off the floor, and then finally getting it into a spray gun, so that I actually got to apply paint!
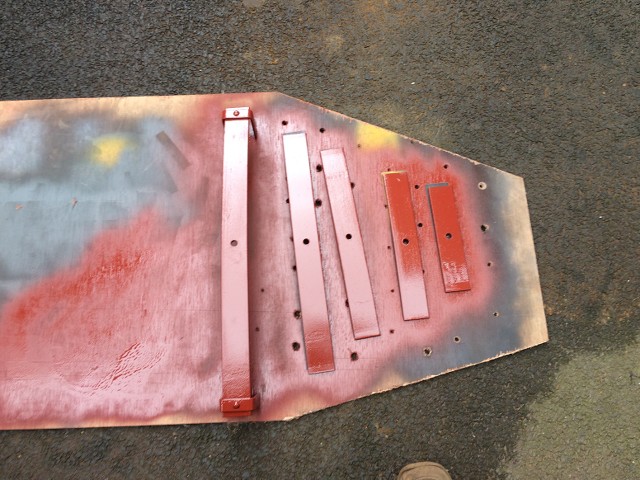
This stuff is seriously thick, and even thinning it by the maximum reccomended 20%, left me with a fairly thick mix, which required about 80PSI to spray properly. Having said that it went on very well, so I also painted the rear track control arms and shocks. Next time I'm going to increase the thinner ratio.
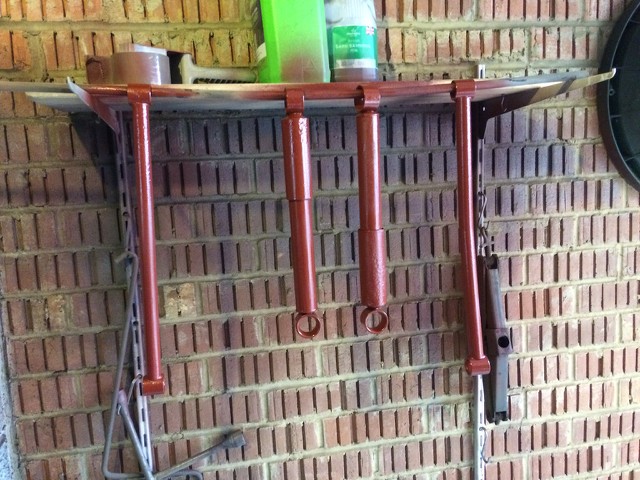
But I still had quite a lot of paint left, so I thought I might as well go for it and start painting the rear of the chassis.
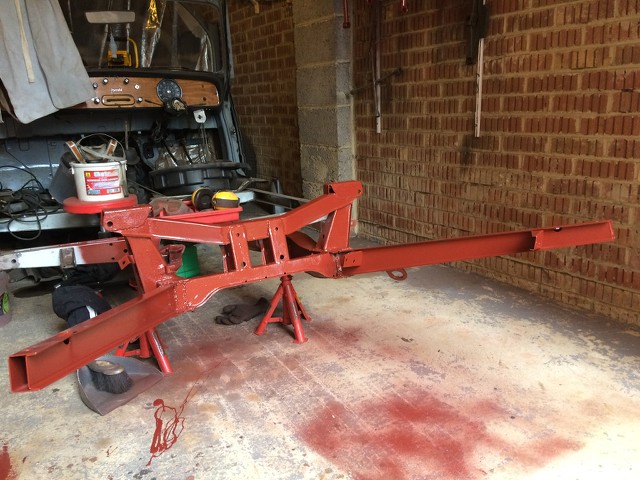
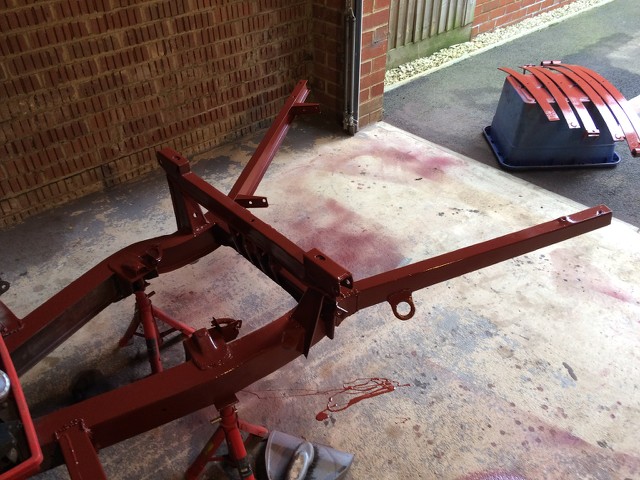
There is still some clean up to do on the chassis, particularly in the top hat section above the rear diff mount, but I wanted to start protecting the areas that I had already cleaned up and prevent all that good work being undone by flash rusting, and it also gave me a good opportunity to familiarise myself with the epoxy mastic primer.
That's where I left it for this weekend, but that really does feel like good progress after weeks of what felt like two steps forward, one back.
I'll leave that lot to dry off in the garage, then do the undersides of the spring leaves next week.
Karl
-
3
-
-
Looking good Colin, the parts not you!
Always nice to see parts in primer, feels like progress.
Karl
-
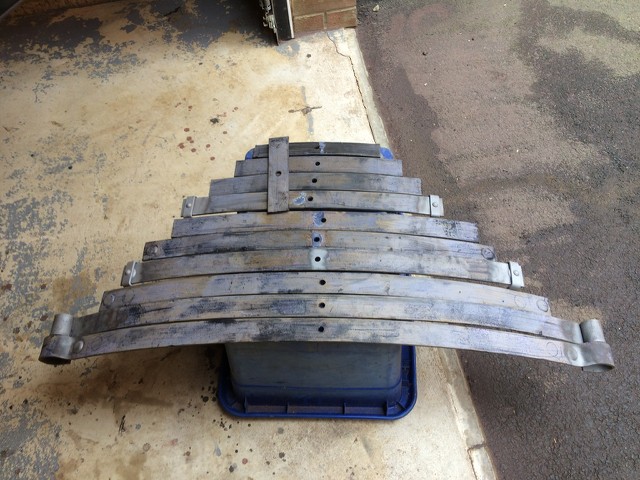
My 1200 has 11 leaves as per the photo below.

You can just about count the leaves through the crud!
Karl
-
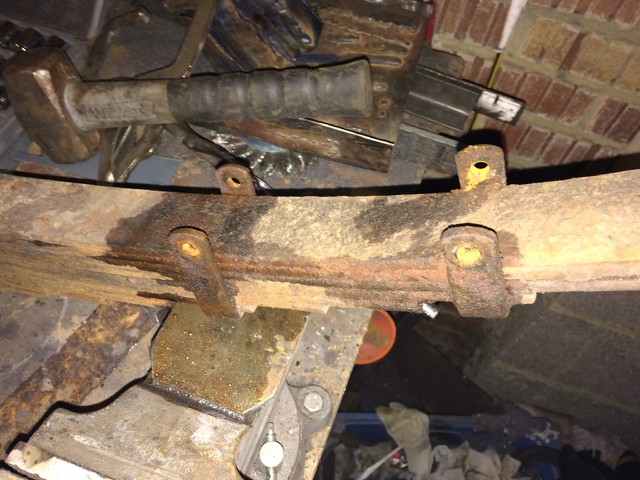
Well I tried using a hacksaw to remove the remains of the spring eye bushes, but despite making two cuts in each, neither would budge, even with serious persuasion from a chisel & lump hammer.
So back to plan A, tungsten cardbide bit in a die grinder, which soon made short work, not just of the of the bushes in the spring, but also the bush that was still stuck in the rear diff mount, leaving me with these sorry bits of metal.
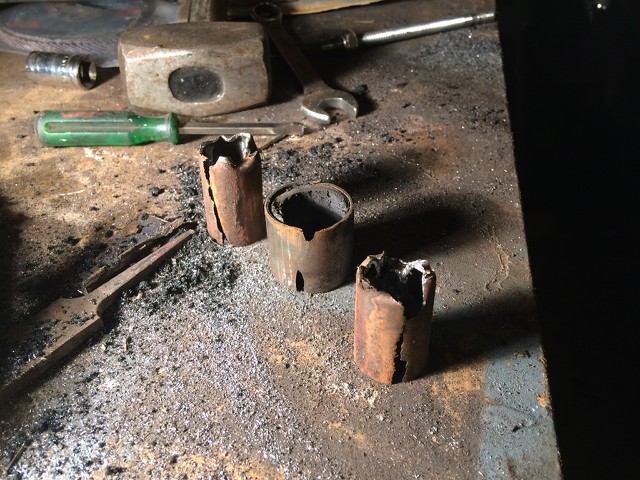
You can see the amount of steel and rubber that had to be removed, from the detritus on the bench!
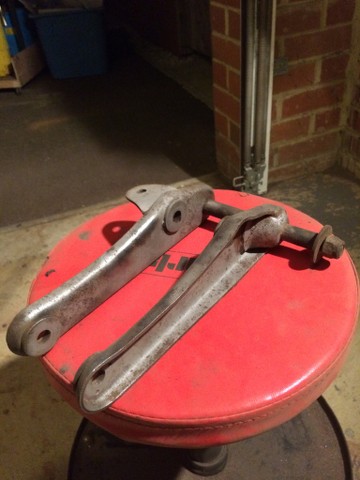
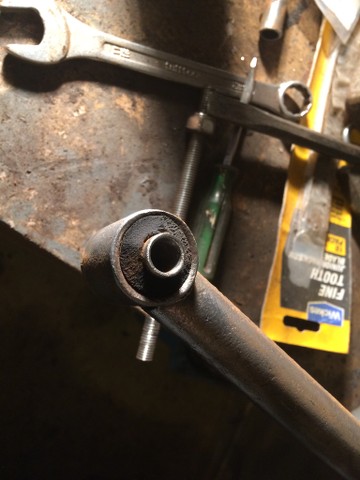
So with these out of the way, I turned my attention to the rear track control arms, or whatever they are called, and removing the bushes them.
The first one I tried resisted all attempts to removce with sockets and studding, and I ended up cutting back the rubber with a wire brush in the angle grinder, and then attacking it with a hammer and chisel.
Still no joy, so I resorted to drilling the rubber out, and then a few quick whacks with the lump hammer and chisel, saw both of them flying across the garage!
Onto the next one, on which both bushes popped out with my usual studding approach, with little to no resistance! Go figure!
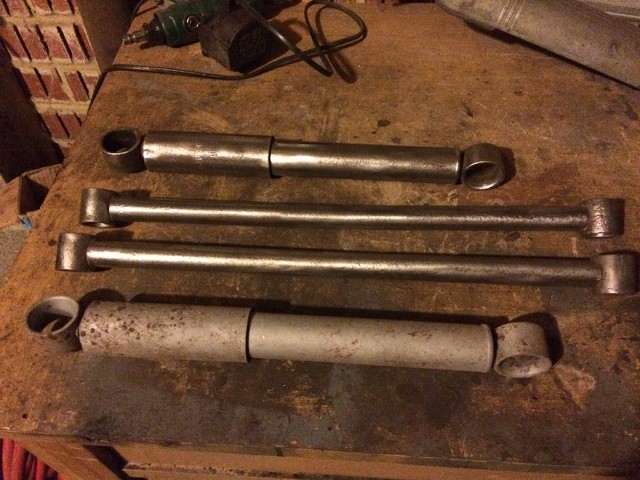
Next up was the remaining rear shock absorber, which was attacked with a wire wheel in the angle grinder, the bushes having come out with ner a fight.
Here it is mid-clean up (above), and alonside it's mate, which was media blasted, and the two track control arms, all of which will get media blasted again, and then given a coat of epoxy mastic when the garage warms up enough.
'Is that all you've managed this weekend? What the hell have you been playing at man?'
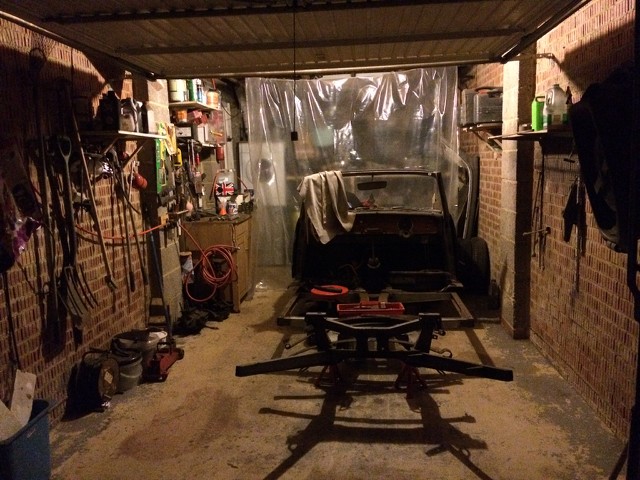
Well actually I spent most of today re-organising the garage to create as much clear space as possible around the car so that I can continue the media blasting, while keeping the mess under control as much as physically possible, so that I now have a clean space, behind the clear curtain, and a dirty space in front of it which will be clutter free by the time I've finished.
All of which allowed me to recover another kilo of blasting grit from the various nooks and crannies!
I still need to sort out all the gardening tools, and my tat on the wall, but that will be a job for next weekend.
Karl
-
Having used Chic’s panels and repair sections before, he may not always be the cheapest, but his panels are very high quality and as a result fit really well.
So in my book well worth any additional expense, whether you are fitting them or someone else.
Karl
-
You mean not use a power tool?
Luddite!
Karl
-
1
-
-
Despite the somewhat less than balmy weather this weekend I made the effort to get into the garage and continue where I left off last week.
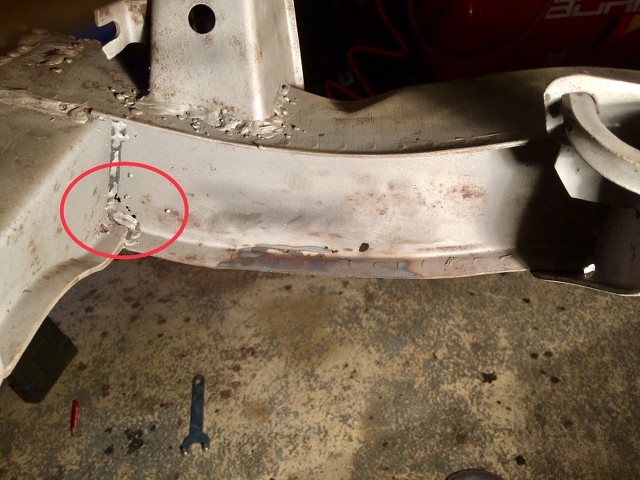
Before that I did though, I spent some time adressing Nick's comment on the porosity of the welds, by reading up a bit on gas flow settings.
I have been welding with a gas flow of 11 litres per second, so tried upping this to 15 LPM, which appears to have addressed the porosity issue as per the picture below.
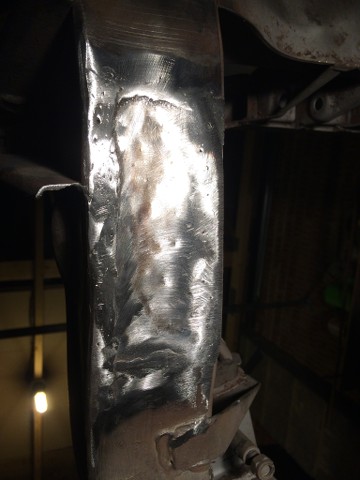
This is after I had cleaned it all back with a flap disc. It's certainly not an invisible repair, but it's nice and strong, and solid all the way round now.
This is where the small side patch was, which just means that I have to address last week's awful fillet weld and we are, fingers crossed, done with the chassis welding.
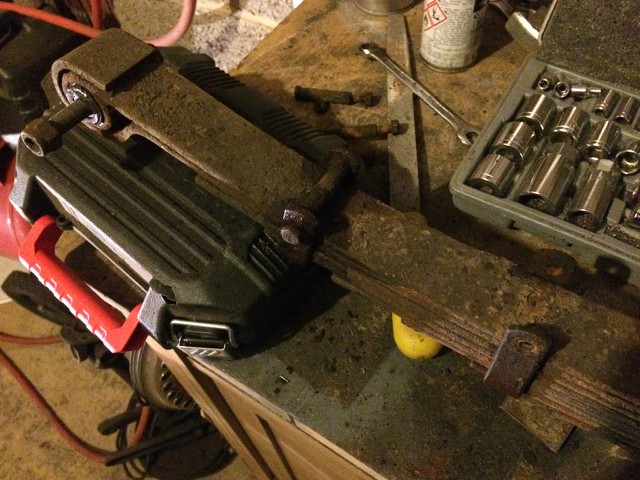
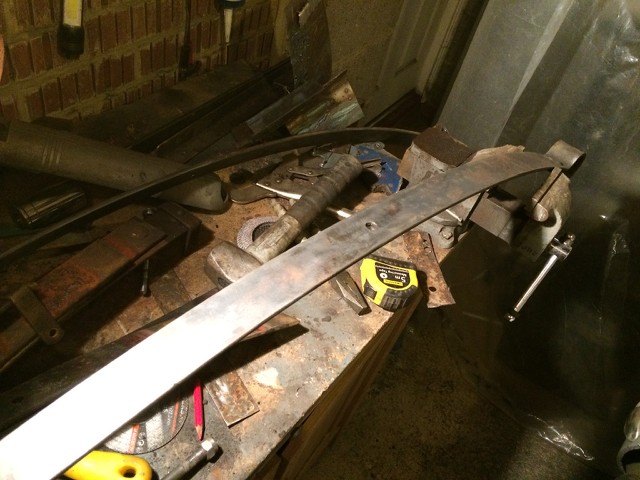
While the welding was cooling down, which was very quickly in this weather, I returned to the leaf spring, and started removing the spring eye bushes.
Here's my usual set up attempting to remove the first of the bushes.
My usual set up not only completely failed to get the bush out, but also completely failed, stripping the thread from the studding in the process.
Time to hit it with a hammer and drift.
Still no movement, this b*gger is well and truly stuck in there.
Time for a coffee and a think.
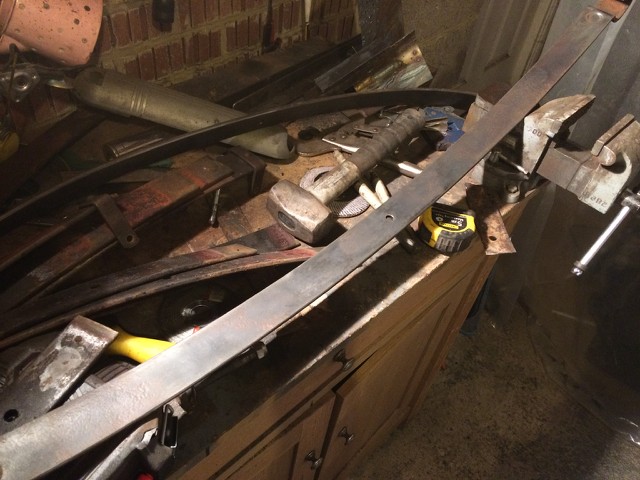
Coffee consumed, time to attack the rubber portions with a drill, followed by a chisel and lump hammer.
Finally some progress. The central steel tube and remains of the bush itself dropped out with a few swift blows, a process I repeated at the other end of the spring.
I still need to remove the steel outer bush sleaves, but that can wait until next week when I plan to attack them a tungsten cardbide burr in the die grinder.
Hopefully by then the mercury in the thermometer will have crept northwards a bit.
Karl
-
Nick, what do you usually run at LPM wise?
Mine is set to about 11 LPM with Hobbyweld, which produces a good weld on the bench, however do I need to increase the flow rate when welding upside down?
As you can tell I’m still getting the hang of this.
Thanks
Karl
-
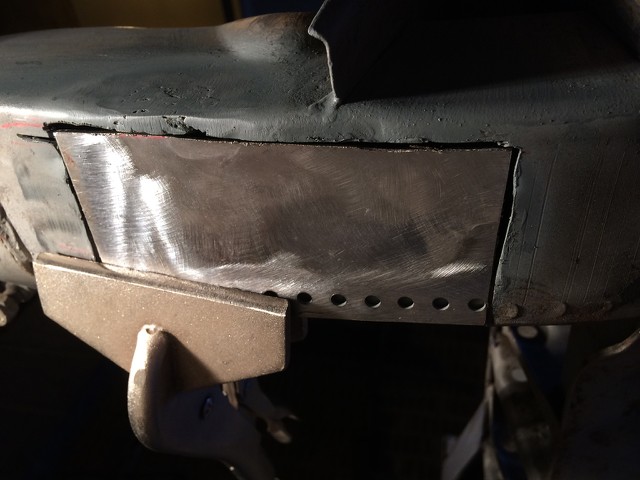
Only a couple of hours in the garage this weekend so not a lot of progress, but I did make a start on welding in the large patch under the chassis.
This is it after the first pass of the welder and a quick grind back with my rapidly disintegrating flap disc.
I need to do another run of weld around the edges, and to tidy up the plug welds, but overall I'm fairly pleased with that.
What I'm not so pleased with was my attempt to do a fillet weld around the patch that I applied last week.
I spent half an hour getting the settings & technique right on the bench before attempting the weld itself, but still ended up with this mess!
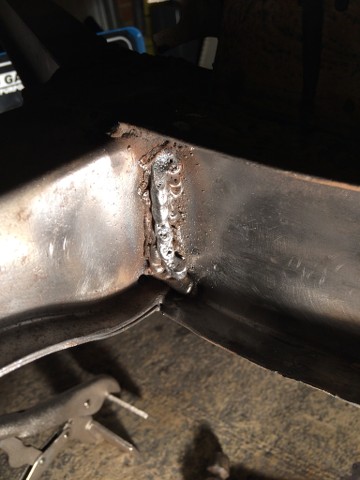
I'll have to grind it back next week and try tidying it up again. It's plenty strong as it is, just not very pretty!
Next up I turned my attention to something I've been wanting to tackle since I took it off the car, stripping the leaf spring down.
First I applied WD40 to all of the nuts and bolts, before starting to remove the 4 bolts at the bottom of the spring assembly.
These actually came out without any issues, which I was pleasantly surprised at, which then allowed me to tackle the bolt holding the leaves of the spring together.
First I clamped the bottom of the bolt in the vice, before clamping the leaves with the F-clamp, to stop the leaves springing apart suddenly.
The nut was then undone, again, very easily, and the F-clamp released, allowing me to strip the spring into it's constituent parts.
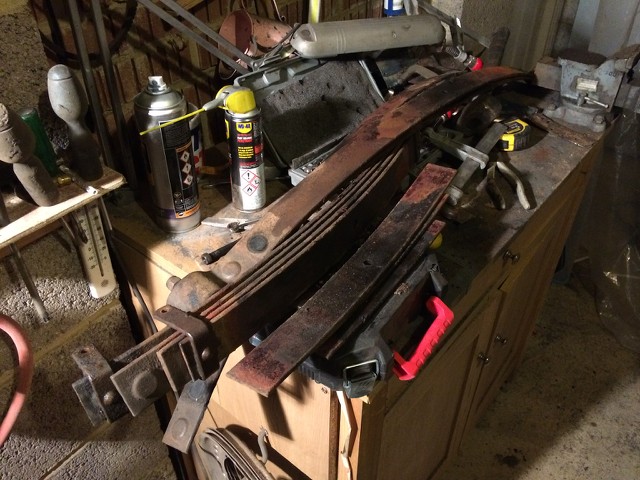
Time to break out the grinder and wire wheel...
....starting with the largest of the spring elements.
I still need to remove the spring eye bushes, but figured that would be easier with the springs cleaned up first.
Once I've cleaned up the springs with a wire wheel, I'll blast them with aluminium oxide, before giving it all a coat of paint.
That's it for this week.
Karl
-
That looks lovely!
Nothing nicer than putting refurbished or new parts back together.
Karl
-
'Super Imp' is that what you call your missus?
The weather was so cold and dank yesterday I just couldn't face the garage.
I know, light weight, fair weather restorer!
But I do have the excuse that it was my wedding anniversary, not that Mrs B would have objected.
However today dawned a lot brighter, if not much warmer, so I decided to venture into the garage and crack on with the chassis welding that I started last week.
First up was the small repair to the outer face of the chassis....

...this was then seam welded, and cleaned up with the angle grinder, but then I forgot to take any photos of it.
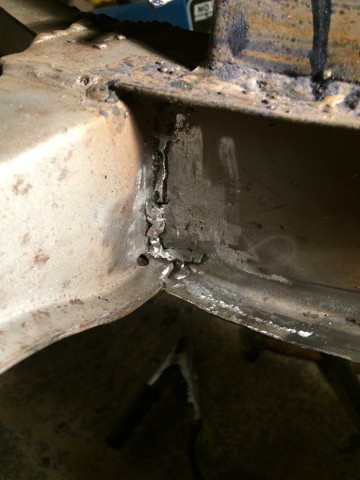
Next up should have been the large repair to the underside of the chassis rail, which I had started cutting out last week, seen here clamped in location.
It still needs a little tweaking, but overall it's ready to go in.
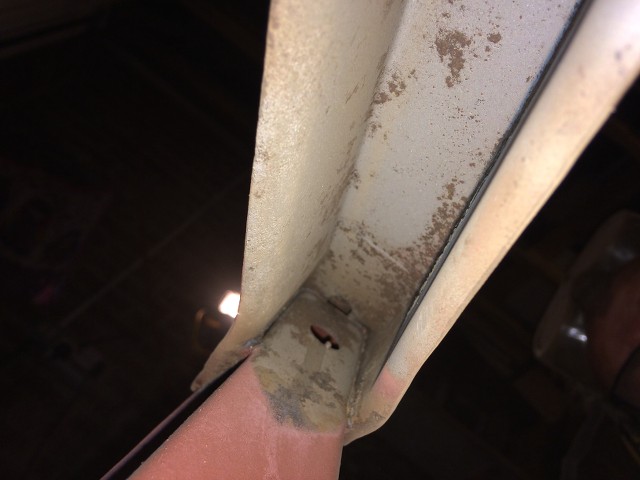
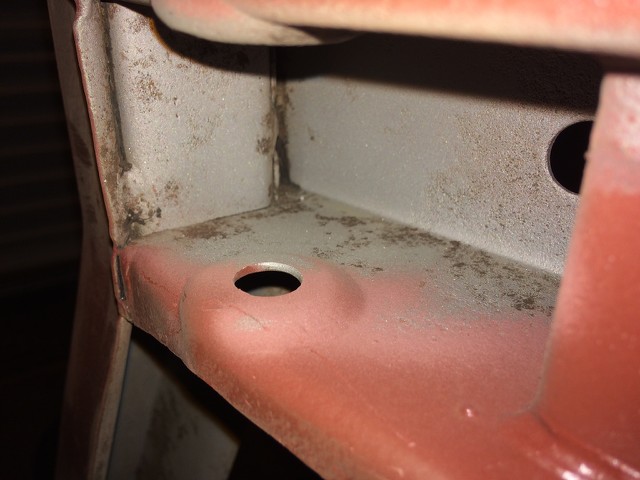
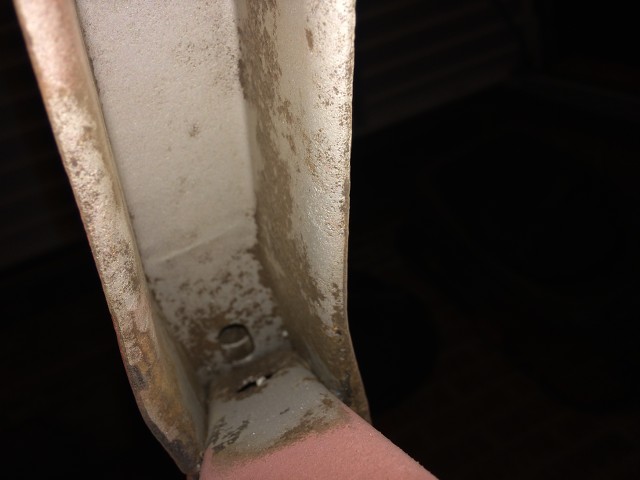
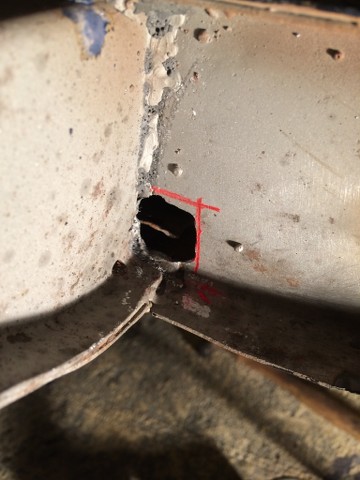
However, while sitting looking at the pics I had taken of the chassis last week, I noticed what looked like a number of additional holes in the inner face of the chassis rail....
Inspection today proved my worst fears, more rot.
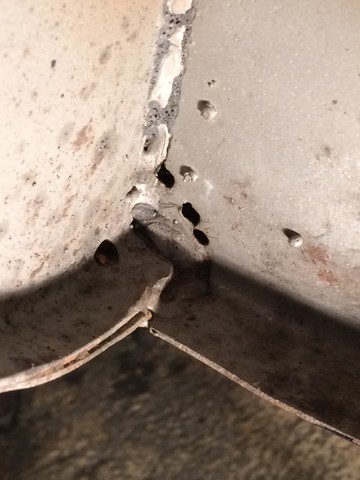
This is after some judicious poking with a screwdriver.
Now that rot is not in the easiest of locations to cut out, and certainly not with an angle grinder, so I decided to break out the die grinder and tungsten carbide tip, pushing it into the holes, and opening them out until I hit sound metal.
Then I marked out the area to be removed with my welding pencil.
Couldn't have done that without the die grinder!
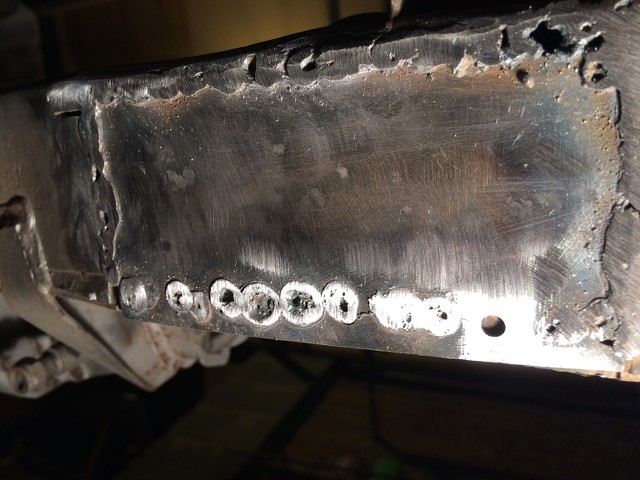
This hole was roughly the size of a 50p piece, necessitating a correspondingly small patch.
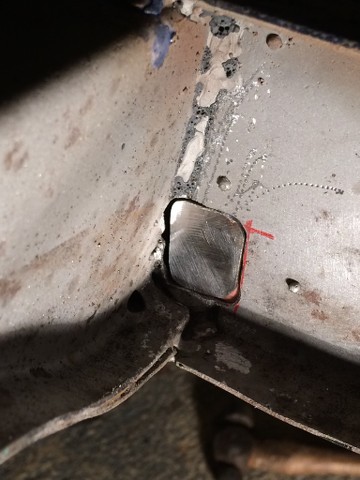
5 minutes with the welder, and half an hour with the die grinder left me with this.
I'll probably run another weld bead up the vertical joint between the inner face of the chassis rail and the stretcher, just to ensure it's as strong as it can be, but I'm calling that bit done.
Next week I should be able to close up the bottom of the chassis rail, leaving me with a solid chassis once again.
And yes I have checked the other side of the chassis, and unlike the passenger side it appears to be sound.
Karl
-
Colin, with all that mud out of the way, it’ll certainly go faster than it did before!
That strut mount looks pretty scabby, what condition is the turret itself in?
Karl
-
Might explain the slap dash welding, and dodgy paintwork!
Mine’s a 68, wasn’t that the Summer of Love?
Would make sense.
Karl
-
1
-
-
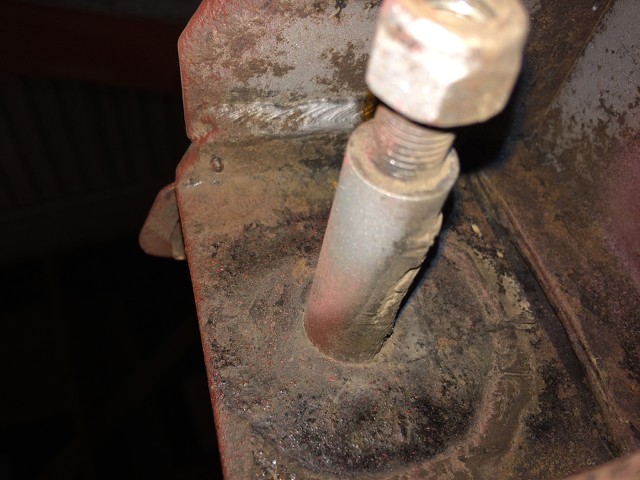
I starting to think it’s the remains of some Coventryite’s baccy pouch, inadvertently left in the chassis!
Karl

13/60 Front grill question - Stuck :(
in Bodywork & Fittings
Posted
You should be able find pinstriping tape the same width as the recess in the grille bar, and then something like a cotton bud would probably work to press the pinstriping into the groove so that it adheres properly.
Karl