

Bfg
-
Posts
1,168 -
Joined
-
Last visited
-
Days Won
44
Content Type
Profiles
Forums
Blogs
Gallery
Downloads
Store
Events
Everything posted by Bfg
-
On Monday my engine's new camshaft arrived from Newman Cams.. I'm glad to see that they are trading and able to provide these excellent camshafts once again. . ^ The old camshaft is that in the foreground and a new set of cam followers is seen behind the brand new PH1 camshaft. I had supplied my engine's camshaft to Newman ..for their opinion as to why, despite almost no wear, there were chips out of the cam lobes ? Ken Newman's thoughts were that the damage was most likely to have been caused by the valve springs becoming coil bound. Coil bound for those unfamiliar with the term, describes the situation when ; the value of (wire diameter) x (the number of coils which make up the spring) when fully compressed is greater than the space they are asked to squeeze into - then things lock up. ie., it is to do with the physical size when compressed and not the stiffness of the spring. In the scenario of our engine's valve springs ; the camshaft lobe is turned to lift the cam-follower and push-rod, which in turn tilts the rocker arm to open the valve. In doing so the column of forces compress the valve springs between top and bottom collars. When the cam-lobe lift is greater than standard spec. - the valve opens further, but also the distance between these collars is reduced. When it is insufficient (too short a length) to accommodate the fully compressed spring's length - it becomes coil-bound. In the extreme it can totally lock up the valve gear and prevent the engine from turning over. But when just a little too tight (..even just a few thousands of an inch) then the metal parts flex just enough for it to work, but at the same time - it excessively loads every part. Something has to give so the spring might slip sideways a little, or the push-rods bend, the rocker arm's contact pads get dented in, the camshaft is loaded until bits chip off it, and the rocker-arm shaft and bearings get a hammering. In fact everywhere throughout the valve chain is subjected to more loading that it was intended to, from the cam-chain and its sprockets to the camshaft bearings, to the tappet adjuster screws, and even the bolts which hold the rocker shaft to the cylinder head. On my own engine - this would also account for the damage apparent on the rocker arm pads, which have crater like indentations rather than being recessed by long-term wear, and likewise the excessive wear of the rocker-arm shaft ..which added together now measure perhaps 0.025" ? One might only guess what, being that much too tight, has done to the push rods. Note., when the engine is cold - it might still be free enough to turn freely without coil binding - but as each part thermally expands in length, when the engine gets hot - then it can be too tight - and then damage is done. . As I haven't an accurate means to measure the ratings of the valve springs which were fitted, not least because at the time they with the cylinder head at the machine shop, I had a set sent directly to Ken - who had kindly agreed to measure them for me. His assessment was that those valve springs were slightly stiffer and with larger diameter wire coils than original specification, and dependent on the cups used were probably too tight for the extra valve lift of the camshaft that was in this engine (# A MC24174 307036) ..and so they became coil bound. According to the Moss catalogue that is a Triumph 'replacement' camshaft number. Newman and others recommend standard (original spec.) valve springs are used with the PH1 camshaft. So mine need to be replaced. . ^ It's of interest to compare the shape of Newman PH1 camshaft lobes (left) with that of the Triumph ' TR4 replacement' previously fitted. Using my vernier gauge I've just measured the lift of the Newman cam lobe at 0.2775" compared with 0.266" for the old one, so the Newman has 0.011" more lift. I cannot say what the difference is in how long the valve is opened. That's it for today. I wish you a good one. Pete. P.S. and Btw.., There has been no news / no photos from America, with regard to getting this project TR4A together enough for shipping - which after I conceded (several times) was meant to have happened at the end of March. Then they asked for another couple of weeks, because of family preparations needed for the pandemic, so always glad to be understanding - I suggested the end of April. Being in lock-down ought to give Raymond a chance to get such tasks at home done. That deadline is tomorrow. Again it's disappointing to have heard nothing. I made the offer to buy this project, complete with its spare TR6 chassis (but without his TR6 engine or the MX5 seats) exactly one year ago now. The offer was counter-proposed and so we agreed on the 6th May. I try very hard to keep to any agreement I make and to be a man of my word ..even if my own circumstance happen to change. But I'm feeling aggrieved by this transaction repeatedly not happening and my being led along. I do feel for the seller, who by his own account has had a difficult year ..but surely - to pack loose parts of a single car into cardboard boxes or refuse bags and place those inside that car, and to build a pair of simple wooden cradle legs (which I supplied a cutting list for and which I was to pay another $500 for) to mount the spare chassis on - shouldn't have taken more than a weekend ..after all his wife and two adult sons are there to help. Naturally, I feel I've been shown to be a trusting FOOL - which indeed I may be ..but I'd rather preferred not to exhibit it ! I am upset ..so as of tomorrow's deadline - I will be writing to Raymond to say that our (repeatedly) time-expired agreement has finally come to an end. Whether I pursue my old-man's-final-ambition to own a Michelotti Triumph sports car remains to be seen. I will put this engine together again to the best of my ability, but then whether I sell it, mothball it, or find another car to drop it into is uncertain. I am undecided. I would however like to express a BIG THANK YOU to all that have been a welcoming friend through this forum..
-
. I'd have to agree with Pete's comments regarding practically everything of the Vitesse would need upgrading, including the chassis, to cope with a whole lot more power from the BMW or an American block ..and all the wrenching torque which goes with those cubes. It would also cost a fortune to do bit by bit ..and then the insurance would be more than someone like myself might afford. Remember also you'll need to restore any remaining Triumph parts too ..after their long and good service life and then such a long sleep. So in almost every respect - it would be more practical to start with the chassis and mechanicals from a yank ..and to drop a Vitesse body on top - just for its looks.! If that doesn't sound like what you are really looking for, then perhaps you'd be smarter to team up with your grandfather to get the Vitesse back on the road and in half decent shape ..with a firm deadline to be legally on the road in it - this year ! ..and to enjoy it going to rallies together. Think of it as a first project, an essential but still fun part of the learning curve, while you keep your eye open for an interesting American car or truck to do next. However if you're adamant to V8 power the Vitesse, 'cause you love the sound ..and for the sake of having something really special - then I think you'd do well to look out for a Daimler V8 2-½ ltr motor ..designed by Edward Turner (who was also famed for his Triumph motorcycle engines). You'll find its smooth but still sounds great. Its also a tough motor, and yet I'd guess it to be much the same weight as the 1600 Vitesse six cylinder. So the Triumph's suspension and steering might still work. However it comes with 140bhp (and is tuneable) and bags of torque for such a lightweight car. That's about twice as powerful as the 1600 engine. Pete.
-
Alex, I gather you have little experience of spraying., and so I ought to warn you that buying a compressor and spray gun for a first attempt on a bonnet is most unlikely to give you the results you might hope for ..any more than ones first attempt at welding is either beautiful or structural.! Automotive painting is a skilled craft that takes a lot of time, effort and attempts to learn, and even then it can be incredibly frustrating. Conversely, rattle cans actually contain very little paint, so the thickness applied is microns thick ..and that means surface preparation needs to be spot on and there's very little room to cut back and polish out any flaw. And because the aerosol paint is really quite thin you have to be careful not get runs. Dust and bugs (you can see them in streaming sunlight) is a real heartache when painting, because the process physically literally attracts them. Wet walls and floors help, but as soon as you close the garage doors to keep the dust and bugs out then you also loose the light to see what you are doing. Of course most Triumph bonnets are physically pretty big ..and I don't know what car you have, so the question is whether there are natural split lines that you can paint one segment at a time ? Such natural lines might be a hard edge in the shape or perhaps a line where a length of trim covers. If so then you may be able to paint one side, then the centre section (..divided into two or three 'panels' ) and then the other side. Either way you would need a lot of cans already shaken lined and ready to go. Getting the right paint, so it doesn't react can be like banging your head against a brick wall. And if any part of the car has been polished with a silicon product within the past five years then it will have to be decontaminated. Otherwise a change of colour if radical makes life even more difficult, and more paint will be needed. Any very dark colour adds to your woes even more so. In short, pastel colours are most forgiving ..or else a matt-black rally look. And metallic paint finishes are particularly difficult for the amateur because you need to apply the paint wetter (not good with aerosols) and the panel needs to be orientated so the flakes all settle the same way to gravity. Here is a link to another forum in which I write of respraying (..with rattle cans) a motorcycle petrol tank last year < here > NB. if the link just takes you to the page, the actual post is by myself "Bfg" start on the 25th June). Consider this with regard to a bonnet sized panel and it may give you an idea of what to expect and/or to prime you with a whole lot more questions to ask. Best regards, Pete.
-
Just seen this on the TR forum, posted by Bob (LeBRo) and thought it was a good enough idea to share here . . Bob writes " Following a suggestion from Hamish, today I made an adapter out of an old spark plug to allow me to inject compressed air into the pot. So took rocker box off, turned engine till No. 2 rockers were rocking, so that I knew both valves on No. 3 will be closed. (yes there was clearance between valves & rockers) inject air at approx 50 PSI and lo & behold lots of air exiting from the exhaust (none from carbs)." Thanks Bob / Hamish .. I'd not seen that one before. Pete.
-
^ Thanks John, I found something very similar to that glazier's knife in the bottom of an old tool box. Never could find a use for an extra thick bladed blunt knife with a taped up wooden handle. Now I know I never will
-
The official workshop manual says ; Main Journal Dia.: 2.4790 - 2.4795". Today measured the front journal at 2.4675" = which according to my maths is not the 0.010" increment, but rather is a 0.012" difference. Admittedly my measuring with digital vernier calipers is not so accurate, but my previous pressed-tight measurement recorded a 0.013 - 0.014" difference ! ..so I might only hope that my calipers &/or each of my measurements are way out. Again I'll have another engineering company check them for me, but the fear is that this machine operator removed 0.010" from whatever he measured the original part-worn journal size was ..rather than referring to workshop manual. I provided the con-rods with shells only for the big ends to be reground to. But the mains were not meant to have been reground so the machine shop never had the engine block, caps, or bearings to measure or work from. I loathe the prospect of dragging this through the courts but just in case - does anyone know of a lawyer who is very good with cases like these.? Pete.
-
Certainly the four heavy iron con-rods with their pistons were with within just 3g (0.002%) of each other ..so they must have been balanced. Likewise the original fan has a balance tab and is also marked to ensure it can be dismantled and then go back together again in the correct orientation. Similarly the flywheel was drilled for balance. To my mind it is inconceivable that they would have done those and then not balanced the crankshaft. Are these not from balancing ? As you see such notches have not been removed in all instances, nor are they in line (..as if they were some sort of location for a jig). ^ the two red arrows indicate where these corners has now been angle-ground away. The one has actually cut into the ground side face of the journal. ..


-
. Finally I got my Triumph engine parts back from the machine shop. But to be honest - I'm of mixed emotions ..because things were not exactly as I had expected. . . Cylinder head ; now has been pressure tested and the core plugs replaced. It now has hardened exhaust seats, re-cut inlet valve seats, NOS valves (all of them), NOS valve guides, and the cylinder-head gasket face has been skimmed. Good news is that it's now good to go (..I hope), unfortunate news is that the original valve guides were a better fit than these. I thought those from #3 cylinder, and possibly one of those in #4, were a little loose and so might need replacing - but instead they went ahead and changed them all ..and now the all valves feel as loose in the guides as those to #3 cylinder were.! As you see I haven't yet unwrapped the cling film - so I also haven't visually checked the valve seats or the job done. I guess next week I''ll do this and also refit the valve springs so that I might do a drain-down test ..just to ensure the valves are well bedded in. Aside from replacing all the valve guides, I also didn't ask them to, nor want them to skim the gasket face. I simply asked them to check it for trueness and to advise. I have no reason to suspect the old gasket had any issues so if it ain't broke - don't try to fix things. I don't know how much has been skimmed off but I had no desire to increase the compression ratio. I'm not overly happy. Crankshaft ; journals reground to 0.010", oil-way drilling plugs removed and cleaned out inside, and crankshaft assembly has been balanced.. But......... I specifically didn't want the main bearing to be reground. (only the big-ends). The mains didn't need it ..and I so bought original manufacturer NOS main bearing shells of a standard size ...Which Now Don't Fraking Well Fit ! That has me well and truly 'upset'. Balancing . . . Having seen the job done on Mike's (another TR4 owner in the TR register) crankshaft - which necessitated his having to buy a replacement ..because his had been previously 'balanced' so badly and was beyond retrieving - I now see this in mine. I fail to see how so much needed to be removed from the balancing Triumph had originally done ? It gets worse on the other end . . . ^ this corner has been angle-ground away. Again, I fail to see how so much needed to be removed from the balancing Triumph had originally done ? I am of a mindset that they have done the same damage as Mike's crankshaft endured.. I may be wrong but I really don't think so. But to be sure - I now need to take it to another company to have it checked. Flywheel (right) is good (I think) and I am pleased. As requested - they turned the outer edge of the TR3 flywheel ..to reduce its overall diameter and to take the bolt-on TR4A starter gear ring. I'm told its metal was very hard indeed. With its starter ring, this is now 17lb in weight. As the standard spec was 31lb - I'm very happy with that weight saving. The flywheel seen here on the left is an already lightened TR4 one (which I borrowed for dimensions) which weighs in at 19lb. The gear ring weighs 3lb so altogether = 22lb. I would have been happy with that but it was not mine ..which is why I bought the TR3 one and had it reworked. The TR4 flywheel (left) is drilled for the 6-spring type clutch, my TR3 one has now been drilled for the diaphragm clutch. It was balanced independently and with the crankshaft. Overall the bill with VAT was £40 less than anticipated (all in all very close to £520 total), but until I know that crankshaft has not been ruined I'm left worrying. I also need to check dimensions and to find myself a set of +0.010 main bearing shells, so the final bill will end up more. Oh., and I need to drive back to the machine shop because they still have my con-rods and big end shells. My mistake as much as there's I should have remembered. There was no work to be done on them (I had weight matched them myself) but I supplied them so they might measure for themselves the exact big-end journal size required. That's all for tonight. Pete.
-
. Update from America.. this morning a reply from seller's wife included the following . . . " Ray is almost finished with the new engine installation of our sons 91 Firebird, and then we will get "Chance" ready for his long trip to you. We are still planning on having it ready by the end of March assuming nothing unexpected happens to slow us down." . . ." As we get back to work on "Chance", I will try to keep you updated on our progress. I am sure Raymond will be getting in contact with you about the specifics of the shipping requirements." Not much I might add to that, but that I'm pleased Pete.
- 1,015 replies
-
- 1
-

-
- tr4a
- restoration
- (and 3 more)
-
. Not much to write home about, despite it being best part of a month since I last posted here. But I did receive a parcel of very useful bits this week from a most amicable private seller / club member . . . Parcel Force delivered. It seems they used the tape as a handle for carrying the box. * Fortunately the parts inside were over-wrapped with packing materials and otherwise carefully packed with all the small bits and packages inside larger packets ..so was nothing lost nor damaged. ^ Contents were engine parts and ancillaries for this engine and some extras (for the engine I still hope to get with the car). Including : (top) standard 4A twin-exhaust down-pipes, in mild steel - used but in good shape. Left : Distributor for the 4A which had been rebuilt by the Distributor Doctor but never fitted. The other distributor (lower left) "originally a 25D Distributor is also thought to be for a 4A, This unit came from Lucas as a special but is to 4A spec – The major difference between 25D & 45D is that the latter does not have vernier control of the advance/retard ignition timing, so is more difficult to set the timing accurately. In as-new condition having done only a couple of thousand miles" Well., from my perspective, the distributor on my Sunbeam motorcycles don't have a fine adjuster either, nor did I have the fine adjustment on my last classic ..a Citroen with a GS boxer engine ..and I was very happy with those for normal road use. So I'll try this and see how I get on with it. It shouldn't be impossible as I'll otherwise have the reconditioned one from D-D to set everything else up. Aside from that, I bought NOS brushes for the starter motor. NOS repair kit for the fuel pump. A thermostat. Set of NOS Lodge spark plugs (free). A set of NOS Vandervell little-end bushes. x10 NOS Unipart rocker shaft bushes (I know x16 are required but this is all the seller had). Then there's the rocker shaft, complete with rockers. It has light surface rust on it but the valve pads are as-new, so if used it certainly hasn't done many miles (..those from my engine are 'impacted' as if valves had been coil-bound). Bottom row : felt washer for the dipstick, an assortment of studs I need for the manifold and also a set of new brass nuts. A rocker cover stud (I need two but this is the only one the seller had). A cylinder head stud, a set of new cylinder stud washers and four nuts. A couple of heavy duty disc washers for the engine mounts, and a NOS camshaft front bearing. I'm very pleased with these parts. Thank you kind Sir ..you know who you are Next I need to shop for are a high quality timing chain and (very likely) a set of valve springs. I also need to by an alternator. All in all the cost of getting a good set of ancillaries is costing a fair percentage of the cost of the engine rebuild itself, which is something many of us don't really budget for when we think of "what is the cost to rebuild an engine ?". But without the ancillaries also being in good to excellent condition - the car will not run well nor be reliable ..however nice the engine's bearings, valves, pistons and camshaft are. To give an indication of the costs .. the (bare) engine machine work and parts would seem to working out about £1800. And to restore the ancillaries . . to date about £1200. These figure exclude the costs of my actually buying this 'spare' engine and its complete package of ancillaries. Aside from the usuals like new pistons & liners, the conversion to unleaded valve seats, and the crankshaft's balancing.., the value of these engine parts include using quality NOS items such as Vandervell main bearings and Glyco big end shells, plus all NOS valves and guides, plus the crankshaft's rear oil seal conversion, a new Newman Ph1 camshaft & its followers. Ancillaries include the carburettors, distributor, and the water pump each being professionally restored. It also includes lightening the flywheel and a new clutch, plus the lightened fan pulleys. So when all done and dusted - their condition shouldn't be too shabby. I'm still waiting upon the machine shop, but I'm not pushing them because I still have to wait for the camshaft (whose blanks are on back order). Accordingly this engine rebuild is on a back burner while I get on with my vintage motorcycle engines. Regarding 'Chance' ..the TR4A I'm still hoping to buy from the US.. Well again, I've not heard from the seller for the past few weeks. I dropped him a line on Friday but haven't heard back yet. Time will tell if he can get things together to prepare the car ready for collection ..at the end of this month ! No money has exchanged hands so I've no reason to suspect anything sinister, it's just his ducks seem to keep wandering off rather than getting all together neatly in a row. I'll let you know when I hear anything. So that's it ..a page of no news, but always hopeful for good things to come. Best regards, Pete
- 1,015 replies
-
- 1
-
-
- tr4a
- restoration
- (and 3 more)
-
How about clear silicon sealant.? I recall when working for Cab-Tech in the 90's that the JCB digger's open rear window hinge was simply a full width run of clear silicon sealant. That was a big / heavy pane of glass and of course used in a tough environment ..so clearly plenty strong enough. Otherwise self-adhesive pads of the type used for holding number plates on could be used ..but these would hold the badge plate a 1/16" away from the surface ..which would then snag on any cloth as the car is cleaned. Pete.
-
. Not a bundle happening at the moment because I'm waiting for the engineering shop to do their thing. As of Thursday - the crank has been reground but its plugs (to clean out inside the oil-ways to the big end journals have not yet been removed. The flywheel hasn't yet been modified so the final dynamic balancing cannot be done. The cylinder head has been pressure tested and the core plug at the rear is said to be weeping very slightly. This was to be done before any valve work so I guess that hasn't been started. All in all it's disappointing not to have had this all done by now. I understand that the machine operator going in for a cataract operation would cause a delay but I assumed and machine shop would have more than one person to do the job. Hey ho, nothing I can do but be patient and ready for when the bits come back. So the weekend has started early this week.. ..I've been suffering garage envy ..you know who you are ! ..you people with gorgeously clean and bright garage spaces On Friday afternoon my garage started like this . . ^ chipboard sheets that had been painted with household gloss paint.. Wear by the bench, despite there being a rug there most of the time. Scarred from numerous motorcycle centre stands, and spills. ..And by 4:30pm it was like this . . with about three quarters of the garage floor freshly repainted.. I've lived here some 14 years now (it's a rented house) and soon after I moved in - I laid the 3/4" chipboard floor over a foam plastic membrane and gave it a coat of inexpensive paint. I have touched it up once but with a heavy car being parked in there for a a couple of years, my own motorcycle centre stands digging in, plus a lot of work ranging from building a wooden boat to car restoration work, to using this space for two years restoring motorcycles (professionally), to bending, grinding and welding-up a coal burning stove., it's had its fair share of use. Yesterday I moved Katie (one of my Sunbeam motorcycles) across to the other side and painted the floor along that side. It's only a single coat but so much brighter. Pete.
-

Alternative to spire clips for GT6 rear lights?
Bfg replied to Colin Lindsay's topic in Bodywork & Fittings
I do like that Colin, on steel wheel as well - beautiful. That's a very special car, you have every right to be a proud owner restorer. -
Alternative to spire clips for GT6 rear lights?
Bfg replied to Colin Lindsay's topic in Bodywork & Fittings
The GT6 looks seriously fantastic Colin .. I want ! (..but can't ) but in reply to your query (..I relate !). There are all sorts of plastic clips to screw into if you can get to the backside to hold onto. Otherwise perhaps something like < these > may be found suitable. That company (and others I am sure) have a broad selection of different designs. Pete -
. . yesterday afternoon, out in the garage was flipping cold ..but I did a little more dismantling and cleaning.. I turned my attentions to the thermostat's housing. . ^ as it came off. Btw the aluminium washer under the temp sender was doing absolutely nothing, as the inside end of this unit seats in a cup (like an plumbing olive) and so that washer was loose. ^ the temperature sender was a right sod to get out. Penetrating oil and the right-size spanner (courtesy of Austin of England) didn't work, nor did applying heat to the surrounding case. Even clamping the hex head in the vice and using extension bars didn't want to play magic roundabout. The more effort I applied the more the brass hex-head slipped. In the end the darn thing crushed. After that I'd was resigning myself to the likelihood of it shearing off completely and I'd have to drill it out or find a replacement housing ..But it finally shifted. It felt like it had sheared but nope it broke its lock ..even then it did not give in to the struggle. Determined little "wotsit" ! ^ reckon that needs replacing ! Thereafter it was just a matter of dismantling and cleaning up each component. ^ One odd bolt ? anyway I cleaned up the gasket faces on a flat of emery paper too. I liked how the bronze-age Waxstat came apart for cleaning. It's possibly shot but I don't know the critical parts of how it works (again m' motorcycles don't have such sophistication !) so I'll simply push it back together again and drop it in a mug of hot water to see if it does anything. I assume, when heated the wax expands inside the capsule and the consequential movement along the central pin opens the coolant's waterway. I'm just not sure if the (presumably rubber) seals on this are any good. Mind you, looking in the Moss catalogue, they're only £4 ..so I'll get a replacement anyway (if only as a spare). This one was rated at 82-degrees c. which (according to Moss) is for 'standard' climate. So, unless y'all advise otherwise I'll get the same. And that's all the practical work I got done ..huh ! Pete.
-
Sorry, can't help with an original one but perhaps a coat of clear lacquer on this one will bring it back to looking right ? Pete
-
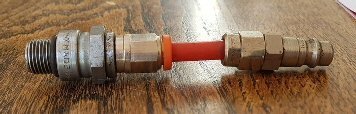
The original bolt on the later TR4 is 6-3/4" long and 9/16" diameter.. so a very beefy fastening. This is a left-over from the earlier one having starter dogs on the bolt head (..deleted on the later cars). Instead of that long heavy bolt (320g) I'm planning to use a short bolt - just to hold the spigot (this is the one which the timing case seal against) onto the crankshaft ..and then to use the six 1/4" bolts around its registered flange to secure the aluminium pulley, lightweight fan extension (spacer) and fan in place. There's no bolt compression through the fibreglass etc part. Pete.
-
The standard iron one, from my engine, together with its long centre bolt is 1.48kg. And the original fan weighed in at 0.91 kg. To me that's a HUGE amount of weight to literally hang off the end of the crankshaft. And of course the spacer doesn't need to be made of aluminium. The replacement fan weighs less than 0.2kg and without a starter crank there is hardly any load on it. I've felt more air being pushed by a model aircraft motor with its tiny prop. shaft ! Of course the billet doesn't need to be aluminium. Indeed I have considered laminating it myself in fibreglass ..but I'd still need a lathe to true it up. A price I got was £125 in either aluminium or structural plastic (which I suspect was polypropylene), but equally I would be happy for it to be made out of Tufnol or a c.21st equivalent. I've read the six potter is a different case regarding balancing, but on TR Revington's Notes and Queries page I read : Q: If I fit a plastic fan to the original fan extension or remove the fan and extension altogether, would I be risking crankshaft breakage or damage due to changing the dampening effect of the original fan/extension arrangement? A: Irrespective of whether you use a wobbly aluminium fan or a wobbly plastic fan, the effect is the same. It helps (just) to cool the engine and that is all. In our opinion the amount of damping it offers is negligible. Dampers have been in use since the 20's where necessary. If Triumph (one of the largest sports car manufacturers in the world at the time) thought is was necessary they would have fitted one. We have been building TR2-4A engines with no fan and no extension for 25 years with NO broken crank related failures. As a result we are quite happy that an engine in good shape, from standard up to all bar the highest revving competition engines should not suffer ill effect by having the fan substituted for a later TR6 plastic type or having it and the extension removed altogether. If you do remove the fan altogether we recommend using a properly designed washer and bolt arrangement to hold the pulley to the crankshaft. Order part number RTR1027. ^ (the italics are mine) ..I certainly wouldn't argue with that experience, so I'm prepared to have a go ..naturally at my own risk. Your daughter sounds like someone I'd very much enjoy talking with Pete
-
. ..delivery today from Paul King of E.P. Services, Wolverhampton who recondition the water pumps. It used to look like this . . and now looks like this (Below, bottom Left). . . ..aside from recondition everything inside the pump, EP very kindly swapped out the pulley for a narrow v-belt one. It's apparently off a Jaguar XJS, which had been a double pulley until their local machine shop turned it down. Unexpectedly Paul also found an aluminium narrow v-belt pulley blank (no holes in it) with the right offset for me, and it passed over to his friendly machine shop to be modified to fit the TR4 crankshaft. Needless to say Paul has been very generous in his time and trouble on my behalf, but he says he enjoyed the challenge.! I have yet to source an alternator for this engine but I guess I can find one also with a narrow-v-belt pulley on it. Adjusting it offset might be fun but hey ho.. I'm all up for a bit of joviality.! I don't have the engine parts, so I can't check the alignment of each pulley, but that on the water pump has some room for adjustment and the alternator brackets will have to be made anyway, so I recon things ought to work out at the end of the day. The cost ? ..well let's just say it was a substantial saving over 'the usual suspects' prices for a narrow belt conversion. That said, I'm sure the Triumph suppliers would be more convenient to buy as a complete package. If it wasn't for Paul's helping me - it probably wouldn't have happened. Give me a month or two to get the engine bits back together and to reassemble it then I'll tell you how well it all worked out. Next, I need to find someone with a lathe ..to make a replacement of the fan extension piece for me, in some material lighter than forged steel ! Pete
-
Not a whole lot of progress to report ..but a smattering of jobs interspersed with everyday life from the past couple of weeks. As mentioned above, the camshaft was sent to Newman Cams - to see if they might be able to identify why cam lobes had chunks missing. I spoke to Ken Newman and he thought the wear on the leading edge of the lobe was excessive for the overall wear that was otherwise apparent and suggested the springs may be too stiff. I've now had those sent to him (by the machine shop as they were still with the cylinder head) and hope to speak further on the matter. Btw. the waiting time on the Newman Ph1 camshaft is six weeks, or thereabouts, as they are presently awaiting another consignment of blanks. JD Robertson, Colchester - the machine shop I'm using, hadn't done anything as of mid last week, as the chap who is to do the work went in for a cataract operation. Unfortunate timing on my part. The water pump was sent off to Paul King at E.P Services and is now rebuilt and parceled up to send back to me. He's also changed the pulley for me. Further news about that soon. "Tune in.. Same time, same channel". The carburettors were sent to Glen Watson of GW Carbs for total refurbishment. They were in a bit of state, not bad but very much needing careful disassembly and cleaning . . . Topside doesn't look so terrible but you can see the underside is pretty filthy. The fuel inlet pipe is bent and both carb's sliders are locked in place. I suspect these are tarred up with stale fuel residue. Why might I suspect that ? well .. ^ literally the consistency of treacle. But I wasn't going to taste it to see if there were any other similarities ! ^ judging by the oil distribution it confirms the timing cover was seeping oil and the fan has distributed that to the underside of the forward carb. Altogether with the manifolds and control rods - these are a pretty big lump to post, but I found a plastic storage crate to packed them in, and used cardboard wrapped over the top to close it off. A parcel I had received some time ago had blocks of expanded polystyrene as packing. This was recycled to secure the carbs very tightly All up weight wasn't very much and MyHermes couriers delivered them safely. I think their insurance cost as much as the courier service. . . . I've also been going through parts lift sent to me by Bob Smith ..there are numerous other little bits in need ..like a replacement rocker shaft, manifold studs, head stud washers and all those sorts of things. It was a surprising time consuming task, checking and cross checking numbers required and part numbers, but hopefully Bob has most of what I need for the engine's reassembly. While in the 'admin' mode I've also pulled together a spreadsheet of where my money has been going.. It adds up to quite a bill.! I'll present that as this engine rebuild nears completion. ^ I didn't need to measure the wear on the rocker arm bushes to see if they might needed replacing.! Funny wear pattern though. These and indentation (..more than wear) of the contact pad (where contacted by the valve stem) again implies too stiff valve spring or perhaps as likely the spring coil-binding (the spring be fully squeezed down and yet still being loaded by the lift of the camshaft lobes). . . . Aside from that I've done a bit more cleaning up and repainting . . ^ I cleaned up the cam chain / timing cover and went around straightening where the localised fastenings bent / dished the metal around the bolt holes. Here you can see I'm using a craft knife blade as a short straight edge to see if the cover is locally flat. Non were (..the blade rocked on the indentation). The metal on these covers is surprisingly thick though, compared to the motorcycle ones I'm used to. Those are possibly half as thick as this. ..now they really get bent ! ^ The flange around the sump was nice and straight, as if it had been even torqued down in the factory and never since has been off. Perhaps it hadn't ..after all most owners wouldn't drop the sump to change the oil, and the prior owner of this engine doesn't even seem to have changed the oil.! There were a few minor dings in the metal, just as likely to have happened when this engine was taken out and put aside by the gent I bought it off. I knocked those out as best I might (there's limited access to get inside because of the baffle plate). But otherwise it was a matter of thoroughly degreasing the outside and using various wire brush / abrasive wheel attachments to clean off all the paint and as much of the rust as I could. Again I'm using POR-15 as the protective coating (outsides only). All in all I'm pleased with how well they've straightened and cleaned up. Earlier today I was trying to buy 5/16" oval washers, which are used on MG timing cases, but so far I've not found them at a sensible price. Hey ho., I can always cut some penny washers down (which is what I use on my Sunbeam engines). So that's about it for now as a progress update. Hopefully soon I'll be sharing photos of parts as they come back from the machine shop &/or specialists. Have a good evening, Pete.
-
Thanks Peter, I didn't want to have the block acid dipped because the camshaft bearings are still in there, and because I didn't want to remove the original paint inside the machine space. Doing things this way also saved me the cost of that professional service and the hassle of to'ing and fro'ing to get it done. I had a 3.8ltr Jag (six cylinder with huge exhaust manifolds in a very tight engine bay and small grille opening) which got rather hot after a long motorway run and then stopped sitting in M25 Dart Crossing traffic. Thereafter I decided it need a good flush out, so pulled the manifolds off and pulled all the core plugs and drain tap. I poked and prodded inside through those and used the jet wash to blast inside that water jacket. Together with a radiator out-of-the-car flush - that seemed to do the job rather well. Pete
-
^ Thanks I appreciate the suggestion. I rarely use my sharpening stones but I think it's a good idea on this occasion. JD Robertson are very nice to deal with, but you do have to be considerate of their 1- 2 lunch break and their tea breaks. It's very old school. I'll let you know how I get on, but they were recommended to me by a friend in the TR register. A chap on the TR forum made a point of mentioning how the water jacket drain hole his engine had been blocked with rusty crud. This was mine . . . ^ Arrow indicates the spot where, drilled from the outside - the water jacket's drain tap is ..which was likewise hard-packed with rusty crud. Obviously the photo is before I chiselled it out ..shamefully misusing a small screwdriver to do so - - - Next.. very likely controversial but.. I've decided to paint my engine block inside the water jacket ( and out). " I have read the arguments against painting inside the water jacket.. and that antifreeze has anti corrosive properties so there's no need to do so ..but having seen the crud that was in there (see photo below) the thought of putting it back together with raw cast-iron inside there was just too difficult to bear.. I spent most of a day looking on-line, and was frustrated that no-one in this sunny Suffolk backwater called Ipswich seemed to stock anything but VHT rattle-can paint. So it's my own engine and I'm prepared to use it as a guinea pig. And I've used POR-15 petrol tank sealant, which is what I had left over from coating / sealing petrol tanks on my vintage motorcycles ..so I know it sticks incredibly well to rough surfaces and raw metal that's not perfectly clear of rust. I also know it has excellent resistance to many strong chemicals. So my major concern was - how well would it stand up to engine temperatures.? I contacted POR-15 and was told it's only rated up to 100 degrees c. However, short of experimenting with other / unknown products, I decided to test a sample piece. Actually, this was a length of 1/2" flat bar that I had used as a mixing stick .. and which had deliberately been left outside in all weathers for the past six months. That was a test to see how well it might protect the chassis. I used the oven in my tiny coal-burning stove and placed the painted and weathered bar in there. It's temperature tends to range from 100 to 190 degrees c. depending on how low or high I have the stove burning. When I put the piece in there it was c. 140 degrees. I laid it flat to the floor of the oven (hottest place in this particular oven because the fire box is immediately below it) and left it for an hour. I pulled it out and was happy with a simple scratch test. I put the sample back in the oven as I worked for another couple of hours. I stoked the fire before bed and left the air-intake vent cracked open, so the fire would burn hot (575 degrees is usual in the firebox itself). The following morning, the paint on the sample was still fine. I have to admit that my sample had weathered outside from being originally the grey aluminium colour you see (above) to being gold ..and that amount of heat had caused it to turn more of a darker antique gold colour. Although that indicates a change - I'm still giving it a try. I've also painted inside the water pump housing (which will have most turbulence) and I will do the same with inside of the thermostat housing.I can easily lift this off to inspect inside. If I see evidence of flaking then I can of course strip the engine down and remove it again. That will cost me in time and a gasket set, however compared to the rust that was in there (below) I can't see paint as being much of an issue, unless it comes off as a sheet rather than as flakes. . Note: I'll not be painting the liners themselves, so heat dissipation through those to the coolant / water will be unaffected. Nor have I painted in any place inside where there's engine oil, so they'll be no risk of paint getting in the oil ways, pump or bearings. The inside / machine spaces of the cast-iron block was of course originally painted by the factory ..and it remains in excellent condition ..despite I feel it being a very much harsher environment.
- 1,015 replies
-
- 1
-
-
- tr4a
- restoration
- (and 3 more)
-
Good afternoon all, Just thought I'd add a quick pictorial sequence of what's been happening the past couple of days in (..and out) of the garage. . . ^ Water pump housing, much as it came off. ^ Cleaned up but not quite finished yet ^ cleaning up the pushrods. I cleaned one by one so as to keep them in the same order as they came out of the engine. and then I polish them on the mop. The one being held is half polished to show the difference. Why ? Well, at the last TR club meeting (again tonight at The Alma, near Colchester), a gent brought in a push-rod in two parts ..as if it had separated in the middle, twisted slightly and been pushed back together again. I cannot quite imagine how it had happened, but I felt the necessity to carefully examine mine ..to ensure that non had any sign of stress nor had any nick in it - that might propagate to a failure. Polishing these parts helps me see any surface imperfections very much easier. Of course one has to be very careful when doing this job because the polishing mop tends to toss anything aside that is not being held very carefully. ^ pretty ..but more importantly exposed to very close examination. ^ I finally got around to pulling the pin and cleaning out the shish kebab. The shaft is badly worn so I'll look for a replacement. Again every part is kept in strict order of assembly, for when it goes back together again everything will be in its original position. ^ engine on the stand again. You can see the inside of the water jacket, sans liners, and amazingly (to me) it still hadn't dried out in the corners. Considering the horrid rusty mess that came out of it I'm pleased at how well it looked ..but I needed to do a bit more yet This is the first time I've mounted the engine-block from its bell-housing end. Must admit I'm not impressed with the balance I achieved, as it was top heavy and so awkward to rotate. However it did mean this still heavy engine case was easier to move about on my own ..away from the overhead winch. With the (Makita) pressure wash on it's most viscous fine jet setting I wanted to blast out any remaining rust flakes and to for the water pressure to delve right into the casting's pitting and deep corners. I then scrubbed it with a household degreaser (Sgrassatore) for pots and pans that I was introduced to by my dear friend Barbara ..living in Slovenia. A few years ago, she and her family helped me clean up (ready for restoration) a '74 Citroen Ami-Super, and she used this stuff to clean off underseal from the inside of that car's wings (they were also bolt on / removable). I was so impressed that I bought a couple of bottles back to England with me, and when they were used up I then bought 5-ltrs via e-bay and had it shipped from Italy.! In the photo above I had used a pot cleaning brush, with stiff plastic bristles, to work it into the corners. I used a pipe cleaner into any of the larger drillings. And I used an old wood chisel to loosen a few more encrusted rust lumps in the corners of the water jacket, and then used a rotary wire brush in my cordless drill to really work it in and scrub it all a bit more. I spent a good two hours trying to get this clean. The cavities where the cam followers go and the underside insides (where oil normally is) is painted from the factory. I didn't want to loose nor damage that finish so I only scrubbed in there with the plastic bristle pot cleaner and degreaser - Not with the chisel or wire brush. I did thoroughly blast it with the power wash though ..including into each of the oil galleries between the main bearings and the camshaft bearing, and along the oil gallery which runs the length of the LHS of the engine (pulling each of its bungs and blasting in inside.) And then the block came back into the garage and was placed alongside the coal burning stove, and with my dehumidifier blowing up its skirt. I proceeded to dry the metal with a clean t-shirt and paper towels. ^ underside inside - the original factory paint (used to seal any pores and to lock any remaining sand from its casting) remains intact and in excellent condition. As far as I can see non was blasted of by the power wash (which I used as aggressively as I could). ^ the water jacket is about as clean as it's going to be (save just a little more work with the wire brush). The machined faces where the figure-eight sleeve gaskets go are in good shape, and the heavy build up of sludge in the cavities above the cam followers is now cleaned out. I think some of that came back and hit me in the face judging by the look that greeted me when I later looked in a mirror ! Each of the drillings for the studs had been jet-blasted into or through so I'm guessing they'll be mainly clean too. That was it. The stove was stoked up to burn for another six hours, and I laid a dry clean t-shirt over the top of the engine and left the dehumidifier on a high setting all night to blow through and thoroughly dry inside all the crevices and drillings. Another job done and most of the engine parts are now clean enough to handle. Pete.
- 1,015 replies
-
- 3
-
-
- tr4a
- restoration
- (and 3 more)
-
. I haven't pulled the rockers off the shaft yet to examine the bushes, but I have tried to rock them (side to side) to feel for play. Only the inlet port rocker for #2 cylinder seems to have excess play. I'll strip them off to check them this coming week. In the meantime I'd be glad for any advice on the rocker arms themselves again #2 cylinder rocker arms are in the worse condition . . . ^ in a close-up photo they look worse than they feel. Without caps on the valve stems, the stem of the valve presents a localised load. I asked the machine shop I'm using and they said that they do not have the facilities to re-harden surface if they were to grind these smooth. They recommend hand dressing them ..to take of any high ridge, but otherwise making do with them. What are the thoughts of this forum ? - - - Very little tangible progress this past week. I did get the camshaft wrapped and sent of to Newman Camshafts. I want to ask them what they make of the broken surface condition of the lobe tips ..as discussed previously < here > and whether it was practical to / worth regrinding that camshaft.? Their Ph1 camshaft has been recommended and is intended for good degrees of torque rather than a high revs. So that's what I'll go for. Otherwise I also got the water pump sent off to EP services, in Wolverhampton to be checked and if necessary rebuilt. ^ It cleaned up and looks to be in good shape, but was locked up when I bought this engine. The belt-pulley is a press-on type rather than bolt on, so I thought I'd just pass the matter over to their capable hands. I've asked them about converting to a narrow belt and they are going to advise me as to what they can do. - - - For sake of pulling together my experience with this engine ..all in one thread, and for the sake of anyone doing the same in the future - I (below) copy a reply to Mark, who has just imported a TR4A from the US < here on the TR Register forum > .. The reply was in regard to his rebuilding the carburettors, and I spoke of my intent to out-source some tasks to a few specialist companies . . . Mark, I'm glad to be of some guidance. I am a novice to car engines so I have to take things pragmatically if I am to learn with least mistakes. There are some chaps on here who are great with their advice and have been really generous in sharing their experience and contacts.. I bought a pair of carburettors with this engine, but I haven't touched them yet. My friend Rich and others have suggested a few specialist which I will probably try. One of the first was Glen Watson t/a GW Carbs in Bicknacre, Essex - 07803 593126. I haven’t spoken to him yet, but Rich tells me that he will refurbish the carburettors & linkages, returning them to as new condition for about £400. Well, I could tackle this task myself, and probably save a chunk of money to boot. But if someone is geared up specifically to do them, to thoroughly clean inside n' out, and will return them with good adjustment and pretty much guaranteed to work ..straight out of the box so to speak - then that will save me shopping for rebuild kits, getting exactly the right parts (of decent quality), possibly a couple of trips to the machine shop, and a few weeks of work myself ..that I might better use for other doing other jobs (..of which I have plenty !). So perhaps £400 isn’t too much ? ..in the big picture of getting the car running smoothly and reliably as soon as possible. Another, contact was Martin Jay - Distributor Doctor - 01984 629540. I spoke to him a couple of days ago (seemed a very nice chap) because the distributor supplied with my car was incorrect to the TR’s. (see page 88 in the Moss catalogue for the correct numbers) and it was also rusted up inside. I have managed to source a replacement ..but that one is off the TR4, which again is not quite the same as for the 4A. It is also without a cap. Martin can correct the specification to be 4A as he rebuilds it, and includes the cap - so it's ready to just bolt on, set the timing and go. His price is currently £195 + VAT to rebuild my own distributor, or plus another £50 + VAT to supply one outright. Again it’s a lump of money ..and I don’t have much to splash around, but I’m thinking - if I'm spend a thousand or two on the engine itself, am careful in its rebuild, and then the distributor and carburettors are in first class order - I ought then to have a really good and reliable engine. Final decision has not been made yet ..but that’s the thinking. A third contact was ; EP Services, Wolverhampton, West Midlands - 01902 452914, who specialise in rebuilding water pumps. Again I have spoken to them recently, and they are very helpful. They will charge £45+ VAT on exchange. My car’s water pump has a interference-fit pulley on it, rather than a nut on the front which is more easily removed & refitted, and although I could probably do the job myself for less, it probably isn’t worth the small amount I’d save. These chaps replace what’s needed to give a 5-year guarantee. So their parts must be good. And for about £60 (with postage) I feel that’s good value.. Yes, these costs do add up very quickly, but they also shortcut a considerable amount of time. They'll save a lot of my time in learning, and any concerns about decent quality parts, and getting the job done absolutely right. Personally I’m tending to think - I’d rather like my project happening and be done ..before I’m too old. These are decision anyone doing a major restoration is faced with. To have the satisfaction of doing it ourselves or just get it done n’ dusted ..while we get on with saving money in doing other tasks.? Food for thought perhaps. Only you can make those choices according to your own time and financial pressures. Pete. - - - And then, yesterday I wrote to Raymond, the seller of 'Chance' the TR4A I'm trying to buy in Arkansas. Back in May last year, we came to an agreement of price, and what was to be included (I didn't want his TR6 engine nor the Mx5 seats) and what was necessary to prepare for shipping. I offered to pay extra, for him to build (or have built) a cradle up from the bumper irons and to fit the 'spare' chassis on that. The car was rolling but had been stripped out of interior, exterior trim, ancillaries, engine, gearbox and diff., but these things were still with the car, even if the engine was totally in bits. ie., I was buying a basket case. The agreement was ; the heavy mechanical lumps were to be loosely refitted into the car and everything else was to be boxed up inside ..this was for convenience of handling one rolling, steering 'car' overland to Huston and into a shipping container. Cutting to the chase - the agreement was that the car would be ready to ship by the beginning of September. However, Raymond, his family and their community have had a series of disasters, including a flood, hurricanes, accidents and illness. All in all the family had a pretty difficult year ..so I tried to be patient. And I bought another engine to get on with .. moving towards my having a half decent TR4 to tour in. From the beginning of May to nearing the end of January is quite a long time when you're waiting for something, but the real issue was - that Raymond was communicating less and less each month. No money had been transferred so it wasn't a matter of having been ripped off, it was just that it looked as if this was never going to happen. Excuses, however real and valid - are still excuses. 5 or 10 minutes occasionally to keep me updated should be too much to ask. So I wrote a stern but polite letter yesterday evening to express my profound disappointment, saying that he was making a fool of me, and that I wished him and family well. In short, a kindly but rather sad Goodbye. It was time for me to look elsewhere. > Twelve hours later, received at 5:49am our time, which would be just before midnight in Arkansas, I received a very nice letter from his wife Kathy (who had not written before) to apologise and to explain that Raymond was working 60-70 hr weeks in his own job and in helping with her commercial cleaning business, which on top of the catalogue of disasters this past year has him "beyond exhausted". She went on to say.. "If however you are no longer interested, we would fully understand. After all of the delays, I wouldn't blame you at all. If you choose to go ahead with purchasing the car and are willing to wait until the end of March, please let us know as soon as possible so that we may go ahead with getting it prepared." Even though I know this car needs a huge amount of work, I still have a good feeling about 'Chance'. And in my mind's eye - it is the car I see us touring in I must admit I've never known anyone waiting the best part of a year to buy an old car ..which is not rare, is in bits, which they haven't seen, and don't even have very good photos of. Admittedly, it's not expensive (by today's prices), but with overland transport to Huston, and then shipping across to England, and then import tax and registration ..it's not cheap either. I have just replied that I would still like to buy the car, and agree to wait until the end of March before it's ready to ship. What is with men ..that might account for such irrational thought and actions ! ? Pete
-
By coincidence, on the TR Register forum there was a thread regarding someone using a hi-torque starter motor on a TR3, using a super-lightweight flywheel. The question then was which way around should its gear ring be fitted.? That in turn made me unsure of myself and the instructions I gave to the engineering machine shop. For the TR4 / 4A the Haynes manual says fit with the "front of the teeth facing the flywheel register". That is unclear to me. I might, at best, only presume the "front of the teeth" is that with the chamfer, but even then I'm not familiar with what a "flywheel register" is. Unfortunately the Standard-Triumph TR4 / 4A workshop manual appears to make no specific mention of which way around the gear-ring is fitted, nor do the drawings show the teeth chamfer, but a photo on p.1-123 (fig.46) does show them on the gear-ring's teeth facing rearward. The TR4 flywheel (I borrowed) didn't have its gear-ring fitted, so I can't use that to confirm. NB. The type of clutch being irrelevant to the starter & gear ring. My own logic does tend to suggest ; the chamfer side of the ring-gear teeth faces the direction the starter-gear engages from. So.., The early car's bomb-type starter gear pinion (this is used with the 91-tooth heat-shrunk-on ring-gear) moves rearwards ..to engage with the gear-ring from the engine side. Therefore the teeth's chamfer are to face towards the flywheel's crankshaft mounting (ie., away from the clutch cover). The TR3A / TR4 / 4A bendix-type starter motor pinion (which is only used with the 90-tooth bolt-on ring-gear) comes forward ..to engage with the gear-ring from the clutch cover / gearbox side. Therefore its teeth chamfers face towards the clutch cover. OK here's we go again. . ^ This is a bendix type starter motor used on the later 4-cyl. TR engines. The point which is so obvious that I was missing it ..is that the chamfer / bevels on the gear-ring are there to both help engage and disengage. As you can see in the above photo, the starter's gear pinion also has bevels on its teeth to help engage it ..so even if the starter ring was on back to front it would generally work. But the very important function of those bevels on the gear ring is to ensure that the starter motor disengages when the engine starts. Consider for a moment, the ratio between the starter's gear and the flywheel's gear ring is (..lets say) 1 :10. So the starter motor turns at 1000rpm, and because of that gear ratio - turns the engine over at 100 rpm to start it. (That may not seem a lot but I can assure you it's very much more than a motorcycle kick-starter ..however many cylinder or powerful the engine is). Now what happens when you've blipped the throttle and the engine starts ? The engine fires, starts and engine revs spin up to 2000rpm. So if the starter motor is still engaged that would be spinning at ; 2000 rpm x gear-ratio of 10:1 = 20,000rpm ! Those ring-gear chamfers / bevels are there to protect the starter motor by encouraging the gears to disengage as soon as the fire kicks into life. Clearly that's a pretty important thing to happen, so the chamfers/ bevels need to face the bevels on the starter motor's pinion. And as the early cars and the later ones had a different starter motor, and the hi-torque may come in either configuration, and then there's probably some which have been mix n' matched - then the sure fire answer is to look at the starter motor to see which side of the starter's gear pinon the lightweight spring is. (see illustration above). Out of interest would it not be usual practice to replace the gear ring for new when you fit a new starter (or bendix gear / pinion assembly ) ..so the wear of one was not detrimental to the other.? Pete.


