

Bordfunker
-
Posts
1,005 -
Joined
-
Last visited
-
Days Won
17
Content Type
Profiles
Forums
Blogs
Gallery
Downloads
Store
Events
Posts posted by Bordfunker
-
-
Colin, given that I still need to finish the chassis welding, and then sort out the supremely rusty bulkhead, I’m probably not that far ahead, if at all!
Karl
-
Hoping everyone had a good bank holiday weekend, even in these somewhat bizarre times.
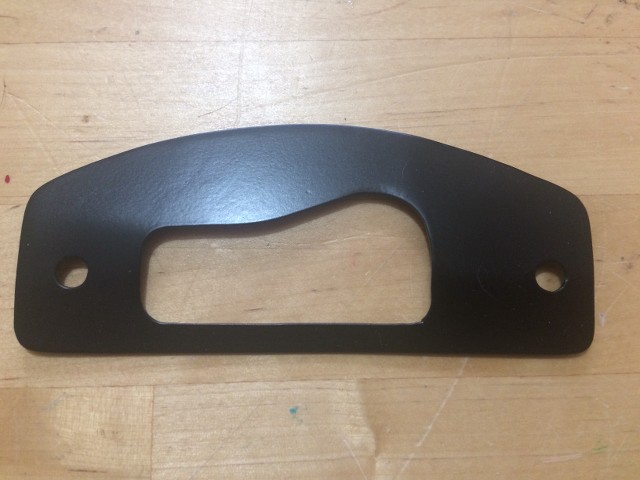
First job for me this week was finishing off the interior light surround that I started last week, giving it a coat of primer and satin black.
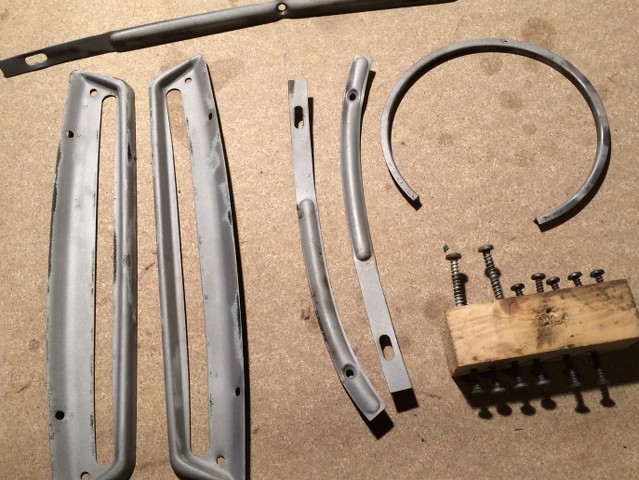
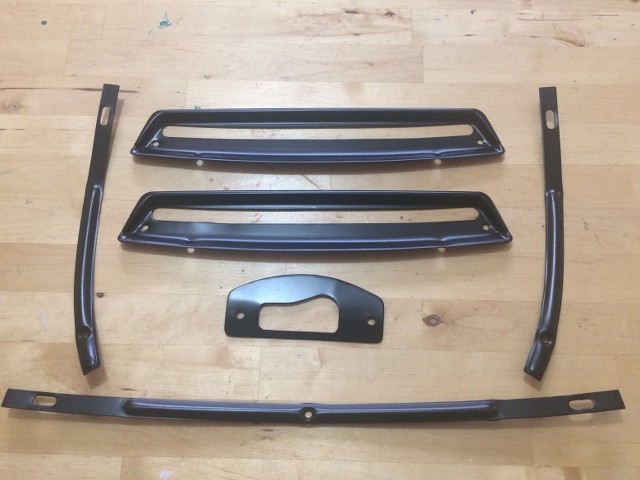
And continuing that theme, the dashtop vents and finishers that I cleaned up the other week got the same treatment.
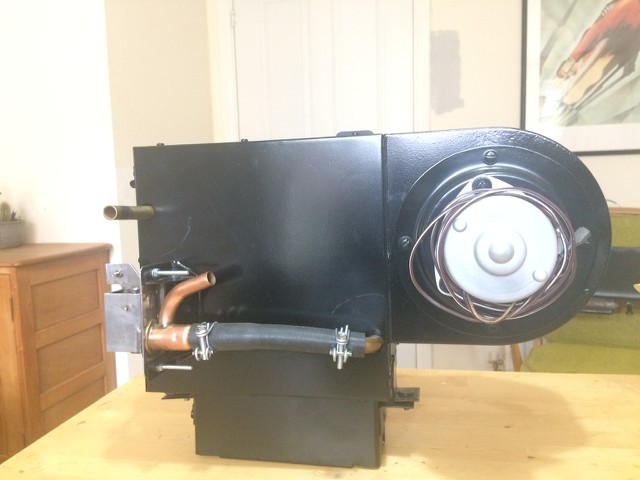
Remember that heater that I removed from the car back in 2016, here it is ready to be packed up and put away for that day that I finally get to reassemble the car.
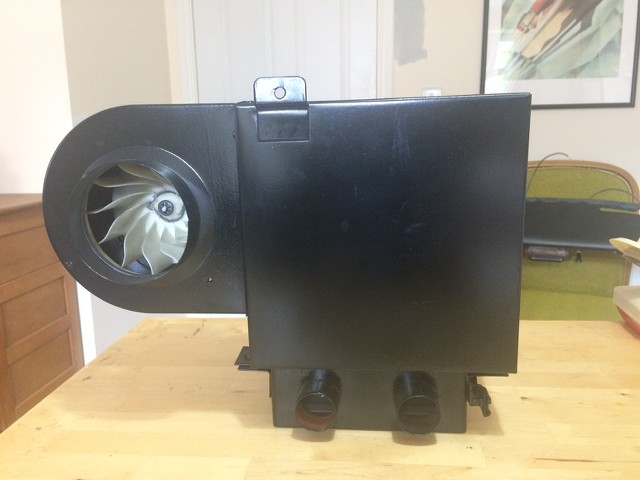
Still need to address those scratches that I managed to put in that fresh paintwork while reassembling the case, but that can wait.
The main event for this weekend, apart from my continual battle against the brambles in the hedgerow opposite, was starting work on the loom, after my package from Autosparks arrived last week.
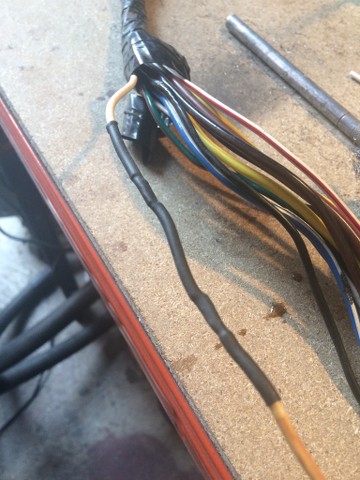
The loom has a number of issues, not least that it has a couple of areas where the insulation has chafed off the wiring, like below.
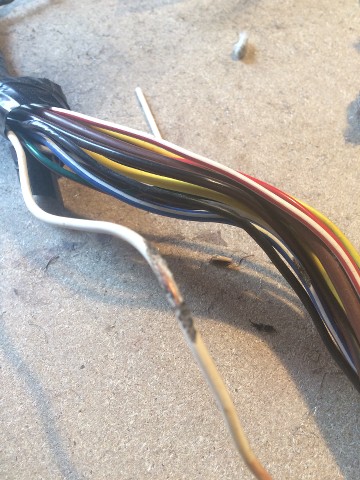
There were a couple like that tucked away within the main run of the loom.
Thankfully the bulk of the loom is pristine once the tired insulation tape is removed.
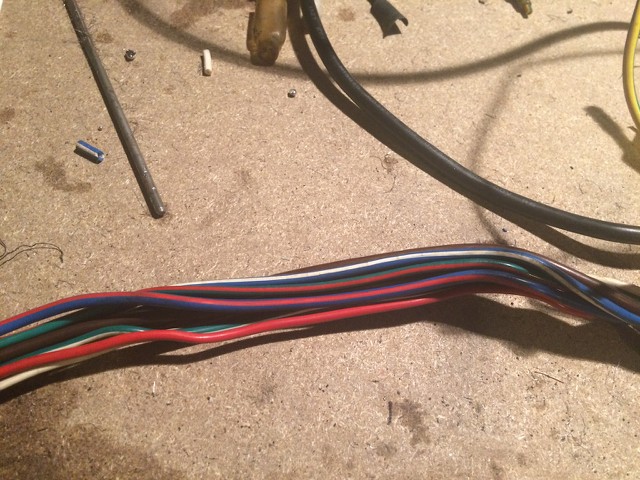
But back to the dodgy bits, which I started off by cutting out and replacing with new, soldered in, and correctly colour coded sections, which were then covered in heat shrink tubing.
Probably the best thing to do would have been to replace the entire length, but given that the affected sections are all at the base of the bulkhead where they won't be subject to movement, I felt more comfortable taking this approach.
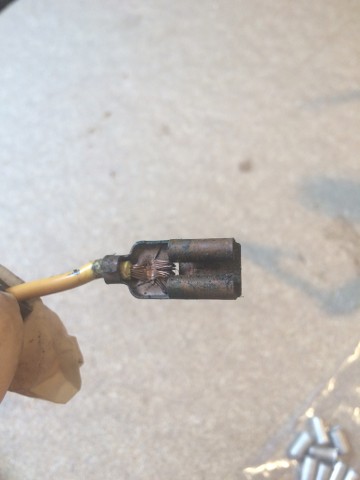
As well as the wires themselves, some of the connectors also need replacement, this is one of the better ones.
And here is one of the new ones, complete with a new plastic cover!
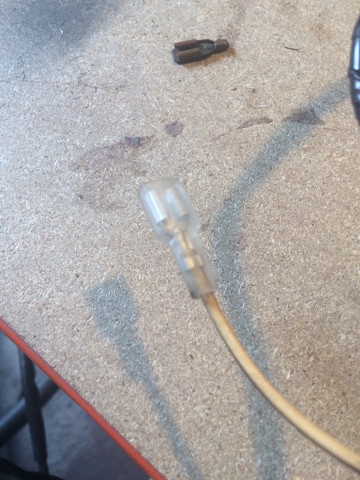
I bought the crimper package from Autosparks as I figured that I would need to replace a number of connectors, and it comes with a selection of connectors and associated plastic covers.
The crimpers are very good quality, and produce an amazingly secure connection between the connector and the cable itself, and are light years away from the horrible cheapy ones that you frequently get.
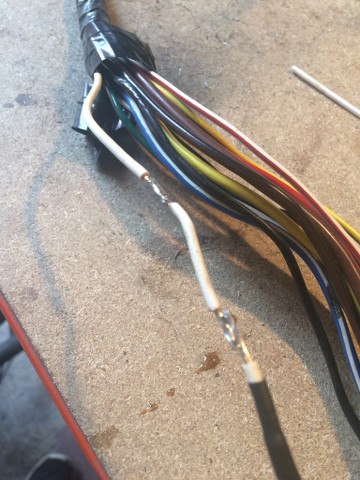
As well as replacing the damaged wires, and dodgy connectors, I also took the opportunity to tidy up the loom itself, as my car has been converted from dynamo to alternator, and due to the way that the change has been performed, I have been left with a number of wires that are no longer required, such as these two.

Both of these went to the back of the dynamo, but have been replaced in my current set up by two wires going direct from the alternator to the starter solenoid, and therefore were removed from the loom. Similarly the thick brown wire which ran from the control box to the starter solenoid has been removed, leaving me with a loom which only has the wires I need, at least on the engine side of the bulkhead.
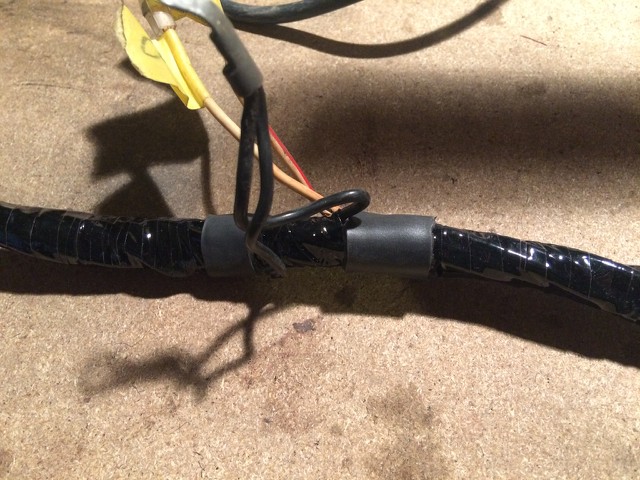
This is a section of the loom I re-wrapped, and with heat shrink tubing applied to hold the ends of the tape securely, as like the original Lucas wrapping, the tape is non-adhesive.
The section of loom behind the dash requires a bit more work with some of the connectors missing, or barely hanging in there, but that will have to wait for a couple of evenings this week.
Karl
-
 3
3
-
-
Adrian, that looks excellent.
I ended up going the old skool route with sheet steel.
Karl
-
I got mine from Paddocks;
http://www.jamespaddock.co.uk/horn-high-note-8
Both mine were shot, one had already been replaced with some German thing.
Karl
-
Colin seeing as you are on a streak, can you check your stash for Lord Lucan?
Ta
Karl
-
Colin, the voltage regulator came from Paddocks.
Tony, thanks for the link. Think I might have to investigate getting some.
Karl
-
Tony good idea, I hadn’t thought of fibreglass!
The dashboard is now in, but that wouldn’t stop me applying some reinforcement.
What fibreglass and resin product would you recommend?
Thanks
Karl
-
The new blower switch, meant for a Spitfire, but cheaper and better looking than the one meant for the Herald arrived last week, along with the voltage regulator.
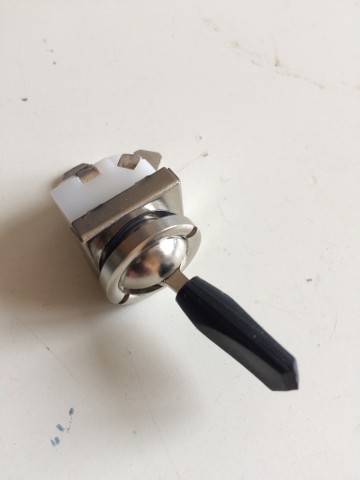
The Herald one was over £17, with a raft of connector spades on the back, whereas the old one that I took off, was like the one above.
Colin, not sure whether the voltage regulator is old school or fully electronic, but I'm guessing that the green in the picture below may be a PCB.

Both have now been fitted to the dash, but I've neglected to take any pics yet.
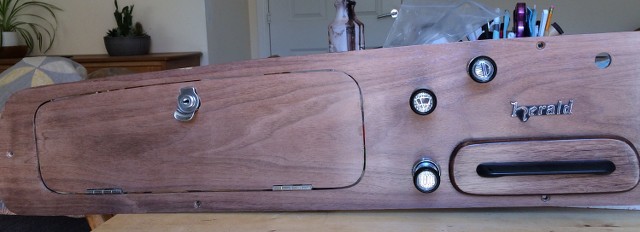
I did however take some pics of my ad hoc reinforcement to the rear of the dash, where the centre screw goes through the wood and into the fibreboard.
From the front the dash surround looks pretty good....

.....but from behind the true horror becomes clear.

The shiny patches in the pic below are where I have glued cracks in the fibreboard, as well as applying the alloy reinforcing patch.
And yes I have folded over the staple ends before I shred any more skin from my knuckles.
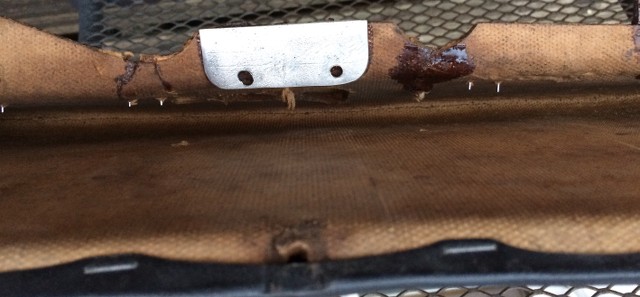
Earlier in the week I posted a question on the Bodywork forum about the interior light, as mine just protruded through the crash pad amidst an untidy mess of vinyl and foam padding, and I felt sure that there must have been some sort of surround fitted.
Colin came to the rescue with a picture of what should have been there, a steel stamping with a cut out for the bulb and switch, which I then enlarged on my iPad and used to create a template.

Not perfect, but a starting point to create my own from a piece of sheet steel.
First came the marking out, utilising all my O-level Technical Drawing skills!

This then had the centre points punched ready for drilling.
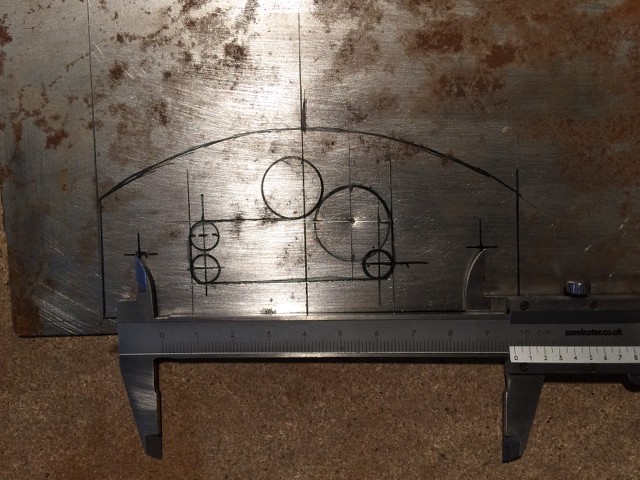
The Vernier gauge was there because I was keen to ensure that I wasn't about to drill the mounting holes in the wrong place!
Here it is drilled out, not perfect, but close enough for me.
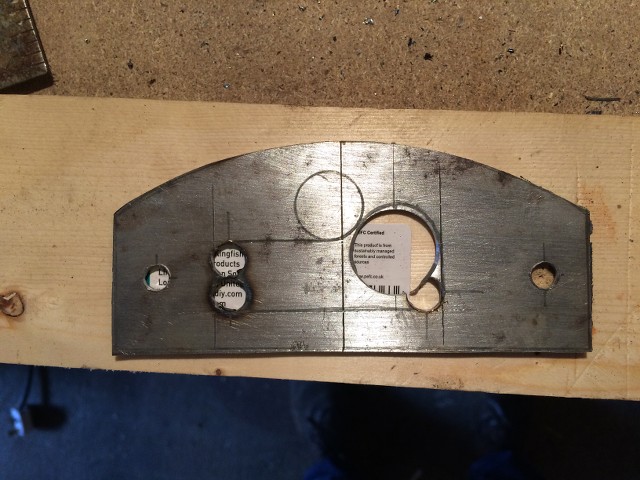
About an hour later I was left with this.
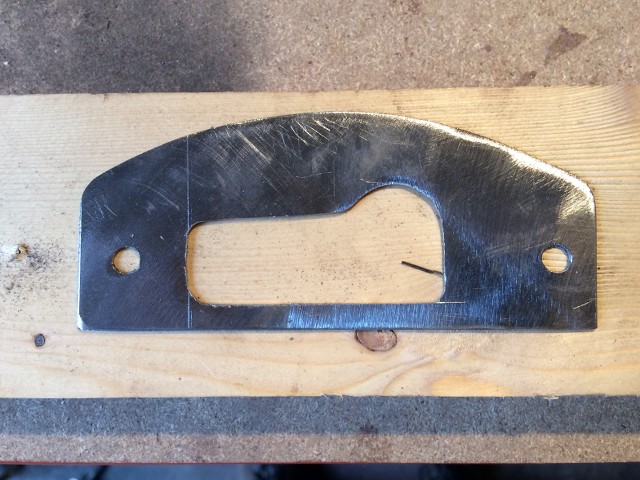
It's not quite right yet, as the shoulders are too high, and the switch cut out should be more angled, but it's already much better than the component that wasn't there before.
In other news, I have finally finished rebuilding the heater, the first component that I removed from the Herald in 2016! No pics as yet, but I will post pics as soon as I get around to taking them.
Karl
-
2
-
-
All seams should be sealed, as even a seam welded joint may contain pinholes which could let water in.
I usually apply several coats of primer, then the sealant, followed by top coats, therefore the sealant shouldn’t be trapping any moisture.
Karl
-
Colin, I scaled your image on my iPad so that mounting holes aligned with the holes in my light unit, then took a tracing, before transferring it to card.
All very technical!
I now just need to work out the drilling centres for radiused corners and the switch cut out, then I’ll mark up a piece of sheet steel and cut it out.
Karl
-
Which vehicle?
-
 1
1
-
-
Colin, no need!
I’ve already been busy with the CAD.
Cardboard Aided Design that is!
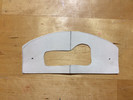
Based this on your photo to make one in steel sheet at the weekend.
Karl
-
1
-
-
Colin that’s brilliant, thanks for going to the trouble of digging that out.
Mine is a 68, so I’ll need to try and make up a new one in sheet steel, or alternatively go up market and make one out of wood and veneer it to match the dash.
Thanks again.
Karl
-
Thanks Pete.
I think I may try and at least edge the cut out so that it looks vaguely neat.
Karl
-
Thanks all!
I’ve got the festoon bulb, and everything worked as it should before I took the dash out, but with the dash going back together it looked a bit sorry for itself.
Is there any edging around the lamp aperture, or is the vinyl supposed to be glued down?
Karl
-
Another dashboard related query, is there supposed to be a cover over the interior light on the dashboard?
Or is the whole assembly supposed to expose ragged vinyl?
Mine just has the latter and looks rubbish, hence the question.
Thanks
Karl
-
I’d be inclined to contact someone like Mick Dolphin at mickdolphin@tinyworld.co.uk, or have a trawl of eBay as there seem to be quite a few Lucas motors available at the moment.
Karl
-
Could be a Delaney Gallay like mine has.
DG components seem to be few and far between, and consequently more expensive, so if it is a DG unit, might be worth considering replacing it with a complete Smiths unit as they are interchangeable, and a lot more common.
Karl
-
Dave, one of the things that I noticed when I took the glove box apart was the unequal length of some of the screws, so made sure to make note of that!
I’ve made that mistake too many times in the past!
See you can teach an old dog new tricks!
Karl
-
Colin the surround is as bought, and externally is in good shape.
The fibre board has split in a couple of places, predominantly beneath the interior light, where the top centre dashboard screw goes into it.
I’m in the process of repairing the splits with a small piece of alloy epoxied to the back of the panel, that I can then drill a hole through for the dashboard securing screw.
I’ll post some pics later.
Karl
-
It's been a few weeks since my last update, not because I haven't been doing anything, more the complete opposite.
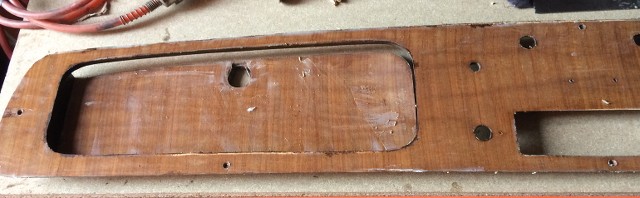
Previously, I had re-veneered the dashboard, and stained it, however the more I looked at it, the less happy I was with the finish, so decided to start again and strip the new veneer off.
Thankfully, being a thermal glue, it just needed heating up with a hot air gun and peeling off.

Like a sloughed off skin from a snake!
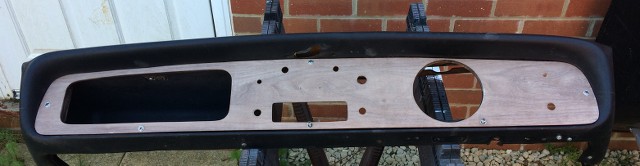
And a near naked dashboard to start afresh with.
Practice makes perfect, well perfect maybe overselling it, but it went much better the second time around, utilising the lessons from my first attempt.
This time I didn't bother with the stain as it looked too dark to my eyes, and left the veneer au natural.
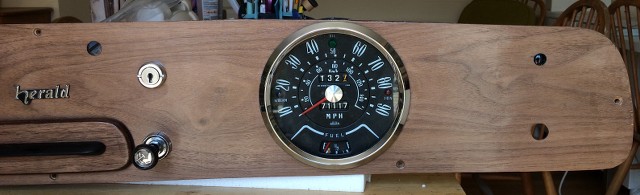
Here it is during a test fitting session, and prior to varnish.
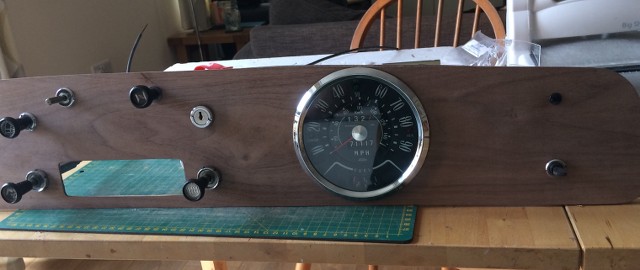
Followed by a test fitting in the crash pad assembly.
All good apart from two of the new dash mounting screws not fitting, they are meant for a TR6, were too wide for the holes in the reinforcing bar, but nothing that a few minutes with a drill won't fix.
Everything then got a final rub down, followed by about 8 coats of varnish, to be fair I lost count after about the 5th coat.
I found with the Rustins' varnish, that if you thin it about 10% with water, assuming that the one you are using is water based, brushes on much better, with little to nothing in the way of brush marks, and rubbing down every few coats.
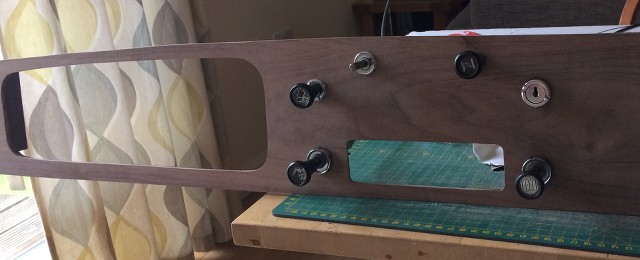
All of the switches and knobs have been cleaned up prior to refitting, after all no one likes a dirty knob!
It's not perfect by a long chalk, but, I at least have the satisfaction of knowing I did it myself, and it is a lot better than what was there before.
I'm waiting on a new blower switch from Paddocks as the one I have is a horrible aftermarket item in plastic, and a new voltage regulator for the back of the speedo as my fuel gauge has never worked properly, and every other has component has checked out OK.
This just leaves the choke cable assembly to be sorted ready for refitting.
More updates later.
Karl
-
1
-
-
Colin, mine appear to be both held in with nut/screw, and soldered!
Pete, I’ll pick up some outer sheath, and then make up the isolating section as suggested.
Thanks
Karl
-
Thanks for the responses.
The inner cable is mine, it’s just the outer sheath that is missing, and it looks like mine has lost the section between the rubber tube and stat washers and the carb.
I might see if I can order a new length of outer sheath, and make up a replacement rubber joint as suggested.
Out of interest, why the rubber joint? Neither the heater, nor interior heater control flap controls have this feature?
Many thanks
Karl
-
I am in the midst of rebuilding my dashboard, and one of the last items to go back in is the choke. However while the choke knob and associated assembly are in good position, the same can’t be said for the Bowden cable, which has lost half its outer sheath.
Therefore rather than just buy a complete new cable and knob assembly, can I just replace the cable?
If so, how?
Thanks
Karl


3D CAD availability
in General
Posted
Adrian I was discussing this with my eldest son over the weekend as he is a graphic designer by trade, and frequently has items laser cut as he has a sideline in bespoke keyboards, so was challenging my old skool approach.
Making mine was fairly straight forward, but still entailed several hours work, so would definitely have bought one if available, particularly given that this will sit under the top of the dash where most people will never see it.
Karl