

Bordfunker
-
Posts
1,005 -
Joined
-
Last visited
-
Days Won
17
Content Type
Profiles
Forums
Blogs
Gallery
Downloads
Store
Events
Posts posted by Bordfunker
-
-
Colin, I’m going to disappoint you on the screws as I have simply cleaned up the old ones in the blast cabinet and given them a blast of gloss black.
Rob, I’m thinking I’ll stick with the satin finish, as it’s a million times better than the applied with a bog brush finish it originally had.
Pete, shiny beats the crusty state it was originally in.
Karl
-
For once, a weekend that hasn't been about trying to separate hubs!
It did involve hub components, but in a far more productive way, namely getting paint on some more of them.
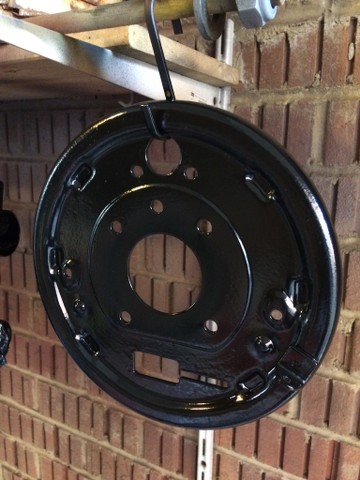
Driver's side back plate.....
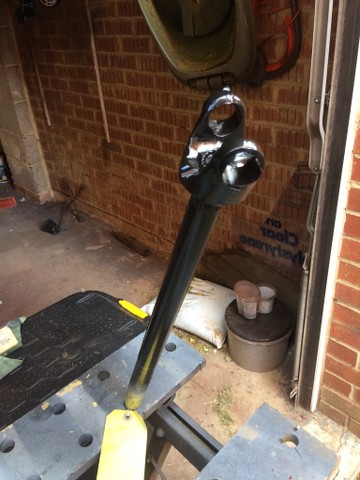
...driver's side driveshaft...
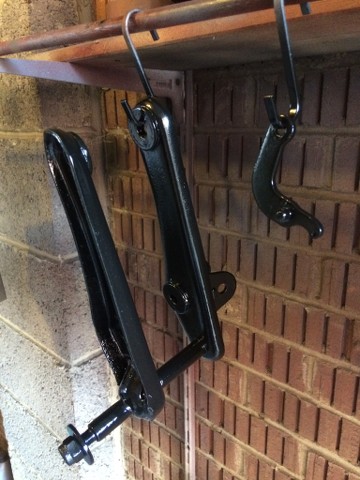
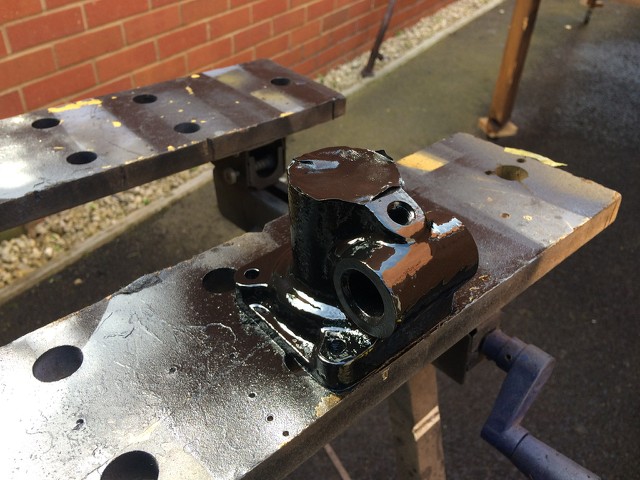
....passenger side upright and hand brake actuating lever.
Everything had got a coat of etch primer yesterday, and was left overnight to dry, before an application of black epoxy mastic today.
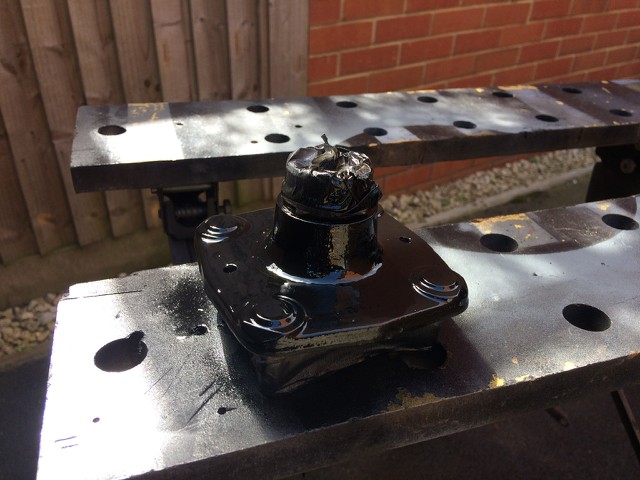
As well as the suspension components, the heater box also got some paint.
Front cover and motor mounting plate....
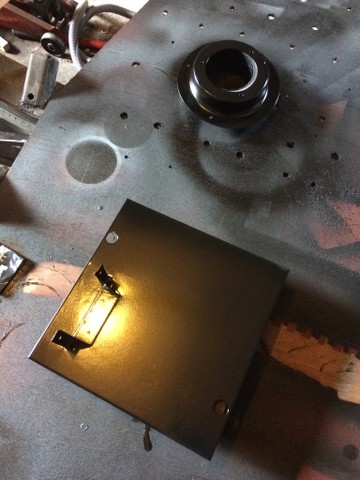
......main box....
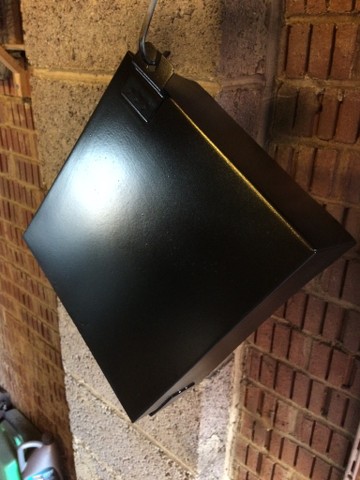
....and output control flap box.
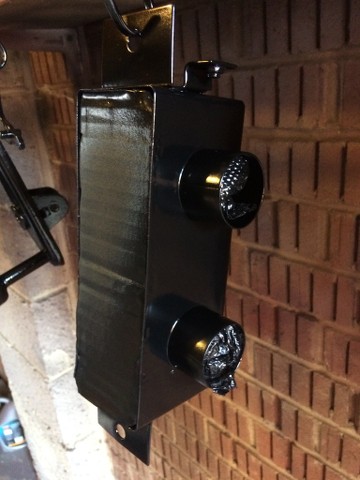
The finish on the heater box components isn't as glossy as I would like, being more of a satin finish, so not sure if I'll stick with that, or flat it all back and give it a coat of gloss cellulose, time will tell.
The seals for the driver's side hub are on order, so next week I'm hoping to get the driver's side hub, driveshaft & upright back together, and potentially the passenger side assembly back from the garage in two peices rather than one!
Karl
-
 1
1
-
-
Colin it’s not the bearings, it’s the hub itself which is stuck firmly on the taper.
I put as much as heat as possible into the hub itself to try and get it expand enough to break the taper, but a heat gun just isn’t man enough.
I’m fully expecting the garage to have to use a lot of heat and a bloody great press.
Karl
-
I don’t have access to a torch, only a heat gun, which while it turned the grease in the hub to liquid, and melted the rubber hub seal, generating copious amounts of acrid smoke in the process, couldn’t generate enough heat to really make the hub expand on the taper.
Matt, I measured the driver’s side driveshaft and it looks to be 310 mm between the knuckle and the rear of the bearing housing, so if the other one is scrap, I may take you up on that offer.
Today was spent cleaning up various drive and heater components ahead of applying a coat of gloss black tomorrow, so should post some pics tomorrow.
Karl
-
All many thanks for your comments.
Matt, I’m hoping I won’t have to take you up on the offer, but many thanks.
Colin, knowing me, the one on Fleabay would probably be equally stubborn, but I will certainly bear it in mind if the big b*gger press can’t shift it, especially as at that price as I dare say I could clean up and paint the bits I didn’t need and sell them on.
Tony, the mechanic sounded pretty determined when I spoke to him, and slight peeved that he hadn’t been able to shift it.
Given the weather, I think this weekend I shall try finishing the paintwork on the driver’s side driveshaft and hub, as well as the heater box, so that I can reassemble them next weekend.
Karl
-
Mrs B has said much the same, and I did think about that Colin, but at a combined cost of £150+, would like to try and re-use what I’ve got.
That doesn’t mean that when the driveshaft is removed it isn’t toast, but I’m hoping it’s in a similar state to the driver’s side.
Karl
-
I would love to be reporting that the passenger side hub and driveshaft were now two separate entities, however that is still not the case, despite rigging the bench to hold said assembly securely while I assaulted it.
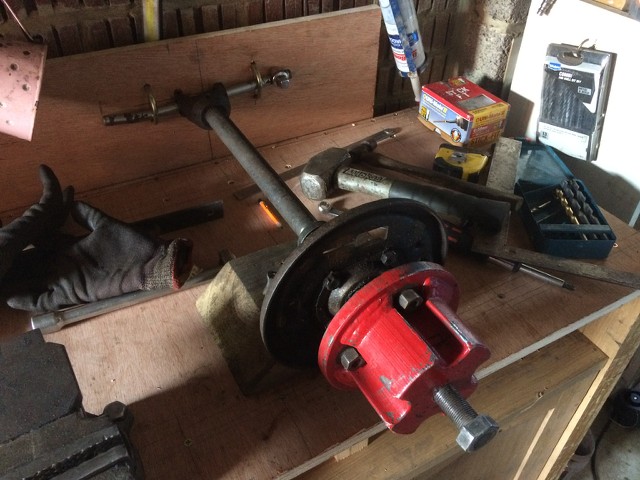
And secured to the back of the bench to prevent unwanted rotation with a couple of Rimmers steering rack clamps which don't fit my rack! I knew I'd find a use for them one day.
With all that set up, I set to with the torque wrench and a makeshift extension, which appeared to be making headway, until I realised that all it was actually doing was easing the wheel nuts off the wheel studs by stripping the threads!
It was at this juncture that I gave up and walked away, hot, sweaty and deeply dispirited.
The hub is now in the hands of my local garage, who have just informed that they can't shift it either, but the mechanic is determined to separate the two components, so it's off to another garage on Monday to be put in a very large press!
Good to know it wasn't just me.
Karl
-
If memory serves the piece of scaffolding pole I had was about 5 feet long.
Never had a problem getting my nuts off with that!
I have no idea where I got it from though.
Karl
-
Colin at least the parts for C1/107/Aygo’s are cheap as chips!
Having had 2 C1s over 140k miles, I’ve had to replace one exhaust box, a rear bearing and a radiator, which I don’t think is too bad for a bargain basement run about.
Adrian, when I say ‘bench’, we are in fact talking about an old cabinet, so 18mm ply is a definite upgrade until such time as I invest in proper bench like yours.
Pete, I wish I had a length of scaffolding pole. I used to have one many years ago for getting the hub nuts of my VW Beetle, but the scaffolding pole went with the car.
Karl
-
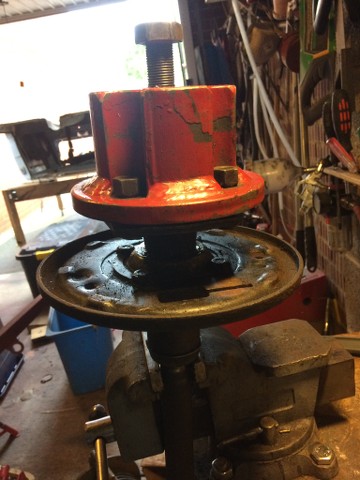
No real update this week, as I didn’t really make a lot of progress, as I’m still trying to get that bloody hub off.
I ended up mounting the driveshaft and hub horizontally on the bench so that I could push down on the torque wrench, rather than trying to pull it with it mounted vertically in the vice.
Long story short I ended up with both feet off the garage floor, and all 10 stone 4 of me hanging off the torque wrench!
Did the hub budge?
No but the bench top did!
I manage to rip it in half!
Cue Sunday afternoon after getting back from the Bicester Super Scramble rebuilding the bench with a new 18mm ply worktop, massively reinforced and screwed into the bench frame.
At least I now have a shiny new bench top on which to try again next week.
Karl
-
That looks very good.
I think I might have to fit decent fuse box to the Herald.
Karl
-
Colin, the C1 exhaust was £142 supplied and fitted from Kwikfit. I did contemplate trying to weld up the bracket, but with no room in the garage, and it peeing down, I took the lazy option, which was probably best as the pipe work was starting to look very scabby.
Tony, there are a number of agricultural engineers in the area which I will have to look up if my father doesn’t have a blow torch, of if that doesn’t work.
Pete, good to hear the corrosion isn’t terminal. I was using the vice and socket approach, but while one cup had pushed almost out of the yoke, the corresponding one opposite was only a couple of mm proud, at which point it refused to move further in either direction.
NM, not sure on the torque figures will need to check, but it’s probably not far short of a 100lb.
Matt, I’m hoping not to repeat your experience!
Thanks for all the suggestions.
Karl
-
OK tried all that, and the hub is still stuck to the bloody driveshaft!
It's mocking me now!
Tried taking it to the local classic friendly garage on Friday, but they didn't seem overly interested and suggested applying heat!
I don't have a blow torch or equivalent, so will have to see if my father has something that might do the trick next weekend.
This was supposed to be a long weekend as Mrs B is away up North, but driving home on Friday my modern started making strange noises on the M25, which further investigation at Beaconsfield services revealed to be due to a sheered exhaust bracket on the back box, leaving the pipe resting on the rear beam axle, hence the noise!
So Friday, which was supposed to be focussed on Herald based activities, ended up with me spending several hours sittiing in a coffee shop, while the C1 received a new exhaust.
Saturday dawned wet and dreary, so I set to trying to remove the UJs from the drivce shafts, a task which was definitely a game of two halves.
The passenger side UJs, unlike the hub, came out without too much trouble, however the driver's side completely refused to budge.
I tried setting up a variety of rigs to push the recalcitrant UJ cups out, even resorting to using my suspension spring compressor, which it managed to break, with barely any movement.
In the end I gave up and sacrificed the diff flange and ground the UJ out, so now need to buy a new UJ and drive shaft flange.
Not my finest hour, but the bearing cup looked to have effectively fused with the hole in the driveshaft yoke.
On a brighter note I did manage to get some paint on the components that I had removed from the driver's side hub.

Even the good UJ got a lick of paint, as well as the diff studs for the spring.
The passenger side upright got a clean up in the blast cabinet, followed by rust stopper and a coat of etch primer.

However, looking at the lower wishbone mounting this looks to have suffered quite severe corrosion.
Is this salveageable?
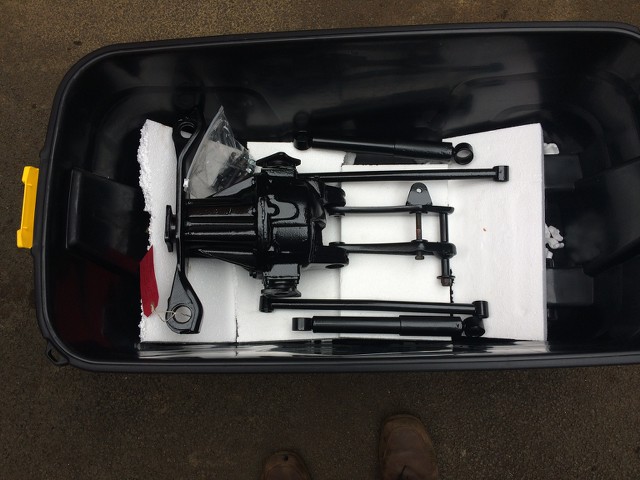
Today was spent cleaning up the garage, to which end I bought a large wheeled storage bin from Homebase for £16 in which to store the components that had already been rebuilt.
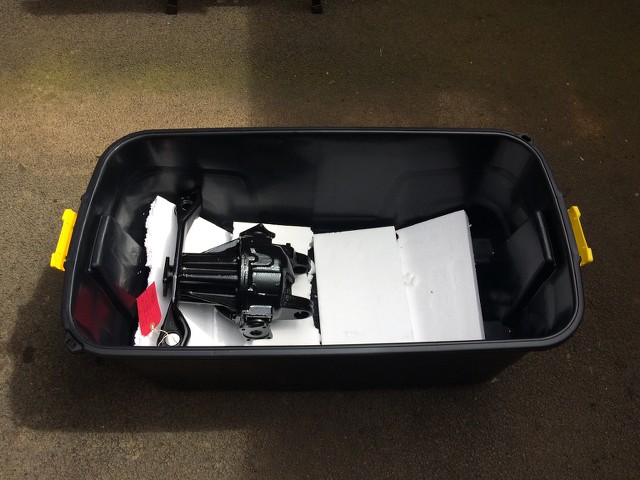
Look how clean that diff is!
Unfortunately the spring is too big to fit in the storage box, but it does look good, even if it is only loosely put back together.
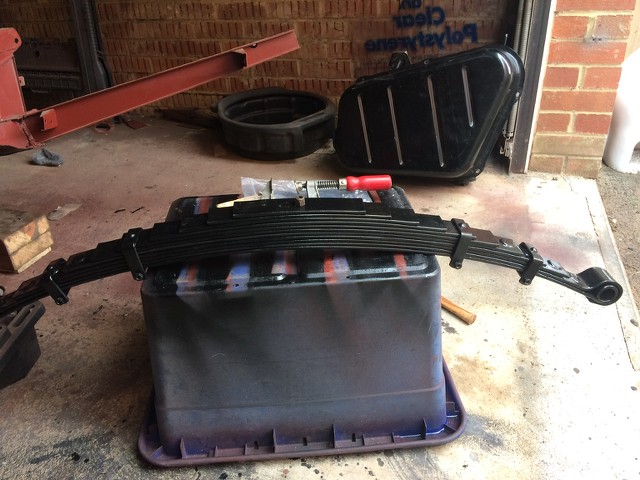
Currently tucked behind the door in the study for want of a better place to store it.
Another weekend gone, and the hub is still attached, but let's see what next weekend brings.
Karl
-
I think I might have to give the rhythmic hammering a go as a last ditch effort before I take it to the garage.
Nothing to lose after all.
Karl
-
I’ve left the hub nut on so that even it it does release it can’t brake free.
Well that’s the theory at least!
If that released in the back of my little Citroen C1, there’d be nothing left of the car!
Karl
-
Overnight?
Try over the weekend!
That beggar isn’t going anywhere.
The club hub puller seems to stop too much pressure being put on the hub flange and bending it, as the driver’s side hub is still nice and straight after being removed.
The hub puller is still on as I type this, and will probably remain there until it goes to the garage on Friday, at which point it will almost certainly release of its own accord!
Karl
-
Pete, good point on the inboard oil seal, I hadn’t realised it was reversed.
Colin, I’m not sure this hub was assembled by a man based on the evidence, more likely a gorilla with a very large spanner!
I’m hoping the local garage can shift it so that I can get on with stripping it down, cleaning it, and then giving everything a coat of paint.
Karl
-
Having got the hub off the driver's side driveshaft assembly last week, it was time to try my new tool, and eject the driveshaft from the bearing assembly.
So excited was I to try this, I forgot to take any photos! Ooops!
Long story short, the driveshaft was smoothly ejected, leaving me with a naked driveshaft, and a pile of constituent components.

Which meant now was crunch time, was my driveshaft fit for re-use?

Yes! Although there are track marks where the bearings have run, there is no wear, nor sign of a lip either, so that's a relief.
The bearings also got a thorough inspection, and both appear of decent manufacture, and working as intended, no noise, no roughness etc.

Here they are, along with the cleaned up back plate and oil flinger thingy.
OK so that is one hub removed, what about the other one I hear you cry?
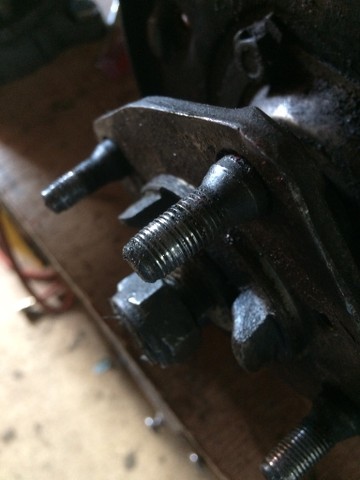
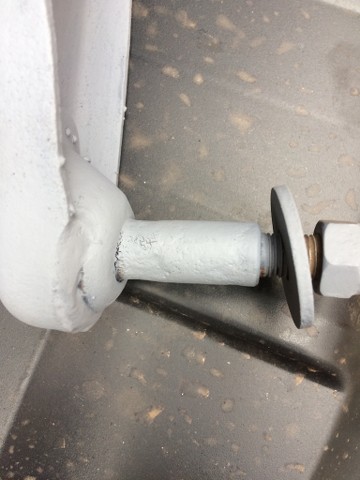
No dice! This begger won't move, despite my best efforts, and actually managed to deform the steel cup that goes between the bolt in the hub puller and the end of the driveshaft!
Therefore the passenger side driveshaft will be taking a trip to my local classic friendly garage on Friday morning to see if they can shift it. Arguably I could just leave it given that the other hub was fine, however both the front and rear oil seals appear to have failed, so failing to address it now, would just be saving up trouble for another day.
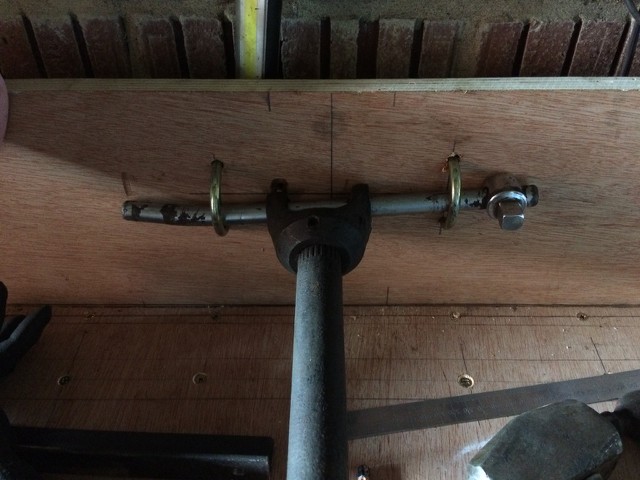
This is the passenger side driveshaft and backplate.
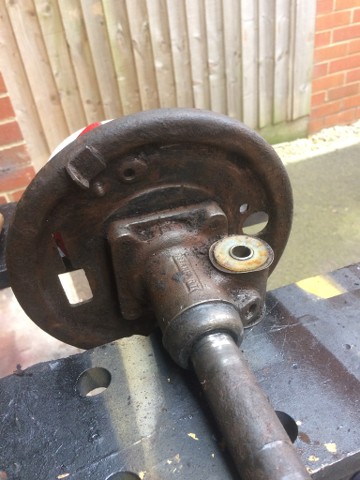
It's much scabbier than the driver's side, and when I removed the adjuster, one of the rams simply fell out!
If I couldn't remove the hub, I could at least make a start on removing the UJs on both shafts.
Again more easily said than done, as my first, albeit somewhat cheapo, set of circlip pliers self-destructed on contact, cue trip to Halfords for a decent set, and a can of WD40 release agent.

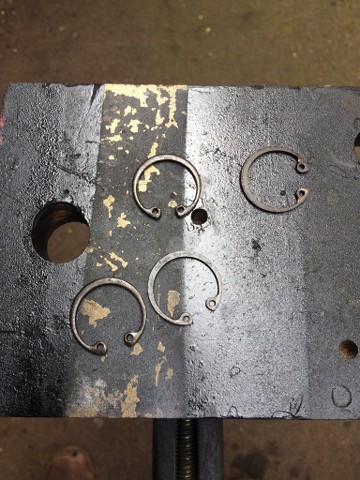
Result!
Now how do I get the UJs out?
YouTube is your friend here, and I soon rigged up a crude extractor, leaving me with this.
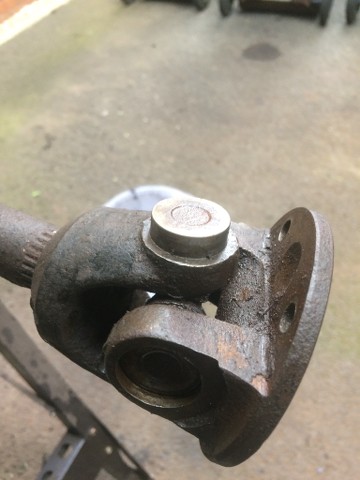
30 seconds with a pair of mole grips had this removed, which just leaves the other side of the UJ to do, before I do the other driveshaft.
Both UJs are in good shape, with no play, or obvious wear, and are both GKN, so appear to be good quality.
And finally, a quick comparison between the two rear uprights, one post clean up, and the other following a rough clean up with a wire brush.
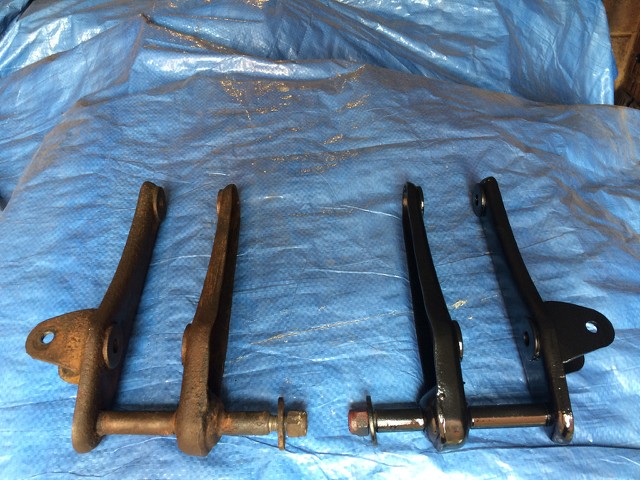
All in all a fairly productive weekend.
Karl
-
1
-
-
Loving the Beagle!
We’ve got 3 and they are completely mental!
Karl
-
1 hour ago, Colin Lindsay said:
I just hired a new Triumph for £35 a day from Sixt!
Even Smugger of Scarva.
Being a new Triumph, I am assuming that it only has 2 wheels!
Which means £70 for the correct compliment of 4 wheels on a Triumph!
Karl
-
41 minutes ago, johny said:
The trouble is the list of items to carry in our limited boots starts expanding: jack, board, axle stand. All for something that these days, taking how many miles the average Triumph does, is a very rare occurrence.....
Sounds like an argument for two Triumphs to carry everything!
Karl
-
I definitely wouldn’t trust a scissor jack, particularly a Triumph one, having seen one collapse under my teenage mates Triumph Toledo while replacing a front disc.
Many of the bottle jacks have the screw up top to increase lift, and looking at a few of those on the MachineMart site there are quite a few with high degree of lift.
I would still be inclined to Cary a section of board to set the jack on to ensure stability.
As you can probably tell I’m very nervous about working with just a jack, even if it is just changing a tyre.
Karl
-
Chris, my Herald 1200 is Dolphin Grey so looking forward to seeing how your Vitesse looks when complete.
I was thinking of a white flash down the side of mine to enliven the overall grey.
Karl
-
Pete it really ought to be called a driveshaft ejector, as that is effectively what it does, but I guess if the club called it that, no one would have clue what it actually did!
The ‘carrot’ is an earplug I popped into the brake line connectors to keep the muck out, and is a core component of the ABS on my car.
ABS is this case of course stands for Absent Braking System.
Karl

** 26/02/23 Heading Up ** Probably how not to restore a Herald!
in My Triumph Restoration Project
Posted
Colin I think you will soon overtake me given the rate at which I work!