

Bordfunker
-
Posts
1,005 -
Joined
-
Last visited
-
Days Won
17
Content Type
Profiles
Forums
Blogs
Gallery
Downloads
Store
Events
Posts posted by Bordfunker
-
-
That all sounds like a loose flinger then!
Hopefully that means it just needs a strip down, clean up, and a coat of paint.
Thanks guys.
Karl
-
Pete, the housing moves easilly off the bearing, but if you pull the housing so that the bearing is flush, you are then left with a 3mm gap between the oil thrower at the diff end of the housing, and the housing itself.
Even with the retaining plate in place, holding the bearing in the front of the housing, there is still about 3mm of movement, wheareas I would have expected the distance between the oil thrower and the bearing to be fixed with the bearing fully seated on the shaft to define that fixed length, effectively pinning the housing in place on the shaft between bearing and oil thrower.
Hence thinking that either the bearing isn't fully seated, or that the oil thrower has shifted towards the diff.
I didn't notice any issues with the drum fitting to the hub, but then that relationship is fixed, with the driveshaft moving fore and aft in the hub, and 3mm isn't a great deal.
I'll strip it all down as a matter or course and check everything over, so if there is anything amiss, it should become obvious.
Thanks
Karl
-
Colin, to be honest I haven't torqued it up yet, as I was going to leave that until it was back on the car.
Even then, I will just use the locking handle that I made up and the torque wrench, as thankfully my diff just has the castellated nut, rather than the crush tube thingy.
The plan was to get all of the parts that I'd prepped last week painted this week, making full use of the long weekend, however best laid plans and all that as Mrs B scored a new sink for our ensuite for £10, so no excuse not to replace the one that she cracked with a perfume bottle. Dont ask!
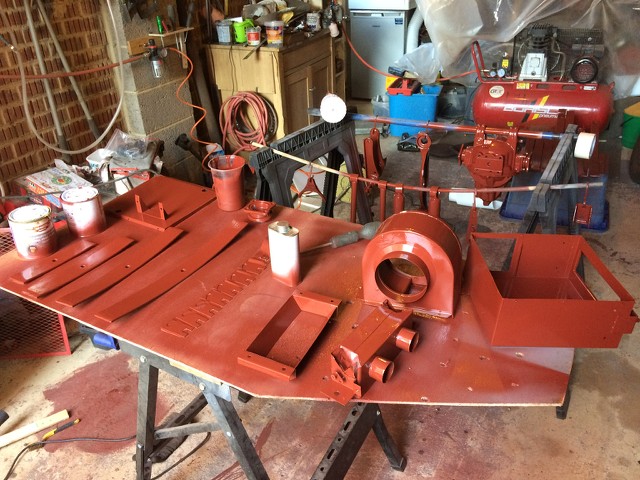
Between that and the weather, I only managed to get a few hours on Saturday afternoon, but that was enough to get a first coat of gloss black epoxy mastic on.
Looking like a rack of overcooked ribs!
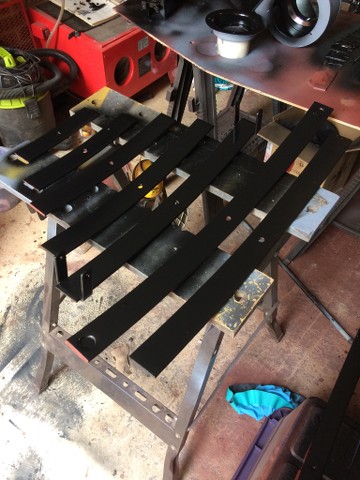
And the long ones.
As I can't hang these up, I am having to paint them one side at a time, starting with the underside.
Also in line for paint were the track control arms and the upright.
Along with a number of other rear suspension components.
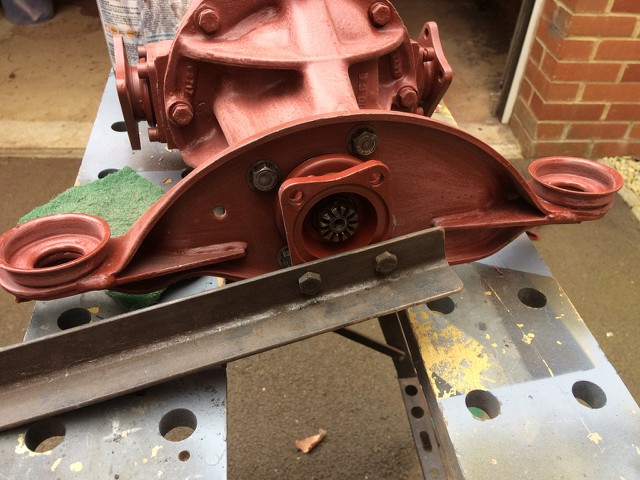
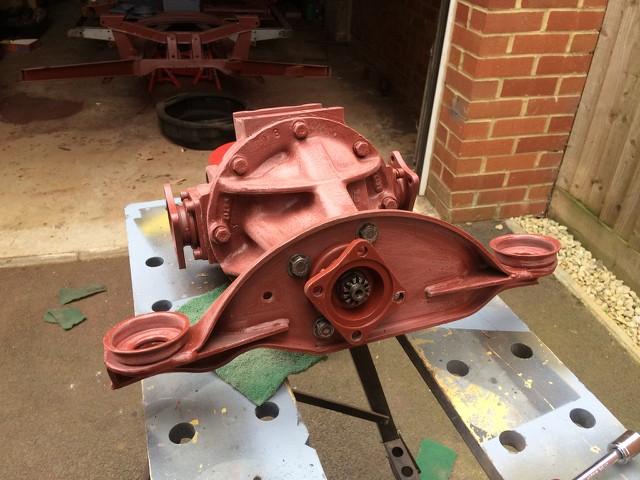
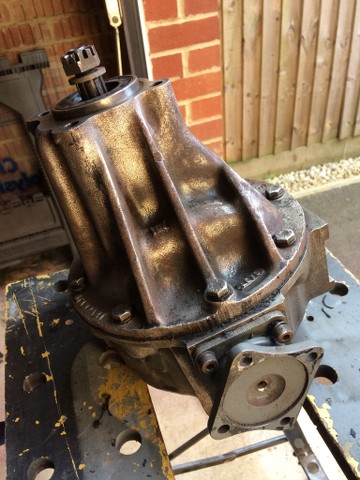
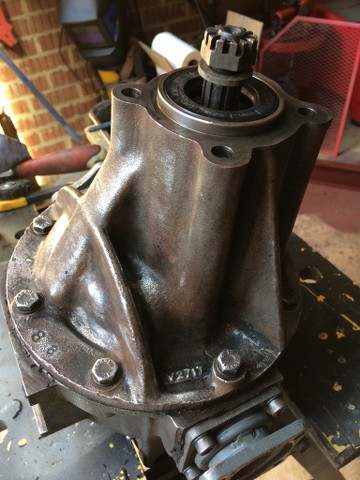
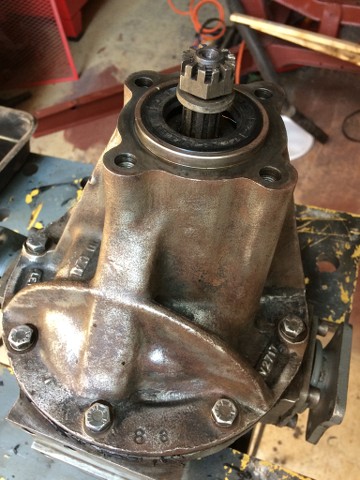
The diff also got in on the act, though not the best photo.
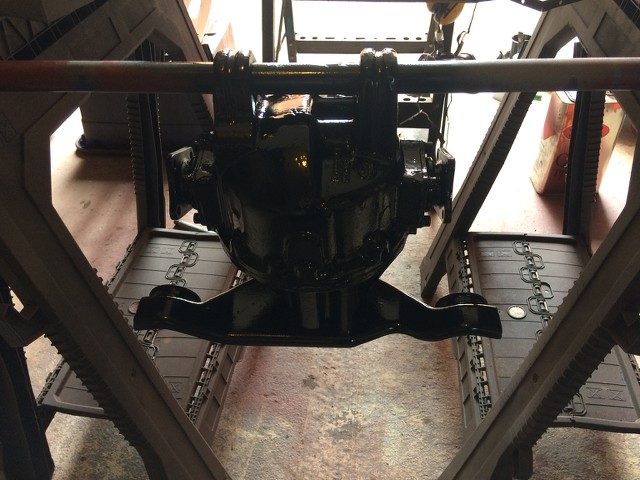
The diff will need another coat as there are a couple of places where you can still see the red primer.
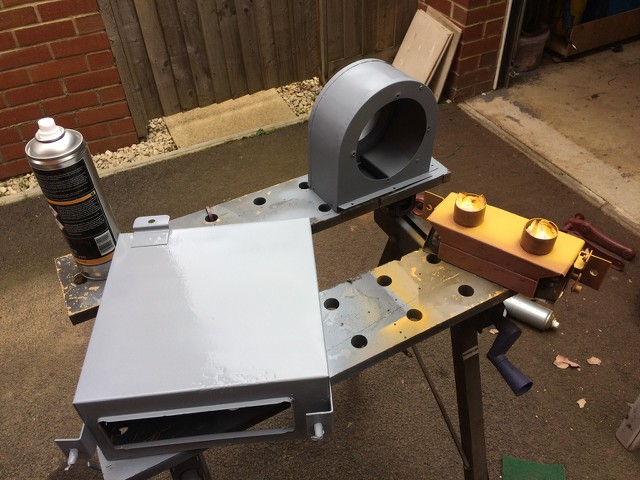
And seeing as I had paint left in the gun, I gave the internals of the heater box a first coat of black.
All of which only took around 90 minutes, including clean up, not helped by me kicking the dreggs of paint in the mixing cup over the garage floor. Did I mention I was clumsy?
So what to do next?
Well, given that I had picked up the local club hub puller earlier in the week, I set about fitting it to the hub.

At which point I realised that none of my spanners fit the nut on top, but thankfully I found a truly ancient spanner, that I acquired from who knows where, but which fitted perfectly.
At which point the straining and grunnting began as I tried manfully, stop laughing at the back, to pop the hub off the taper.
I ended up standing on one leg, with my boot against the vice and driveshaft, straining away until eventually it released, dumping me on my arse in the middle of the garage! I did say I was clumsy!
I must have made a racket as Mrs B came out to see what the hell I was up to.
All this did leave me with access to remove the backplate....

......and take a look at the bearing itself.

The bearing looks to be in fine health, but doesn't look to have been pushed fully onto the driveshaft, which suggests that someong has replaced it in a half arsed manner.
Next job will be to extract the driveshaft, so that I can take a good look at the roller bearing, and driveshaft, but that will have to wait until next week now.
Karl
-
I’m going with body colour on mine as it’s light grey, but did consider painting chassis and underside black.
Unfortunately, given the light sucking qualities of black, I figured it would be easier to spot damage to the paintwork on the light grey, and make it easier to see generally under the car.
Karl
-
And you are certainly getting getting there a hell of a lot faster than me!
Karl
-
Despite the fact I didn't post anything last week, it doesn't mean I didn't get anything done.
With half the flatting back done the week before, I spent another hour or so flatting back the heater box components and the diff.

The shocks and the rear track control arm mounts got a coat of filler primer to try and remove some of the pitting, leaving me with a pair of Spax knock offs!

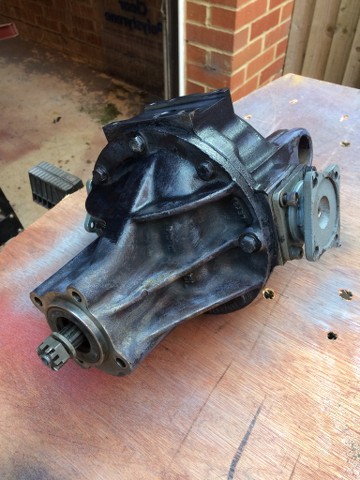
I then reassembled the diff and yoke, utilising my patented locking bar.
All back together and ready for paint.
The heater box components also got a coat of filler primer, followed by etch primer.
These will need some more work before they are ready for top coating, but nice to see them going in the right direction.
Karl
-
 1
1
-
-
Picking up a hub puller tomorrow night from local club meet, so should get a chance to crack open the hub and bearing housing at the weekend.
Karl
-
You are a delicate soul!
Must try nitrile gloves, as the powder on the latex ones isn’t good when you’re painting.
Karl
-
 1
1
-
-
It’s a lot safer too than trying to strip the paint off small components with a rotary wire brush in a drill!
The number of times I’ve lost a latex glove to the spinning bristles of wire brush.
Karl
-
Stupid question, but what controls the float in the housing?
I am assuming that the bearing is a tight fit to the taper, which is then held in place between the bearing housing and the back plate.
So does that mean that the bearing is no longer a tight fit on the taper?
Karl
-
Pete, no probs, I'm planning on replacing all the bearings as a matter of course as they've probably been on there 50+ years.
Karl
-
All, many thanks for the feedback, particularly with regard the replacement drive shafts, as although I don't intend doing huge mileage (once I finally get the car back on the road), I don't want to be having to do this again any time soon.
The hub is quiet when you spin it, in answer to Johny's question, which suggesst that the main bearing is OK, but as per Jumpinfrog's comments, I'm guessing that the needle roller bearing has failed, and potentially chewed up the drive shaft, allowing the fore and aft movement of the shaft.
Chances are I will simply reaplce all the bearing as a matter of course, but most likely with ones from the club or reputable SKF ot Timken ones.
Oh well, I know what I'll being over the bank holiday weekend then.
Off to find a puller now.
Thanks
Karl
-
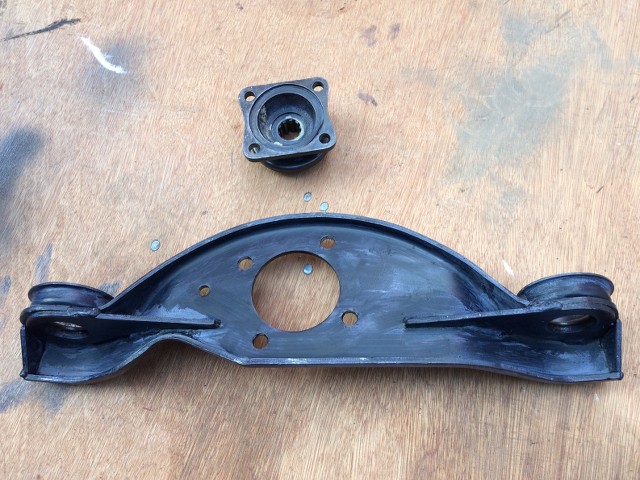
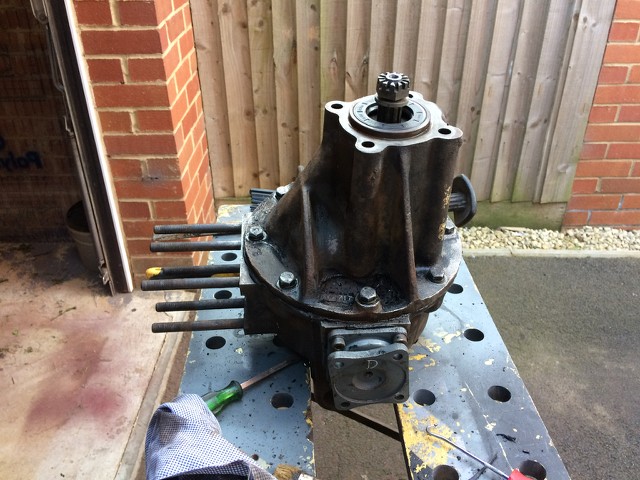
As some of you may know I’m in the process of rebuilding my 1200 Herald, and having rebuilt the diff oil seals, attention has now turned to the rear hubs and drive shafts.
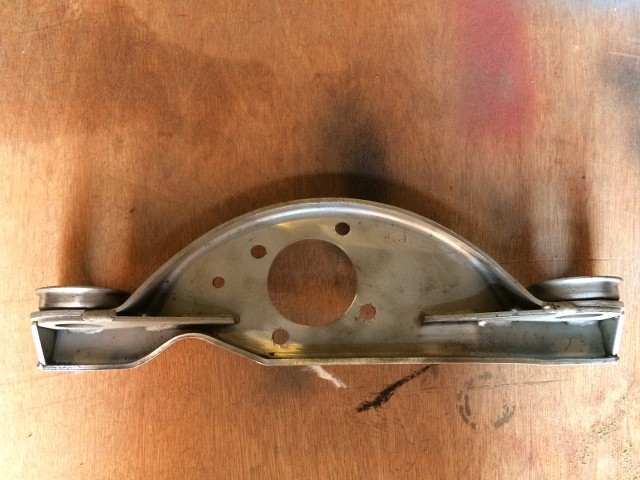
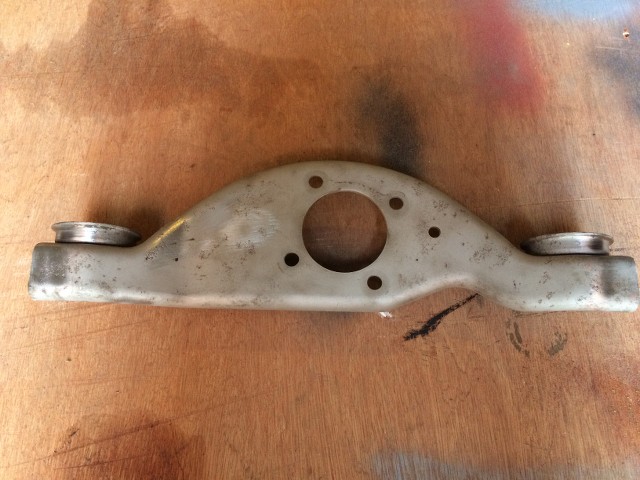
Having stripped the brake components off one side I’m left with a drive shaft, trunnion/bearing housing and back plate, which has highlighted the fact that there is movement between the drive shaft and hub, and not rotational, but linear as per the photos below.
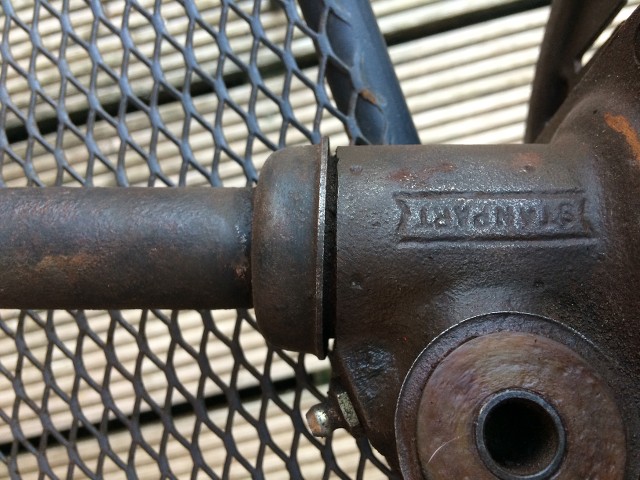
Which at the hub side translates to this.
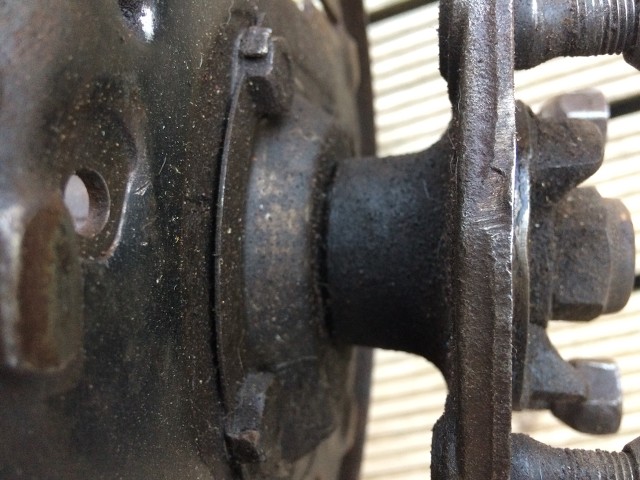
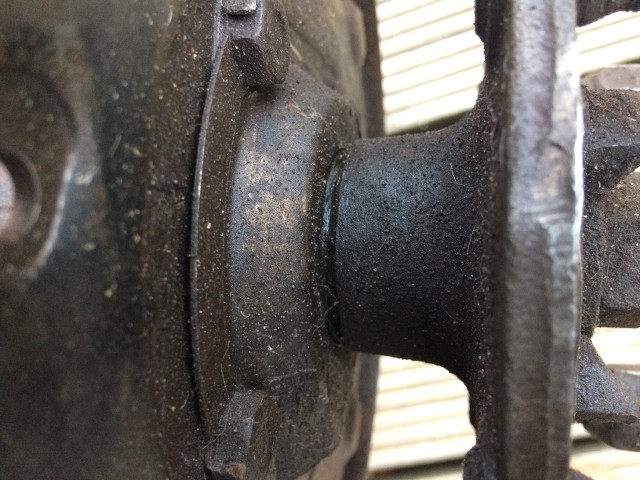
Which means about 2-3mm of longitudinal movement, which I am assuming means at the very least that the bearings have collapsed, allowing the movement, and/ or the drive shaft is toast as well.
Therefore I am assuming I will be needing a proper Triumph spec hub and bearing puller?
Hence checking my interpretation with the combined wisdom of the forum before I start stripping things down.
Thanks in advance.
Karl
-
No update last week as I was in York for a family wedding, and this Saturday was spent doing all the stuff that didn't get done last weekend due to being York eating and drinking too much.
So having primed the main components of the heater assembly last time, I dug out the screws and bolts that I'd put aside 3 years ago, and put them through the blast cabinet.(Can I just say how much I love having a blast cabinet!)
These were then given a quick blast of etch primer.
Along with some of the handbrake components, all of which then got a coat of gloss black from a rattle can.
I could of course have painted these with all of the rest of the suspension components, but figured it was easier doing these with a rattle can.
With that lot out of the way and drying, I set about starting to flat back the components that I primed the other week.
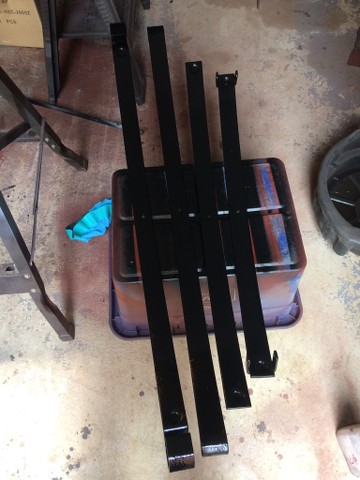
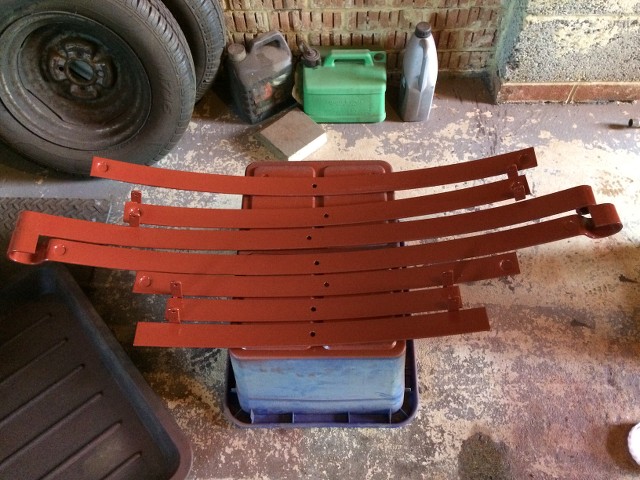
First up were the leaves of the spring.
They will get sprayed separately for the final coat of gloss black, but I stacked them up to keep them altogether and stop me falling over them on a regular basis.
Can I just say how boring and slow flatting down is, as this is all that I managed to get done in an hour and a half.
Which still leaves the rest of the heater, the diff & yoke, and the upright to flat back next week, before applying a top coat of gloss black epoxy mastic.
The aim is to get the diff & heater painted and rebuilt, and then I can set them aside and start work on the drift shafts and hubs, one of which looks to be shot as there is about 4mm of back and forth movement of the shaft in the hub, so I am assuming a new driveshaft and bearings may be required. This would go some way to explaining the heavy vibration I used to get at speeds above 50, that and the lack of a full complement of body to chassis mounting bolts!
Karl
-
1
-
-
My Herald came with an MoT, and you know what state that’s proved to be in!
MoT is as good as the garage that did it unfortunately, and there are some complete shysters out there.
Karl
-
1
-
-
I do about 500 miles a week in my C1 on the M40/25, and it’s well able to keep up with traffic, however to your point Pete, being small I find a lot of drivers think that they can intimidate you, or just under estimate your speed and pull out in front of you at junctions or on the motorway.
Overall the standards of driving out there are pretty poor, with many drivers far too focused on their phones, or simply lacking awareness of their surroundings, like the woman yesterday who came round a bend on the A1237 outside York on my side of the road, thinking it was a dual carriageway!
Karl
-
I hope they got out OK and weren’t seriously hurt.
Any idea if they are a TSSC member?
Karl
-
8 hours ago, Pete Lewis said:
i would get a modern motor and fan
Pete, where would the fun be in that?
Karl
-
Another weekend, another round of painting, despite the efforts of storm Hannah.
Saturday was a wash out painting wise, quite literally, so I did some clean up work on the remaining tinware from the heater, which first meant removing the fan assembly.
Now I had sort of started 'removing it' previously, by dropping it on the floor, which left me with this.
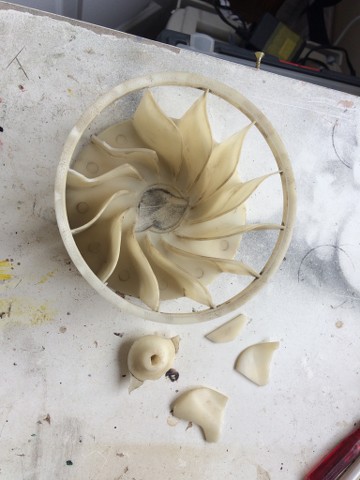
The central hub of the fan was stuck on the motor spindle, mainly due to the effects of 50 years of rust and grot, meaning that I had to use copious amounts of WD40, and judicious use of force.
The aim is to Araldite this lot back together, including the broken blades, as I figure this should be a strong enough repair given it's only a heater fan.
With the broken fan hub removed, I was able to remove the motor and clean it up.
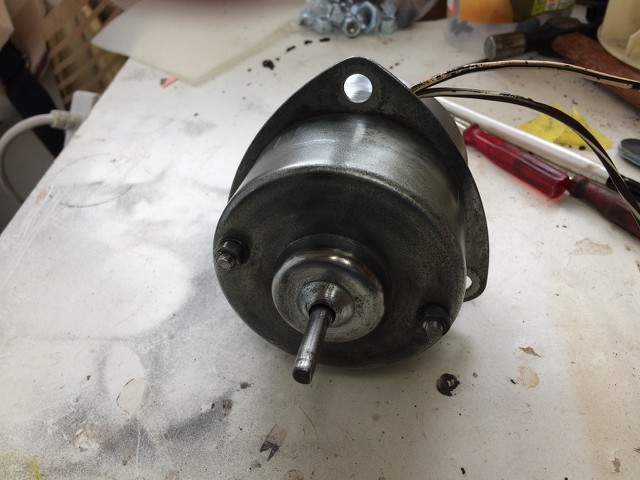
Taking me from this, to this....
It looks like the motor was originally bare metal, so before the motor goes back in it will get a coat of clear varnish.
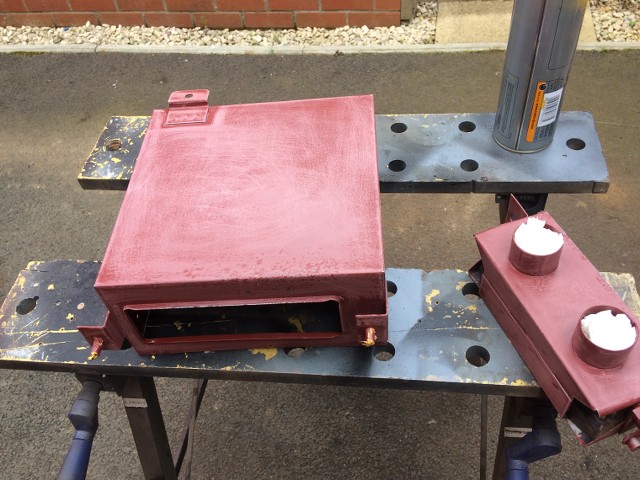
Which just left the final bit of heater tinware to be cleaned up and given a coat of primer.
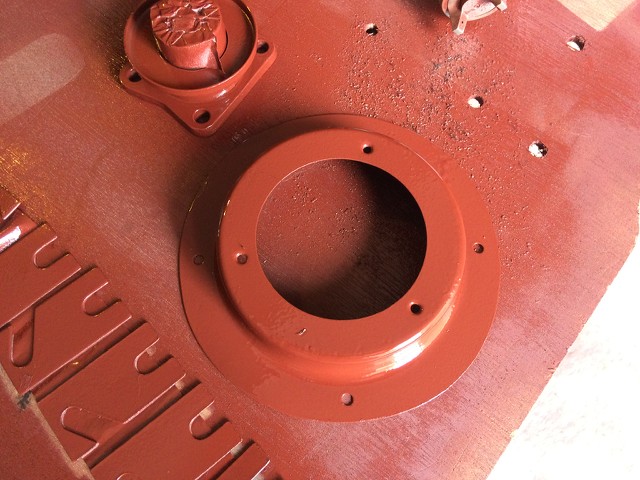
Everything else that didn't get painted last week, got painted today, especially the bits that I'd fortgotten last week, like the spring retaining plate.
Along with the sides of the heater box that I'd been unable to access last week.
You can see just how rusty the inside of the heater box was getting from the pitting.
The back of the main heater box shows similar pitting at it's lower edge, however you can't see it in this photo, although you can see the blob of paint I managed to drop on it after painting. That'll get rubbed down before I apply the final coat of gloss black in a few weeks.
After the painting, which takes 10 minutes, and the following clean up which takes a whole lot longer, I fired up the blast cabinet and started cleaning up the handbrake components, and that was the limit of progress this week.
And that was another weekend gone.
Karl
-
Pete, the paint will be removed before they are fitted to the car, however that won’t be for a few months, I’ll the paint on for now.
The aim is to get the bulkhead repairs completed, after which the chassis can be fully painted, after which the rear suspension and drive train can go back on.
Karl
-
Despite the lack of an update yesterday, I wasn't idle, spending a couple of hours cleaning the last of the underseal from the differential.
Shiny.....
....and then not so shiny as i applied a coat of rust stopper.
Also in the pile for a coat of rust stopper was the diff yoke and the front flange.

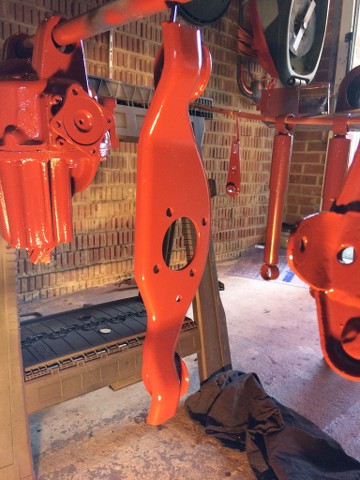
All of which left me in a position to actually apply some paint today, in this case epoxy mastic primer.
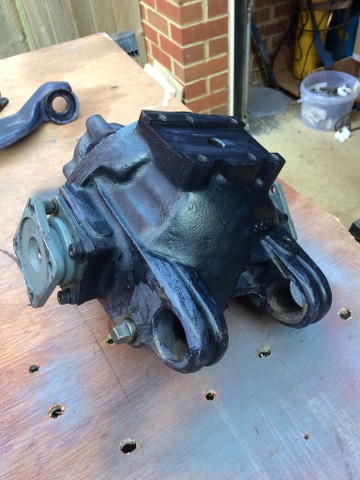
Diff all shiny again.
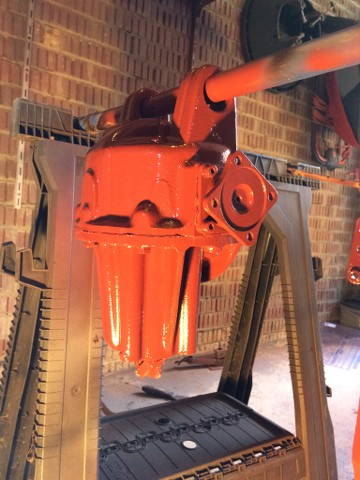
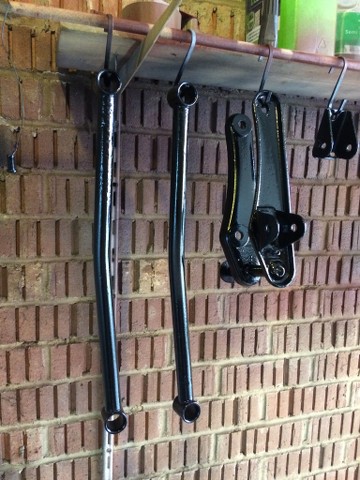
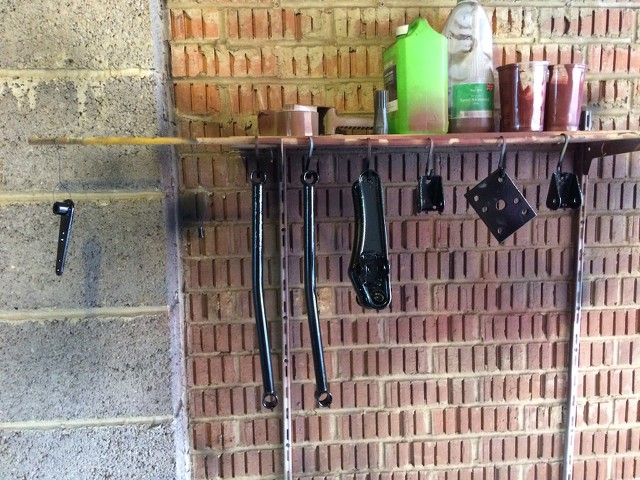
Along with the yoke and with the passenger side upright just sneaking into frame.
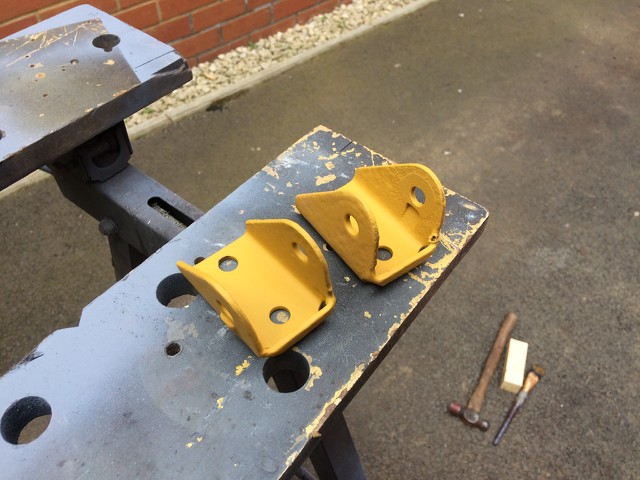
The shock absorbers and trailing links also got a final coat of primer, along with the handbrake components and trailing link brackets.
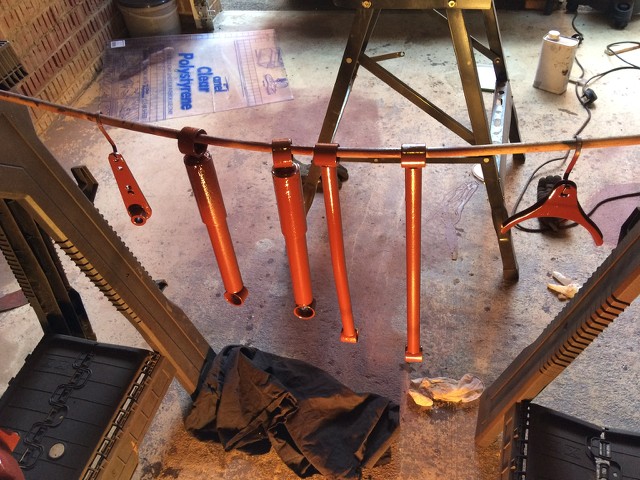
Not to be left out, the spring leaves also got in on the act.
But Karl, that isn't a full complement of leaves I hear you cry!
Don't worry I haven't lost them, they are just with the other items getting a dab of paint. Note even the trailing link spacers getting paint!
Yes the heater components are getting some attention, well the bits that I could reach at least.
I really need to work on how I arrange workpieces for spraying, as I was left unable to reach certain areas of each component, so they'll need to give these bits another coat of paint on the bits I missed.
The epoxy mastic sprayed beautifully, using a boggo-basic gravity spraygun with a 1.5mm tip, at about 40 PSI, and I have to say that a little goes a long way, and when it's dry it's extremely tough stuff.
I'll probably let that lot harden off for a week, before touching in the bits I've missed, and then hopefully getting a coat of gloss black down.
Karl
-
Mark, that looks terrifying!
Mine is definitely in better shape, but I still wouldn’t want to use it again.
Pete, definitely a case of take plenty of photos before you strip everything down.
One of the benefits of this thread is that I can go back and review many of the photos for detail references.
Karl
-
First order of business today had to be fixing Thursday's cock up with the output shafts.
D is for Driver's side, and that is where the output shaft with the D on, now is!
I can confirm that the Loctite sealant is very good at bonding metal surfaces together, which is good to know, as hopefully these won't be coming out for a good long time!
With that done, and the weather so good, time to lock myself in a garage with a bellowing compressor, howling vacuum cleaner and a blast cabinet, well what else would you do on such a glorious bank holiday?
Do you remember right back at the start of this thread I removed the heater because it wasn't working properly, which is when I found the rot in the top of the bulkhead, and started off down this rabbit hole?
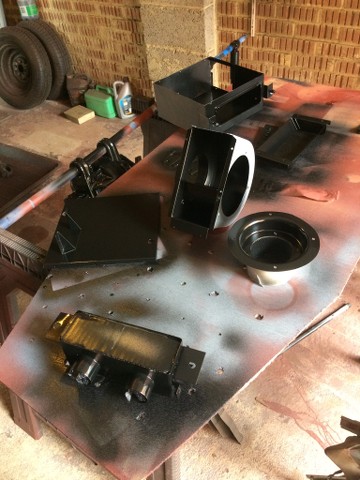
No neither did I, but apparently I did, so having rediscovered the heater casing components, for this being a Delaney Gallay unit, rather than the more common Smith's unit, it has many individual comnponents, and can't have been very economical to produce, I decided to give them a clean up in preparation for paint.
About an hour and a half in the blast cabinet left me with this lot.
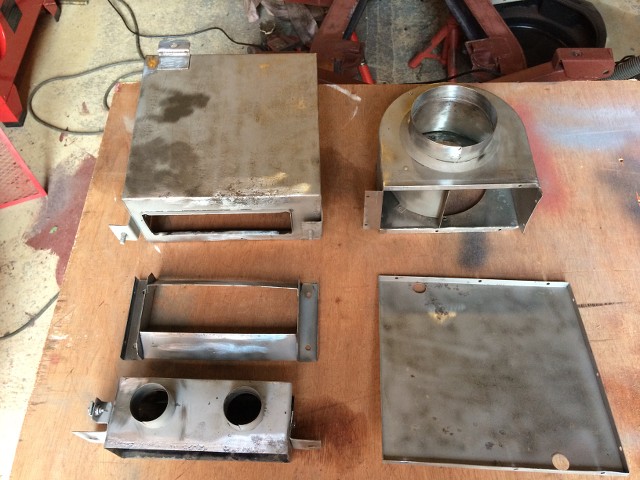
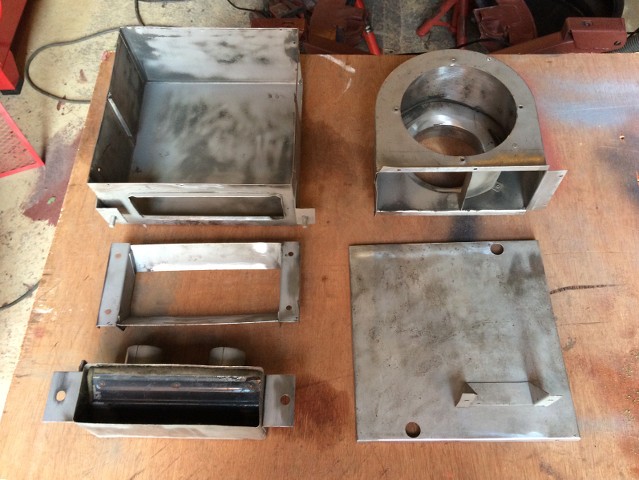
The reason it took so long, aside from the multiple components, was because of the fact the paint had been applied with a bog brush, and was painfully thin in some places, such that the merest whiff of air and blast media took me back to bare metal, while in others I had to resort to a strip disc, and even that struggled.
And to prove that I can remember vaguely how it's supposed to fit together.
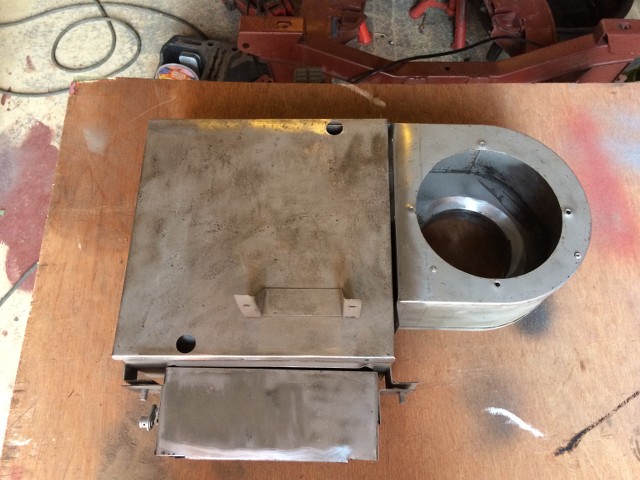
OK the front cover is 90 degrees out, but it's 3 years since I took this off the car as a quick fix!
The next half an hour was spent cleaning up the differential yoke as there was still grot stuck in some of the crevises, which needed removal ahead of paint being applied.
The eagle eyed will have spotted the fact that 3 star washers have now come off, don't worry I haven't lost them, they have been cleaned up and put away safely withn the bolts themselves, which have also been cleaned up.
I then had a go at one of the bolts that I'd missed from the last blasting session, but this one won't be going back on the car.
I think we can all agree that one is toast!
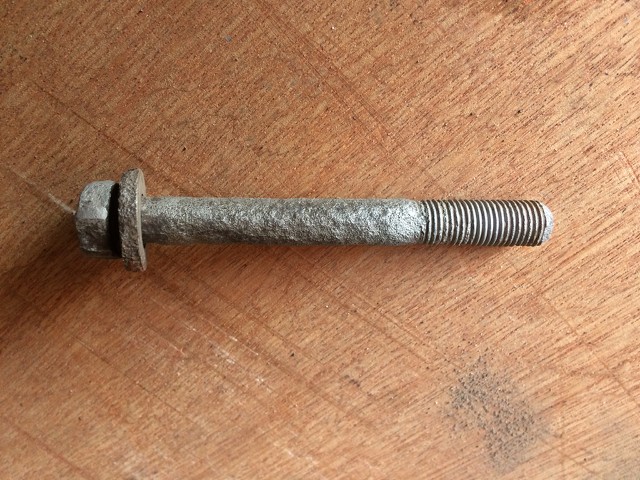
It's one of the track control arm mount bolts from the passenger side, so will be going on the scrap pile, while my shopping cart on Paddock's site will grow by one item.
Tomorrow I need to remove the last of the underseal from the diff, after which it will get a coat of rust stopper, as the heater components have already done this evening, and then everything will get a coat of epoxy mastic primer, followed by a coat of black.
Karl
-
Having scraped a load of ancient underseal off both body and chassis of my Herald, and seen the damage that it has wrought by trapping moisture between the underseal and the metal, I would avoid it like the plague.
I think stone chip has its place in areas such as wheel wells which can come in for a lot of punishment, but elsewhere I would be inclined to go for a decent epoxy mastic, which is what I’m doing, followed by a top coat and regular coatings of a clear protective wax which will let you see any damage that needs attention, while providing protection.
I’m in the same boat as you with this being my first restoration, so wanting to do as good a job as I can.
Karl


** 26/02/23 Heading Up ** Probably how not to restore a Herald!
in My Triumph Restoration Project
Posted
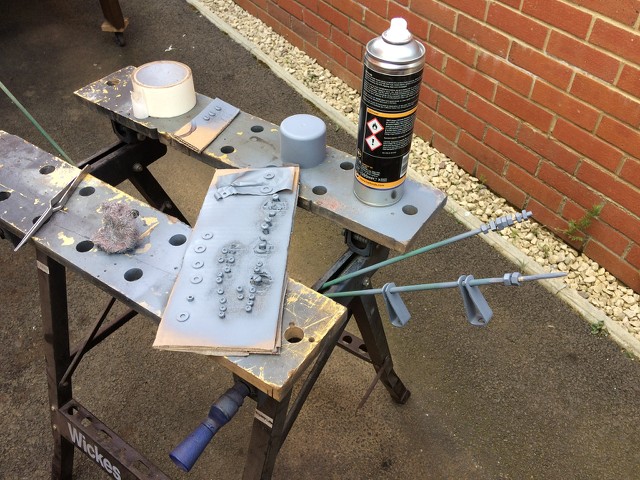
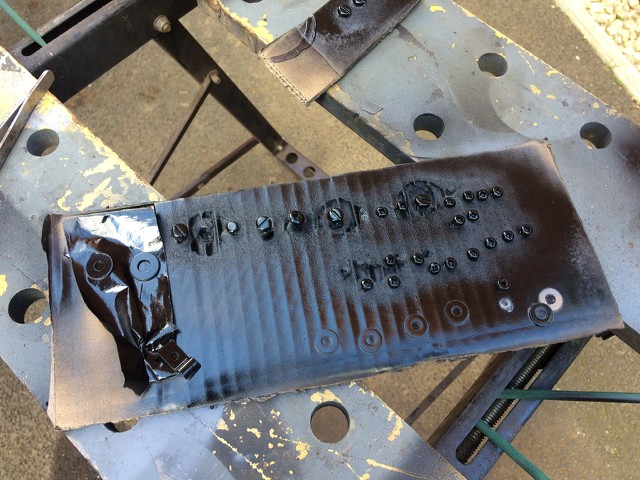
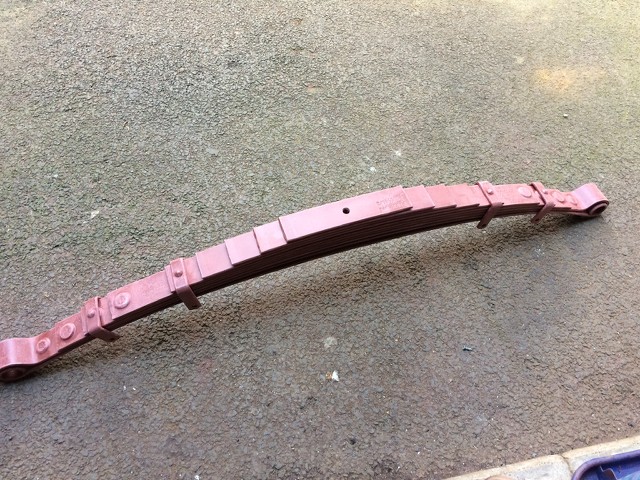
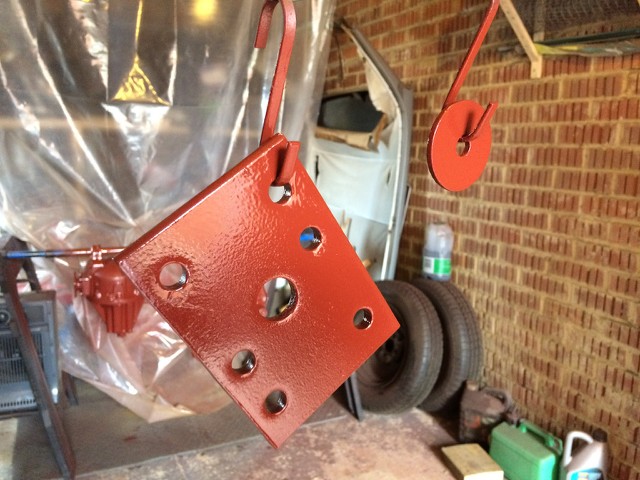
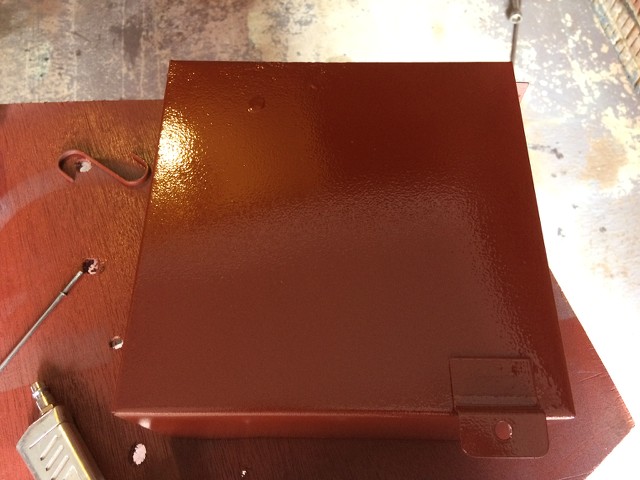
Seeing as last Saturday was lovely and hot, and certainly far too hot to be mowing the lawn, I escaped to the garage to get the final coat of black paint on the diff and springs.
With a bit of forethought this painting mullarkey is definitely getting easier, and I soon had the leaves from the springs looking resplendant in a coat of gloss black.
Proof in the background that the entire car is not in bits. Yet!
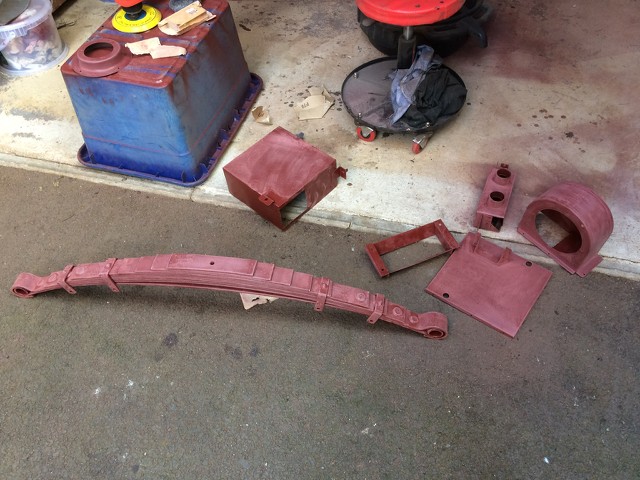
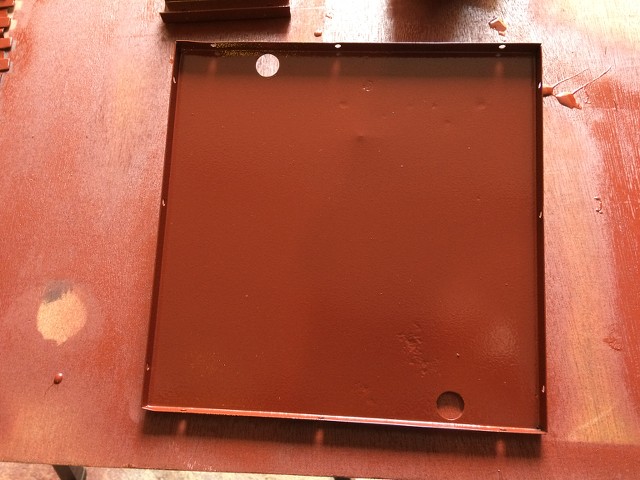
Some of the smaller components also got another coat of paint, and were then bagged up to keep them safe.
These are handbrake and heater assemby components, which will be tucked away in a storage box shortly.
The big cork gasket goes between the fan housing and the fan mounting, and I've retained it as I can't find a replacement for sale.
With paint applied, and time to spare I started on the remaining rear driveshaft and hub, just look at the muck on that!
Removal of the upright revealed a mass of leaking grease.
Which was no doubt coming from here!
It's not clear if there is actually an oil flinger in there, or whether the rear of the housing is open, hence the mess!
The whole lot is now sitting in the vice with the hub splitter on top, as I couldn't get it to budge on Saturday afternoon, so will see if prolonged tension, as per Pete's suggestion will help.
That still leaves the bearings to be extracted from the other housing, for which the following will come in very useful.
Ordered from the club shop on Friday, and turned up Monday.
I know I won't use it very often, but I will make it available to local members to borrow, so that we can all get some value from it.
Karl