

Bordfunker
-
Posts
1,005 -
Joined
-
Last visited
-
Days Won
17
Content Type
Profiles
Forums
Blogs
Gallery
Downloads
Store
Events
Posts posted by Bordfunker
-
-
Thanks Pete.
I replaced the condenser with a new one I had spare.
No joy.
I then tried the old rotor arm which I know worked.
Still no joy.
I haven't tried replacing the points, but I did churn the engine over with the dizzy cap off and there was a good spark at the points.
I suppose I'll have to replace the points next.
Karl
-
I've got a spare condenser in the garage so will try swapping that.
I took the air filter off last night to take a look at the carb, and there does appear to be a lot of moisture around the carb to manifold joint, so further investigation required.
Karl
-
Well, it's not the coil.
Having said that, the new coil does at least give the right outputs when hooked up to the multimeter.
Given that there is power to the ignition system and the engine is at least turning over properly, I need to look at the fuel system and compression next.
Based on the fact that it was running without issue the other week, I'm thinking that the fuel system is the issue here now.
Not that I'll probably get a chance to look at it till after Xmas now.
Karl
-
Thanks for all the feedback all.
We'll soon see if it is fried, as I've ordered a replacement from Rimmers.
Karl
-
Doug there is a definite whiff of unleaded after protracted turning over of the engine, so I'm fairly certain the fuel pump is doing what it should.
I tried the multimeter on the coil, first set to the 200 Ohm setting, and applied to the positive and negative terminals of the coil.
This showed a reading 23 Ohms, when apparently what I should be seeing is around 1.0 - 1.7 Ohms.
That indicated an issue with the primary resistance so next up was a test of the secondary coil.
This time one of the the multimeter probes was inserted into the king lead socket and the meter set to the 20k Ohm setting, which should have delivered a figure in the region of 11, but what I got was 7.5.
Either I'm not doing this correctly or the coil is fried.
Karl
-
Not a lot of time to work on the Herald this weekend due to being knackered from work, and preparations for some forthcoming festive period.
However I did convince Mrs Bordfunker to help test the coil this evening, by repeatedly turning over the engine while testing the spark at the king lead and also at the spark plug end through the distributor itself.
In each case I got a spark at the plug, however if didn't look or sound as powerful as I would expect.
Not really time to check it all with the multimeter, that and I need to do some reading up on how to test the coil effectively with a multimeter.
In other news, I managed to knock the heater motor off the shelf while chasing a beagle out of the garage!
The plastic fan has shattered, so at some point I'm going to be in the market for a replacement fan assembly.
Not my most successful weekend.
Karl
-
The replacement brake master cylinder arrived last week from Rimmers, and was duly installed on Saturday afternoon, with assistance from Mrs Bordfunker in the bleeding of the brakes.
Result, one car that stops, and does not leak brake fluid.
Unfortunately said vehicle then refused to start, despite having the battery charged overnight.
Battery was then unceremoniously dumped in the back of my diminutive C1, and taken down to Halfords for a battery check.
As expected, the volts were fine, but the amps were only about 2/3 of what they should have been, explaining the distinct lack of oomph on starting.
£45 later, and new battery installed, and I have a car which turns over perfectly.
But still won't start!!!
Didn't get time to delve into it yesterday, but suspecting either a fuel or ignition issue. Ho hum.
Mrs Bordfunker, I need your assistance......
Karl
-
Were 948 drums different?
Karl
-
I sourced mine from Rimmers as Canleys didn't have any in stock.
Just turned up this morning.
Hopefully it'll work without issue.
Karl
-
Pretty sure it's Dot 4, but too cold to go out to the garage and check!
As for the paint on my Mini it was standard crappy early 80s Austin Rover fair, and very soft.
Karl
-
I'll second the heated boiler suit!
Could have done with one this weekend, particularly when flushing the coolant out.
Having said that the Herald started beautifully this morning after an hours charging, it must have known I was on the verge of buying a new battery.
I had the battery clamps on and off yesterday a number of times, so not sure if that may have de-glazed the terminals.
Just in case it was I gave them a rub down with some sandpaper.
This at least allowed me to manoeuvre the car in and out of the garage so I could roughly align the tracking after replacing the TRE.
I marked out a couple of straight lines on the garage floor with masking tape at the same track as the front wheels.
It's crude but it'll do for now until I've done the other upright, after which I'll get it set up properly.
Karl
-
Have they changed the formula of brake fluid over the last 25 years?
I remember that brake fluid used to strip paint at the merest contact when I had my Mini back in the early 90s.
I'll give it all a wash down ahead of the new MC turning up later this week.
Karl
-
There's a drain tap part way down the driver's side of the block, make of bronze, which I removed.
The fibre washer on the back of this is looking a bit shabby, so I've just ordered a new one along with a new MC.
Karl
-
Given that I don't currently have a heater, that missing boot is part of my master plan to find alternate heat sources!
Joking aside I will be refitting the boots to both brake and clutch when I've finally sorted out the leaking brake MC.
Karl
-
As well as removing my leaking brake master cylinder, I also tackled replacing the radiator top and bottom hoses, flushing out the radiator and engine block, before putting the whole lot back together and refilling the system.
The first jubilee clip on the top hose came off nice and easily, not so the second which had to be hacksawed off.
The hose itself was starting to perish and come off without issue, leaving me with this.
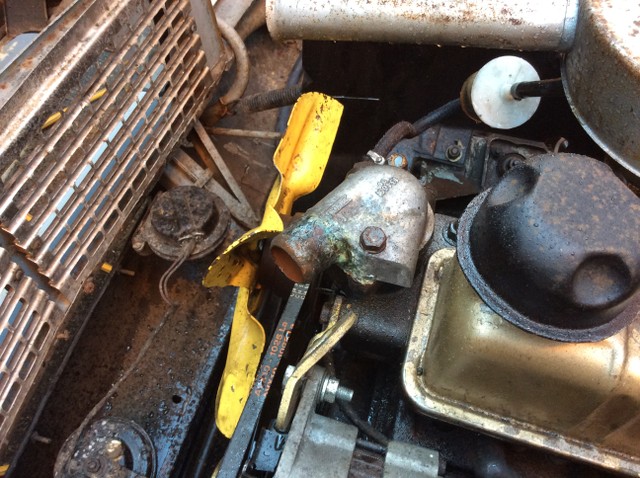
Quite a scabby looking alloy thermostat cover.
That wasn't going to promote a good seal with the new hose, so out came the power drill and the wire brushes, and 5 minutes later I was left with this.
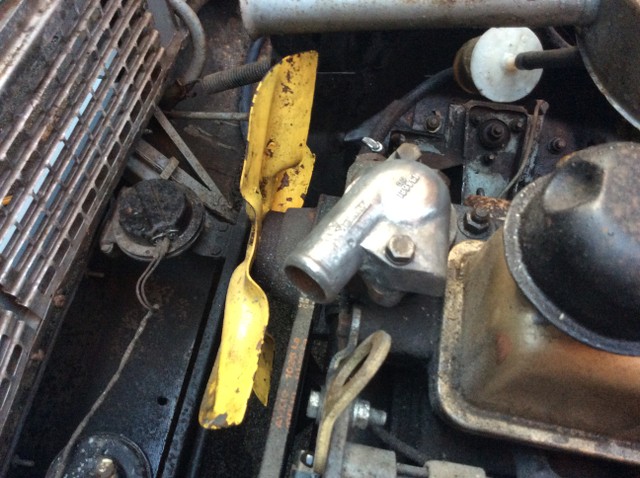
Not perfect, but a big improvement.
Like the top hose, the first Jubilee clip on the bottom hose came off without a fight, no so the second which again required the use of the hacksaw.
However I couldn't reach the lower clip with the hacksaw until I'd removed the radiator itself.
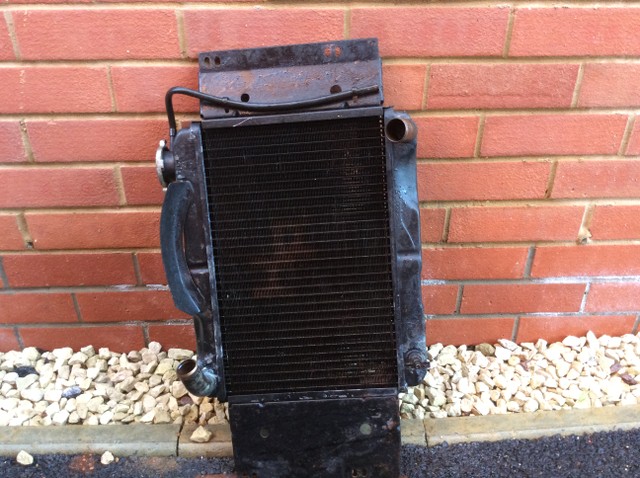
Here it is post flushing with the hosepipe.
You can just make out the letters HR stencilled on the radiator core.
The water pump stub was in better shape than the thermostat housing one, but still got attacked with the wire brushes
to be on the safe side.
With that done I set about flushing both the radiator and block with a hosepipe, having removed the drain taps from both beforehand.
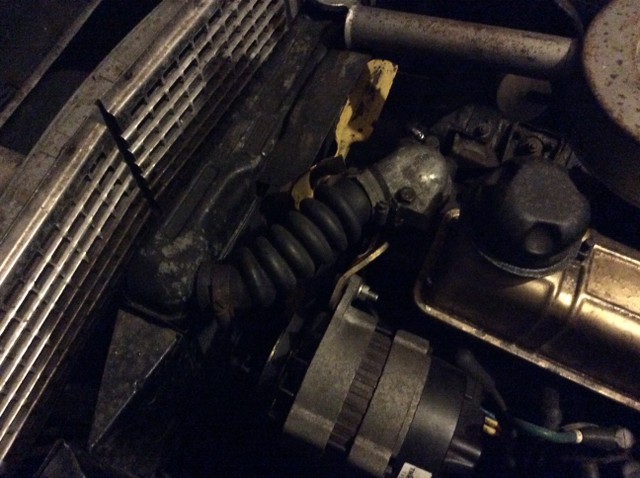
Both block and radiator proved to be pretty clean with the water running clear within a minute or so, so it then time to put it all back together, which took no time at all, leaving me with this.
Not the most dramatic of changes, but one that will hopefully promote reliability in the future.
I tried firing up the Herald after this, but it's still being obstinate, which suggests a dodgy battery.
I tried testing it with my multimeter, but managed to fry it as I obviously had it on the wrong setting! Whoops.
Think new fuses may be in order.
Karl
-
Apparently not!
The MC has started leaking even worse than before, no doubt due to me removing crud that had helped keep it fluid tight!
Time to bite the bullet and buy a replacement.
So 15 minutes this afternoon spent removing the MC and mounting bracket, leaving me with this.

The sheen is from all the brake fluid that has leaked out.
I'll have to give it all a wipe down with White Spirit.
Karl
-
Anything rubber which is difficult to manipulate into place, I leave in very hot water for a minute. Seems to often work.
Cheers, Dave
I pity Mrs Clasper!
Karl
-
I checked both Canleys and Rimmer Bro's sites and they both show the same hose for both Heralds and Spitfires, hence my confusion.
So sounds like I just need to get in a supply of antifreeze in for next weekend, and practise my Anglo-Saxon expletives ahead of trying to get those hoses on.
I'll also give the rad and the block a flush through as it's anyone's guess what crud is in there.
Thanks for the feedback both.
Karl
-
The nipple has finally been extracted from the tip of the Wanner.
It did mean clamping my Wanner in the bench vice and then grasping the nipple firmly with a pair of pliers!
Pretty much a standard weekend in my household.
I've sorted out the brake master cylinder for now, fitting a new seal and cleaning up all the jointing surfaces.
When I ordered my track rod end from Canleys I also ordered new top and bottom cooling hoses and clips, as mine are of unknown vintage, and look like they could do with replacement.
The replacement bottom hose looks fine, however this is the existing top hose in situ.
And this is the replacement.
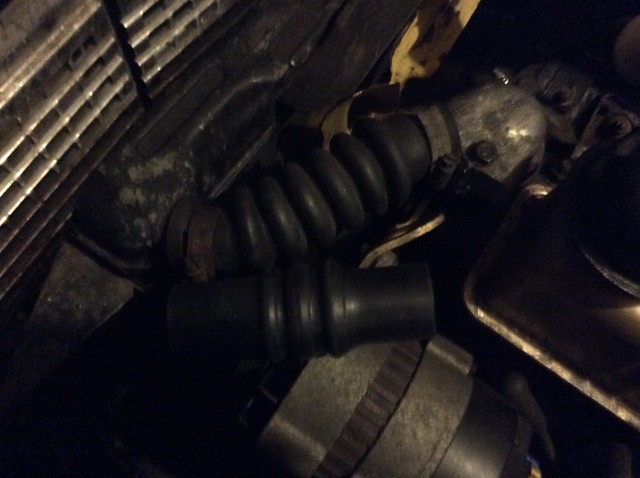
Why is my hose so different?
And more importantly what can I replace it with.
Karl
-
Thanks for that Colin.
For now I've simply removed the plastic extension and metal sealing ring, and cleaned both up to remove 40+ years of crud.
I did drain the fluid down to below the level of the plastic extension piece in the MC.
I also cleaned up the thread on the MC itself with a wire brush, having first plugged the reservoir to stop contamination of the fluid.
Next up was fitting the rubber seal itself, which was obviously designed for the MC without extension, and therefore featured too small a diameter central hole.
Out with a craft knife and a circle template, and 5 minutes later we have an appropriately sized seal.
The whole lot has be put back and the fluid topped back up.
Hopefully that will be the last we see of the leak, but time will tell.
Karl
-
Thanks for your suggestions guys.
It looks like the fluid is leaking out from the thread on the alloy cap, so I might be able to get away with replacing the runner seal, which I didn't bother replacing when I rebuilt the rest of the cylinder.
The reason I didn't replace it was because the cap was stuck firmly on, and so I left as is.
Lesson learned!
Karl
-
I just nipped out to the garage to take a look, and it's definitely the lid which is leaking.
I'll try drawing the fluid down and replacing the cap seal.
Karl
-
The self grip nozzle will unscrew from the gun and you can undo the thing to get at the sprung claw
and its gubbins (well mine does)
Pete
Mine does not appear to unscrew!
Luckily I scored another Wanner gun at the NEC at the weekend so that I now have one for oil and one for grease, so can at least swap the tips over while I attempt to remove the nipple.
Unfortunately Doug my nipple has not fallen off!
Karl
-
Thanks for all the advice guys.
Doug, the union itself is pretty chewed up, and looks damp where the pipe exits, so I'm fairly happy to replace it.
Clive, the lid is also suspect as pointed out by the missus who was assisting with the pedal pumping.
This is the type of master cylinder I've got, and the metal,lid that sits at the base of the clear plastic top is corroded.

Pete, I may get some of those in as useful standby.
Thanks again
Karl


Herald 1200 Speedo Brackets & Retaining Nuts
in Bodywork & Fittings
Posted
My 1200 has been mucked about with over the years, and as a result is missing one of the brackets and nuts which retain the speedo.
To be fair it's also missing all the correct screws to hold the dashboard in, but that's another story.
Does anyone know where I could get the speedo clip & nut from?
Karl