

Bordfunker
-
Posts
1,005 -
Joined
-
Last visited
-
Days Won
17
Content Type
Profiles
Forums
Blogs
Gallery
Downloads
Store
Events
Posts posted by Bordfunker
-
-
I picked mine up at the Practical Classics show at the NEC in April and it is a godsend.
How people work without an auto dimming mask I don't know as you can barely see a thing through a normal mask, which makes placing the welding tip fun!
Karl
-
Got a bonus couple of hours in the garage this afternoon, so decided to continue with the welding on the driver's side boot corner that I had started yesterday.
First up, everything got a coat of weld through primer, and once that was dry, I clamped the reinforcing plate down to the boot corner repair with an F clamp, so that I could start tacking the plate in place.
However the clamp wouldn't quite reach the top corner furthest away from the outside of the car, so I instead used the chassis mounting bolt and washer to clamp the plate down, which is what I probably ought to have done in the first place.
You can see the first run of tack welds in the pic above.
A couple of minutes later and I had tacked around the top edge of the plate as well, leaving me with this.
The next hour was spent filling in the rest of the seam weld, an inch at a time, so as to avoid any distortion of the boot corner through applying too much heat.
In between welding sections of the reinforcing plate seam, I decided to tackle the patch on the boot outrigger, nothing fancy, just a seam welded patch to cover up the holes I found earlier in the week.
Not pretty, but should be sufficient for an MoT.
With that lot in progress, I decided to start work on the side panel, prepping it for welding by punching out the holes for the plug welds with my joggling tool, which handily has a hole punch function as well.
You can see my joggling tool in the background here, and here's the panle with the bulk of the preparation complete.
Next up was to create a joggled edge that would sit over the existing panel at the back of the car, both on the large vertical edge, and the much smaller edge, all of which takes a matter of seconds with the joggling tool.
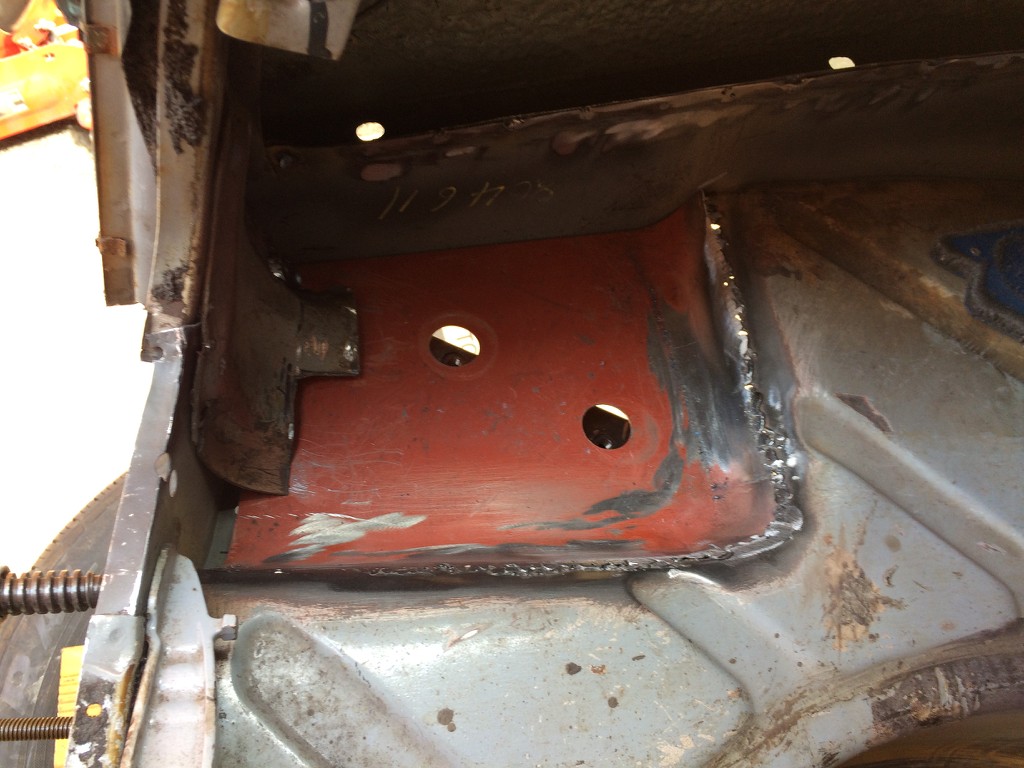
Once this was done, I punched 3 holes into the newly created flange to allow me to plug weld it later.
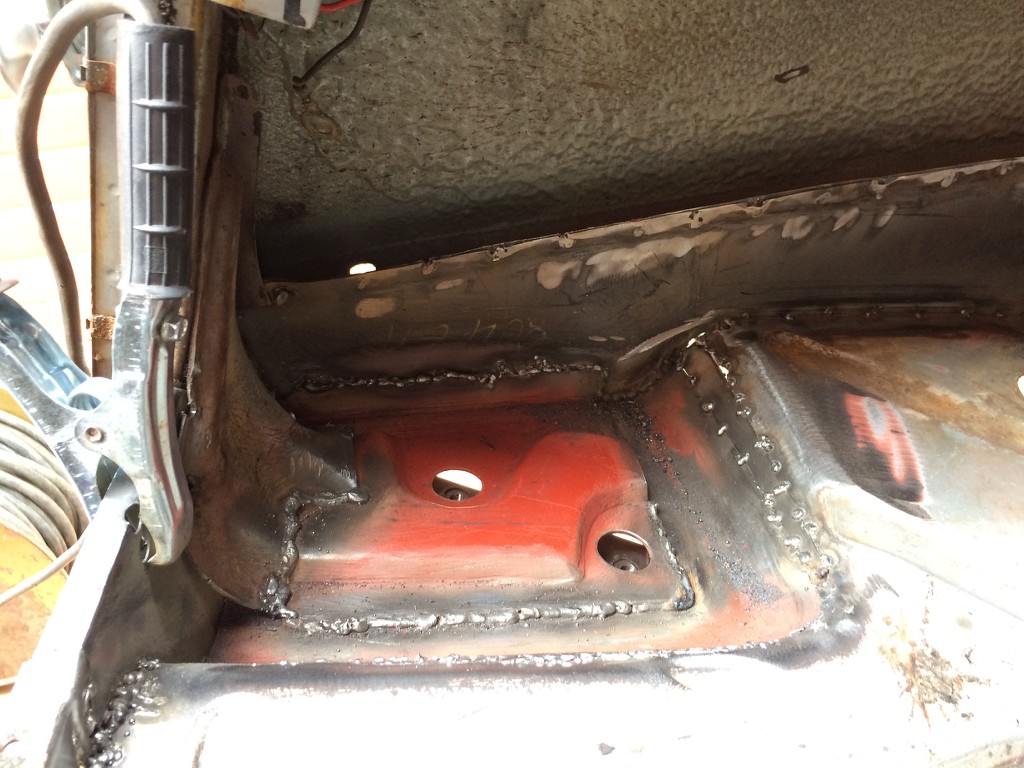
With the welding on the reinforcing plate completed, I could then turn my attention to the pre-prepared side panel, which as carefully tapped into position, and then clamped into position to ensure that nothing would move while I started the plug welding.
Here's the side panel, viewed from inside the boot, after the first few plug welds had gone on.

Plug welding simulates spot welding by filling the hole that you have so neatly punched in the top panel with molten steel, so that it forms a nice puddle which joins the two pieces of steel together.
Well that's the theory at least. It works better on the horizontal, than the vertical, where gravity has a tendency to intervene and draw the weld bead downwards, so I ended up doing a number of smaller weld puddles, which don't look as neat, but beat rolling the car onto its side to get a horizontal weld!
Here's the outside, including the wheel arch flange.
As you can I haven't finished all the welds on the flange, again, having to take it slowly so as not to distort the panel as it's less than 1mm thick.
And a final shot of the whole panel, including the rear joint, which has already been welded up.

Apologies for the lack of light, but it was peeing it down outside, and therefore I had to work in the dark, but dry, confines of the garage.
Overall that was a pretty productive 2 and a half hours on my back and knees in the garage waving the sparkly stick at the Herald.
Hopefully I'll get some time to finish off the welding to the panels over the weekend, including the rear over rider spacer, after which I think the welding may be over.....
.......for now.
Karl
-
I had expected to be off to Ikea today, but after a walk to the local garden centre Mrs B decided she didn't fancy a trip to Milton Keynes, so instead I got a couple of hours to work on the Herald.
Today's job was creating the large patch, roughly 6" square to replace the lost metal under the reinforcing plate from a sheet of 1mm steel.
It took me about an hour and half before I had a patch which fitted properly, after getting through at least 4 cardboard templates.
Despite appearances the patch was not flat, but curved on two sides where the edges of the boot corner recess curve up to meet the rest of the boot floor, all of which required gentle persuasion with a couple of hammers and some blocks of wood to act as formers.
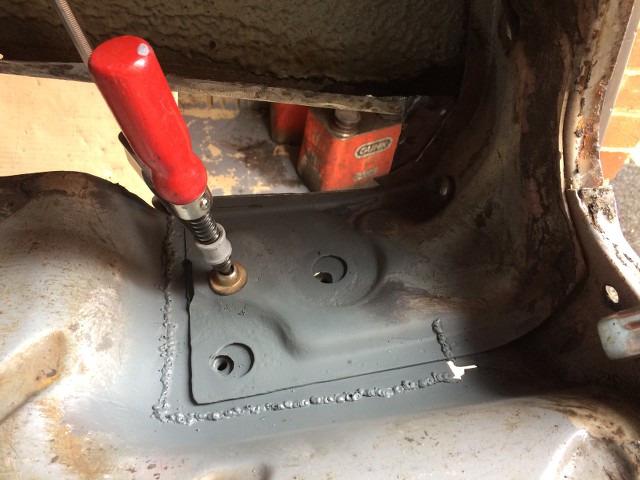
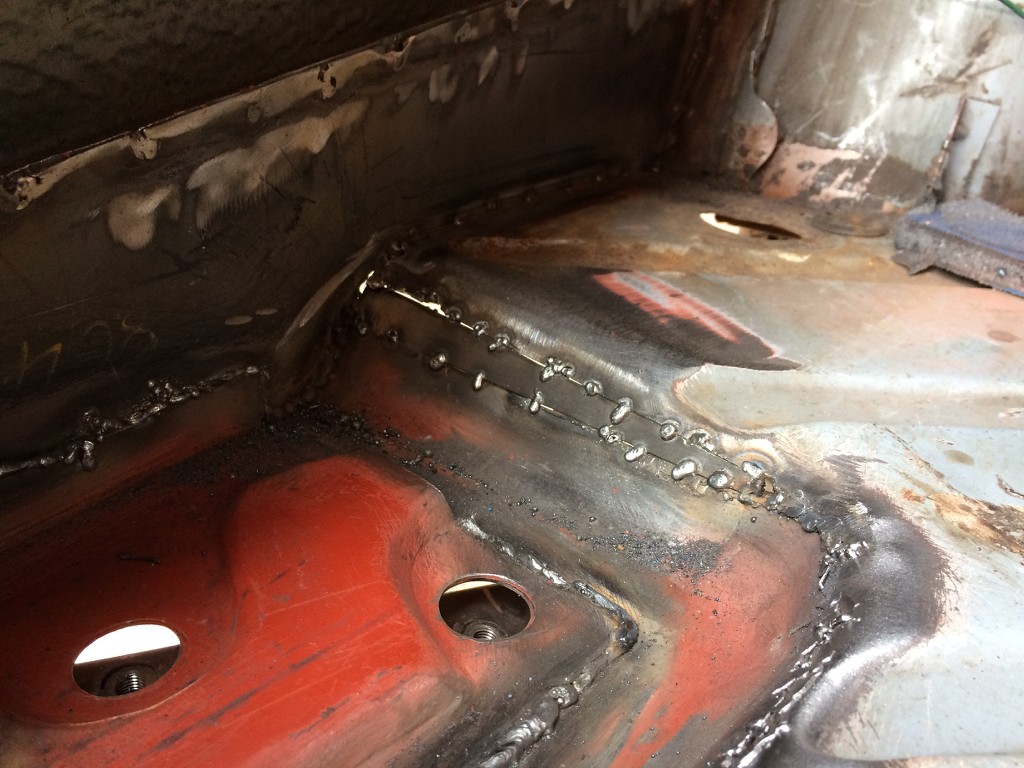
All of which allowed me to start welding the patch in. Here it is tack welded on one side.
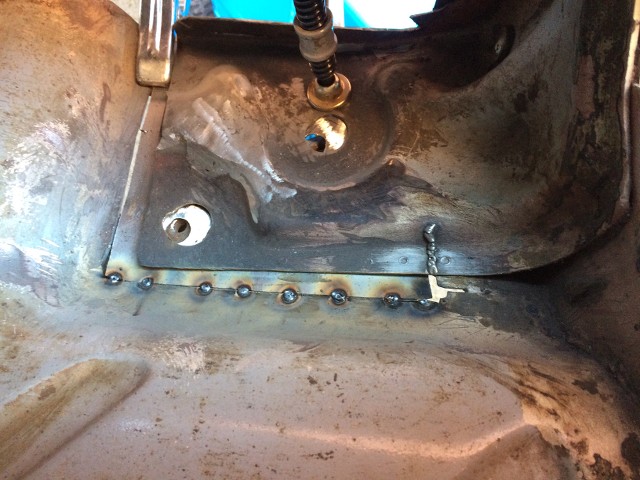
You will note that holes in the reinforcing plate are not centred on the bolt holes in the outrigger, in fact the one nearest the front of the car only aligns with a bit of persuasion, and the bolt came out that way, so it looks like it has always been that way.
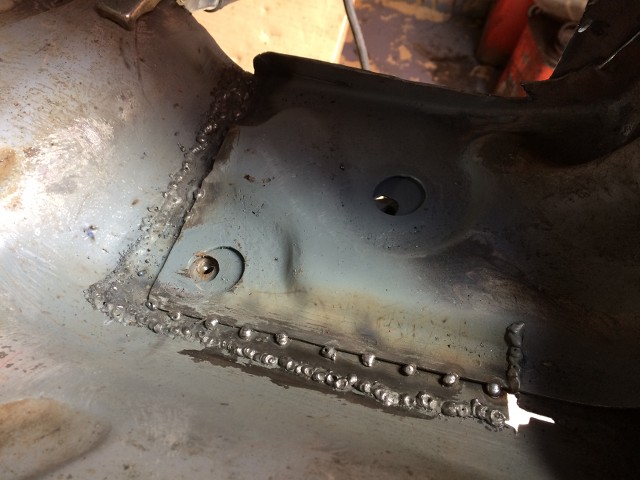
Here it is after an hour's welding.
I'm having to weld slowly to avoid distorting the panels as they are only 1mm thick, and given that I am welding gasless, I am having to effectively do a series of overlapping tack welds to produce a half decent seam weld.
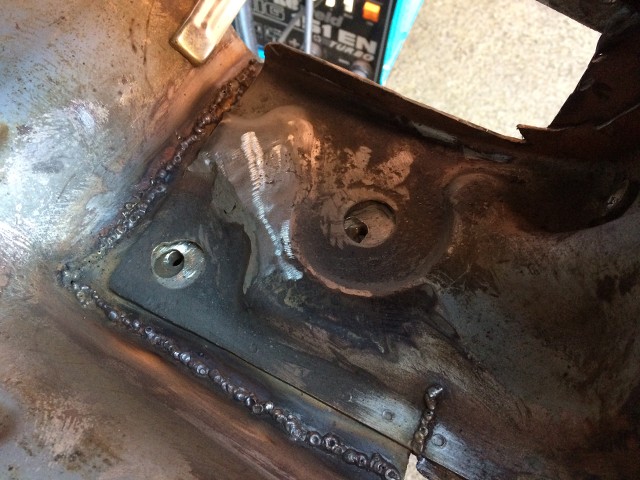
Although not pretty, my welding looks to be getting neater, as can be seen from this view from the underside.
I need to sort out the small gap in the corner, but that should be a simple patch job which I can then grind smooth.
Have you spotted my school boy error?
Yes, like a plum I've forgotten to prime the patch with a coat of weld through primer, which as the name suggests allows you to weld through it, but also protects the metal which would otherwise never get a coat of protective paint.
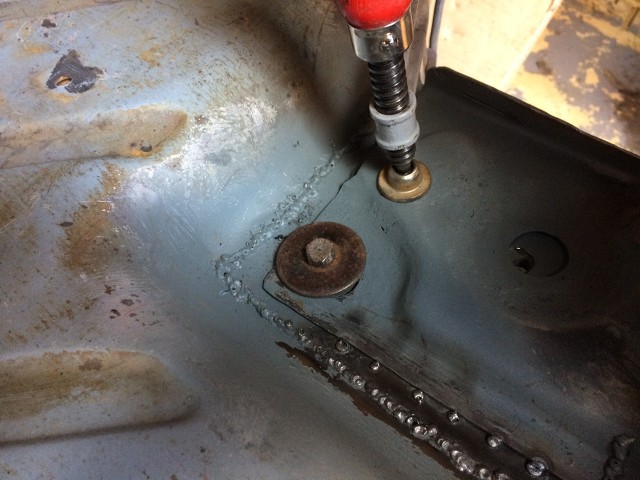
Nothing I can't fix with a bit of dextrous work with a rattle can though, as there's a bit of access to the underside of the reinforcing plate, as you can see from the shot below.
The edge of the boot floor looks fairly good, and will need a touch of adjustment to ensure that it fits the profile of the side panel.
Here we are with the side panel clamped in place.
Overall the fit is pretty good, and as you can see I have cut the panel, as I don't need the portion that forms the lower arm of the 'L' as the section around the lower boot lip is nice and solid, and I can't be bothered to have to unpick the spot welds when I don't need to.
The lip on the left hand side will require trimming and joggling to create a flange, however the panel needs a little more work as the lower edge sits a couple of mm too low, which I had thought was my cock up on the passenger side, but maybe a slight issue with the pressing itself.
Here's a shot of the inside of the boot, with a couple of F clamps holding the two flanges together.
I obviously need to weld the reinforcing plate to the new boot corner section, and once that is done I can then look at fitting the side panel, after which it will just be a case of welding the spacer tube behind the lower rear over rider, and then I can get back to the lovely task of stripping the underseal and rust of the underside of the boot floor prior to applying rust stopper, etch primer, red oxide primer, and finally a top coat of Dolphin Grey.
Oh, and patch that bloody boot outrigger!
One day I may actually get this car to an MoT station, and get to drive it.
Karl
-
With no family activities planned today, I decided to do some more on the Herald's moth eaten rear end.
First up was removing the remnants of the old lower side panel where it joined to the rear wheel arch and the bottom edge of the upper rear wing.
When I did the passenger side I struggled with removing the old panel where it had been welded to the lip on the rear of the wheel arch, and made a bit of a mess of it if I'm honest, so tried something a little different this time.
Rather than trying to grind down the old panel on the inside of the boot, where access is very poor for a big angle grinder, I decided to drill out the spot welds with an 8mm drill from the outside.
Once they had been drilled out, I then used a wood chisel and a lump hammer to simply chop out the remainder of the weld around the edge of each drilled weld, leaving me with this.
A much neater result, and one that took far less time than my efforts on the other side.
I then used a 1mm cutting disc in the angle grinder to remove the remaining flange of the lower panel, before switching to a much beefier grinding disc to grind back the spot welded flange that joins the upper wing to the lower panel, doing my usual, grinding the old flange back until it failed, and then pulled off the strips with pliers or with the chisel again.
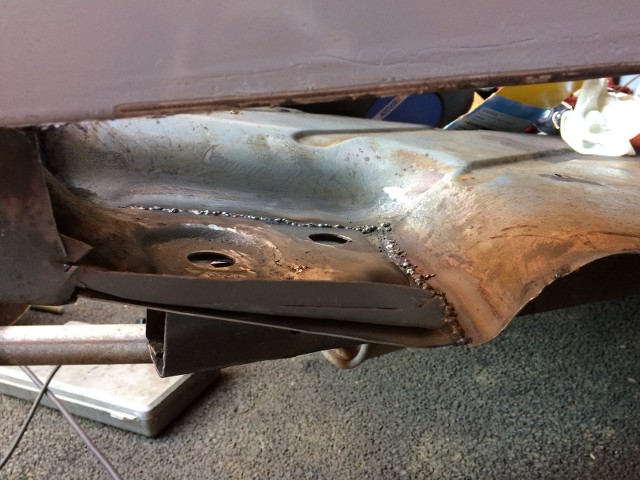
At this point I also cleaned up the section around the reinforcing piece, making sure that the edges were all square ahead of fitting the new section.
As you can see from the picture above, there were number of perforations in the reinforcing plate which needed to be dealt with ahead of any work on the boot floor itself.
I decided to tackle these by inserting a couple of patches, one small one below the main hole that you can see above, and then a wider patch across the base of the recess, which would help seal the two smaller holes either side.
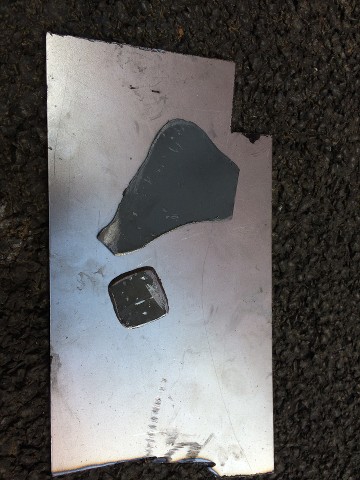
The larger, weirdly shaped patch, was created with the application of masking tape over the panel, and then tracing around the shape, before being stuck onto a piece of steel, and then cut out, and ground to shape with an angle grinder.
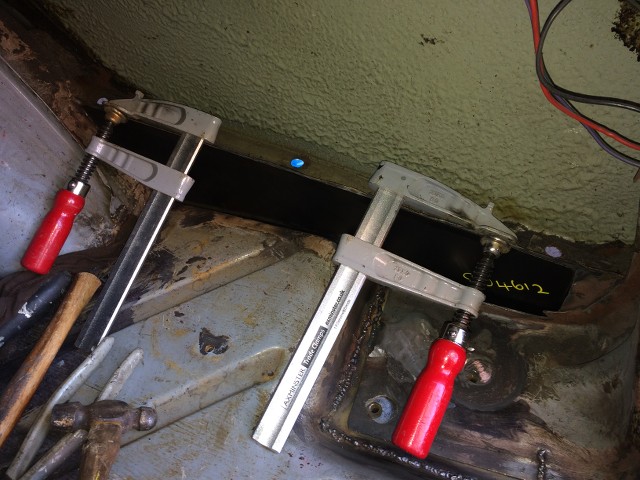
The smaller patch refused to stay in place with a magnet, so it was time to break out the F clamps. These things are very useful, and have helped so much in this restoration, here's one holding the patch firmly in place.
As you can see I have given the area a coat of weld through primer as this will protect the metal, while still allowing the MIG welder to produce a strong weld.
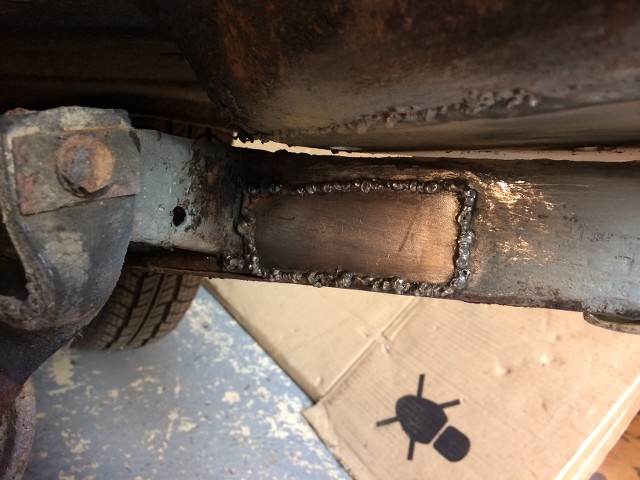
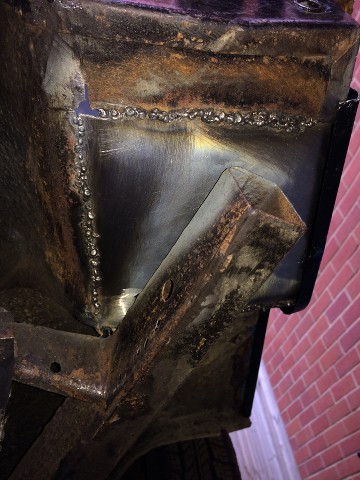
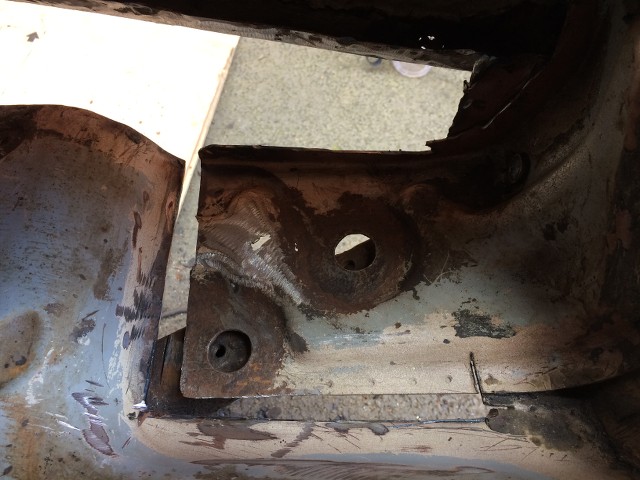
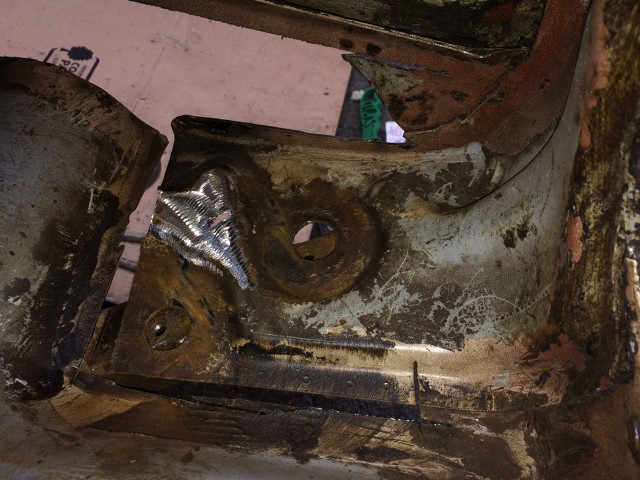
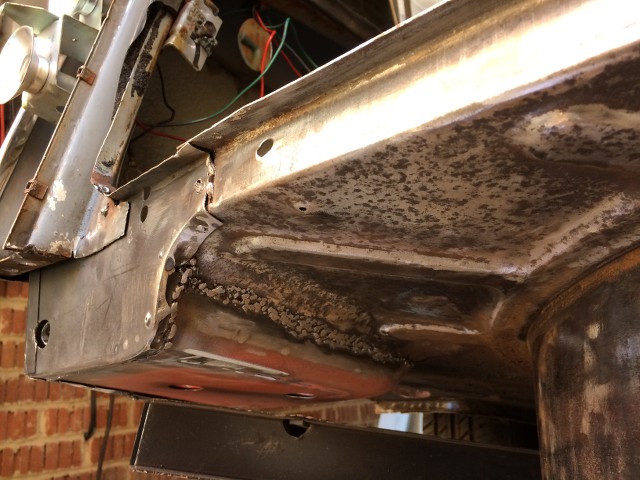
A bit of weird shot this next one, as it was taken from underneath the car, looking up at the underside of the reinforcing piece, with the boot outrigger to the left of the shot, and the larger patch welded in.
As you can see I have seam welded the patch in, and then ground it back, so that it sits flush, and won't interfere with the fit of the boot floor panel when it comes time to fit that.
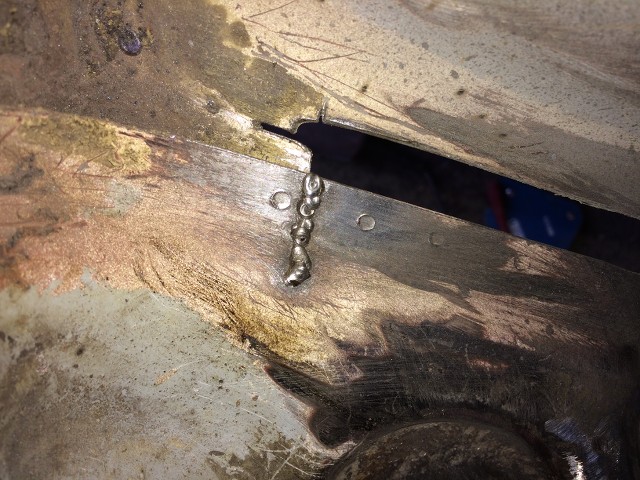
With that in, it was time to tidy up a few areas of damage that I had created when removing the original rotten metal, first was the top of the outrigger which I had scored with the cutting disc, and therefore simply ran a bead of weld over the cut mark.
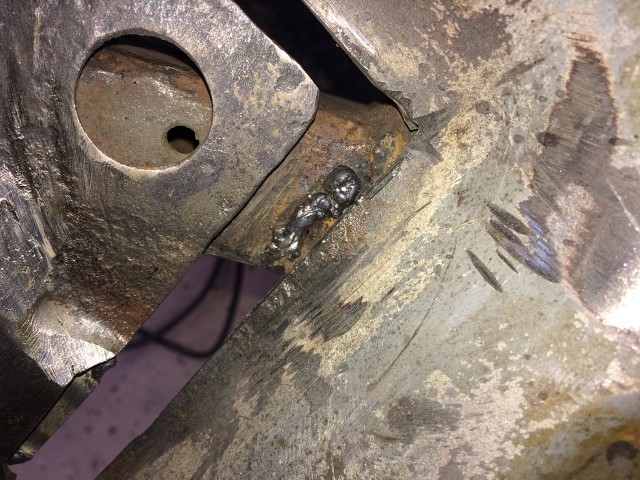
Next up was the rear of the reinforcing piece, which I had inadvertently cut into with the cutting disc when cutting out the boot corner from below, and which again got a neat bead of weld to seal everything up and keep it all strong.
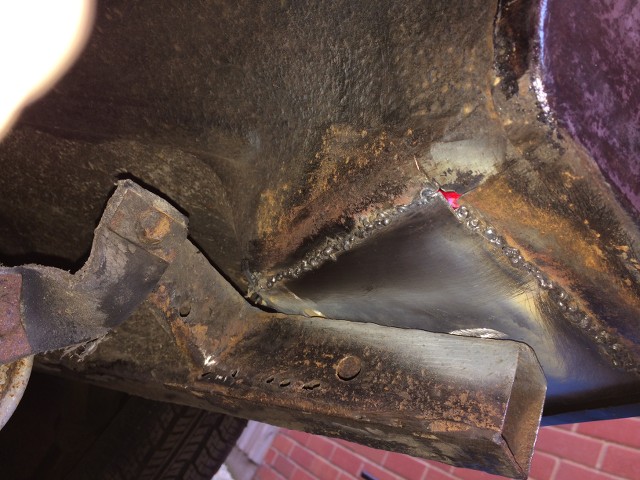
With that little lot out of the way, I am now all set up to cut out a sheet of steel to plug the gaping hole in the boot corner, however not before I had discovered some more welding that will need to be done.
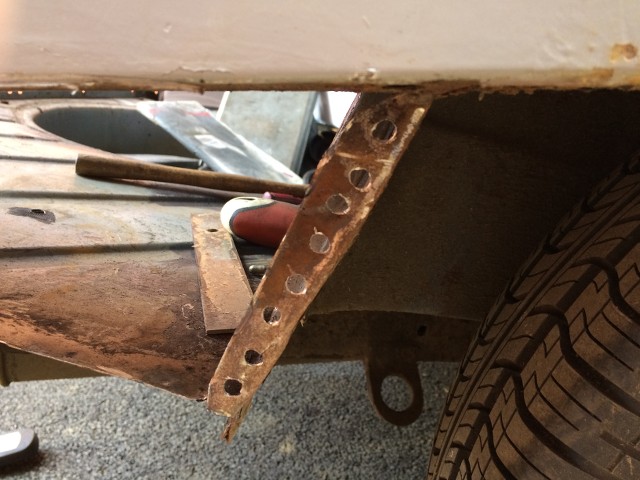
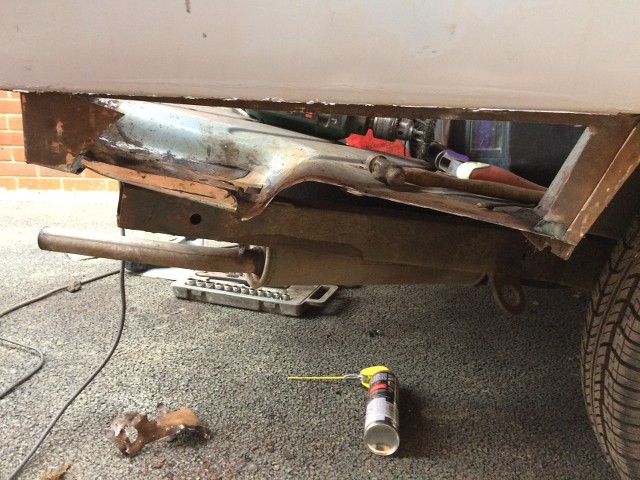
As part of the clean up work around the boot corner, I had attacked the outrigger with a knot brush in the angle grinder (These things are great at removing rust, but are lethal, so always use the guard, and wear full hand and eye protection), which removed the rust, as well as the under seal which has been liberally daubed all over the car's underside, which revealed the following.
You can just make our a line of holes at the bottom of the outrigger out board of the exhaust mount.
Now I could replace the outrigger, but for the moment I will just patch these for now to get through the MoT. If there are no further nasties, I'll replace the outrigger later in the year, as so far I've barely driven the Herald this year.
Karl
-
Thanks Pete.
Despite the unpleasant surprises that lurk in the recesses of this vehicle, it does feel like it's going in the right direction.
Karl
-
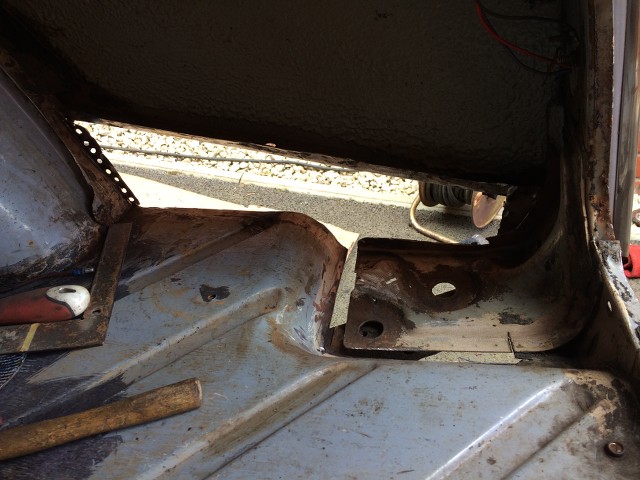
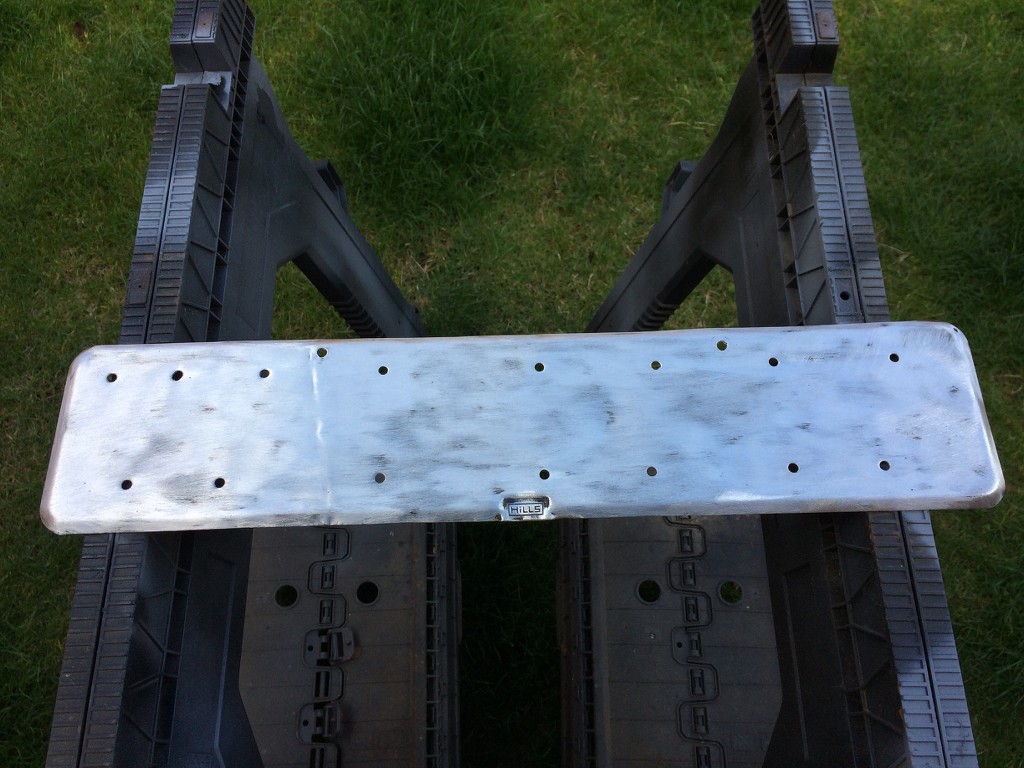
After Saturday's revelation around the rot in the driver's side boot corner, I decided to take a closer look this afternoon.
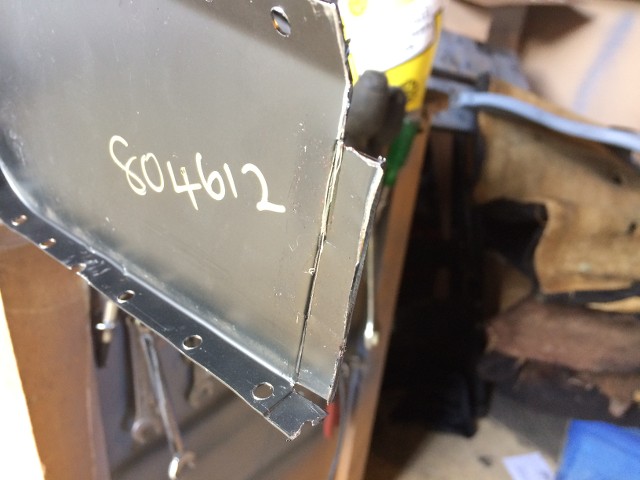
Here's the boot reinforcing panel and the side panel.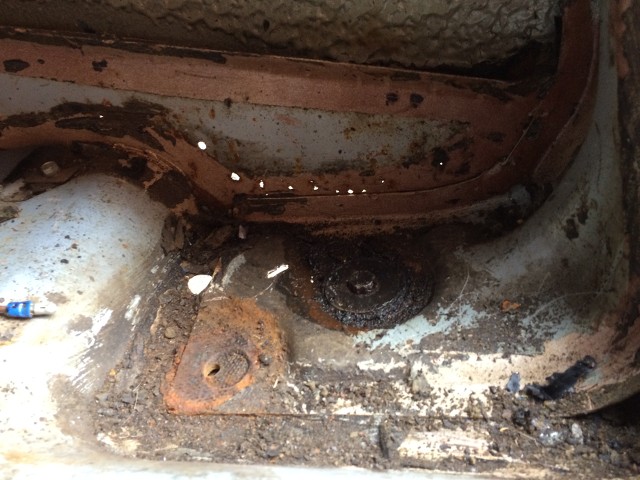
A slightly different view from above, which better shows the roof in the raised web of the reinforcing piece.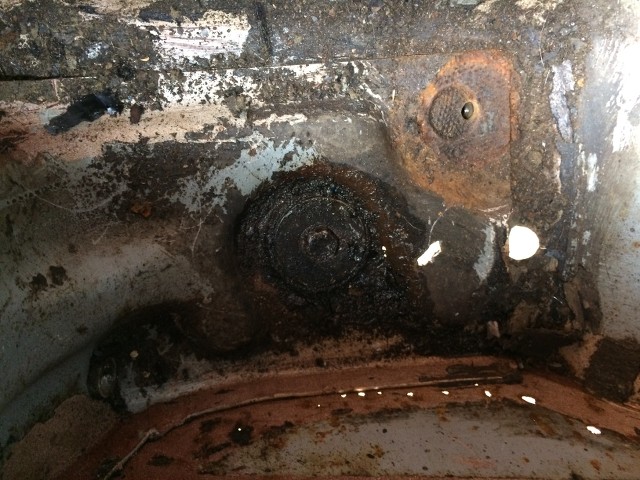
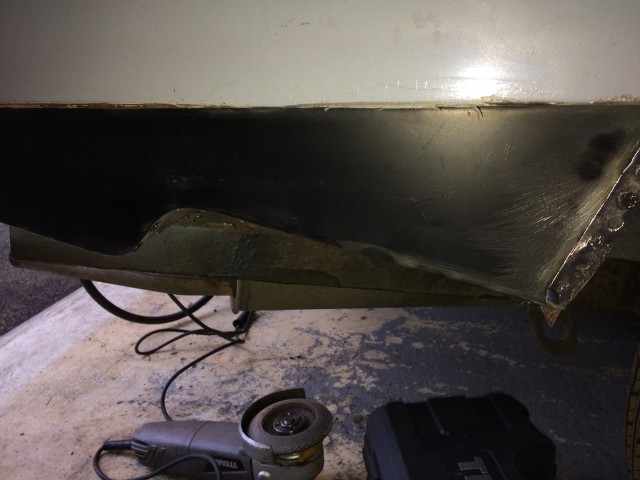
And a view from the side.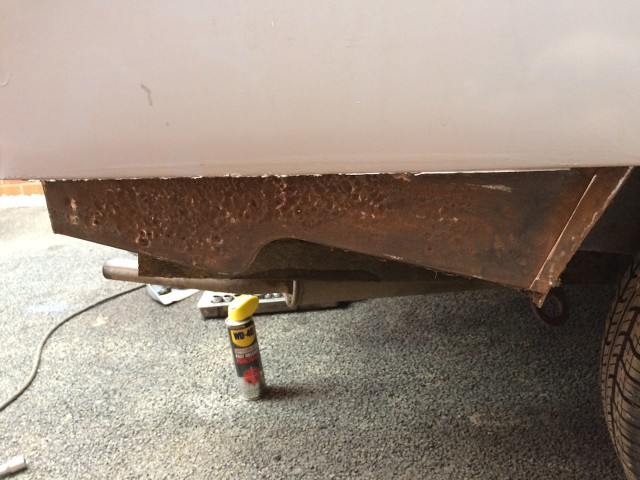
You can see just how pitted the lower side panel become in this shot, so nothing for it but to break out the angle grinder and cutting disc, which quickly left me with this.
This improved access to the panel beneath the reinforcing plate, and thus allowed me cut around the boot floor panel around the reinforcing foot.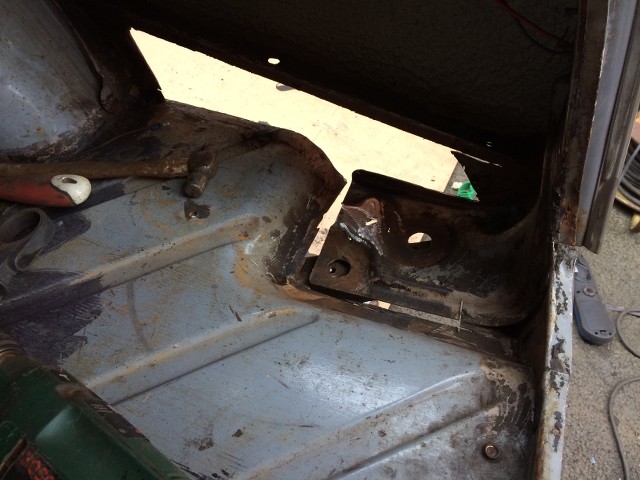
And a view from the underside.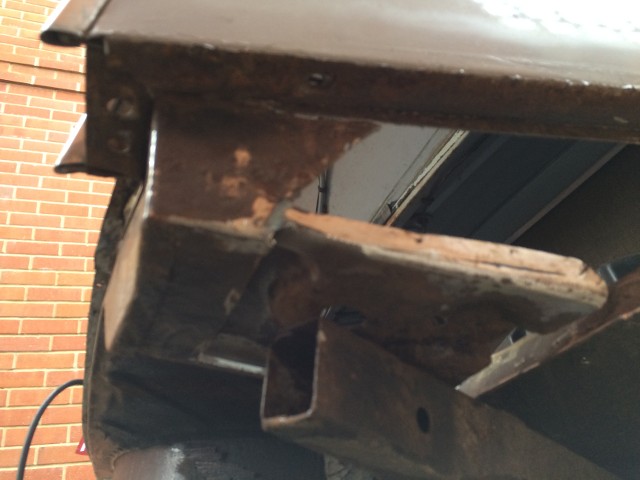
Unlike the passenger side, the rear chassis leg under the boot is crusty but solid, so won't need replacing, which is a small mercy.
I had a quick go with the angle grinder to check the extent of the corrosion to reinforcing foot, which showed it to be localised, which I should then be able to patch from below.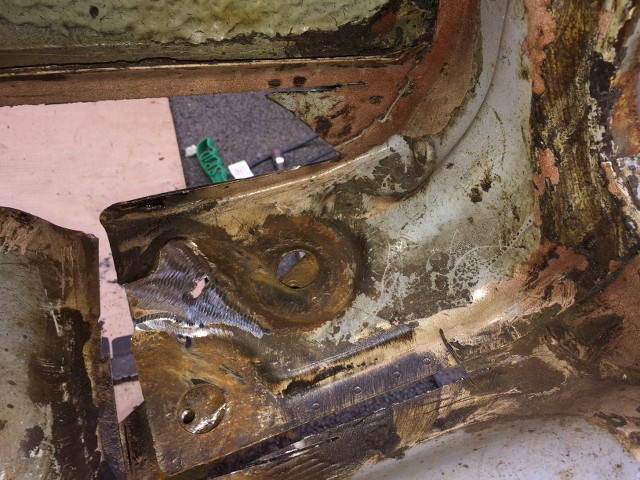
The aim of today's efforts was to determine which panels I would need to sort out the driver's side, but it looks like I will get away with a side panel, and even then I won't replace the whole panel as the rear corner I'd perfectly sound, a patch to the reinforcing plate, and a flat section welded into the floor itself, which is considerably cheaper than the replacements boot corners that I had to get for the other side.
All of which is a big relief, as I still don't know if the MoT will throw up any more issues, but did leave this me with this pile of detritus.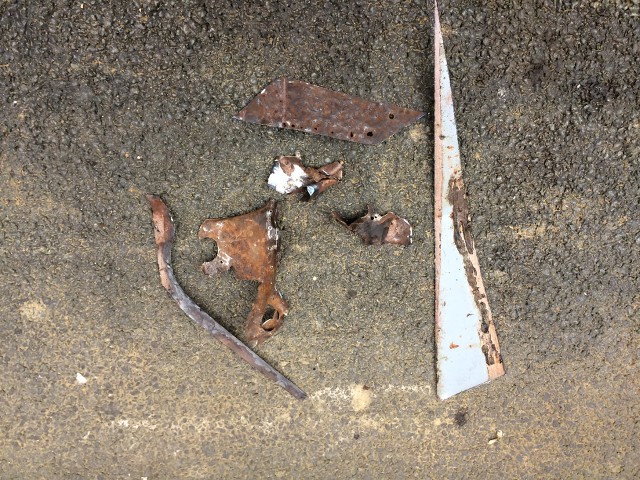
Karl -
Pete, that's a very good idea, I didn't think of using studding, and a wing nut makes sense.
Hopefully my welded solution will hold up better than the original caged nut, though to be fair it had lasted almost 50 years!
Looking at all the valance mountings on the inner wing, it doesn't look like these have been removed since the car left Canley, as all the sealing appears to still have been in place.
Karl
-
After last weekend's marathon welding session, today was focussed on finishing off the last few bits of welding on the passenger side of the boot, and ensuring that everything was properly sealed up.
I've opted to seam weld most of the joints as I'm not convinced of my ability to create effective spot welds, so what I have done is probably overkill, but it certainly feels very strong now.
Here's a shot of the underside before I'd completed the welding, but after I'd started cleaning the remains of the paint and under seal off the underside of the boot floor.
One of the first jobs was to sort out the lower mounting on the passenger side rear over rider where the captive nut had come adrift, following the disintegration of the cage holding the nut.
There was no way I was going to be able to recreate the cage, and I tried welding the nut in place on the back of the bracket, but without success, so an alternative approach was required.
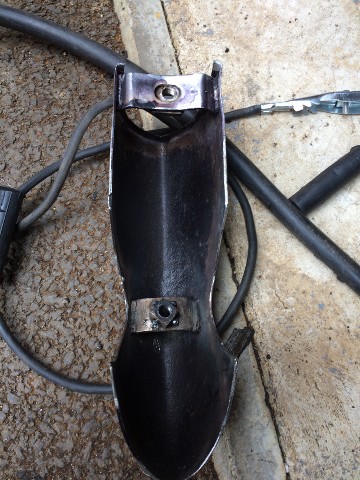
I cleaned up the nut and welded it to the front of the bracket instead.
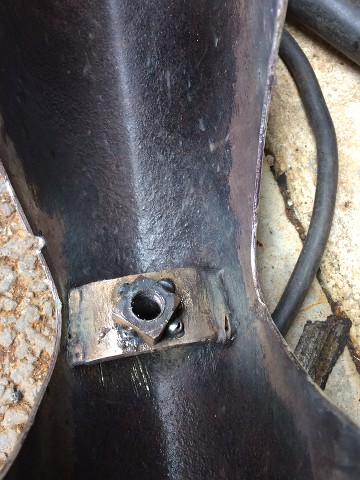
This then allowed me to trial fit the over rider so that I could align the spacer tube that I had cut off in order to fit the side panel.
Here it is tacked in place, awaiting final welding.
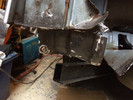
I had to repeat the removal exercise on the other side of the car, as again the captive nut had failed on the driver's side, so I had to remove the side valance so that I could get an angle grinder and cutting disc in, leaving me with this.
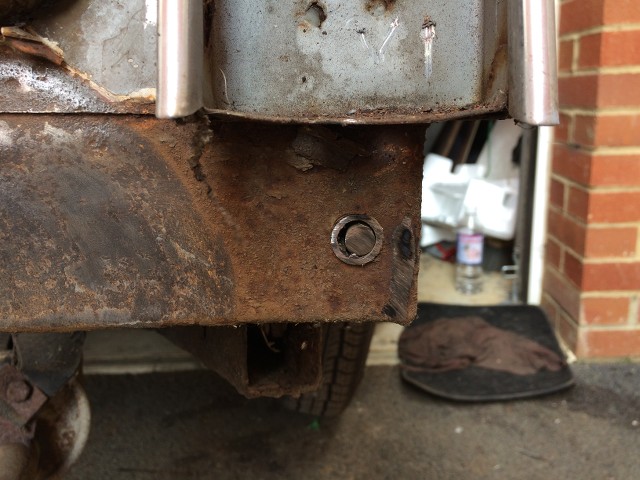
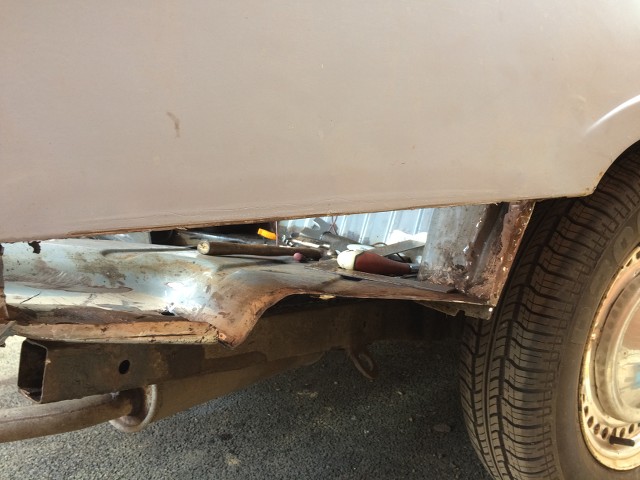
With the driver's side valance removed I had a chance to take a good look at the condition of the lower side panel on that side, which on first pass looked pitted but OK.
So then I took a screwdriver to the sealant that had been liberally applied by the factory, and which was now pealing off, and started scraping it off.
What then became apparent was that what had looked like pitting, was in fact the sealant on the other side of the panel.
Further inspection revealed that the boot corner mount on the driver's side was also shot, with significant corrosion under the reinforcing plate, so it looks like I'll be repeating this exercise.
C'est la vie!
Karl
-
After a bit of poking around the boot reinforcing plate I identified a number of very small spot welds holding the remains of the side panel in place.
You can see them drilled out here.

This left one remaining spot weld at the bottom of the light panel, which I sliced out with a wood chisel, and a sharp blow from below.
Hopefully that may be of help someone in the future facing the same task.
Karl
-
With Mrs B away with her mate in the North East for the weekend, I've spent the last two and a half days working on the Herald, with the focus on getting the hole in the boot sorted.
Now last week I was left with the issue of a piece of the side panel being stuck in between the boot reinforcement pressing, and the front of the rear light panel.
Some investigation with a torch and screw driver, identified a series of small spot welds, which were drilled out, and then the edge of the panel attacked with a hammer and wood chisel, which popped the remaining sections of spot weld, and which allowed me to pull the old piece out with pliers.Et voila![
URL=https://imageshack.com/i/pmevxa8Wj]
 [/url]
It may not look much, but it was a major potential headache it I hadn't been able to remove it.
With that out of the way, it was time to fit the side panel.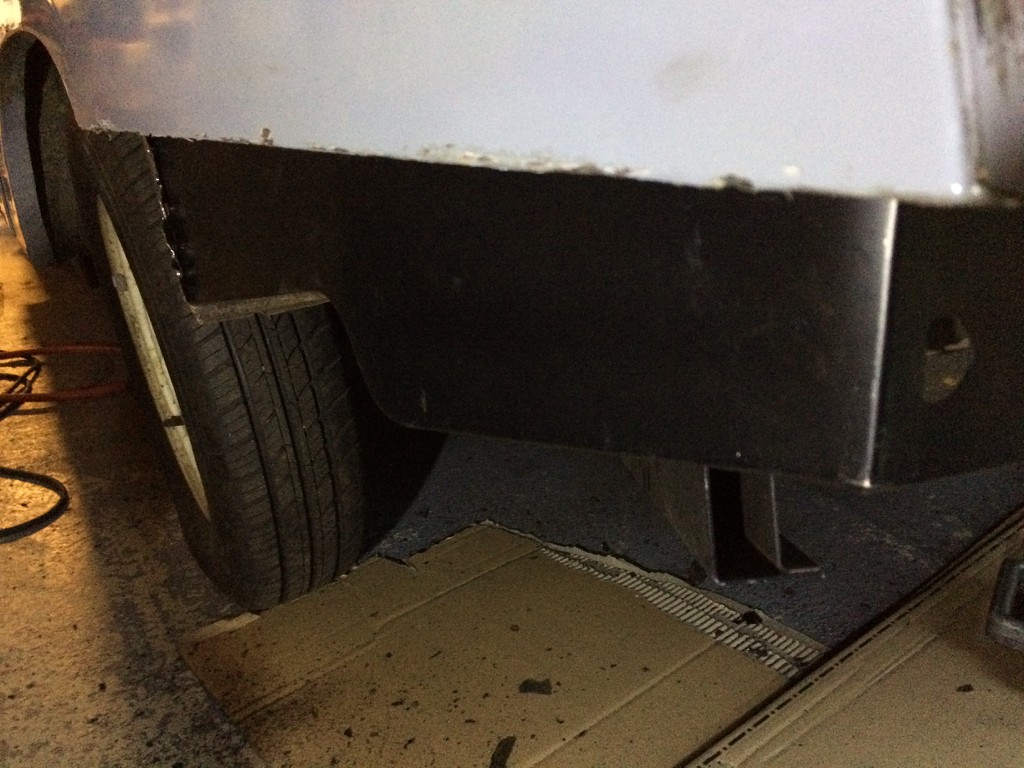
Starting to feel like progress.
At this point I trial fitted the boot corner and reinforcing plate.[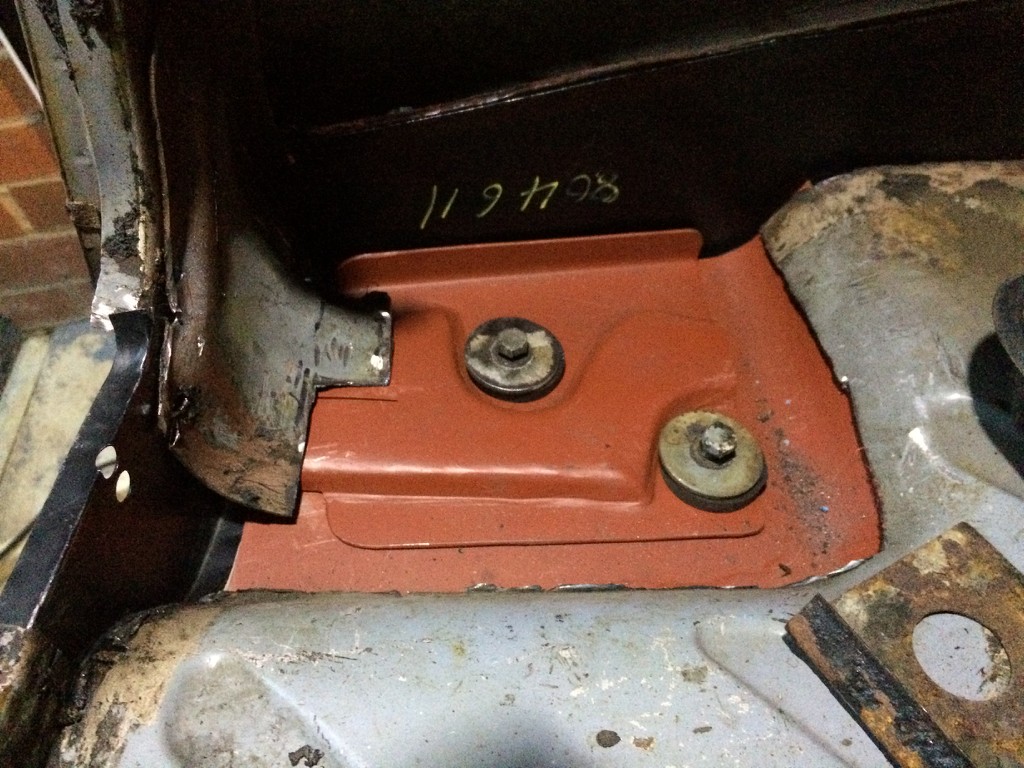
At this point I marked up the boot corner panel, and with much trepidation cut the panel with a 1mm cutting disc in the angle grinder.
I did check the fit a couple of times before cutting and committing to welding.
At this point all looks good, despite my dodgy welding, and this is where I left it last night.
However this morning I realised that the boot panel must have slipped when I was marking it up, and was sitting too shallow.
What to do? Spend another £60 on a new panel? Expensive and embarrassing!
Out with the angle grinder and cutting disc, slicing between the old and new panels, and inserting a new section of metal.
Here it is tacked up.
And showing the seam welding of the reinforcing plate.
I wasn't happy with my attempts at plug welding, and so seam welded all the seams, which should prove be strong if not particularly pretty.
Trying to get everything to line up was a challenge as the back end of the car ends up a bit poppy with all the rot cut out, and so Heath-Robinsonesque work to get it all to line up.[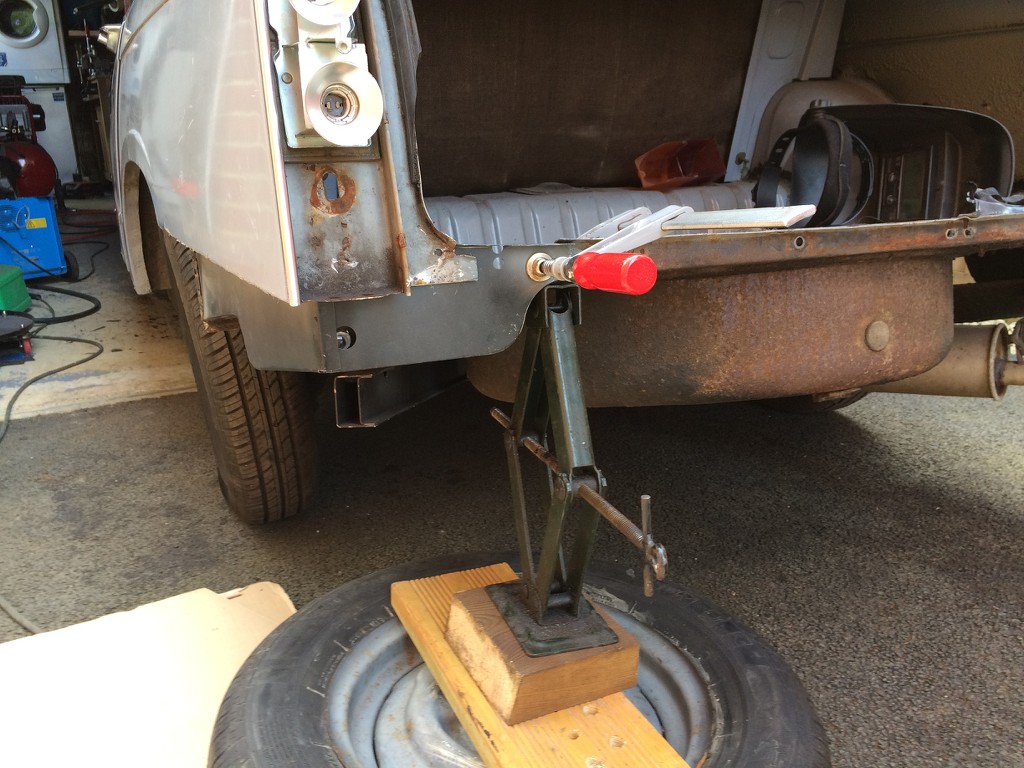
As well as the welding I also tacked the paint on the fuel tank, primering it, and giving it a coat of gloss black.
I need to flip it over and do the other face, but it looking much better than it did.
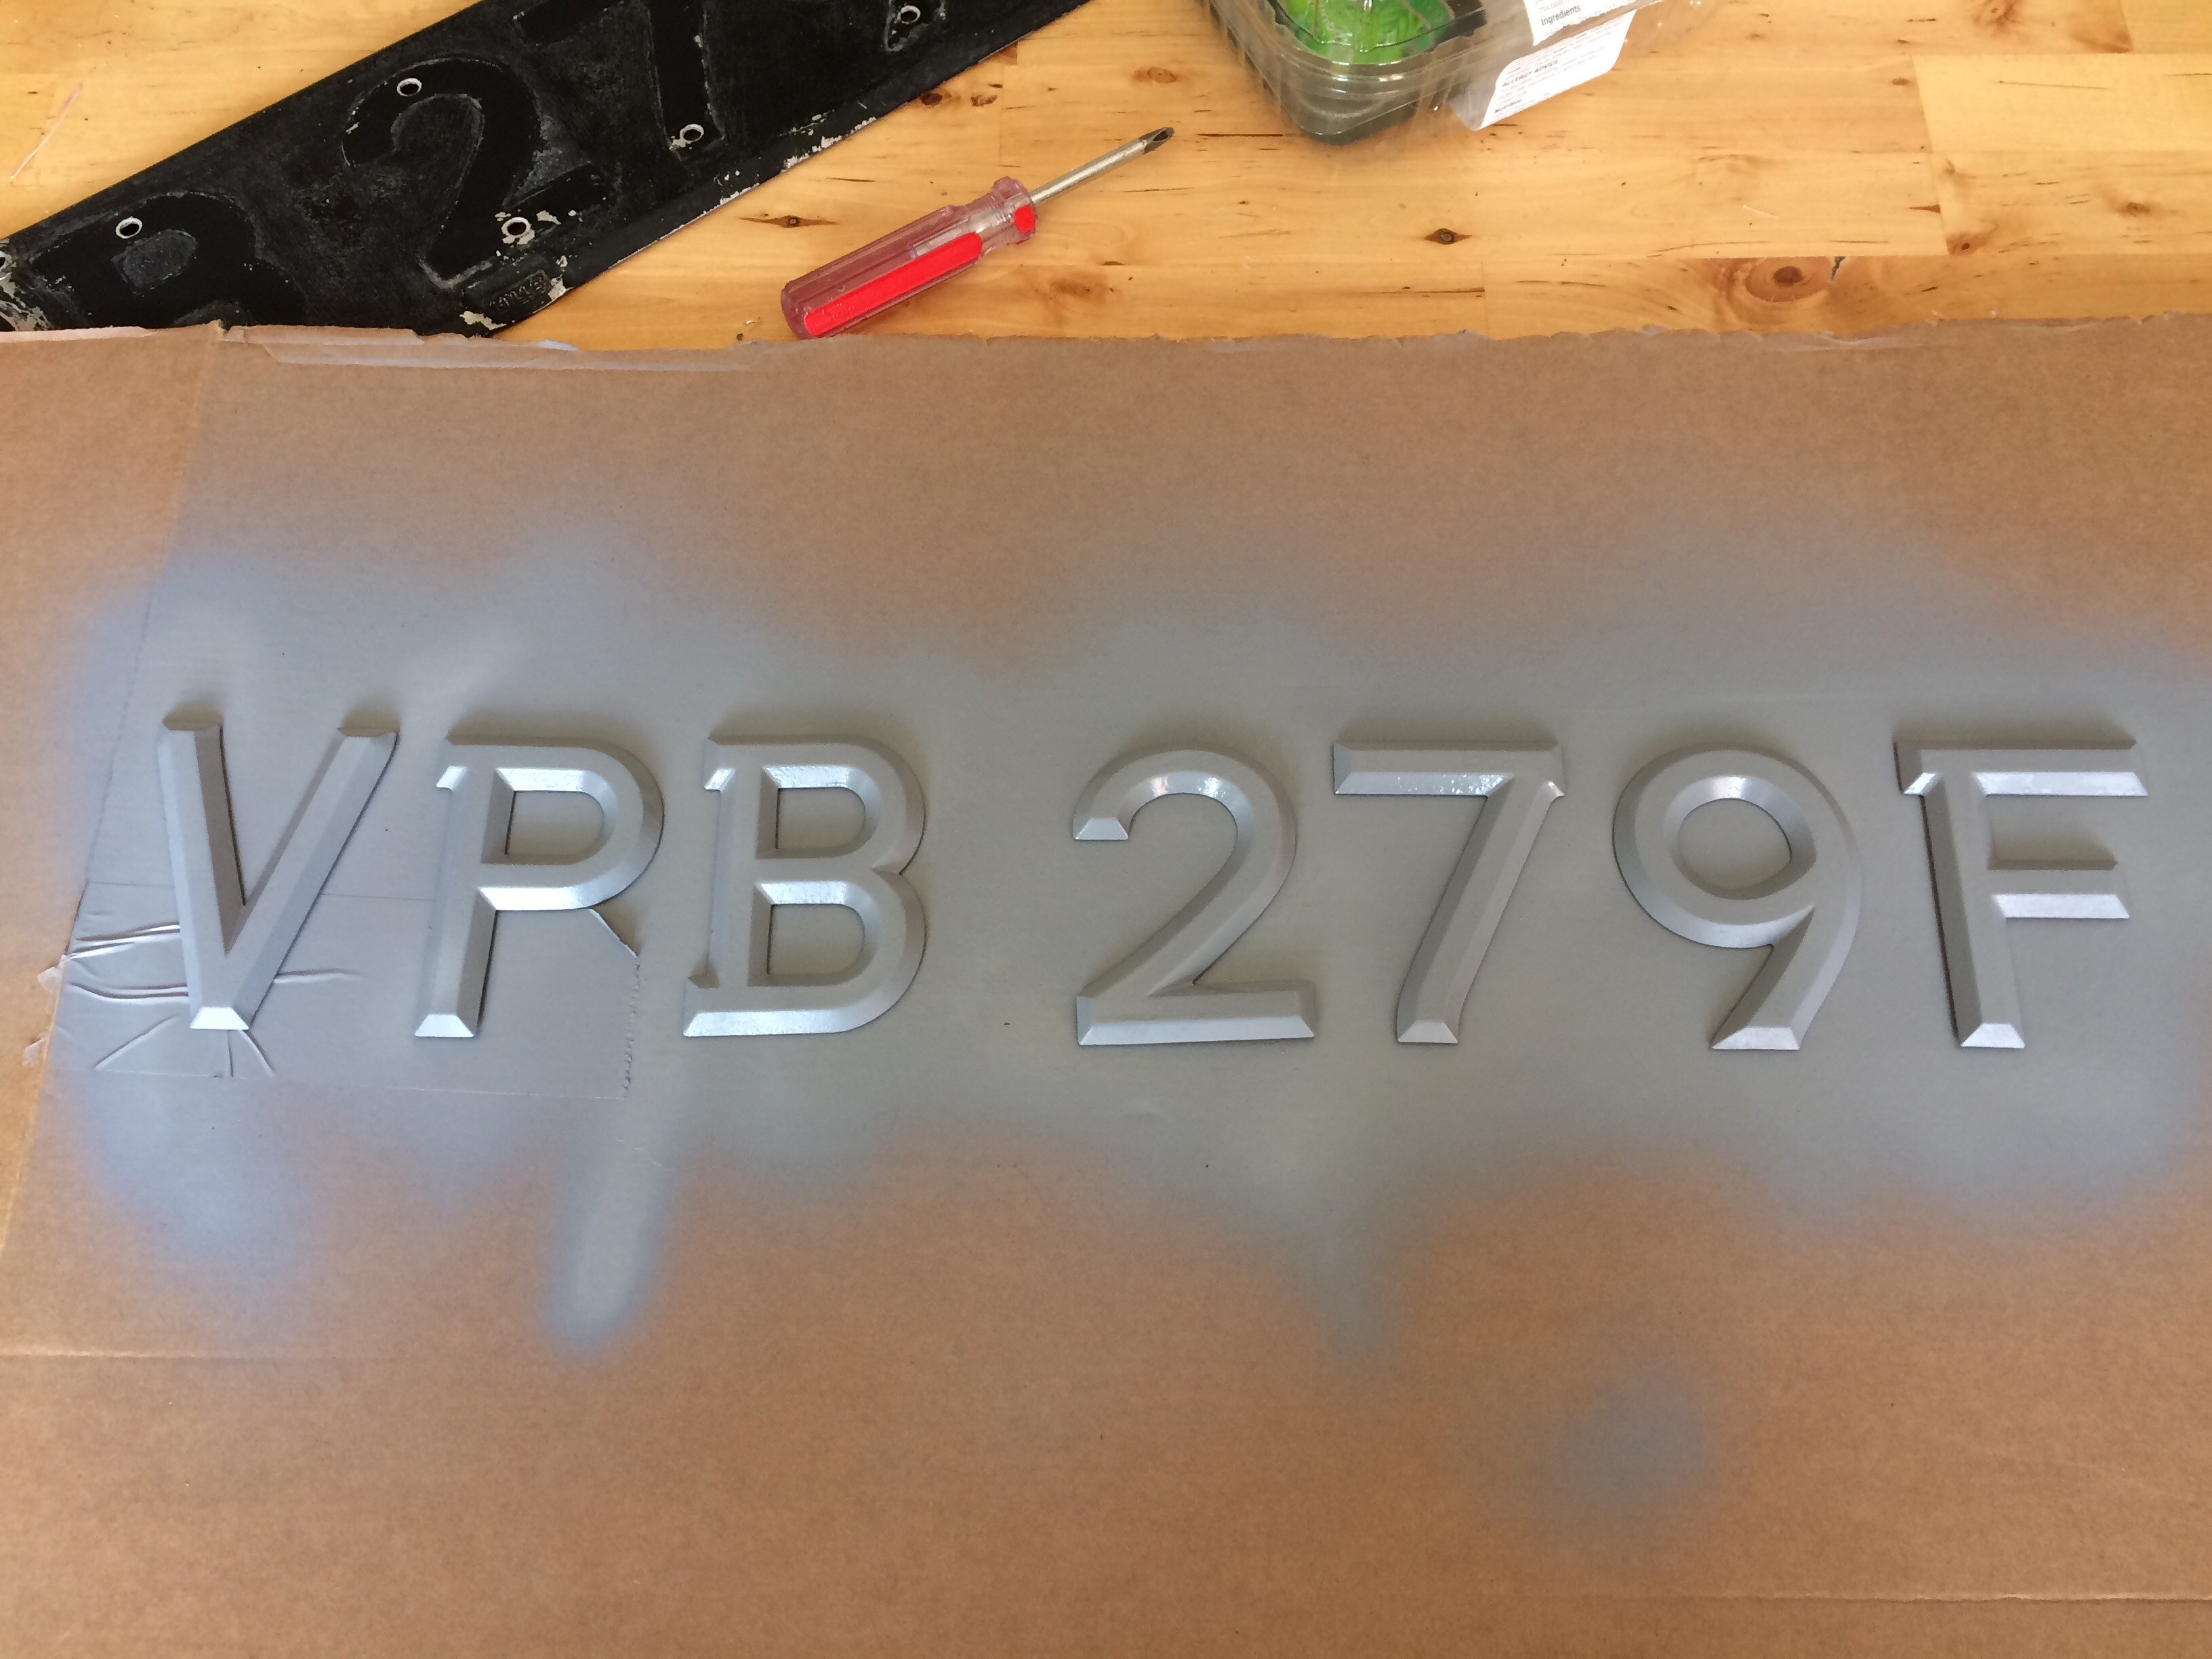
I also did some work on the front number plate, it's not perfect, but again neater than what came off the car last week.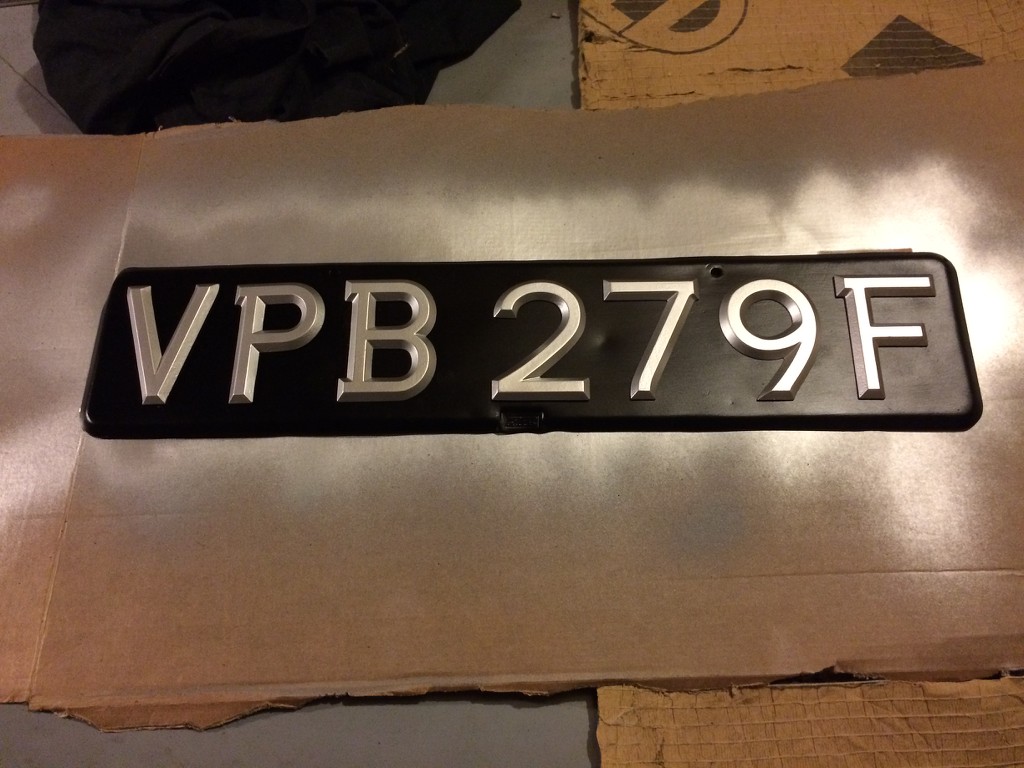
Now I just need to paint up the driver's side engine valance, so that I can get the radiator back in, and the boot repairs painted.
Karl -
Thanks Pete. I haven't looked at the fuel cock yet, so I'll put that on the 'to do' list.
Karl
-
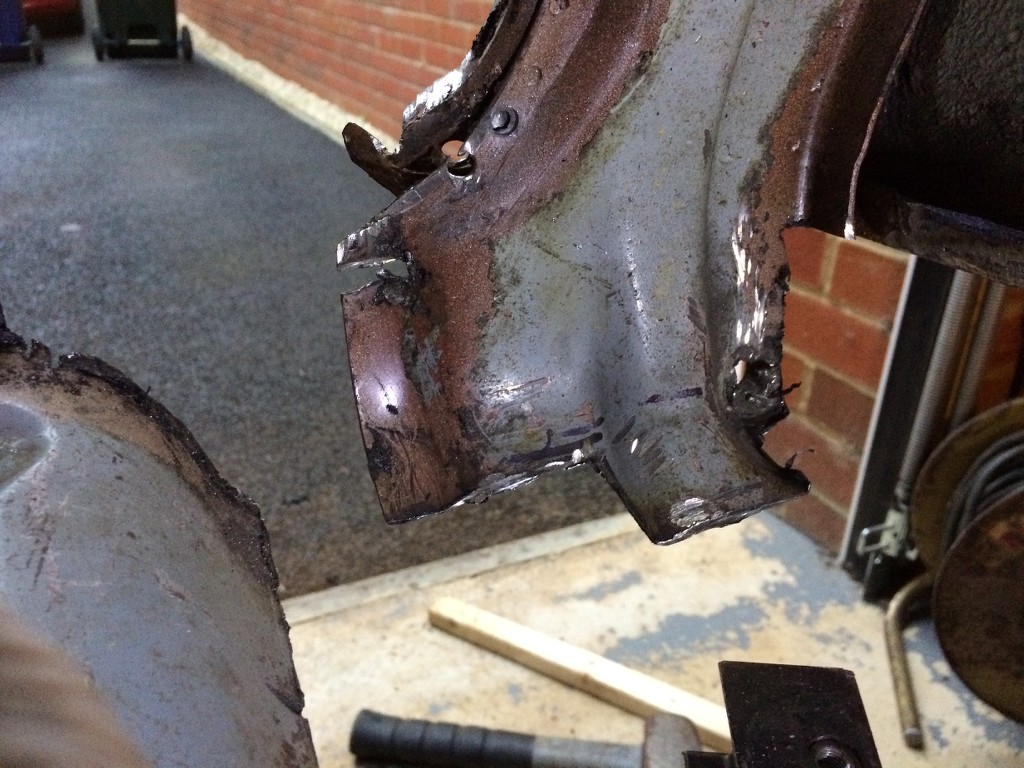
As some of you know I am currently rebuilding the back end of my Herald 1200 after discovering a serious lack of metal around the chassis mounts and the lower quarter panel which sits behind the side valance.
I have cut out the bulk of the offending metalwork, but have hit a snag.
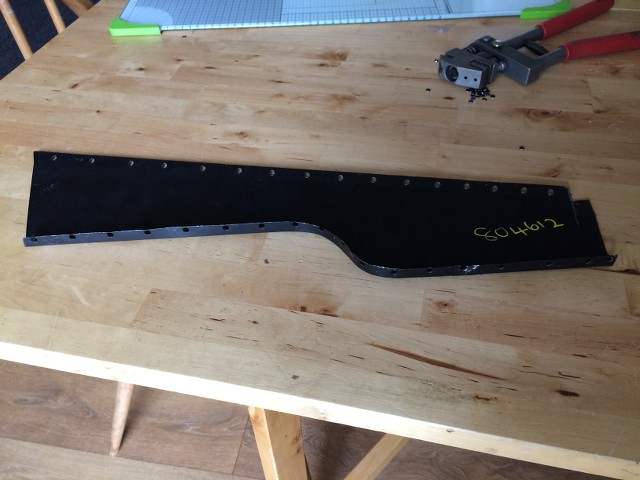
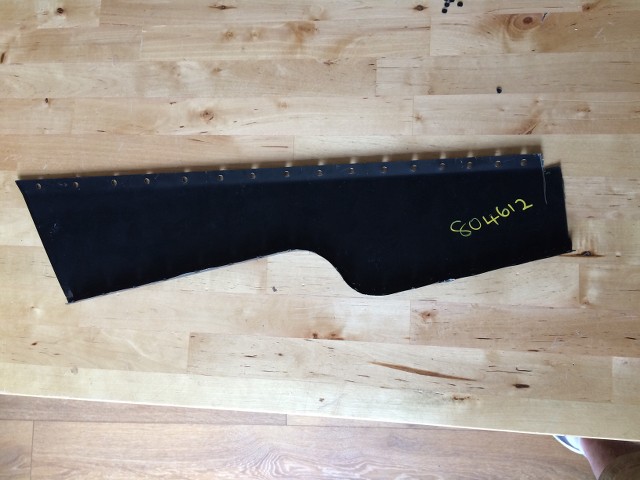
Here's the back of the car as it currently stands.
And here is the replacement quarter panel.
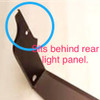
My problem is the part of the panel that sits behind the light panel, which is in turn sandwiched between the light panel and the boot corner reinforcing piece.
Do I cut the repair panel to fit the car as is, and seam weld the panel where it would normally sit between the other panels?
Or, do I have to remove the reinforcing piece to gain access to in turn remove the remnants of the old quarter panel?
Has anyone else done this? If how did you do it?
Thanks
Karl
-
I thought I would start today's activities with a bit more work on the number plate, starting with giving the digits with a coat etch primer, here's a quick before and after.
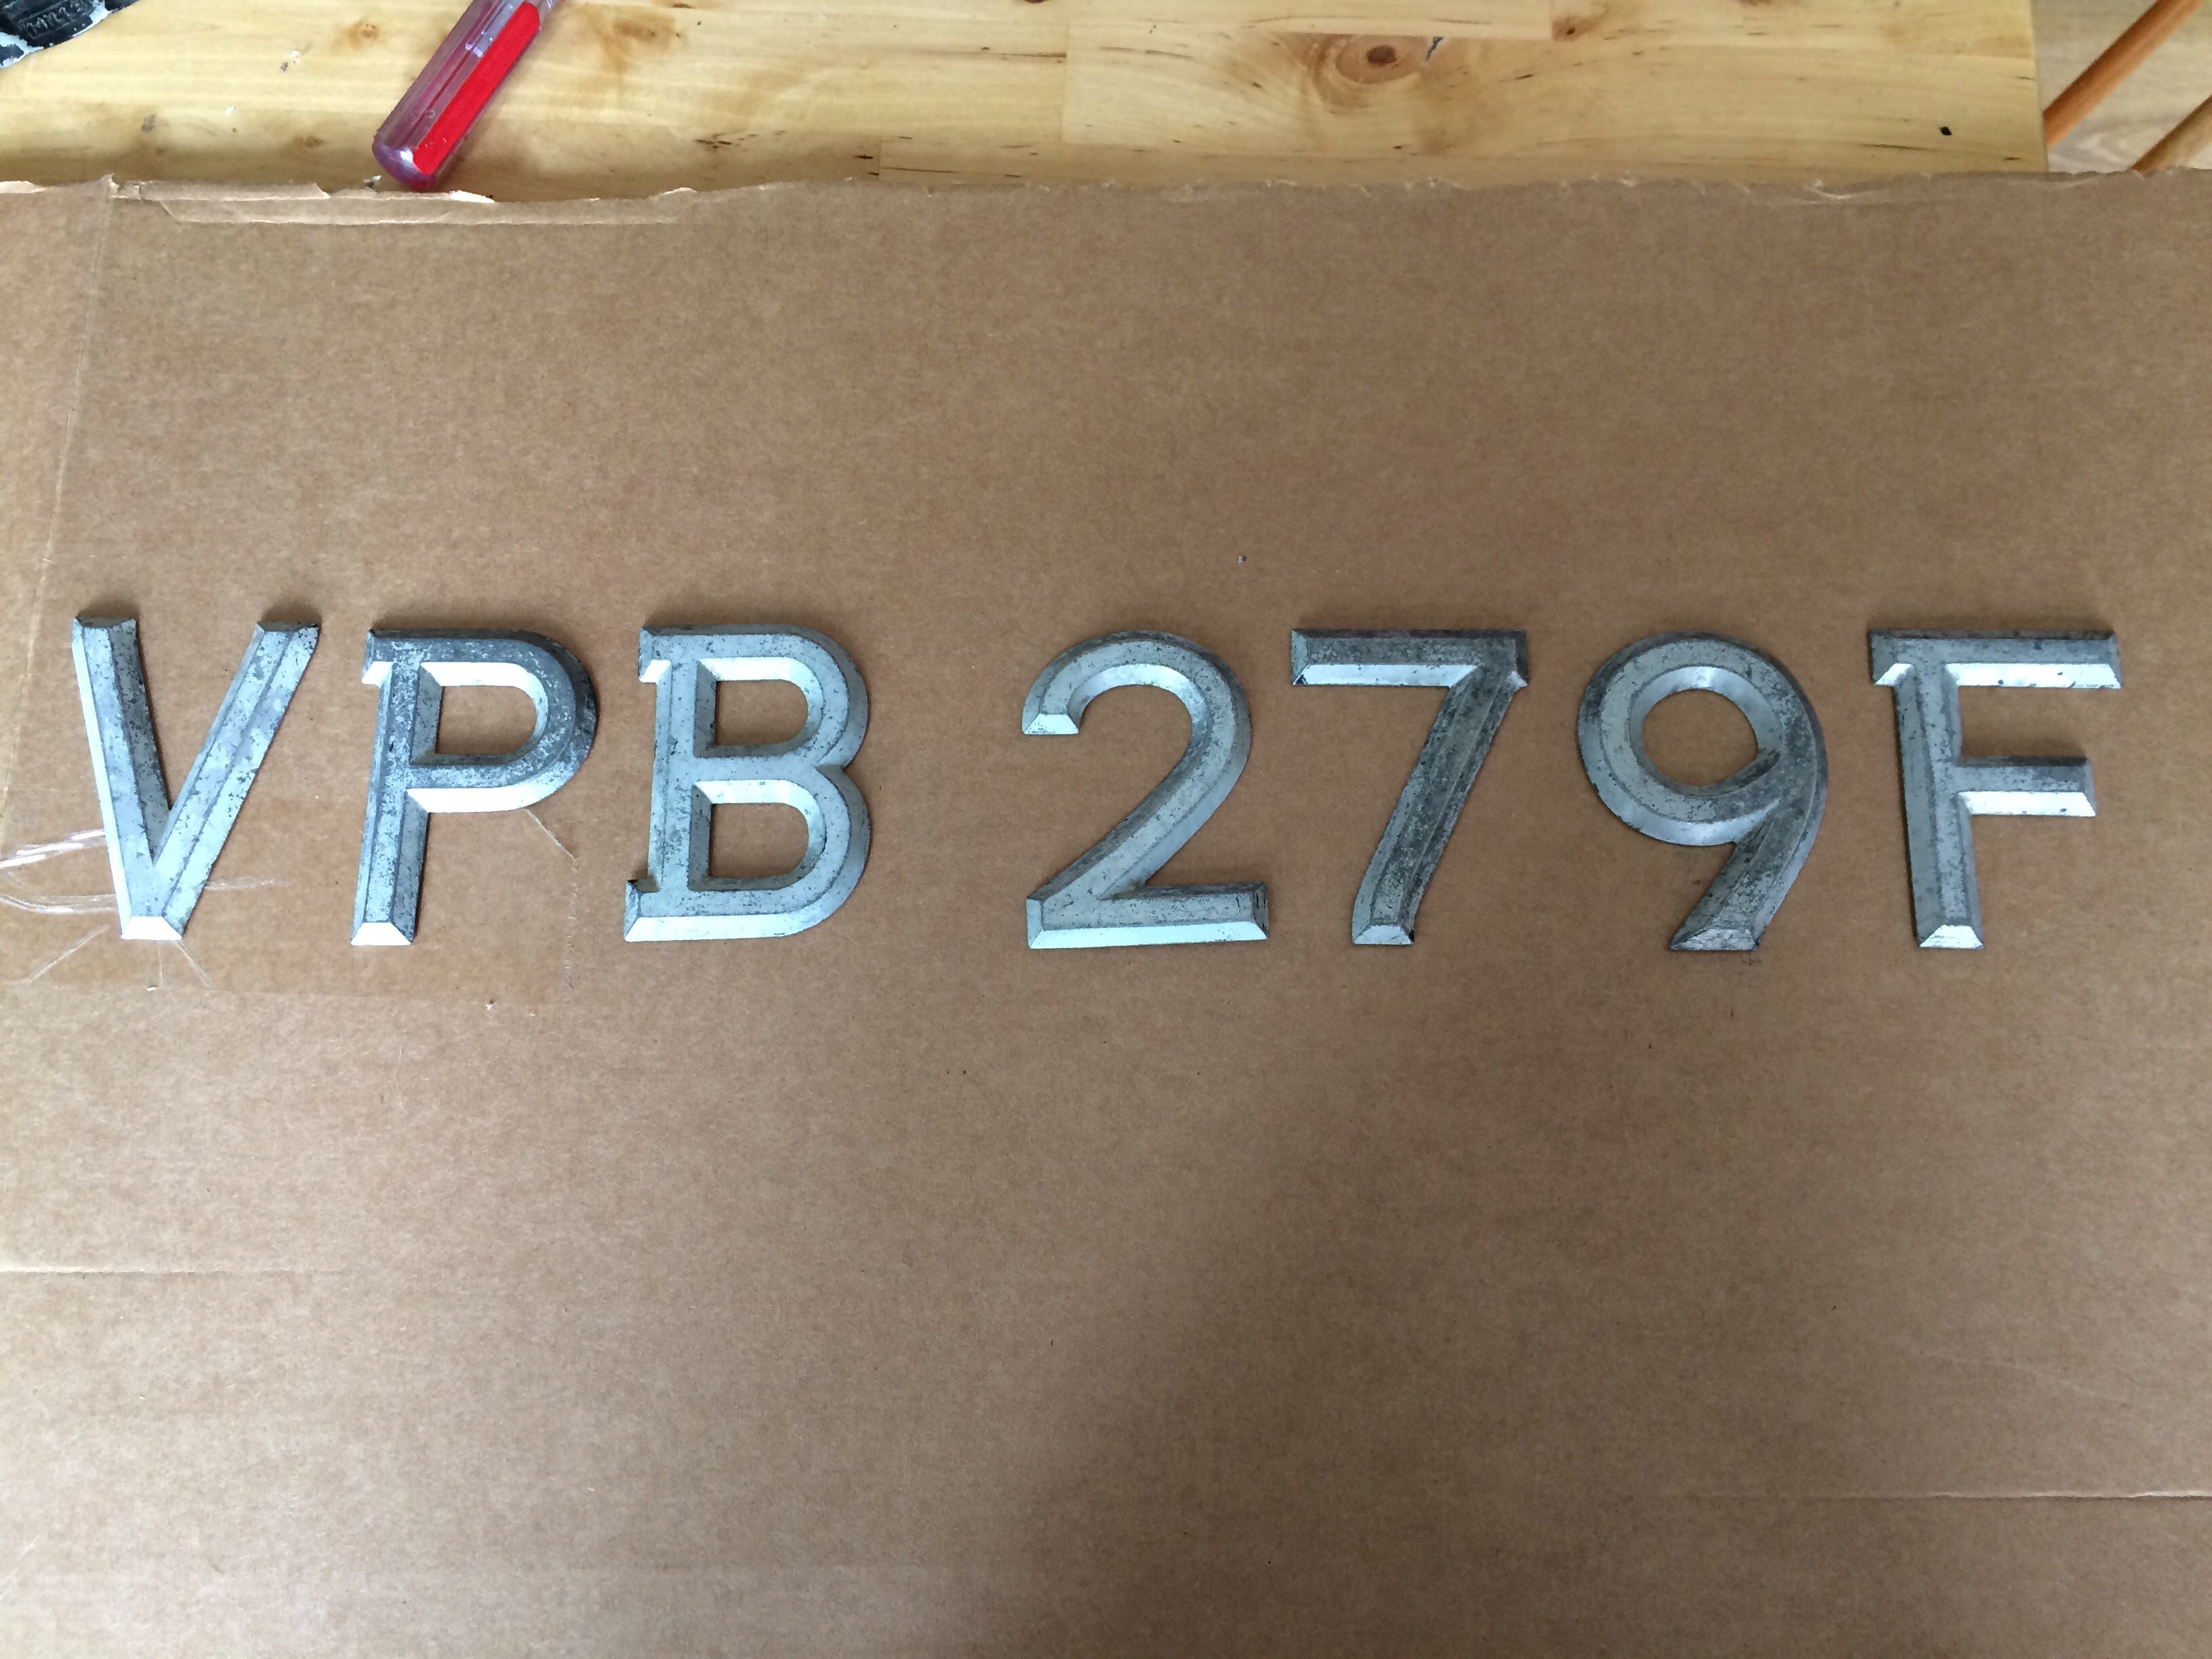 [/url]
I mounted the digits onto a sheet of cardboard, having first punched the holes out through the backplate onto the card. This allowed me to just push the digits onto the card securely for painting.
Attention then turned to the backplate itself, with was attacked with a stripping disc.
It still needs a bit of work to remove a few dents and dings, but it's already a lot straighter than it was. Once they are sorted I'll etch primer it and then give it a coat of satin black.
I also spent some time stripping the paint of the fuel tank in preparing for getting that primed and painted gloss black, especially as I now know that James Paddock do the fuel cock decal, so I can make it look original once it's done.
Next up was a return to the back of the car and stripping out more of the panels that are going to be replaced.
I started off by stripping off the remains of the valance panel to rear wing join, slowly running the grinder up and down the join until the remains of the old panel fell off, leaving me with this.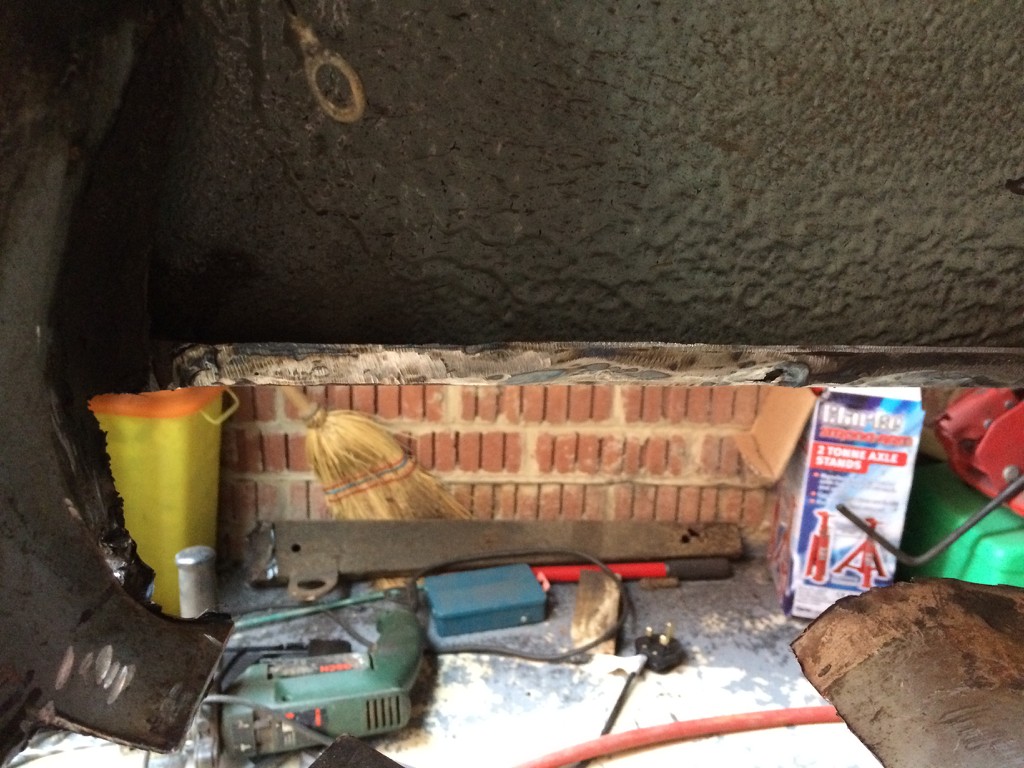
It may not look like much, but this represented about an hours work!
After this I removed the distance tube from the back of the boot floor reinforcing plate, as it was getting in the way of cutting out the remains of the old panel.
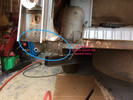
Here you can see how much the rear of the car sags without the lower quarter panel and boot corner in place to hold it all together, which gives me my next problem, as part of the rear lower quarter panel sits between the lower light panel, and the boot reinforcement panel.
I think a little research is required.
So this is where I left it this afternoon.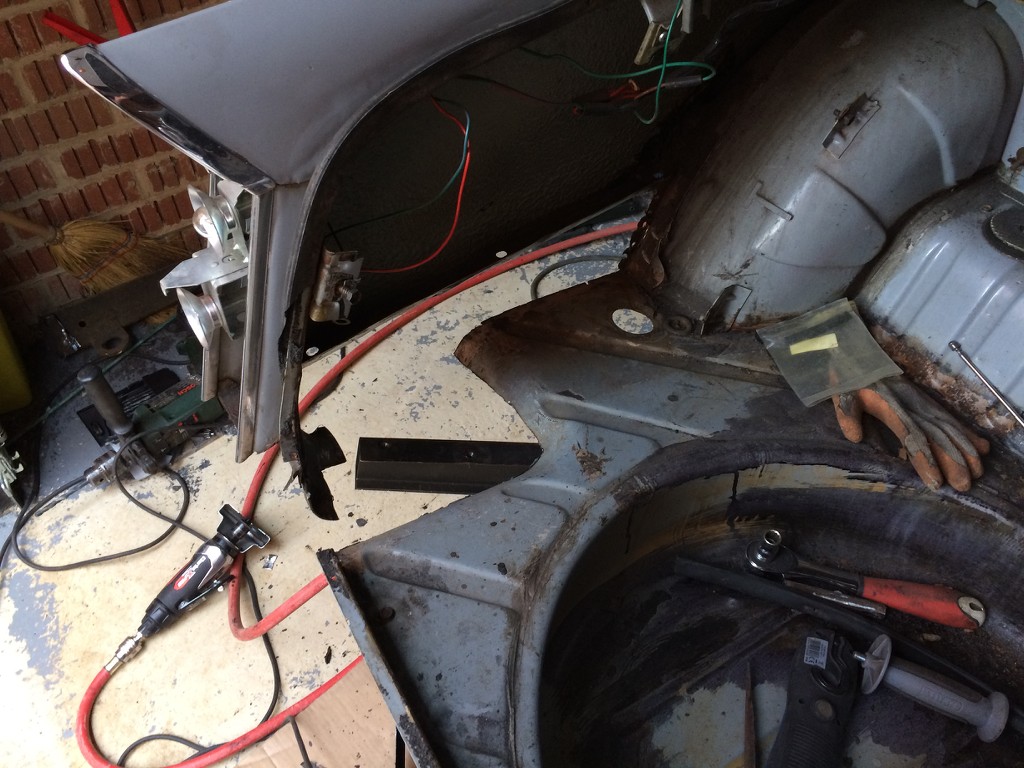
Mrs B is away next weekend, so I think I know what I'll be doing!
Karl -
I had a similar issue with my car, as the dealer I bought it off had greased the trunnions, so I ended up stripping the front suspension down to clean all the grease out of the trunnions.
One thing led to another and I ended up cleaning and repainting pretty much all the chassis and suspension components around the front of the car, and upgrading to poly bushes as I realised the state of the original ones.
If you stick to just cleaning out the trunnions, pipe cleaners are uselful for cleaning out the oil way.
I replaced the washers and seals on my trunnions while they were apart, and then pumped oil into the trunnion nipple until it came out of the top seal that sits under the upright itself.
When it comes out of there, you know it's properly lubricated.
Hope that helps.
Karl
-
Badwolf if you go back to the first post in the thread, and then select 'edit', you will then be able to amend both the thread title, and the tags associated with it.
You can then just submit the updated post.
Karl
-
After all the trials a tribulations with PhotoBucket I've signed up to ImageShack, so let's see how this goes.
I spent a couple of hours this afternoon cutting rusty metal out of the back of the Herald in preparation for the replacement panels, but didn't get around to taking any pics, maybe tomorrow.
However this evening I decided to something about my tatty front number plate, which was looking somewhat bent and battered, hardly surprising given its exposed position under the front bumper.
So off it came and got a good wash, before I attempted to remove the digits, which were held in with pesky star washers. Here they are after an hour of swearing and sweating!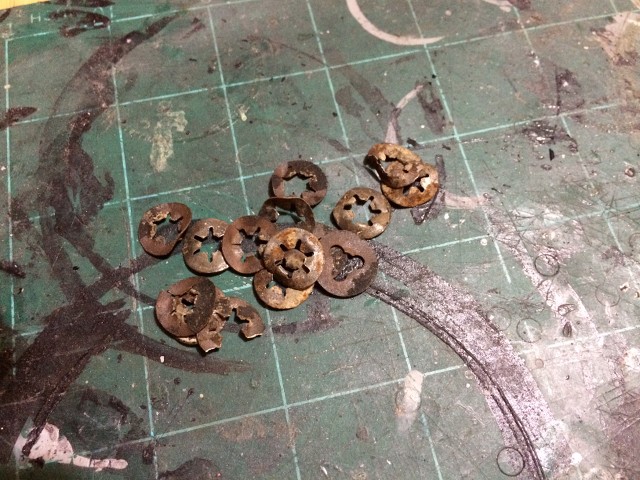
Think I might need to replace some of these.
This left me with this.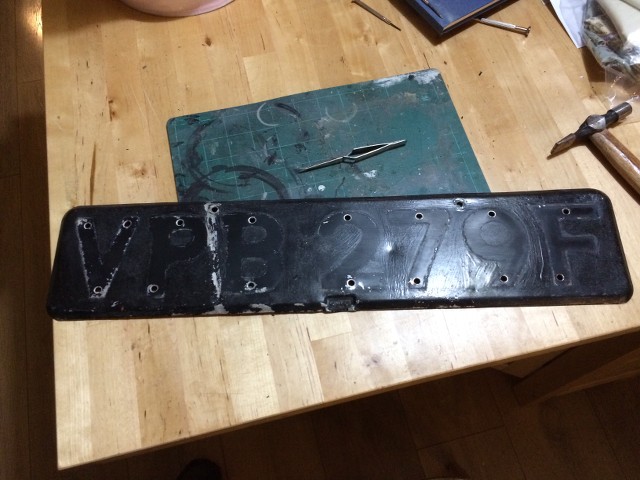
This was after I had knocked all the dents out an straightened it up as best I could, hence the hammer.
The digits were then given a thorough scrub in the sink, and to my surprise appear to be aluminium, I was expecting plastic.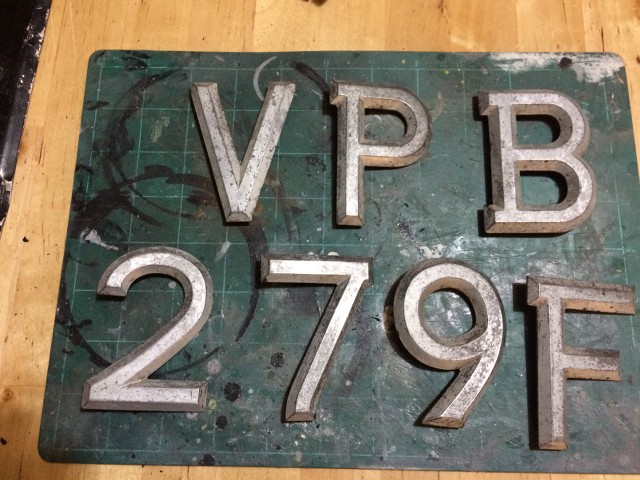
Both the digits and the back plate will need re-painting, the digits silver, and the back plate satin black, but before that I put everything back together for safe keeping, minus the star washers of course!
Looking better already.
Karl -
That looks just like the ones on my Herald 1200' see below.

Karl
-
I spent some time trying to improve the fit of my headlamp rims at the weekend, as they have always been a bit wonky, so removed the outer covers only to find that the headlamp mounting rims were held in with wood screws!
Furthermore, the lights and bowls were only held in by two screws each, rather than the four expected, and none of those matched!
I then went on to explore the unintentional intermittent wipers function, which after 15 minutes work with a multimeter I tracked down to an earthing fault.
Cue 10 minutes hanging upside down under the dash trying to locate the earth connection, only to find it was a piece of wire twisted around a tag which made occasional contact with the steering column!
Makes my efforts look almost professional!
Karl
-
Badwolf, you're more than welcome.
I'm used to doing WIP threads on model making forums, so it seemed natural to do something similar with the Herald.
Karl
-
PB have changed their terms Doug so that if I want to use their previously free services, I'm looking at $400 a year, that's a lot of Herald spares!
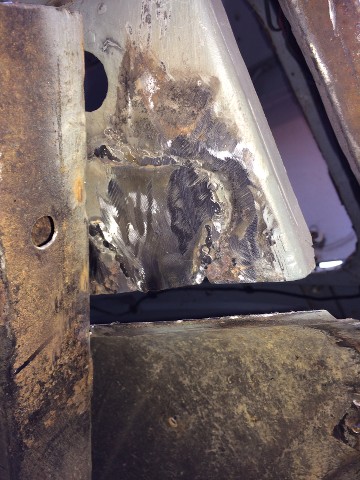
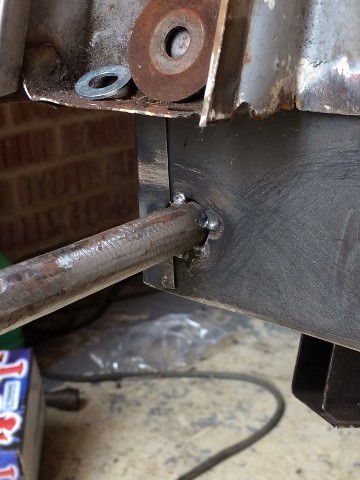
The last couple of weeks have been quite busy, focussing on getting the new passenger side boot chassis extension leg fitted.
Because the replacement leg pretty much butt joints to the rear of the main rail, rather than inserting into the chassis rail a few inches like the original.
Therefore I decided to seam weld around the join, which produced a pretty strong bond, but being me, I decided to add a series of reinforcing patched to make sure this be as strong as possible.[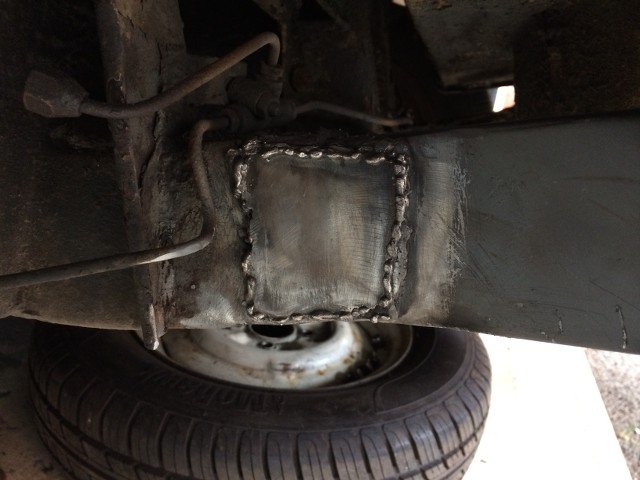
Pretty it ain't, but it isn't going anywhere soon.
Here's the underside where I applied another plate, again beauty is in the eye of the beholder.
You can see the 3rd plate in this shot as well. This was a small closing gusset that sits between the front of the rear cross member behind the diff, and the inner U face of the new chassis extension piece. This one was a pain to weld due to the spare wheel tub getting in the way.
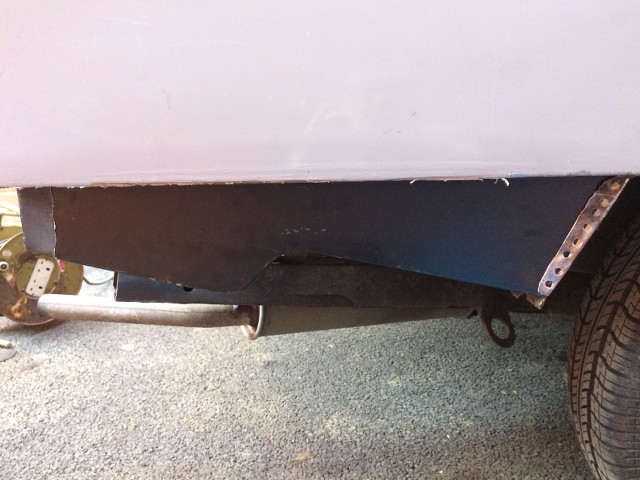
And here's the new extension in place.
With that in place, it was time to turn my attentions to removing the old rotten panels, starting with the lower wing/boot panel which sits behind the side valance, and which was decidedly moth eaten.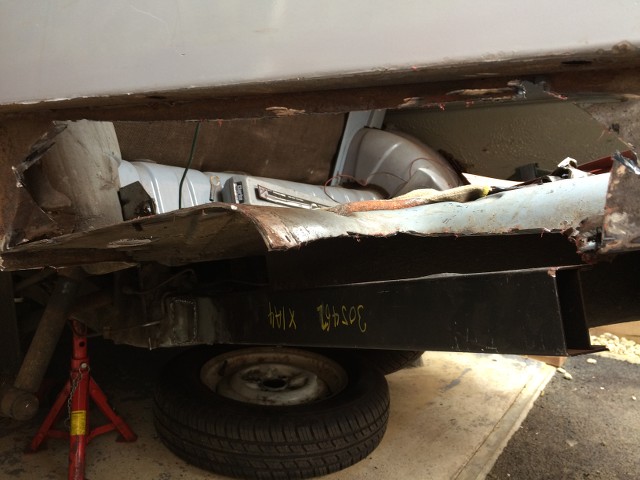
I ground the seam down on the side until the skin separated , and then sliced out the remainder with the angle grinder. There's lots more tidying up to be done.
Here it is from inside the boot, with a portion of the rear corner removed, but still lots more to do.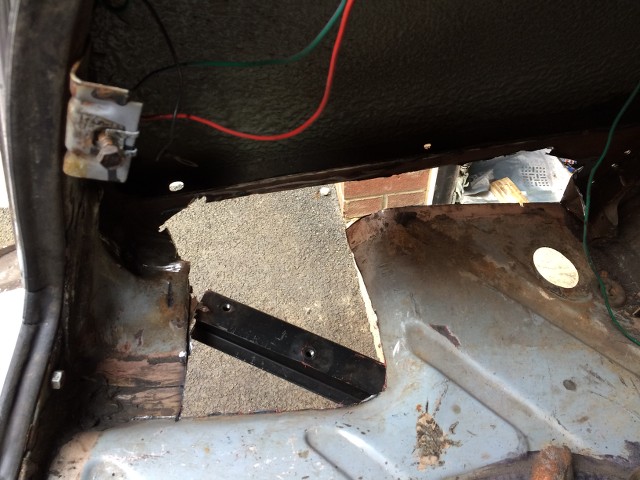
I couldn't resist sliding in the replacement boot corner that I got from Chic Doig.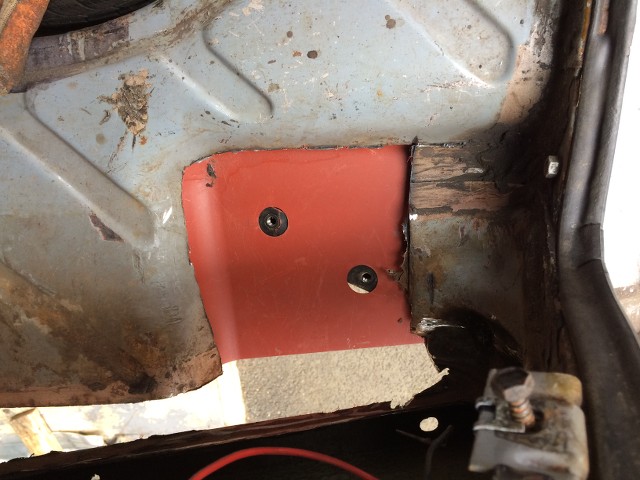

There's lot of work to do before this lot fits properly, but that's for another weekend.
And finally a shot of the rotten metal that's been removed this afternoon.
In other news I've replaced all the bullet connectors on the wiring looms for the front lights, along with the female connectors following an e-bay purchase, and now have a fully functioning set of front lights and indicators.
I also replaced the wood screws which were holding the lights in!
Proves I'm not the first badger to own this Herald!
Karl -
Yes unfortunately Photobucket saw fit to apply a ridiculous price for the previously free pleasure of photo hosting on forums.
At the moment I'm trying to find a decent alternative that either doesn't require you to go visit another URL to view, of provide tiny little thumbnails which you have to open to see properly.
Better find something soon as I've got lots to update on the thread.
Karl
-
Thanks for the responses everyone.
I think I'll start by trying to find an old household plug.
I did have a look through all the usual places around house and garage yesterday for an old plug, but Sod's law they are the melded plastic type!
Time for trip into the loft.
If that fails I'll give Holdens a go as I wanted to order an illuminated reversing light switch anyway.
Thanks all.
Karl
-
The windscreen wiper switch was bypassed on my Herald when I bought it, and the function performed by an after market toggle switch.
I assumed the original didn't work, however following my efforts to diagnose an issue with the wipers just not working at all, turned out to be a dodgy earth connection, I've also discovered that the old switch works just fine.
Unfortunately it's missing the terminal screws, possibly why it was bypassed in the first place.
I'm keen to reinstate the original switch, but does anyone know where I can get a couple of terminal screws?
I've tried looking online, but without luck.
Thanks
Karl
-
That little 948 convertible looks remarkably straight, and a very lucky find.
Best of luck.
Karl

** 26/02/23 Heading Up ** Probably how not to restore a Herald!
in My Triumph Restoration Project
Posted
Splitting today's update into two posts as I didn't post yesterday.
My intention yesterday was to finish off the welding, by completing the last few plug welds, and then attaching the over rider spacer tube, however best laid plans, as I attempted the last two plug welds I heard the ominous clunk of the wire spool emptying.
B*gger, out of wire, and none on the shelf.
That's a half a kilo of welding wire I've managed to use on the boot corners and the chassis patch!
What to do then?
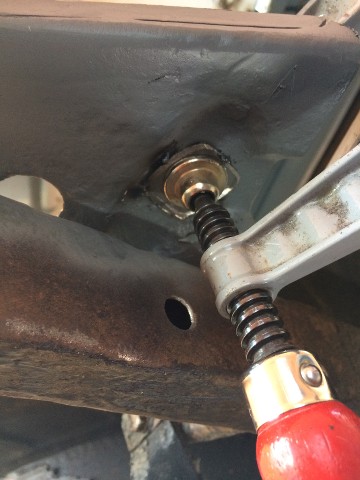
I finally decided to try and sort out the rear brake lines, something that I have been putting off for over a month now, since discovering just how scabby the pipes were when I did the passenger side boot chassis extension.
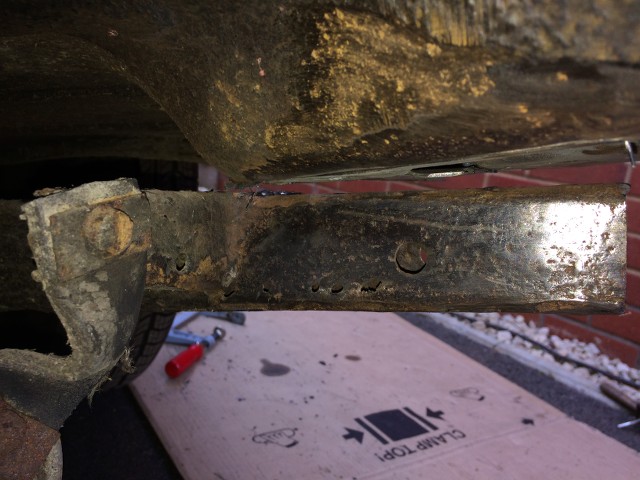
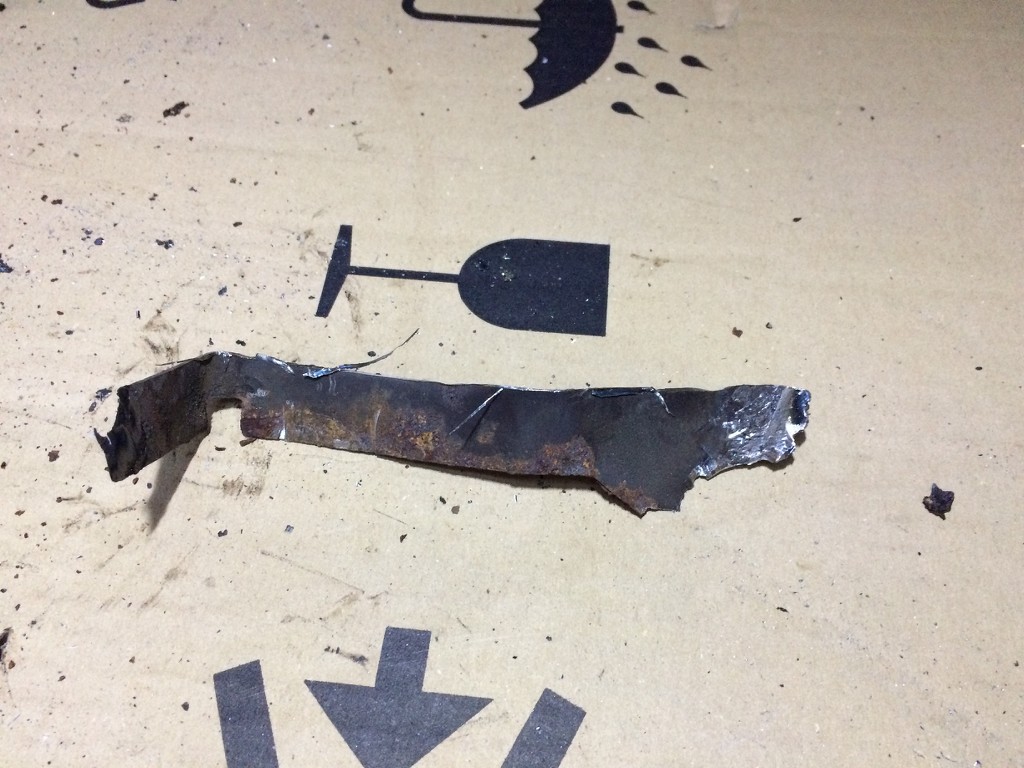
I tried soaking them in penetrating fluid, repeatedly applying liberal doses every week, to no effect. The flats on the unions simply rounded off, and with limited room under the boot I decided to bite the bullet and cut them out, leaving me with these.
You can see just how cruddy they are from the pic below.
I did try cleaning up the shorter run between the nearside rear wheel and the brass junction, but as you can see from the photo below, the pipes are really heavily pitted, and therefore beyond saving.
At least the junction piece itself is in good nick, and responded well to a swift clean up.
I'll be dropping these off to my local garage later in the week to make up new runs with new unions.
While doing all of this I had the drums off, which revealed new cylinders and seals, shoes with plenty of meat left on them, and thankfully no leaks, so that's one less thing to worry about ahead of the MoT.
Karl