

Bordfunker
-
Posts
1,005 -
Joined
-
Last visited
-
Days Won
17
Content Type
Profiles
Forums
Blogs
Gallery
Downloads
Store
Events
Posts posted by Bordfunker
-
-
Damn, my infallible marking system has been rumbled!
With the driver's side output shaft rebuilt, I decided to start putting the diff back together, starting with cleaning all of the mating surfaces with panel wipe.
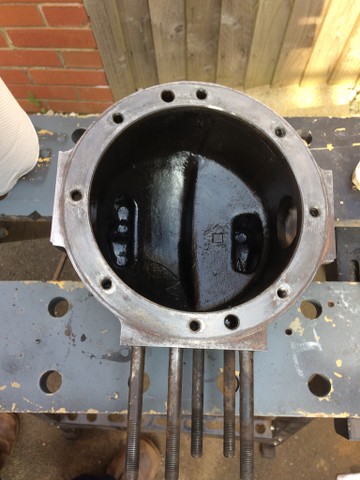
I tapped all of the bolt holes in the diff ahead of reassembly, as well as cleaning out the non-threaded holes to be on the safe side, following which it was time to break out the gasket and gloop.
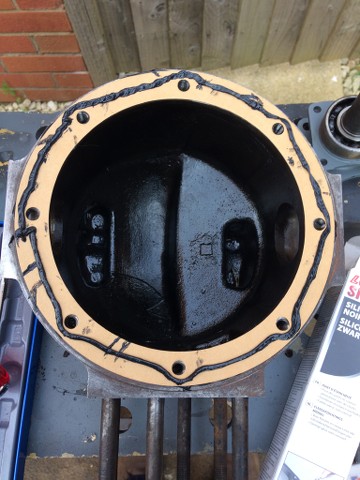
This stuff is seriously thick, and requires some real pressure to get it out of the nozzle, hence the manufacturer including the rather 70's looking cornedbeef tin winder!
Having said that, it goes on nicely, and oozes to form a nice rubberised seal once dry.
I did make sure that both of the output shafts fitted properly before torquing up the diff bolts, as a little jiggling was required to make sure that everything meshed as it should.
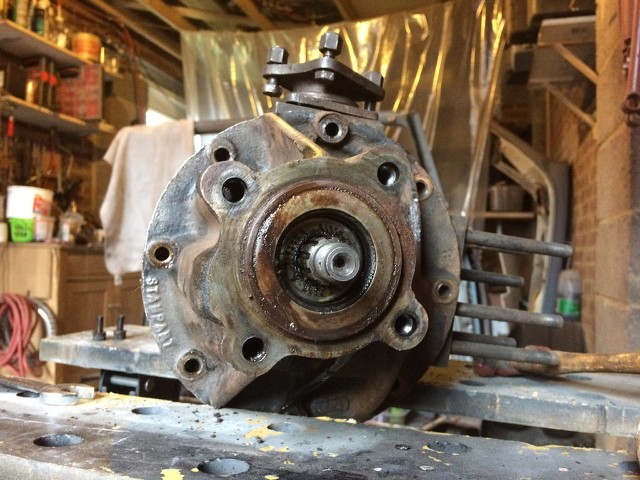
With that lot together, I inserted the diver's side output shaft, having given the area a good clean up first.
Again I used the sealant as there is no gasket on this joint, and the joint shows signs of previoiusly having some form of sealant applied, though none is mentioned in the WSM. Note the ooze around the edge, which I'll trim back with a sharp knife once it's all set.
Can you see what I've done?
It was at this point thaI've only gone and fitted the driver's side outputshaft to the passenger side of the diff! What a muppet!
Not the end of the world, I'll swap them round at the weekend.
I did reassemble the passenger side output shaft, which went together with minimal fuss, however the same couldn't be said of the bolts securing it.
The top right one just wouldn't do up, and that' because it was actually bent!
I know one of them had been quite difficult to remove, and I am guessing it was that one, so I'll need to order a new allen headed bolt, before swapping the output shafts back to their original sides, and sealing everything up.
Aside from putting the wrong shaft in the wrong hole (Matron!), not a bad afternoon's work.
Off out tomorrow, so unlikely to make any progress until Friday.
Karl
-
I’m using Rustbuster’s FE123 on my car, and it seems (excuse the pun!), to flow into nooks and crannies pretty well.
I always the thought the main point was to stop the rust having access to moisture and oxygen, therefore stopping it in its tracks, and therefore by neutralising the outer layers you effectively prevented the chemical process from continuing, however I’m not an expert.
Putting a decent primer and top coat over everything, as well as the application of seam sealant, would further isolate the rust, and stop it spreading.
The only other solution would be to split every seam, clean it back, and weld it all back together!
Karl
-
Just take the mechanicals and stick them in a Toledo shell.
Most excellent Q-car!
Karl
-
 1
1
-
-
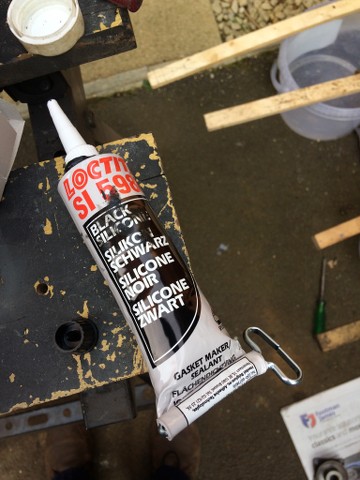
Pete this is what I picked up to seal the various differential components.
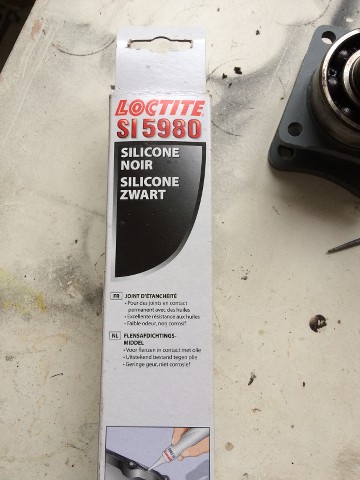
I figured it was designed to be oil proof, and it was from Loctite, and therefore should be good for the job.
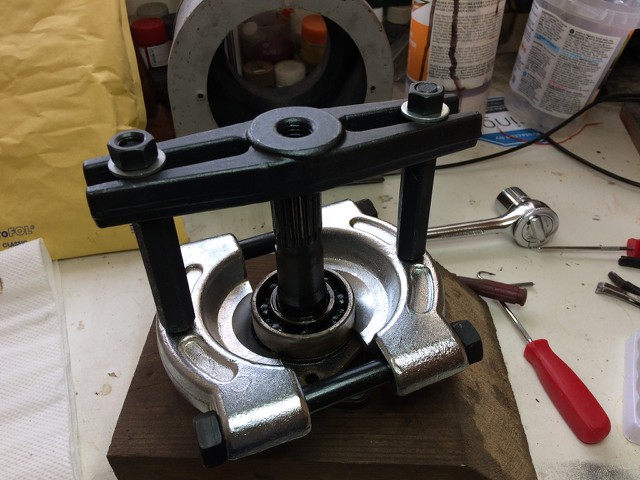
In breaking news I managed to get the bearing off of the passenger side output shaft, but only after investing in some 12mm studding to replace the plasticene ones that came with the bearing separarter kit.
Having said that, the bearing still managed to bend one peice of studding! Made of tough stuff these Triumphs!
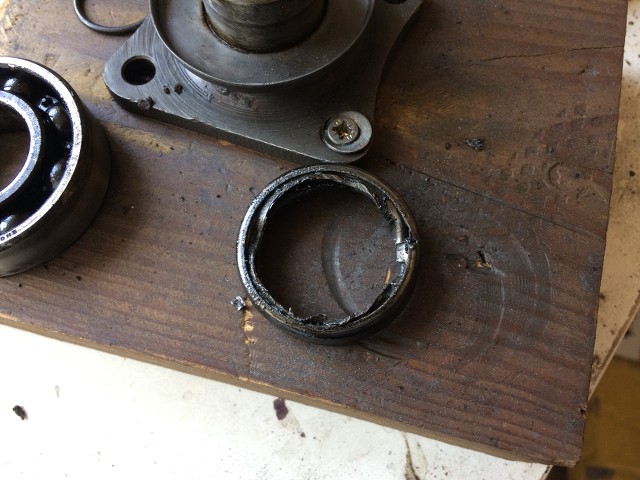
I also got the old seal out, which looked to be barely hanging in there, and practically fell off.
With that out of the way, it all received a quick whizz over with a rotary wire brush, and a blast of primer, but I didn't take any pics!
I figure you've seen one of these, you've seen them all.
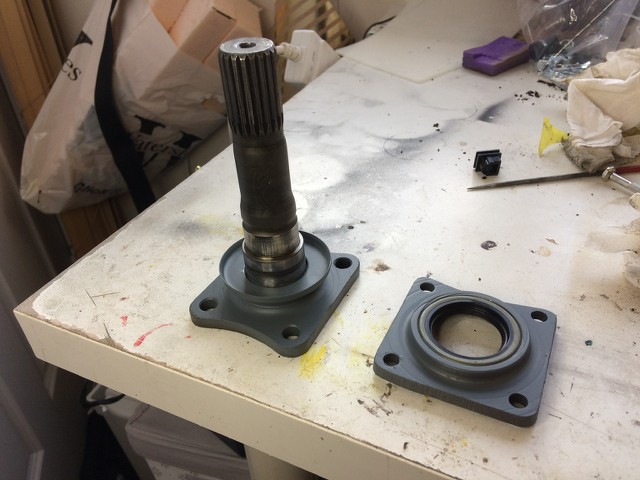
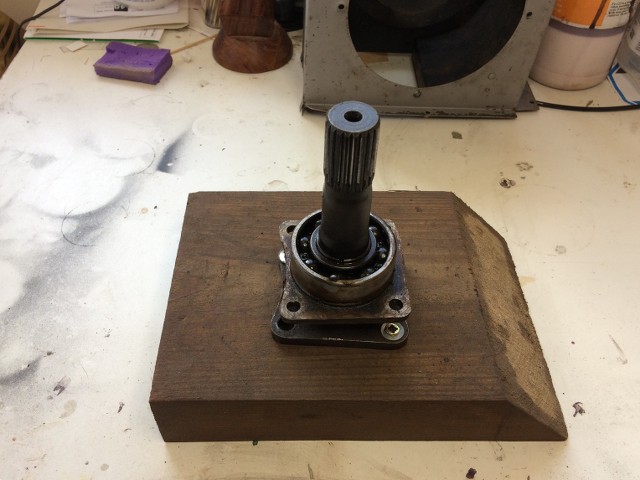
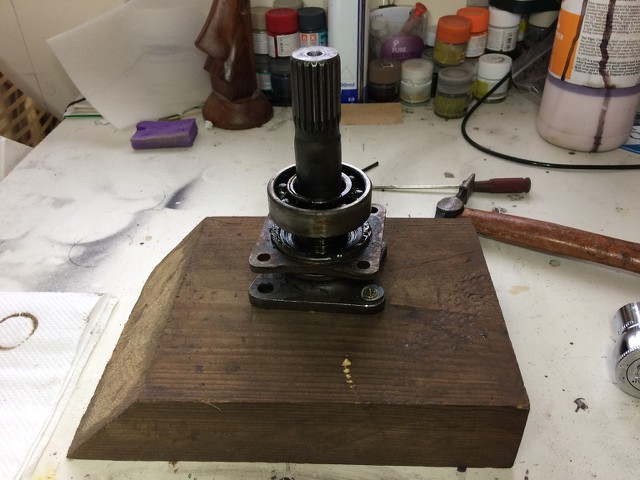
However I did get the driver's side shaft back together, utilising my 3 legged puller, in 2 legged mode, and in reverse to pull the bearing back down onto the taper, quickly followed by the circlip, which went on with nair a fight!

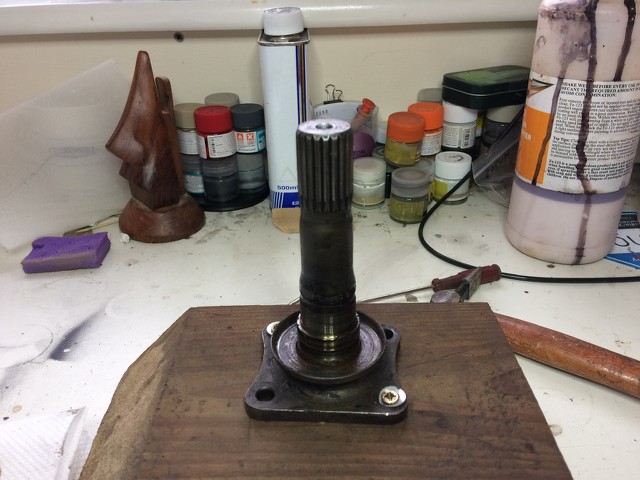
Doesn't that look better?
And just to ensure that I keep track of which side is which, I put a mark on to remind me.
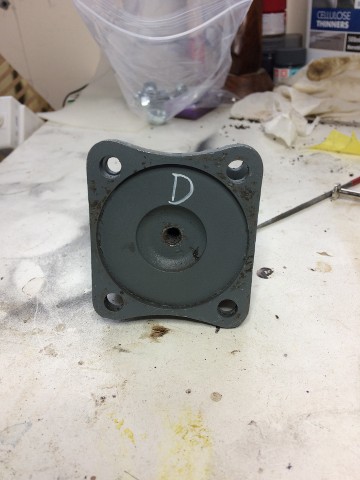
I'll let you work out what the D stands for........
Karl
-
1
-
-
Pete, thanks for the heads up, I’ll sand the mating faces clean before I fit the drive shafts.
Are the plates that the output shaft seals are mounted in, supposed to have sealant between them and the body of the diff?
Mine look like they did have some originally, but the seals look to have been replaced at some point as they are marked Unipart, rather than Stanpart.
Karl
-
Many years ago when I was temping while at university, I worked in the warehouse of a freight forwarding company, and one corner was set aside for storage for the local Ford factor, and I always remember the ranks of new wings for Mk1 & 2 escorts, as well as the early Capris and Granadas. I wonder what they would be worth now?
Back to triumphs, and one in particular, namely mine.
We left it with the driver's side differential output shaft in bits on the bench, but with the old seal still in situ.
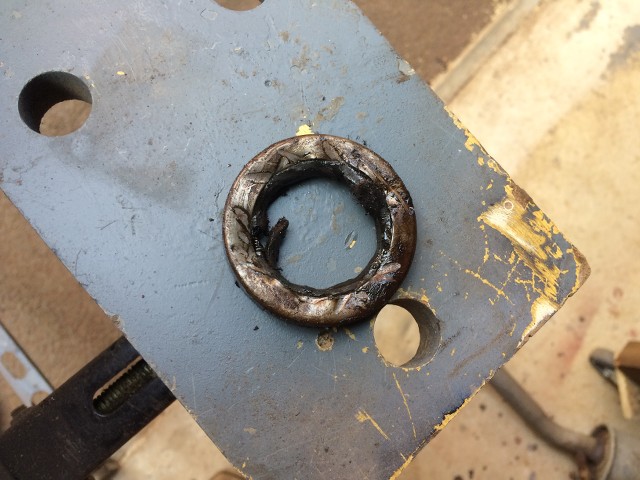
Now I tried drifting out the old seal, but it wouldn't budge, so ended up cutting the seal with a cutting disk in my Dremmel knock off, which did leave me with a very battered old seal.
Good job I don't need it, as I have this to replace it with.
It took a couple of attempts to get the new seal in, finally using a large washer, and a socket in the vice, to get the seal in, but not before manging to distort one of them in the process, which I will now need to tease back into shape.
I will be painting the entire differential when it's back together, but took the opportunity to clean up these components and give them a quick coat of primer as protection.
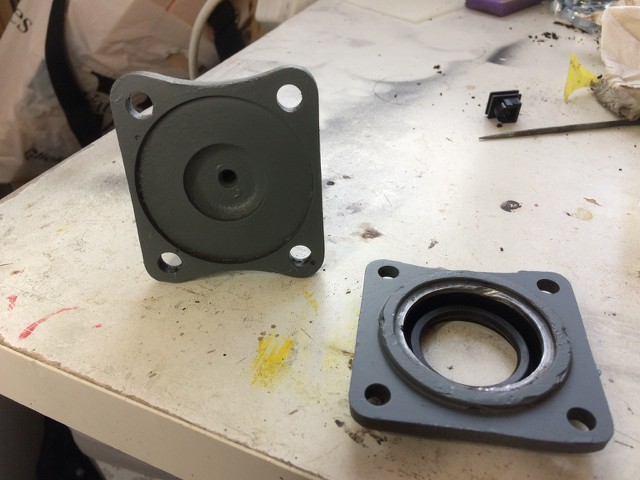
Tomorrow I'll drift the bearing back on, and refit the circlip, after which the driver's side output shaft is complete.
I did make a start on the passenger side output shaft today. but the bearing is proving resistant to all my attempts to shift it, and has boken 3 lots of studding so far, so we'll put that to one side for now, and move onto something more productive.
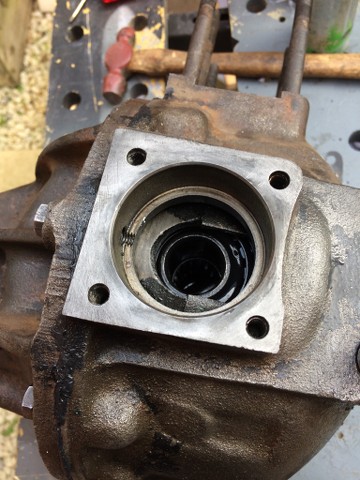
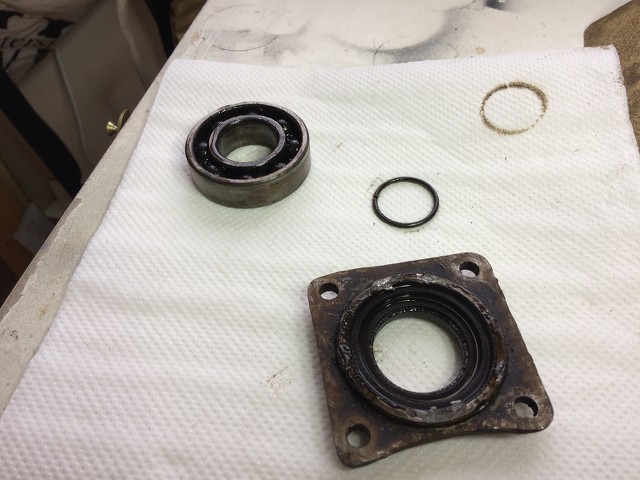
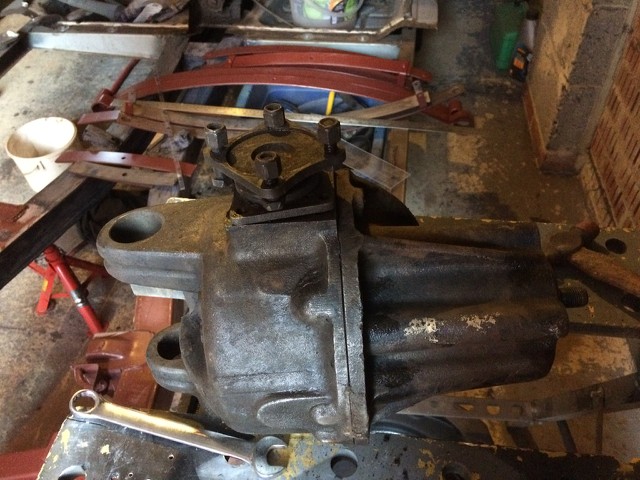
I did have better luck with the seal on the nose of the diff, which came out without too much of a struggle.
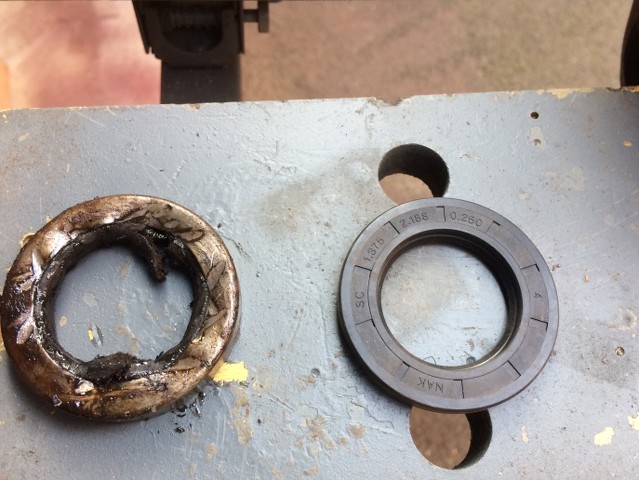
All looks reasuringly clean & tidy in there, the same can't be said abou the old seal.
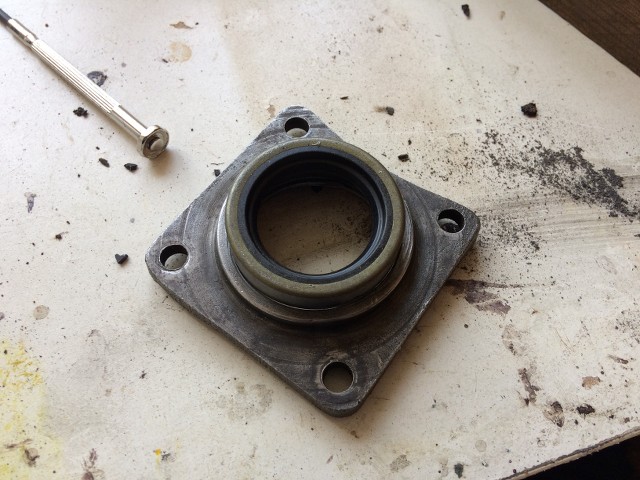
Thankfully the new one is substantially better, old and new side by side.
The seal drifted in with little effort using an off cut of scaffolding pole, however I think I may have drifted it in a little too far, as it's sitting about 0.5-1mm below the nose of the diff, so may have to sort this out later in the week.
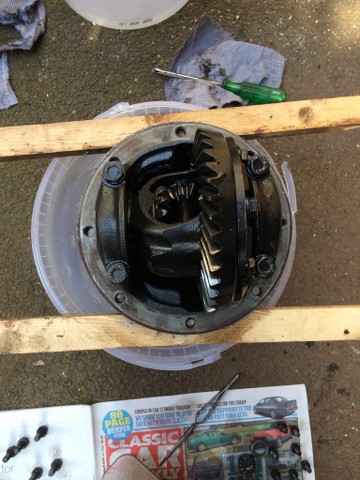
With both output shafts removed, and the bolts holding the two halves of the diff together, there was nothing to keep it all together anymore, and the two section separated without issue, allowing me to remove the old gasket and clean up the mating faces.
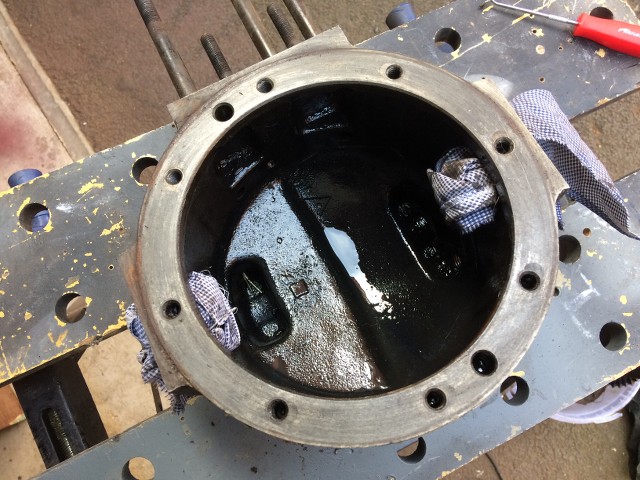
Next time I'll apply the new gasket, along with the silicone sealant, and pop the two halves back together again.
Overall not bad progress for a couple of hours in the garage, but I'll need to find a way of removing that bearing on the passenger side output shaft if I'm to get this done this week.
All suggestions gratefully recieved on how to overcome this.
Karl
-
1 minute ago, poppyman said:
The Wooden (squirell?) in the background looked as though he was laughing at you Karl
") Good work though...
Good work though...
Tony.
It’s supposed to be a glasses stand that I got from Malaysia when I first went out there on business.
Needless to say I have given it plenty of opportunity to laugh at my idiotic antics!
Karl
-
Pete, working in the garage a few months back, one of my neighbours paid me a visit.
At first I thought he was going to complain about the noise as I had the compressor running, but although it was the sound of the compressor which had attracted his attention, it wasn’t to complain but to find out who was using a large compressor locally.
Turns out he’s restoring a DeLorean and is a development engineer for Nissan, so has a wealth of tools at his disposal, including a press!
When the threads stripped I thought I was going to have pay him a visit and request the use of his press.
Good to know it’s an option though.
Karl
-
I call it a study,
Don’t get any ideas about a sumptuous office with a wonderful wooden desk and luxurious leather office chair
it’s just a 2 metre square room with two desks and a load of shelves, where I work from home a couple of days a week!.
It is at least warmer than the garage!
Karl
-
The bearing separator set turned up on Friday from the bay of evil.
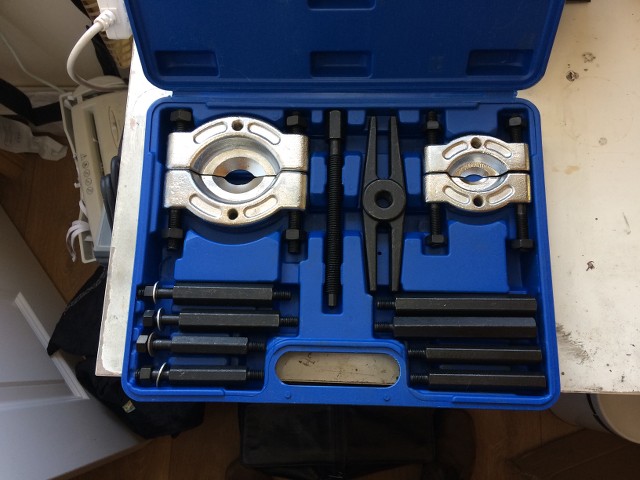
It weighs a tonne!
Before I started on stripping down the first drive shaft, I mounted it on a block of wood to make handling easier.
Which proved a good idea when it came to removing the circlip which keeps the bearing in place on the shaft itself!
You need at least 3 hands to do this!
20 minutes of trying various implements, and a bit of swearing, I managed to get the circlip off.
Time to try the bearing seperator.
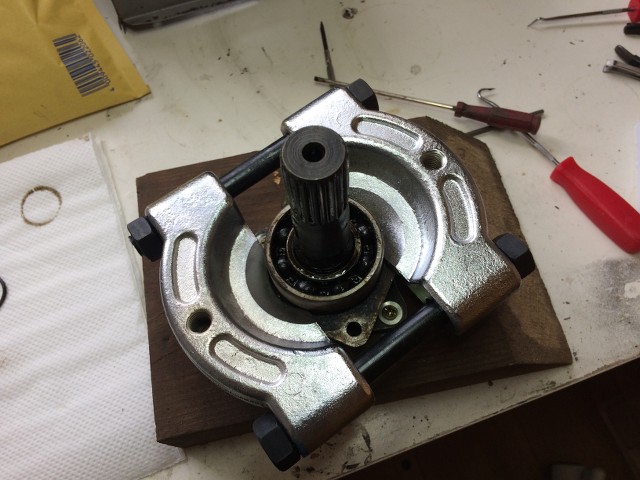
This is where things started to go awry, as I promptly stripped the threads off the bars that clamp the two halves of the seperator together.
Bloody things look to be made of monkey metal, either that or the 50 year old bearing and driveshaft are made of titatnium!
Luckily I have some long bolts in the garage, which I could use instead, leaving me with this after half an hour.
As you can see I wasn't working on this in the garage, instead retreating to the comfort of the study, a much nicer environmant in which to work on a somewhat cool day in April.
And broken down into the component parts.
I need to dress the inner flange with a file as the clamp has marked it, before I drift out the old oil seal then everything will get a clean up with a rotary wire brush, a coat of rust stopper, followed by reassemby, after which I get to do it all over again on the passenger side.
Fonunately I'm off this week, so should get plenty of opportunity to rebuild the differential.
Karl
-
Thanks Pete.
I’ve ordered a pair of the bearing removal clamps and their associated pullers off of e-bay as the bearing looks to be a whisker over 50mm, while most of the pullers are either 30-50mm or 50mm+, and the set I’ve ordered has both for the bargain price of £22.
I also managed to remove one of the drive shafts from the diff with gentle levering with an old screwdriver.
So the aim this weekend will be to strip down the diff, and replace all of the seals and gaskets.
Thanks
Karl
-
Pete, thanks for that.
Is this the type of thing I’m looking for to remove the bearing?
If so I’ll order one off the bay of evil, and have a go at the weekend.
I did check the nose bolts and they are all tapered as they should be.
Rob, I was surprised at just how airtight the cabinet was!
Karl
-
Mark, an air or battery powered angle grinder does look very attactive right now!
Following last week's near HSSE training video incident, I'm starting to think I shouldn't be allowed near garage equipment, as having taken delivery of my lovely new blast cabinet, I managed to break the perspex in the most moronic way possible.
This really belongs on the 'Blonde Moments' thread.
Now you may remember I got the vacuum for my birthday, to go with the blast cabinet, with the aim of using it to extract the muck that comes off the parts I intended to clean up.
So far so good, so with that in mind I read the instructions for the cabinet,(how hard can it be) which advises you to remove the plug on the filter hole.
Cue look at filter hole, no plug fitted, just a nice hole for the vacuum hose to go in.
Insert vacuum hose, fire up vacuum.
Look of bemused concern as gloves 'inflate' in the cabinet, rapidly turning to horror as the perspex starts to bow before shattering!!!!!!
Turns out they meant the blanking plug on the other vent, the one I hadn't spotted!
Arse!!
Nothing for it but a trip to B&Q to get a peice of perspex, and install it, leaving me with this.
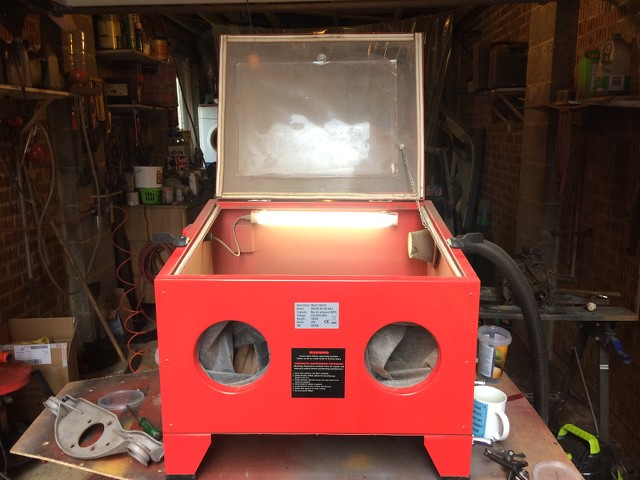
It now works beautifully, but could do with another tub of grit, as you have to keep shoving it around to keep the hose buried.
Having repaired my idiocy, I actually got to blast some components.
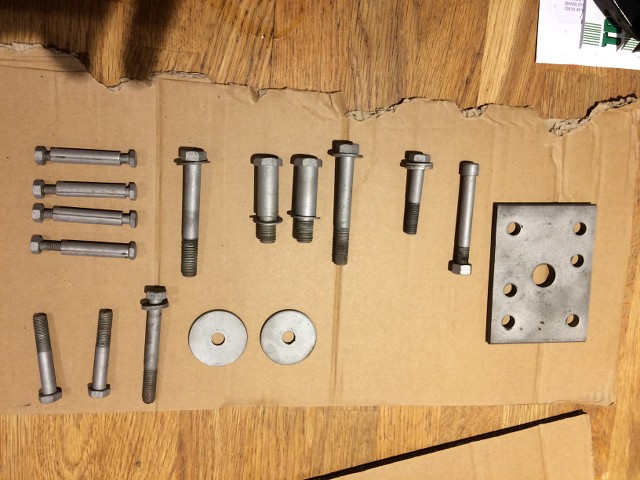
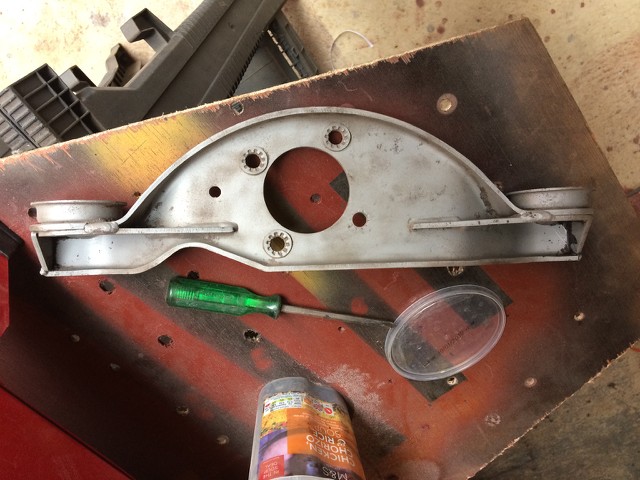
All of the suspension bolts have come up lovely, and none are corroded, which allowed me to run tap down the threads to remove any lingering muck and rust stopper.
As you can see I also cleaned up the top spring clamp plate ready for a coat of rust stopper, which they have all now received.
Also in the rust stopper queue was the rear vertical link.
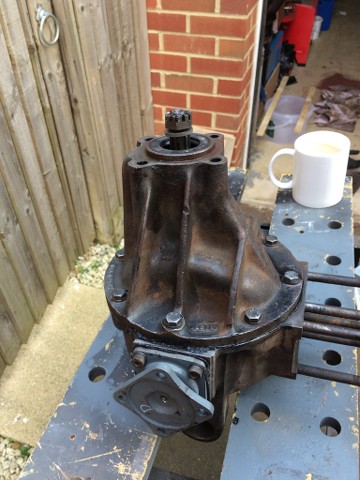
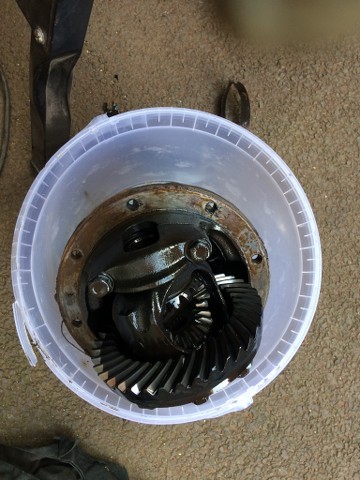
As well as generally breaking stuff, and removing crud on Sunday, I also made a start on sorting out the diff and it's various leaks.
First out came my as yet unused puller, which made short work of the prop shaft flange that had proved so stubborn, followed by the yoke itself to allow easier access to the leaking seal.
I am assuming that the seal is just supposed to pull out?
I didn't try and remove the seal as I want to make sure I understand how it's supposed to come out before I break anything else!
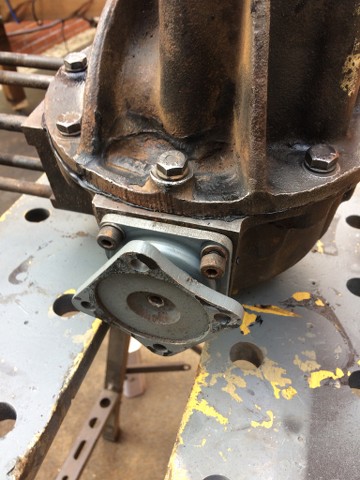
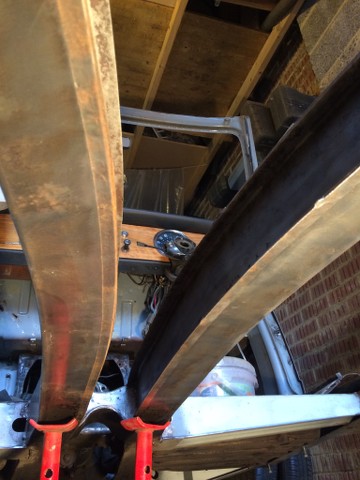
So I then turned my attention to the two drive flanges as while neither of these currently appear to be leaking, Sod's Law dictates that if I don't replace them now, they will start after the car is fully back together again!
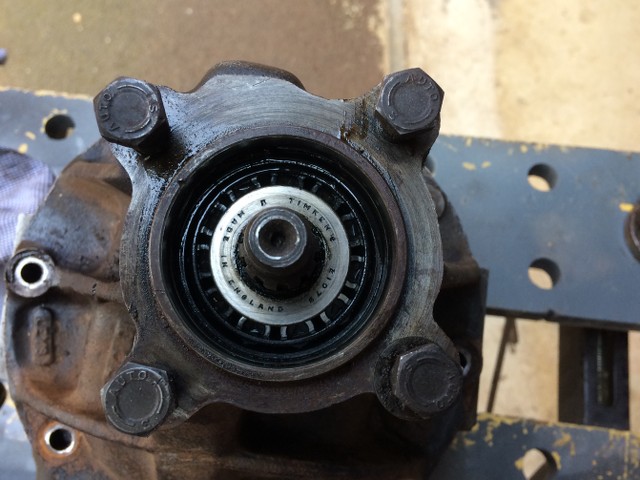
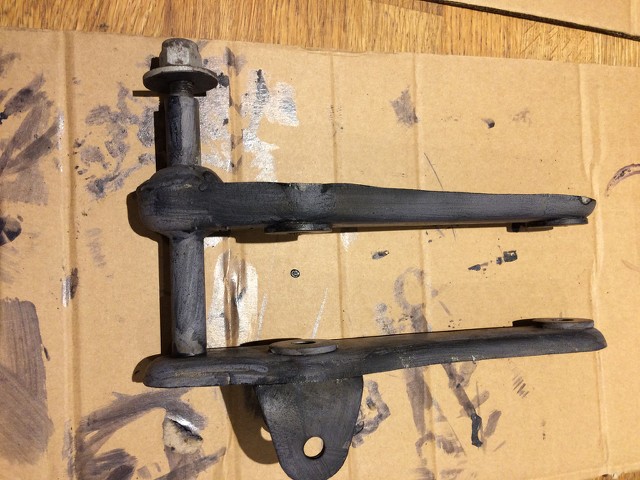
All of the Allen bolts came out without too much of a fight, but neither drive shaft is willing to just slide out as the WSM suggests.
As can be seen from the picture above, they turn, they even come out about 4mm, but they do not disengage. What am I missing?
And finally a bit more cleaning, this time the yoke, which still had patches of under seal and rust on it.
Note how 3 of the washers have remained firmly attached, whilst the fourth simply fell off!

There are still a few stupporn areas of under seal to come off, but I'll do that next weekend.
Karl
-
As expected I didn't manage to get anything done last week due to going to the NEC on Sunday for the Practical Classics show, and given that today was Mother's Day, I wasn't expecting to get much done this weekend either.
I did have Friday off as it was my birthday, no point working your birthday, but spent most of it lazing around eating and drinking as one should on one's birthday. However I did get a workshop vacuum for my birthday, so first order of business was to give the garage a hoover up after all the unrestricted media blasting over the last few months.
But Karl, you are just going to make a mess again when you do the next lot of blasting?
Not so, I ordered myself a blast cabinet, one of the reasons for asking for the workshop vacuum, which should turn up next weekend.
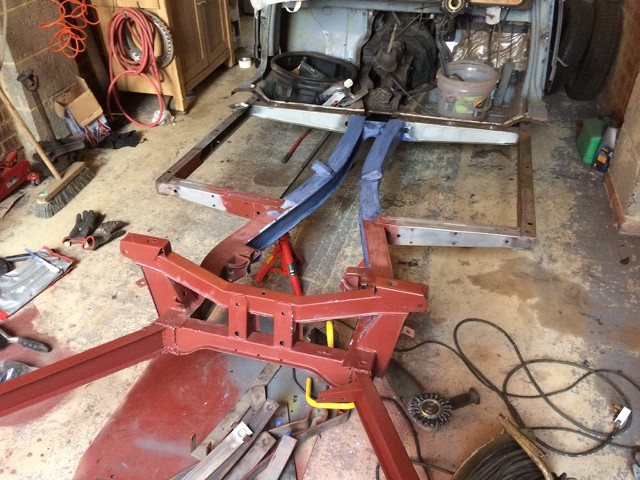
Well that was the hour and a half I got in the garage yesterday, and I wasn't expecting any time today, however Mrs B was busy sewing, so I pootled off to the garage for a couple of hours.
First order of business was to continue to clean up the main chassis rails in preparation for paint, using the angle grinder and a fresh wire wheel as the old one was flinging wires at me!
5 minutes in I watched in horror as the power lead for the angle grinder got caught in the rapidly spinning wire wheel!!!
You've never seen me react so fast as I tried to switch off the grinder while trying to stop the cable snagging and potentially electrocuting me!
I then spent the next 30 minutes, firstly calming down, then swapping the power lead off the heat gun to the grinder.
HSSE lesson well and truly learnt when it comes to power tools and electric cables!
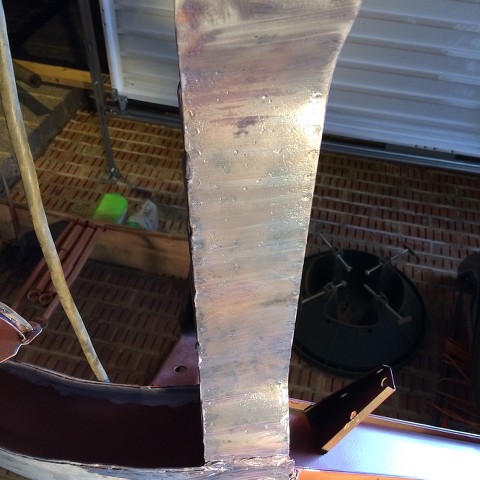
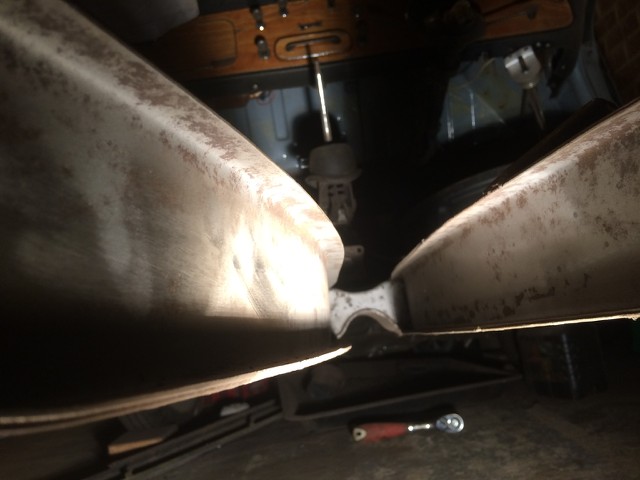
Anyway, I stripped the main chassis rails back to bare metal, as per the pics below:

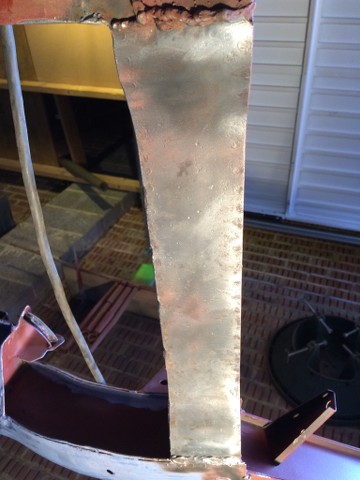
Then gave everything a wipe down with white spirit to remove any traces of underseal, which the grinder would have liquidised.
Then it was out with the FE123 to neutralise any rust.
I also attacked the insides of the top hat sections over the rear diff mount with the FE123, which means that the rear of the chassis is now ready for a coat of epoxy mastic, hopefully next week.
With the blast cabinet arriving next week, I should be able to make good headway on cleaning up the smaller components and prepping for paint.
Karl
-
1
-
-
That’s a very old kit, along with most of the Airfix vehicle kits.
I’ve got a half finished DB6 sitting under my desk that I got for Xmas a few years back from the outlaws.
Karl
-
Rust Busters epoxy mastic.
https://www.rust.co.uk/product/cat/em-121-epoxy-rust-proofing-chassis-paint-7
They were at the NEC last year.
Good stuff, but if your spraying you need a gun with 1.4mm nozzle or greater as this stuff is thick.
Karl
-
After a somewhat lengthier break than anticipated, due to picking up a stinking cold from my daughter, which wiped out the two days off that I had booked, as well as last weekend, I finally managed to get back in the garage today.
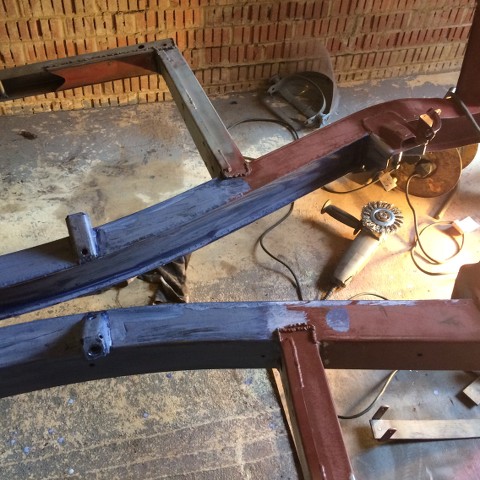
Nothing for it but to crack on with cleaning up the chassis ready for painting, which meant girding loins and tackling the underseal on the inner faces of the main chassis rails.
This is after a bit of initial clean up with the hot air gun and scraper.
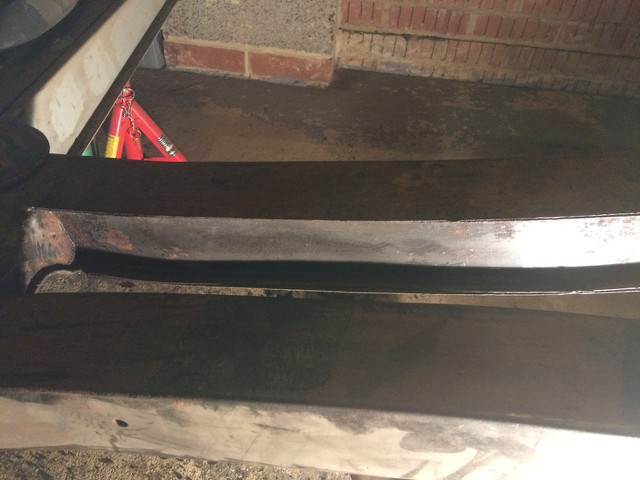
This was then attacked with brush cleaner and rags to remove the remaining layer of underseal which the hot air gun struggles to remove, leaving me with just the most stubborn elements, time for the flap wheel in a drill, followed by media blasting.
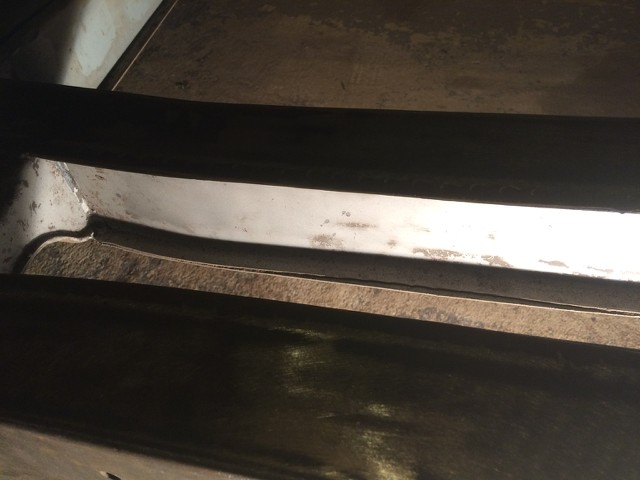
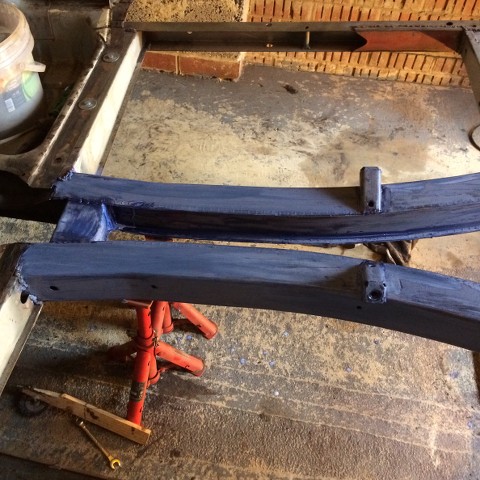
Much better, and the other side looks the same as well, but as the view below shows there's still work to do.
The rust on the top lip of the chassis rail is surface only, and due to the under seal trapping moisture against the original chassis paint.
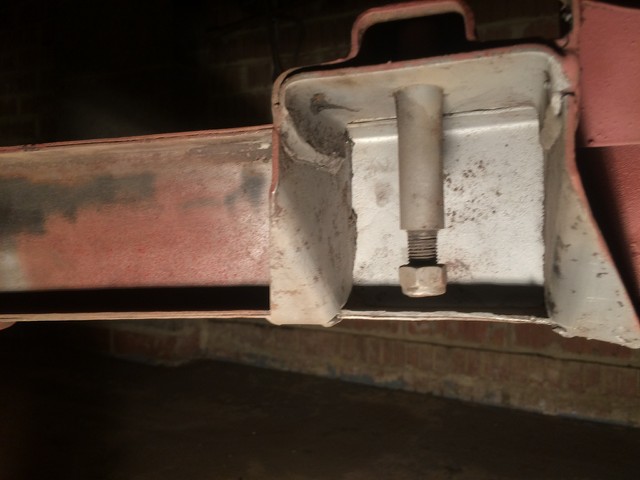
I also tackled the driver's side front diff mount, which just needs a few blobs of old underseal removed, and a coat of rust stopper, which the rest of the chassis will also receive.

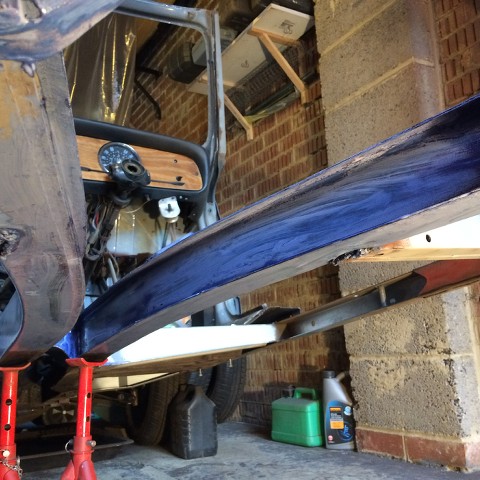
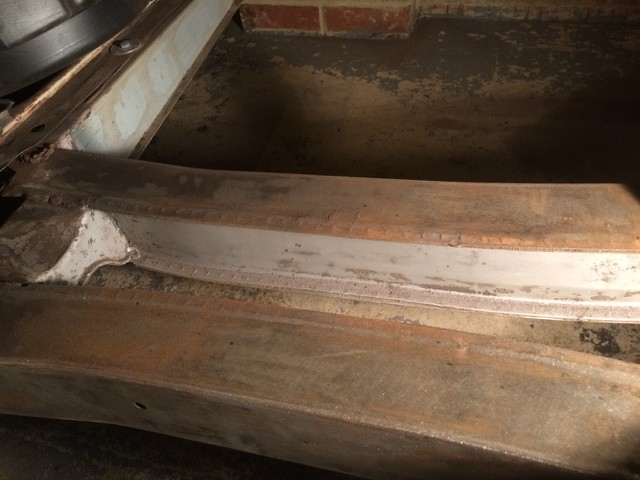
I won't bother media blasting the exterior of the chassis rails, but due to the need for the epoxy mastic to have a good key on the base metal, I have started giving the chasis rails a going over with my DA sander with a 60 grit disk, which should provide sufficient key for the paint.
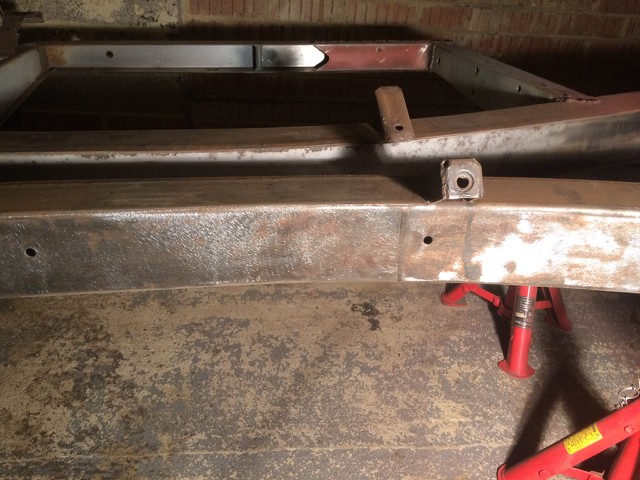
You can see the keying in the shot above, which should mean that the epoxy mastic stays adhered to the base metal for many years to come.
Not sure if I'll get any time next weekend as off to the NEC for the Practical Classics show, the aim is to get the rear half of the chassis ready for paint by Easter.
Karl
-
1
-
-
If you need spring compressors, I have a set from the club that you can borrow.
Karl
-
With regard the bushes that makes the biggest difference, I would have thought the following:
Front
- Wishbone bushes
- Top and bottom shock mounting bushes
- Anti -roll bar mounts
Rear
- Top and bottom shock mounting bushes
- Spring eye bushes
- Track rod bushes
Diff mounting bushes would be good, but are a pain if you aren’t dropping the entire diff.
As for the rain gutters, as per Paul’s comment, spot weld drill, or grind the spot welds down until the old gutters fall off.
If they are anything like mine, you will be looking at welding the frame itself where Triumph created that wonderful moisture trap!
Karl
-
On 13/03/2019 at 13:56, Paul H said:
Canleys reccomend polybush everything except trunnions which is what im doing on my Vitesse mk2.
Paul
.
That’s the route I’m going given the quality of modern rubber replacements, as I don’t want to doing it all over again in two years.
Karl
-
If it’s just those two elements I would be inclined to get someone else to do the welding as it will probably be cheaper and less frustrating.
Now if you have chassis like my Herald’s then doing it yourself makes sense, but given that the bulk of yours is solid, let someone else take the strain.
Karl
-
As I have learnt, even if you take the diff off the car, remove the filler plug, and invert it, no all the oil comes out!
Triump appear to have used a steel which absorbs oil and refuses to relinquish its grip on it!
Karl
-
Sounds like what I have on the bonnet of my ‘68 1200.
Karl
-
A mate of mine at uni did this on his 13/60 and the doors used to regularly fly open on roundabouts!
Therefore I would definitely suggest using additional convertible catches, and some sort of bar assembly to tie the b posts together.
Karl

** 26/02/23 Heading Up ** Probably how not to restore a Herald!
in My Triumph Restoration Project
Posted
Starting to feel like I’ve taken up residence there!
Karl