

Bordfunker
-
Posts
1,005 -
Joined
-
Last visited
-
Days Won
17
Content Type
Profiles
Forums
Blogs
Gallery
Downloads
Store
Events
Posts posted by Bordfunker
-
-
It lives!
I’ve managed to get the Herald started!
I gave the fuel pump a helping hand and sucked the fuel up from the tank to the pump, and then having reinserted the fuel line into the pump, primed the pump until fuel appeared in the fuel filter.
With that a quick turn of the ignition key, 5 seconds of churning and the Herald burst into life again, for the first time in almost 7 months.
It did also spring a fuel leak on the engine side of the pump where the fuel line runs behind the radiator, so I’m now in the market for a length of new fuel hose.
But a happy bunny as at least the beast is now alive.
Karl
-
 1
1
-
-
Colin, it’s lovely to see all these beautifully restored cars with every panel and weld factory spec, but unless you are infinitely skilled and/or fabulously wealthy, and have unlimited amounts of time on your hands you have to be pragmatic about what you can reasonably achieve.
I’ve just put the fuel pump back in, but still no joy, so some more investigation is required.
It may be an air leak in the fuel line, or the pump not working as it should due to my dodgy reassembly.
Karl
-
 1
1
-
-
Pete, thanks for confirming that.
Looks like whoever fitted this one omitted the paper gasket.
Might try and get that back on this evening if I can.
Karl
-
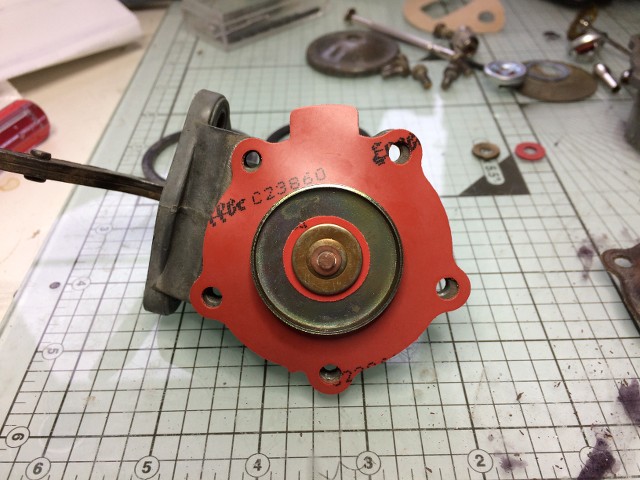
Pete, this is what I currently have fitted.
Karl
-
Pete, that’s what I figured, so they can stay put.
One thing that I did notice is that the pump didn’t have a paper sealing gasket between the pump itself and the block.
Is there supposed to be one?
Karl
-
Badwolf, I need to test the horn, as I haven't got around to that yet on mine.
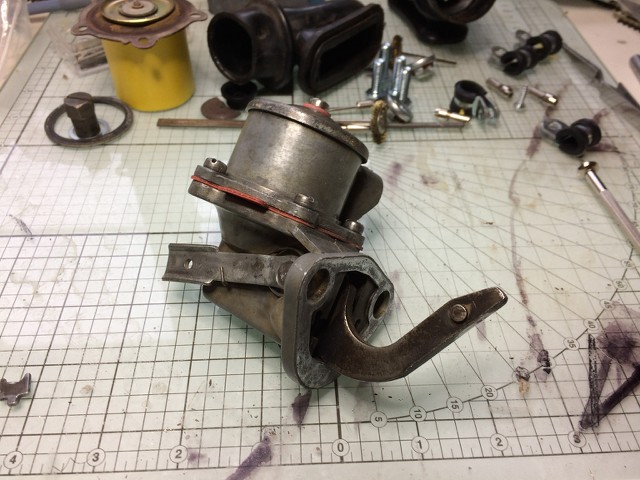
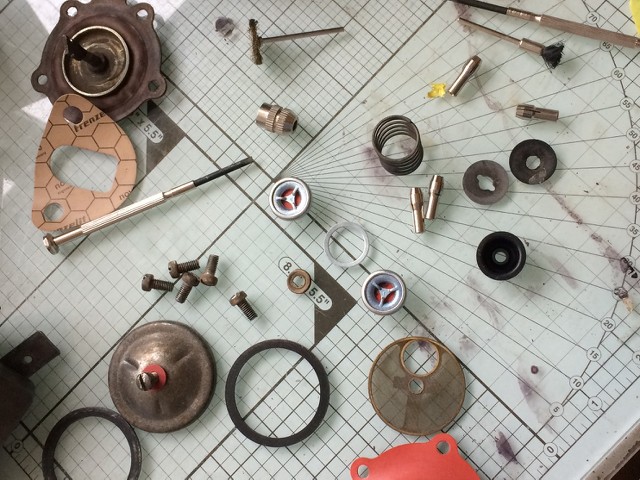
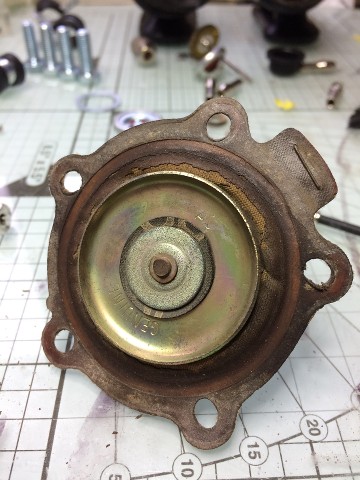
I have managed to spend a bit of time cleaning up the fuel pump and fitting the various components in the rebuild kit.
Here's the old and new diaphragms side by side.
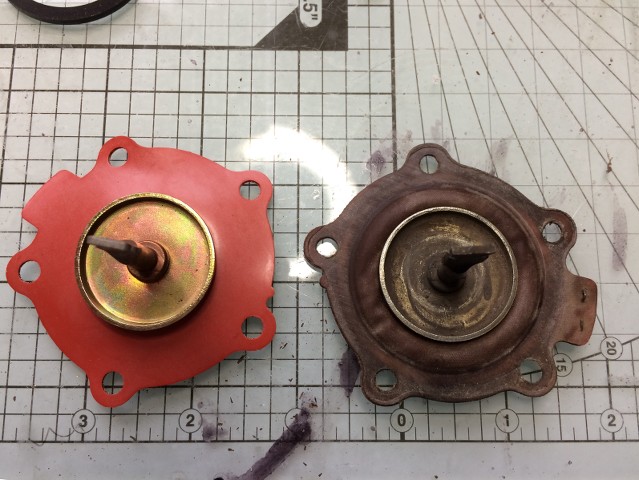
And here's the top of the old one, showing how perished it is.
Might explain the lack of suction!
These are the sealing rings that sit beneath the top cover.
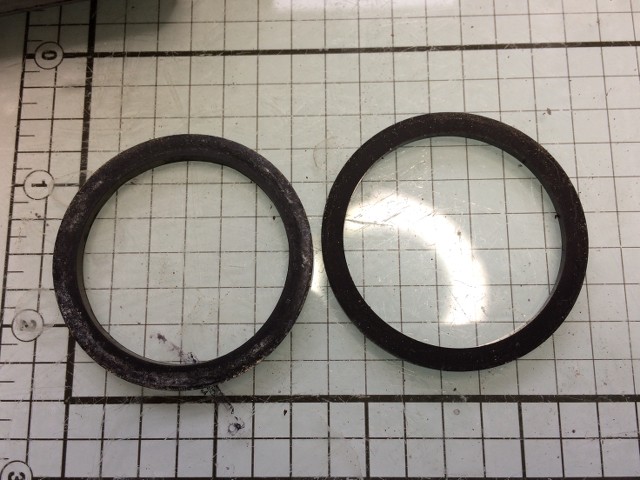
The old one on the left is very stiff, and probably wasn't sealing too well either.
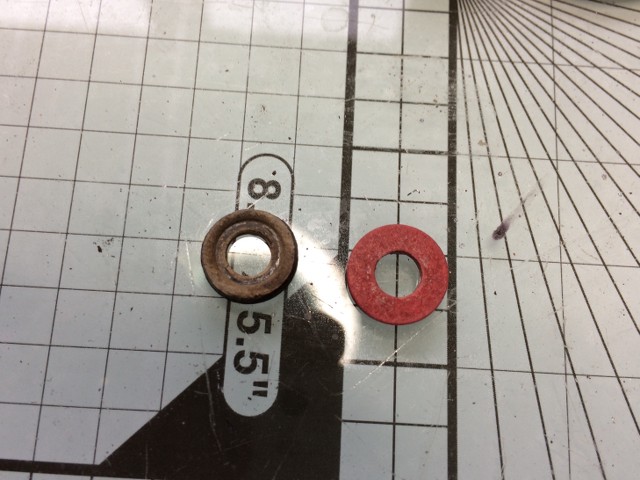
It's a similar story with the sealing washer on top of the pump unit.
Here's the shiny new diaphragm in place.
The pump itself has had a thorough clean up with a rotating brass brush in a Dremel.
The rebuild kit came with a two new valves, but I can't see a way of removing the current valves without damaging them, and given the fact that they both work, I am inclined to leave well alone.
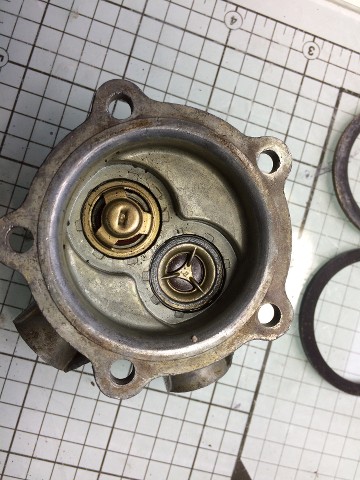
This just leaves me with the task of refitting the pump, after which, hopefully the Herald will start.
Karl
-
Used would probably be cheaper than buying new.
Try Quiller for a second hand tank, see link below.
http://www.quillertriumph.co.uk/Quiller/Parts/partsused/partsused.htm
As for getting the tank back in I found it was a case of levering some of the mounting brackets about a little bit, particularly the boot stay one, and then the tank went back in without a fight.
Karl
-
The doc reckoned I’ve had a strep infection in my throat for the last month, which has now turned into tonsillitis!
I haven’t been ill like this for a decade, so blaming number 2 son for spreading his freshers germs from university.
Karl
-
No progress this week as I've come down with a case of tonsillitis!
I did however manage to remove the fuel pump and start the strip down process before succumbing to the lurg!
Here's the crud I removed from the fuel pump bowl.
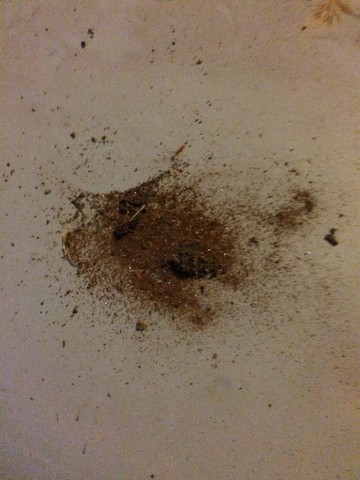
I checked the valves and they look to be working OK, however the two large sealing washers are very hard, so I've ordered a rebuild kit, as I doubt anyone has had this pump apart in the last 49 years.
Karl
-
I’ve got one snail type horn and a flat Hella one that is clearly a replacement.
The Hella one is dead as one of the contact spades has snapped off, but the other one should be working as it was when it came off the car.
I think the problem is possibly earth related, as the wiring under the dash needs sorting out, and I have had similar issues with the earth for the wipers which is now fixed.
Just need to gird my loins and spend an hour on my back with my head under the dash while I sort out the wiring.
Karl
-
Pete, I think you might have something there as I took the top off the pump and extracted the diaphragm, no holes, but it does feel very crispy if you know what I mean.
I’ll remove the rest of the pump this evening and order a rebuild kit to be on the safe side.
Karl
-
No progress pics this week as it was too cold and too dark in the garage to work the I-phone camera, though lots of progress.
The front valance is now firmly attached with two new brackets made up from mild steel, painted and fitted at either end of the bumper bar, replacing the two previous brackets which had been secured with fibre glass resin!
The fuel tank and line are now back in, but it now looks like the pump itself has failed, so I can feel a pump rebuild coming on.
So no engine start up this weekend.
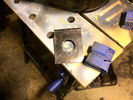
I also managed to get one of the captive seat mount bolts replaced as the previous one was no longer captive, and the hole in the floor which it sits in had become enlarged, requiring much furttling under the car to get it to fit, along with a couple of hefty thumps from the lump hammer.
Just to make sure I then added a couple of weld beads either side of the new bolt to stop it moving in future.
Not the most exciting progress, but a few more steps closer to a working Herald.
Karl
-
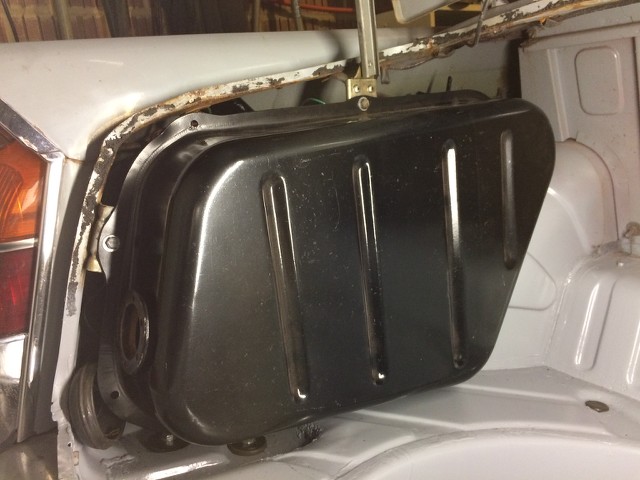
The tank is now in, including the additional piece and the rubber donut, all without putting up much of a fight at all.
The additional plate does close off the hole in the boot floor a bit more, so I can only surmise that this solution is to allow wiggle room on the production line given the high tolerances so which all Triumphs were no doubt built.
After all that, it looks like the pump has failed, as I can blow into the tank, the pumps failing to draw any fuel, so I’m guessing a failed diaphragm.
Karl
-
I’d be inclined to remove the panel at the front, preferably by drilling out the spotwelds and popping it off as a complete panel, which you can then repair and then plug weld back on.
This then allows you access to the back panel to remove all the rust and weld in fresh metal, confident that there is nothing lurking.
Well worth reading this guy’s experiences with similar repairs on his Renaults, very instructive.
http://www.renault4.co.uk/gordini-inner-wing.htm
Karl
-
Colin why didn’t they just make the drain hole smaller to stop water ingress in the first place, or put a rubber grommet around it?
The sponge seal that I took out was solid as a rock and most certainly not have absorbed any shocks, just transmitted them straight to the underside of the tank!
And we all know that condensation doesn’t settle around the drain, but around the rear chassis mounting bolts as I have discovered!
Karl
-
Thanks Darren, thanks Pete.
I’m going to need to take the tank out again and fit the seal and the plate in the correct order.
At least I now know how it is supposed to fit.
Thanks again.
Karl
-
Thanks Pete!
Just need to sort out the driver’s seat, which Mrs B is currently working on, fabricate some brackets for the front valance, and get the horn to work.
Karl
-
Pete, thanks for that.
Can I ask what the orientation of the L bracket is?
Is it with the arm of the L facing down so that the back,of the L is roughly parallel with the road?
Struggling to see how it is supposed to seal the boot.
Karl
-
Pete, have you thought about making a frame on wheels that can be slid over the chassis, that the body tub can be mounted on?
This is the approach I am thinking of taking, as and when the time comes to sort out the rust on the chassis and the underside of the tub, as it would allow access to both chassis and tub, all within a single garage.
With regards the valances and rubber bumpers, I may well lose the rubber and just go with the painted valances a la the original Herald 948.
I managed an hour and a half on the car this afternoon, slackening off all the valance bolts and getting everything properly aligned, which has made me a much happier bunny.
With that out of the way, I had a go at putting the petrol tank back in, and amazingly it went in without much of a fight!
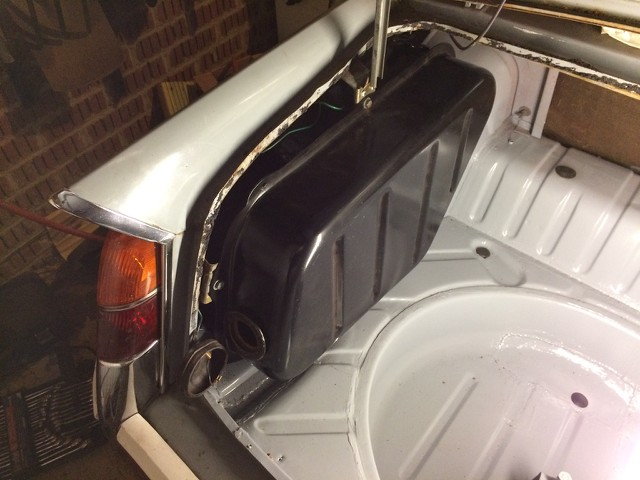
I still need to fit the fuel tank sender unit, for which I have a lovely new cork gasket and some sealant, and I do have a question about one of the tank components which is baffling me.
Oh , and I forgot to fit the filler neck seal, so not sure if the tank will have to come out to refit that, or can attempt it from outside the car.
The other thing I need to do is scrape all of the old boot seal, which I'm really looking forward to.
Other than that, I am now well on my way to having a functioning car, and will hopefully have the fuel line back in next week, and the engine up and running again, which will be a major milestone.
Karl
-
I’ve just put the fuel tank back in, but I’m really not sure this part is supposed to fit.
It’s an L shaped piece about 4 inches long, that’s 10cm for those of you watching from Europe, with a hole for the tank drain.
It sits over the fuel tank drain spout, but how it fits with relation to the boot floor and the sealing bung I can neither fathom nor remember.
The WSM doesn’t mention it, and no drawings I have seen show it.
How is it supposed to fit?
Thanks in advance.
Karl
-
I did actually feel well enough yesterday to get some more done on the Herald, which is starting to make it look like a viable car again.
First up were the rear tub mounting bolts, which received new rubber mounts and a re-spray of the original thick mounting washers.
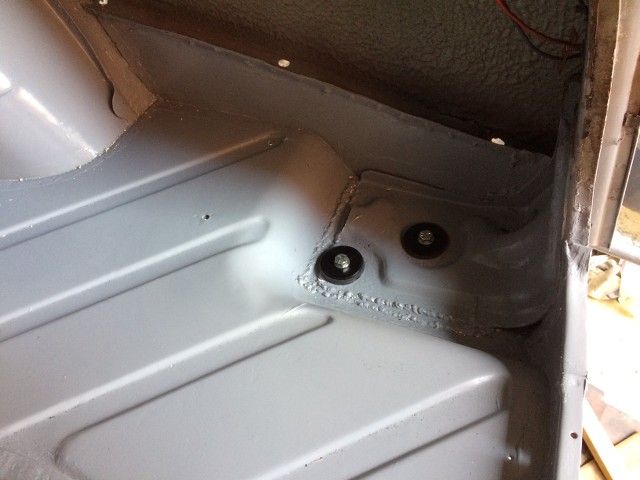
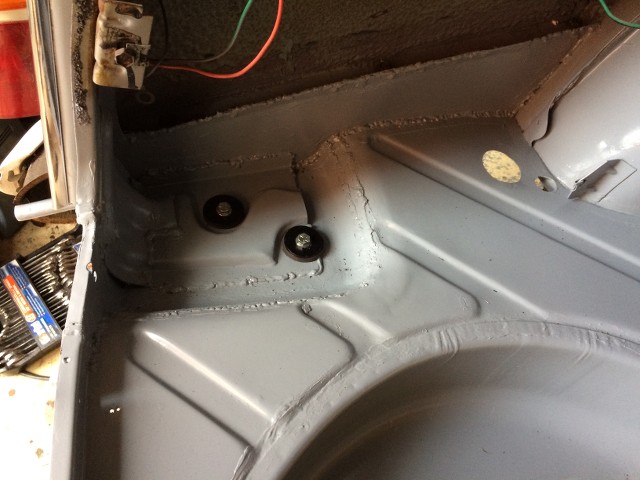
That firmed the backend up nicely, and allowed me to fit the passenger side valance.
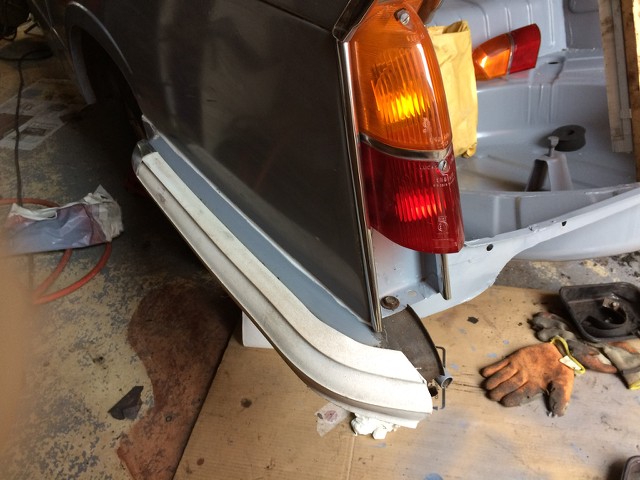
I was probably a bit premature in tightening this one up and applying the sealant, as there is further adjustment required to get all of the valancing to fit properly.
The centre and driver's side valances are in a very poor state, rotting through from the rear of the portions where the rubber bumper strips mount.
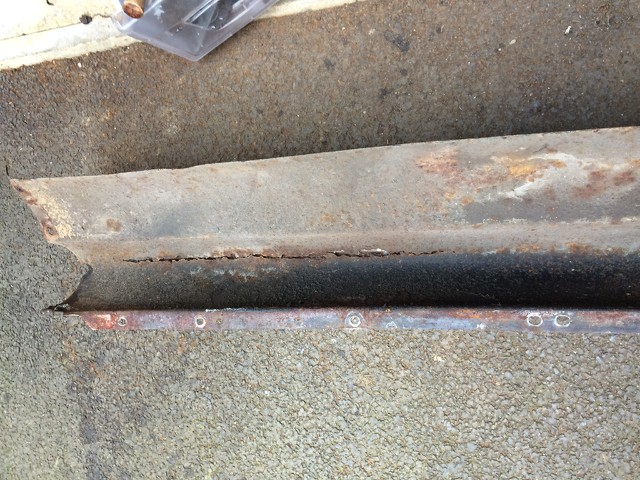
This is the state of the centre valance. It will do for now, but in the new year when the weather warms up I'll fork out for replacements, that I can then spray up and fit.
This is the top of the driver's side valance!

This why I'll need to fettle the fit, as I've managed to get bolts lined up on the boot edge and valances, but not on the mounting points under the lights.

I know no one will ever see, and they will all get replaced in 5 months, but it bugs me!
Here it is with everything fitted, but in need of further adjustment.
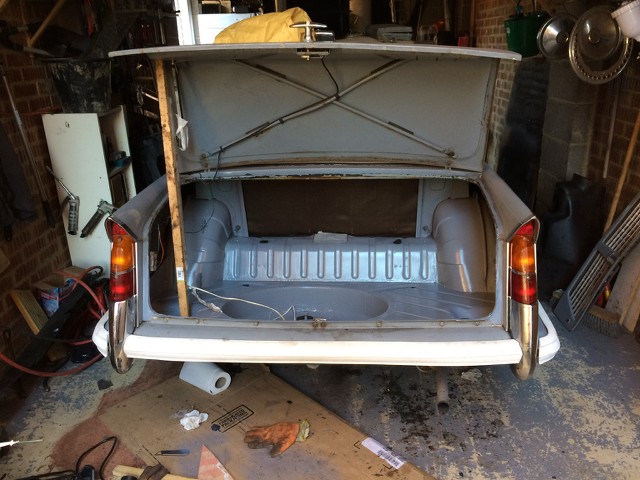
See what I mean about starting to look like a car again?
As you can see, I need to have a tidy up!
Karl
-
Pete, hope you are feeling better soon, like your idea of lifting the chassis for better access.
At the moment mine just about qualifies as a ‘rolling rest’, but given that I haven’t driven it in almost 6 months it doesn’t feel like one.
Given that mine needs an MoT before it can return to the road in earnest, and given that the under seal is peeling off the chassis and underside of the tub, I can see a point where I may need to separate tub and chassis, just so that I can deal with the de-rust and repaint properly, so may well make use of your approach.
Doug, I know what you mean about the mess in my garage! I do usually try and tidy up, if only to prevent trip hazards, but not feeling great the last couple of weeks, and having to ferry kids around has left me with little time, and even less inclination.
Once I’ve got the Herald running again, I’ll have a thorough tidy up as there is loads of stuff that I don’t need any more.
I know what you mean about neat freaks, it’s just not natural!
Karl
-
Thanks guys.
It would make sense that it had been used as a seatbelt anchor point, as I’m sure this had been hiding in the driver’s side sill, stuck on the sill edge, and only became dislodged with furttling under the car.
I’ll check the seat belt mounting point as I did replace the driver’s side inertia reel belt with one of the original fixed belts that came with the car, as the inertia one didn’t retract reliably!
I’m thinking the plate probably came off when the inertia belts were fitted.
Thanks again
Karl
-
I took the driver’s seat out of my Herald the other week so that Mrs B can sort out the split stitching in the seat base.
However having removed the seat mounting I found this under the car.
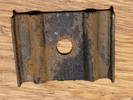
Now I know it’s a body mounting plate, but having checked all the body mounting points all bolts and plates are present and correct, so I am a little bemused as to where this may have come from.
Am I missing something here? Is there another place that these are used?
Karl


** 26/02/23 Heading Up ** Probably how not to restore a Herald!
in My Triumph Restoration Project
Posted
Ooh err missus!
I can just imagine the comments from Mrs B when I disappear into the garage with a tub of Vaseline and a length of rubber hose!
I'll have to give that a go as getting the new sections of rubber hose on the fuel lines underneath the car was a major pain.
Slivers shouldn’t be a major issue due to the inline fuel filter ahead of the carb.
Pete, it’s a Herald 1200, therefore not sure heat is going to be an issue!
Karl