

Bordfunker
-
Posts
1,005 -
Joined
-
Last visited
-
Days Won
17
Content Type
Profiles
Forums
Blogs
Gallery
Downloads
Store
Events
Posts posted by Bordfunker
-
-
1 hour ago, Paul H said:
Hi Karl yes thats the one. Puts a nice finish to the job. Looks like you had instructions how to fit which is more than i did
Paul
Before spending my weekends swearing at ageing Triumphs I was a model maker, and whenever using water slide decals, the process was always apply the decal to a gloss finish, remove all the bubbles, and then when dry apply a gloss coat to protect and blend the decal.
Good to see the 1:1 process is the same!
Karl
-
Paul, I got mine from Paddocks, and it's sitting in the study ready to go when the tank is back in.
I am assuming that it is a water slide transfer, and therefore will need a coat of clear gloss to protect it?
Karl
-
Mrs B is not a fan of the heat, and therefore decided that she would much rather stay indoors today, with the benefit of a fan to keep her Hibernian/Gaelic self nice and cool, leaving me free to go revel in the sun as any good Anglo-Saxon should!
Cue 5 hours of working on the Herald.
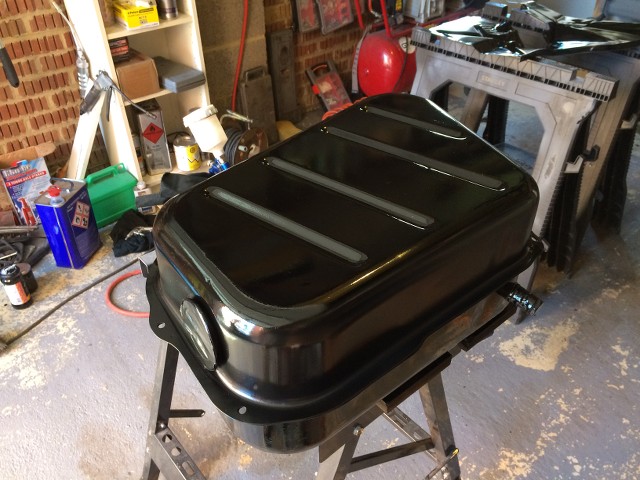
First up was finishing the painting of the fuel tank, and actually getting a top coat on the engine bay valance, which meant pushing the car out onto the drive so that I could set up for spraying in the garage.
It didn't take long to get to this stage, both looking so much better.
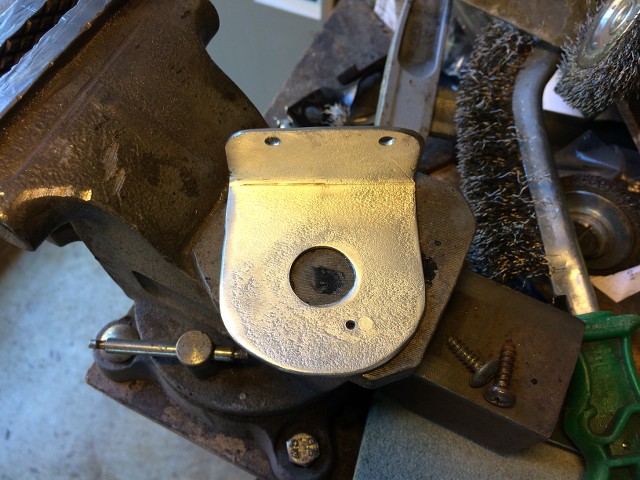
While that lot was drying, I turned my attention to the mount for the washer jet pump.
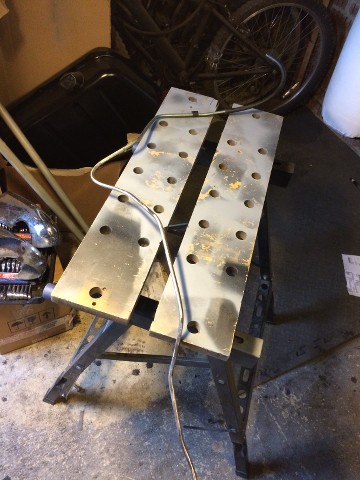
When I bought the car, it came with a boot full of odds and sods, including a rather home made auxiliary instrument panel.
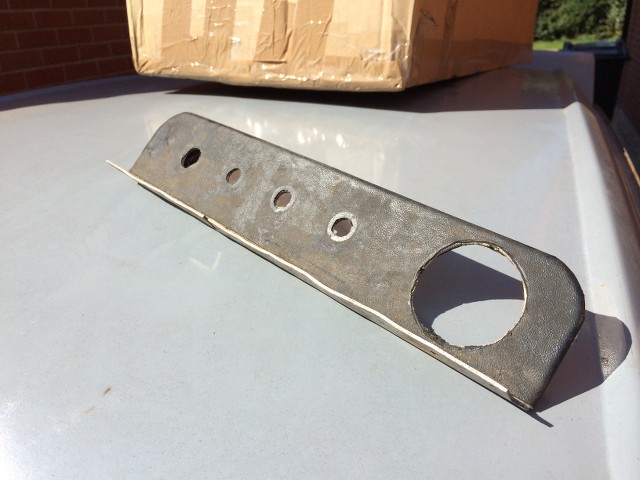
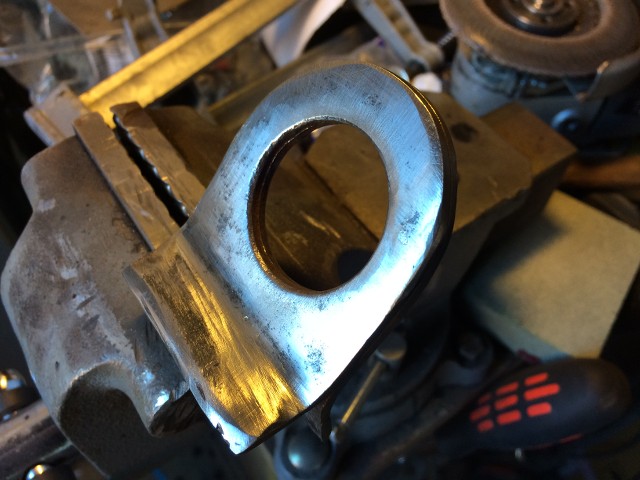
The hole on the left is a perfect fit for the manual washer pump, but I obviously didn't want the rest of the panel, so set about it with an angle grinder and cutting disc.
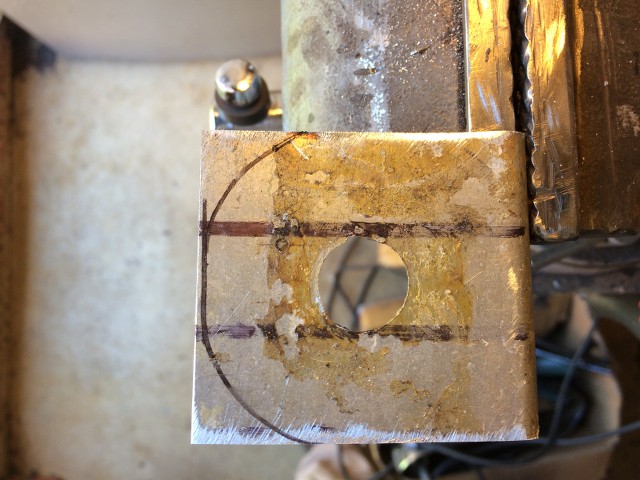
Here it is in the vice, marked up for cutting and shaping. Note the remains of the glue that had held the lovely vinyl to the alloy.
And here it is 20 minutes later, shaped into a more pleasing curve, without nasty sharp edges to catch my knees on.
Don't ask me what the little hole is for as it was just there on the original piece of alloy, and really isn't very noticeable when the panel is installed.
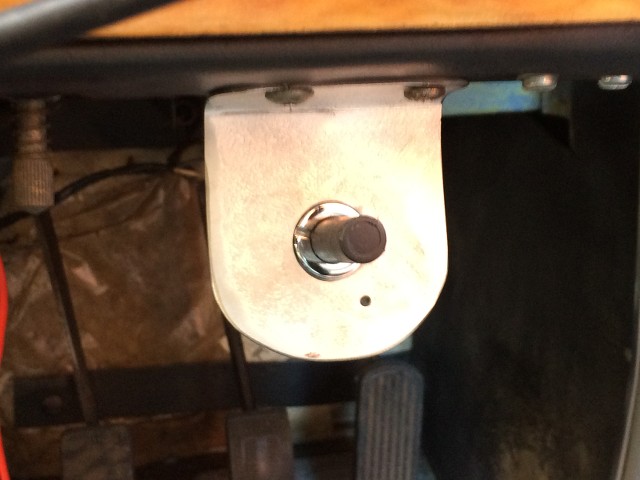
The washer jets don't actually work, mainly I think because the washer bottle is missing a non-return valve, but that's a problem for another day.
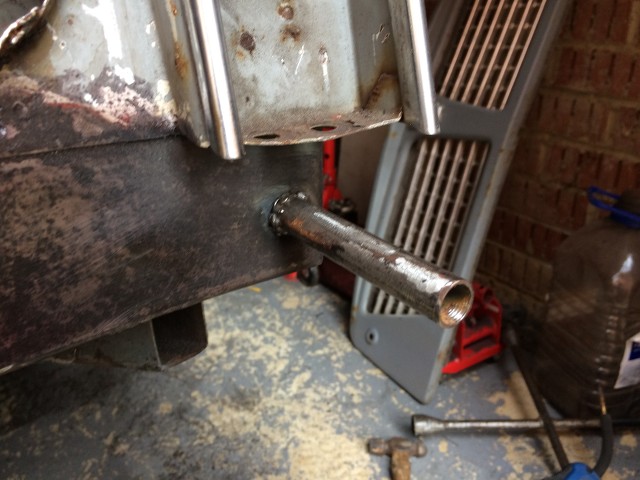
After that I finally decided to get around to welding on the towing eye.
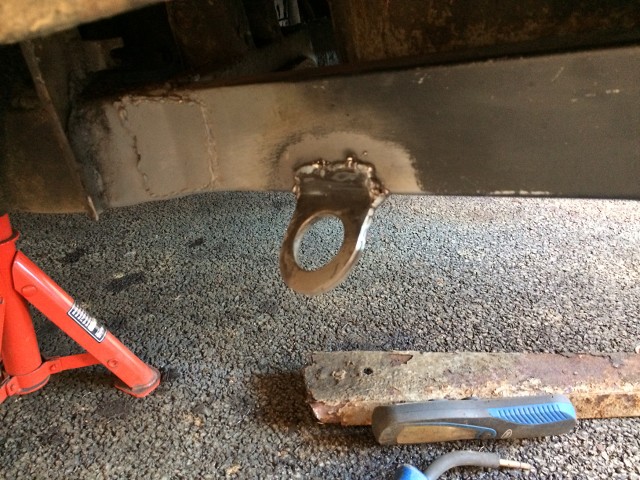
Note to self, weld the eye on the outrigger before you attach it to the car, as welding it after is a pain in the arse, literally, lying on you back trying not to bash your head on the chassis.
Well there was no putting it off, I needed to address this.
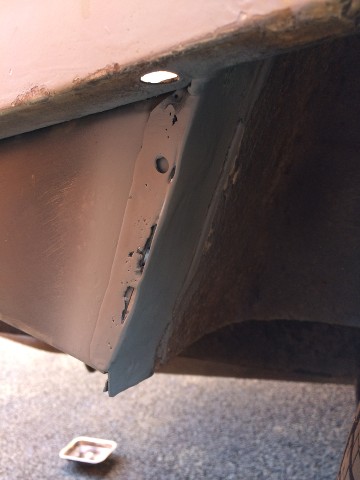
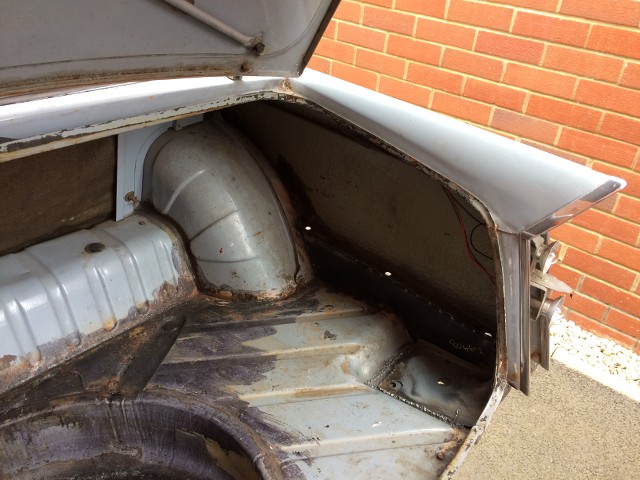
This is the driver's side flange where the lower boot panel attached to the rear of the wheel arch. Obviously my attentions to the original flange have left it somewhat lacking in substance, so I decided to make up a new flange and weld that to the rear of the wheel arch, after having first ground down the old flange.
All of the metal here is relatively thin, and therefore requires care, particularly with my welding skills, which means lots of little tack welds to join the new metal to the old.
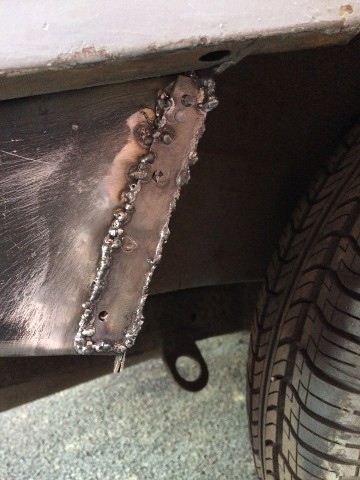
I still need to finish off the welding, after which it will all get ground down so that it looks nice and tidy.
And finally a shot of the Herald looking somewhat forlorn and lopsided in the evening, ahead of going back into the garage.
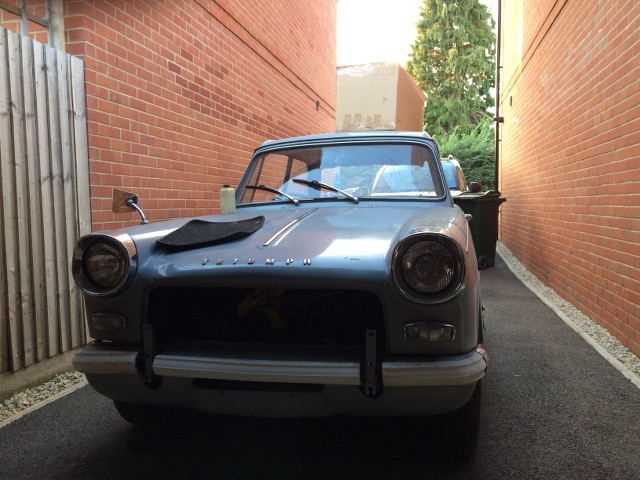
Do you like my Fule roof box? It's a Triumph original.
Karl
-
The captive nut approach makes sense as it allows a range of adjustment, and actually works quite well on the top bolt where the cage is out of the way of the elements.
However, given that the bottom of the overider behaves rather like a scoop channelling road muck and spray straight up onto the captive nut, makes this a much less than ideal solution in that location.
I bet most Triumph dealers simply cut the offending overider off, and charged for a new one, therefore not only a minor problem, but an opportunity to make a bit more profit from their perspective!
Karl
-
Pete, I did give Fitchetts a call, but they didn't have any repair sections available.
Karl
-
I only got a couple of hours in this afternoon, and therefore progress wasn't stellar, however I started off with the towing eye that I needed to remove from the old boot outrigger and clean up prior to welding it to the new outrigger.
Here it is part removed from the old chassis piece, and looking pretty scabby.
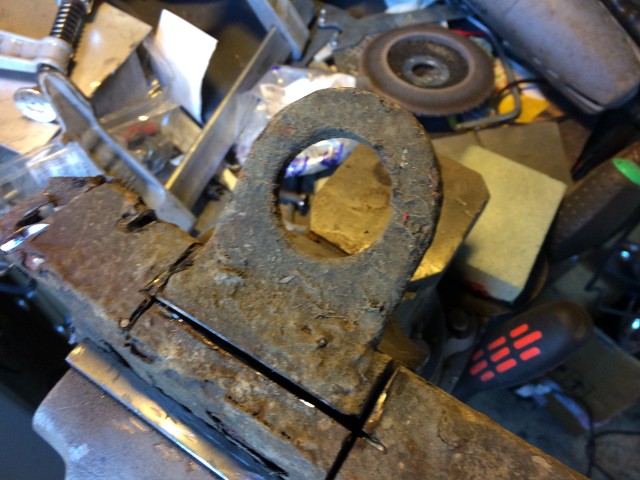
I had to grind the remains of the old outrigger off the inner faces of the towing eye, which heated the old under seal up a treat so that I could easily scrape it off with a chisel, as I didn't want that gumming up the flap disc on the angle grinder.
20 minutes with the angry grinder left me with this.
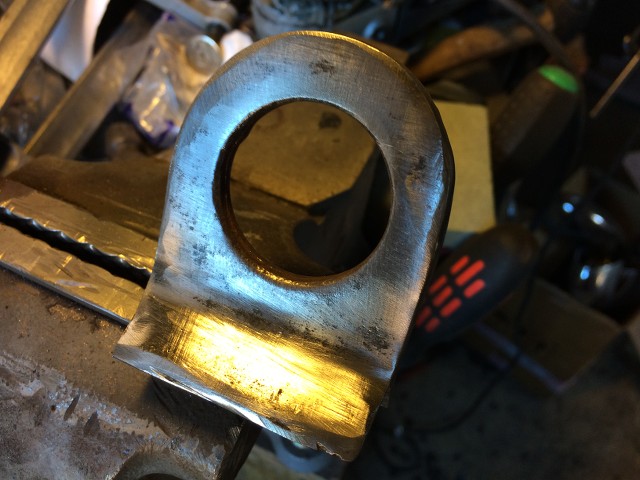
A significant improvement, which was rapidly followed up with a coat of Kurust, working it into the seams to hopefully prevent rust breaking through in future.
With that being left to dry, it was time to turn my attention to another job I keep forgetting, welding the retaining nut into the driver's side overider, having first spent half an hour cleaning up all the loose rust with a selection of wire brushes.
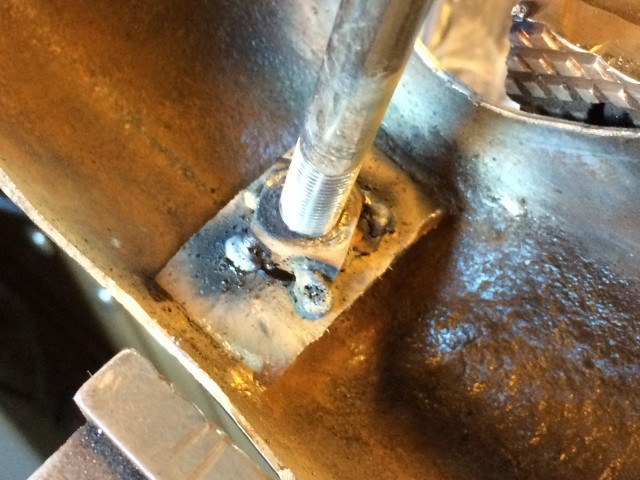
This was it just after welding, and before cleaning up of the weld spatter and scorching with a wire brush.
The interior of the overider needs a coat of Kurust, which it has just received, and then I'll etch prime it tomorrow, before applying a coat of aluminium silver , after which it will be good to go back on when the boot area has been re-sprayed.
Other than that I tidied up the welds around the new spare wheel well, plugging any pin holes, and discovering a few new ones.
They will need a couple of small patch panels made up, but which shouldn't take long to make and fit tomorrow.
I still haven't mowed the lawn....
-
Colin, I've always had a good experience with Chic Doig, I think this part was just a case of the part being in worse condition than expected.
I'll give them a call on Tuesday and send it back.
Karl
-
Must admit I quite like the new set up, clearer and easier to update/navigate.
I noticed an issue last night where when I attempt to paste a link from Imageshack into a post on my iOS device it translates all the back slashes in % signs, and removes the [ ] brackets.
All works perfectly on my Windows 7 laptop.
With regards notification, unfortunately I am guessing this is a SaaS offering and therefore you have no say in what gets updated when.
Just think what that means when you have 70,000+ employees across the globe running business critical systems rather than just a forum which is free.
Karl
-
The second hand section from Chic Doig turned up yesterday, but was in only marginally better shape than mine, therefore I ended up making my own repair panel out of 1mm sheet steel.
Not as pretty as Darren's work, but it should do.
Needless to say the second hand section will be going back next week.
Karl
-
Last week I was left with the issue of the holey spare wheel well, which I finally decided to tackle by purchasing a good half spare wheel well from Chic Doig.
The second hand half panel arrived yesterday, but this afternoon was my first chance to have a good look at it.
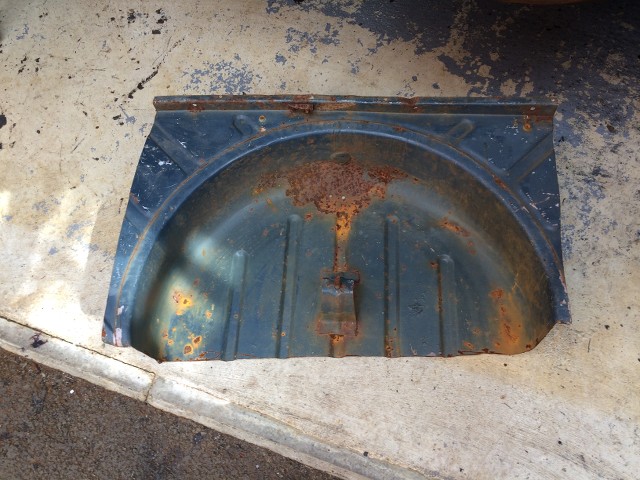
A bit scabbier than I was expecting, and a closer inspection revealed some holes in the front of the well, just the bit I was looking to cut out as a repair panel.
You can see them here as a couple of points of light from the torch behind.
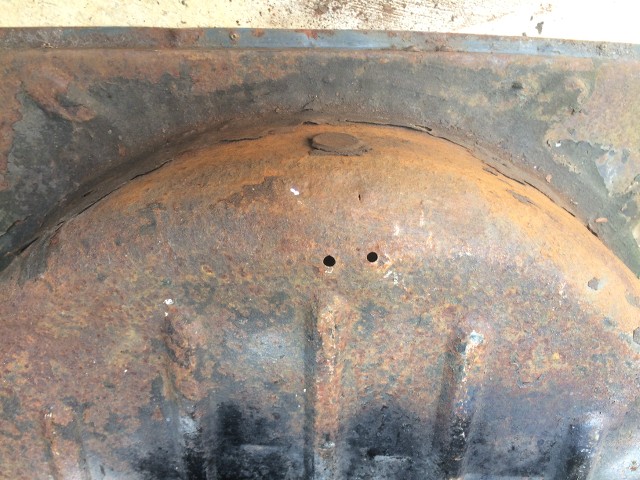
That's never going to do, so back to plan A, make my own repair panel from sheet steel.
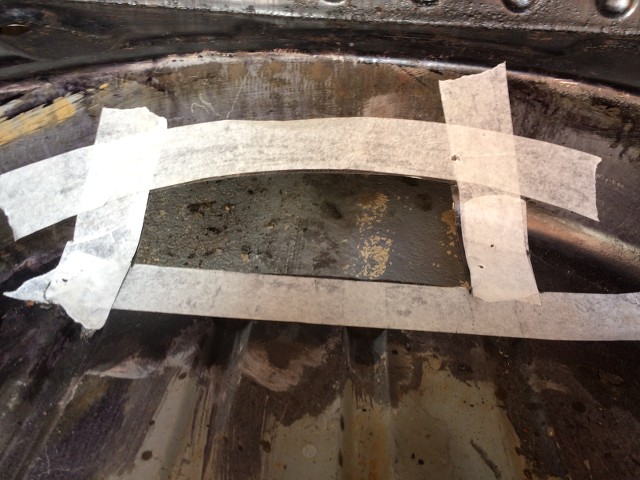
First up I marked out the area to be removed with tape, and then set to with the angle grinder and the air cutting tool for the tighter spots.
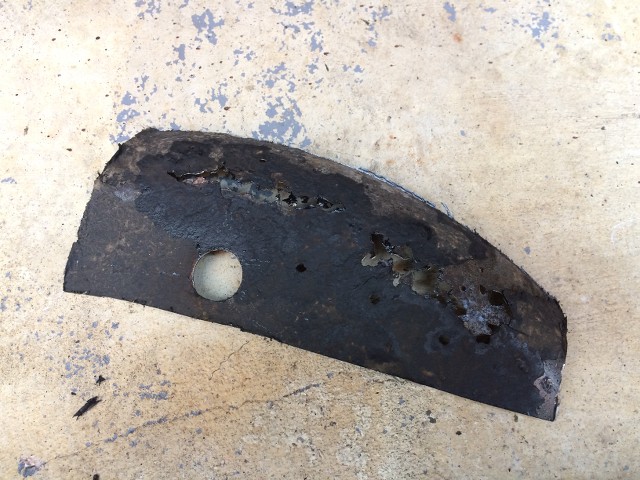
Here we are minus the rusty bits.
And this is the offending item, looking very grotty.
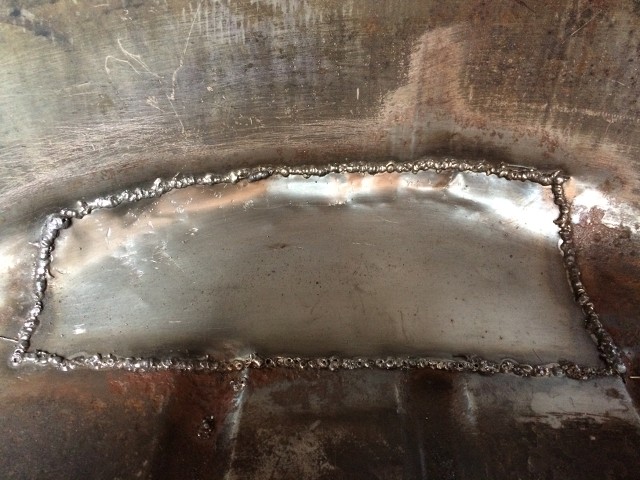
I then set too cutting and forming a sheet of 1mm steel into shape, which took about an hour of constantly offering up the new panel, marking up and trimming, followed by lots of percussive persuasion left me with this.
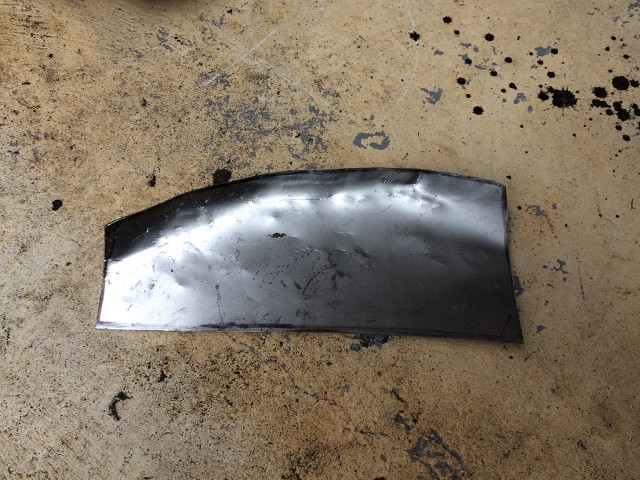
Not pretty, but with a little help from some welding clamps it was soon in place.
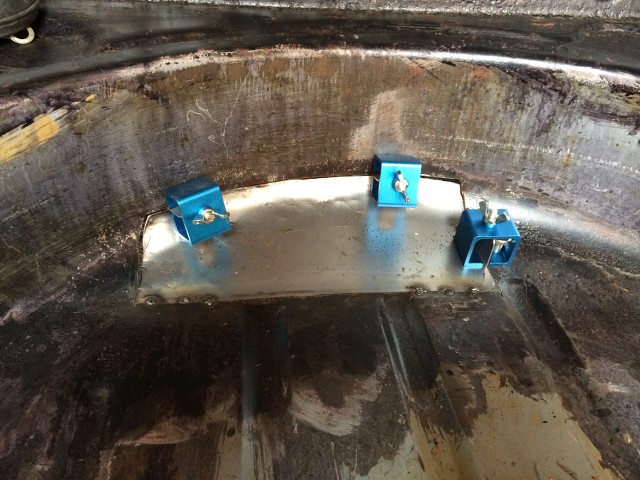
This was then slowly tacked in place, removing the clamps as I went, before commencing seam welding the patch in fully. Given how thin the panel is, I had to weld the seam in short bursts of a couple of inches at a time to prevent distortion, which after about an hour left me with this.
It's not pretty, but it's a lot better than what I removed. Just need to make a drain hole now.
In between the welding on the wheel well panel, I cleaned up the driver's side over rider spacer, and then welded it in.
That just leaves a few little bits of welding and clean up tomorrow, and then, fingers crossed, the welding on the back end is complete, and I can make a start on painting up the boot interior, ahead of getting the fuel tank back in.
I also dropped the old brake lines off to a local garage to make up some new ones, including unions, as the ones I took off last week were shot.
Next jobs to be tackled are as follows:
- Finish painting the fuel tank gloss black.
- Paint driver's side engine valance.
- Make up bracket for the manual washer pump to mount under the dash.
- Clean off the last of the under seal from underside of the boot. (Really looking forward to that one!)
Better mow the lawn as well!
Karl
-
Aidan I had a similar gap between Heralds, though at least ended up with a slightly newer model.
I think it's something to do with parenthood.
I got rid of the Herald, and the Beetle, after my eldest was born, as I figured one noisy, smelly diversion which consumed large amounts of time and money was enough.
Now that my three are almost all grown up, and the dogs aren't cutting it in the smelly, noisy, expensive diversion front, I had to replace the kids with something, so why not an enderly Triumph?
Karl
-
No joy with Quillers so I decided to go with the half a second hand wheel well from Chic Doig.
This should provide me with a nice big repair section to neatly patch my less than perfect example, and leave me some extra sections for future use should I ever buy another Herald.
I did toy with the idea of building my own repair panel, but I knew it wouldn't be as neat as a proper panel.
Thanks everyone.
Karl
-
I think the madness comes first, otherwise why else would you buy a vehicle which in unreliable, smelly and requires constant attention?
Karl
-
Yaki dar mon ami!
Sounds a familiar scenario, particularly in IT over the last 15 years where I have had a number of teams outsourced from under me.
Karl
-
Darren I tried Fitchetts but nothing suitable.
Wins had sold the one on their site a few weeks back and forgotten to remove the listing.
I did give Chic Doig a call, and he has offered me half a wheel well that I can use from a donor car for £85 plus vat.
I've also dropped Quillers a note to see what the might have available.
I would have felt guilty chopping up a good boot floor panel just for a section of wheel well.
Thanks for all the suggestions.
Karl
-
Andrew, I looked at Fitchets site and couldn't see anything, however looking at Wins site they appear to have a secondhand one for £20, so I'll be giving them a call in the morning.
Thanks
Karl
-
Pete why do you have a Renault badge on the garage door?
Karl
-
Doug I live on a new estate, and haven't seen anyone else actually put their car in their garage, they're all parked on the street, usually on the pavement, despite the fact that most people have drives!
I am fortunate that my garage is a reasonable size, or is it just that the Herald is tiny compared to most modern cars?
Karl
-
Pete I'll try Chic in the morning, didn't get a chance to call them today.
Darren, that's a nice bit of repair work.
I don't have access to a shrinker/stretcher, just the usual selection of persuasive percussive tools!
Still if I can't turn up a repair panel I'll use your photos for guidance.
Karl
-
Doug you don't have to get wet when it's raining to get into the garage.
There are pros and cons!
Karl
-
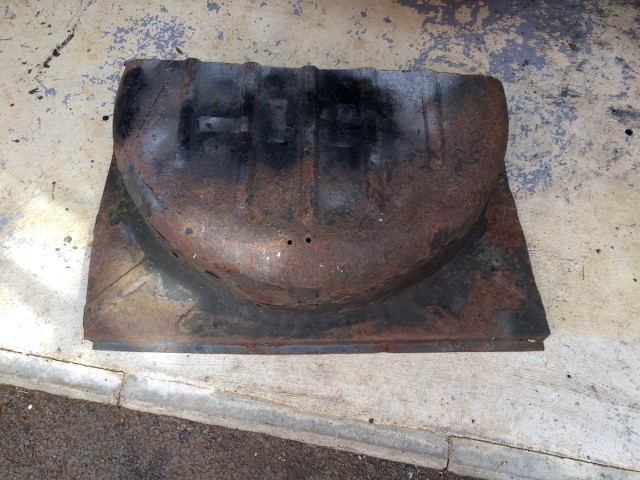
As those of you who have been following my 'How not to restore a Herald' thread will know, I found that my spare wheel well had started to resemble a colander as the photo below shows.
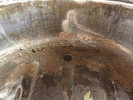
I did look at replacing the entire well with a replacement panel, but at £150, a bit rich for my pocket.
Therefore before I start bashing sheet steel in an attempt to fashion a repair panel, does anyone know if a repair panel is available commercially to save me the hassle?
Karl
-
The original hoses appear to have lasted the best part of 50 years, and survived exposure to modern fuels for a chunk of that, so I'm inclined to give the NOS ones a go.
If all else fails, unlike Doug, my garage is separate to the house!
Karl
-
Paul,
I've got an inline filter fitted just ahead of the carb, but hadn't thought of fitting one by the tank itself.
All of the new rubber hoses for the fuel line are NOS BL items, still in the original packaging, so hopefully ought to be up to the job.
Karl
-
Today, with welding off the menu, and the brake pipes already removed, I turned my attention to prepping the boot interior for paint so that I can get the fuel tank back in and the car moving under it's own power again.
First up was emptying all of my tools that I had been using for the boot floor repairs out of the boot. It really is quite amazing how many tools you end up using!
All of which left me with this.
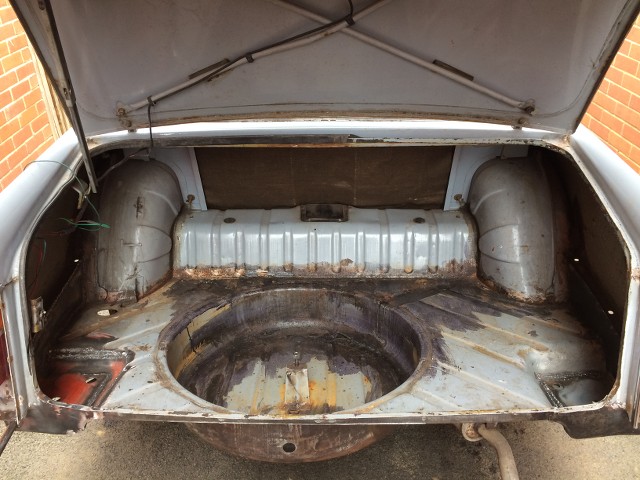
An empty and distinctly scabby looking boot.
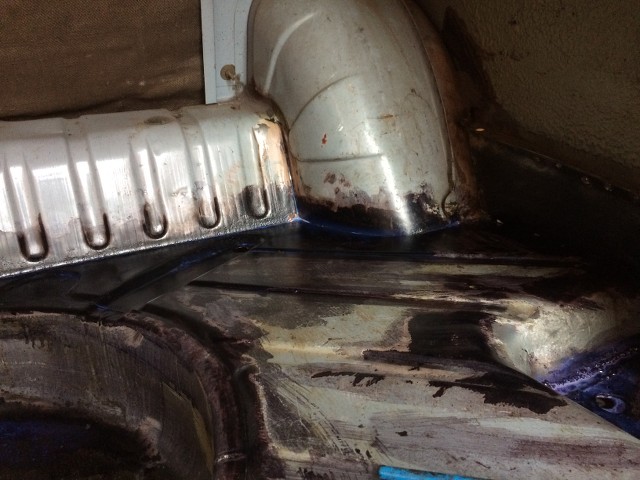
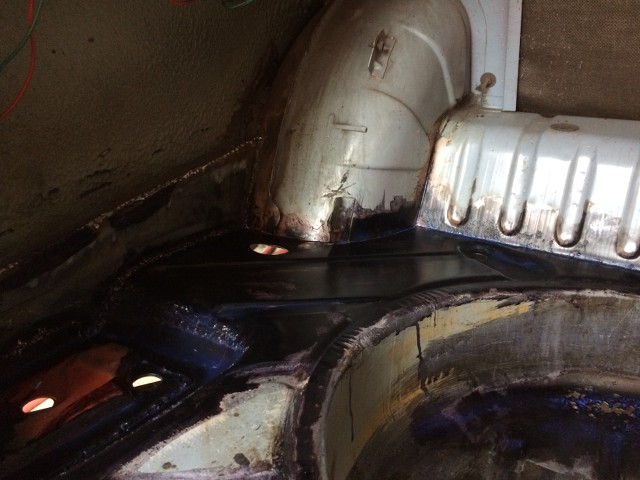
The front boot corners, where the boot floor meets the rear wheel aches were covered in factory applied sealant, which was lifting and revealing the original primer, as you can see in the pics below.
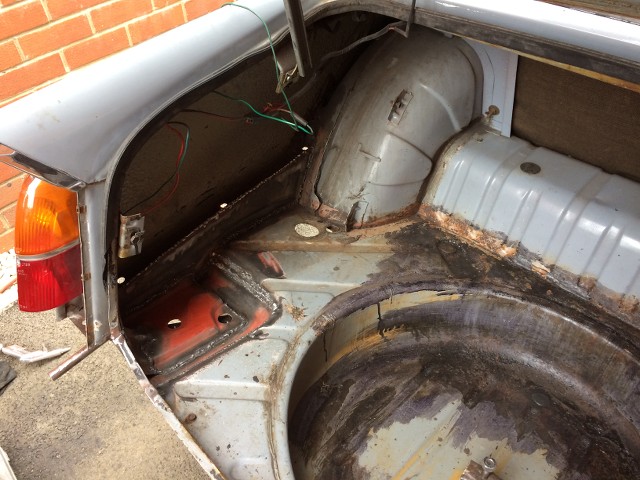
The bulk of the sealant was removed with an old screwdriver, and the wiped down with white spirit, before being attacked with a knot brush in the angle grinder, which rapidly took everything down to bare metal, well, where there was metal!

I had thought that the spare wheel well was pretty sound, but as per usual with this car, under seal appears to hide a multitude of sins, which the angle grinder rapidly exposed!
Would this constitute an MoT fail?
With no welding wire there was no point attempting any repairs today, so instead I applied a coat of Kurust to the exposed areas of metal, letting the Kurust flow into the panel joints to neutralise any rust lurking there.
After half an hour I was left with a dark blue, and slightly shiny boot floor.
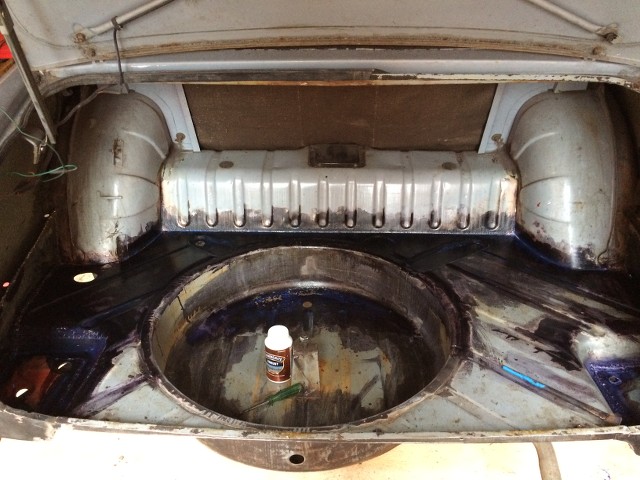
I'll let that lot harden off overnight, and then give it a coat of etch primer, after which it will be time to apply seam sealant to all the joints for which I have a combination of brushable seam sealant, and the PU type that is applied with a gun, so hopefully all bases are covered.
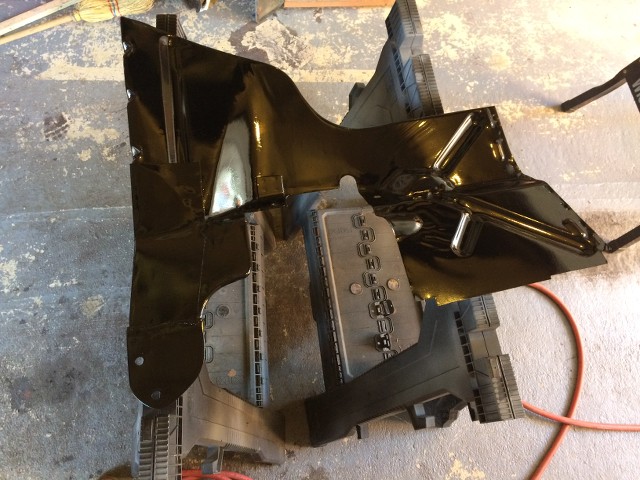
I also finally got around to applying a coat of etch primer to the driver's side engine bay valance.
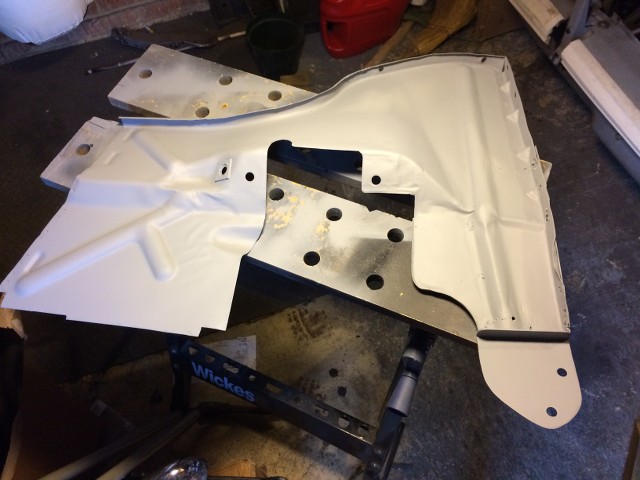
This was the one that was rotten at the front corner where it mounts to the chassis, and which I had repaired previously. I wasn't happy with that repair as it looked messy, and so cut it off and replaced it with a much simpler and more elegant bracket.
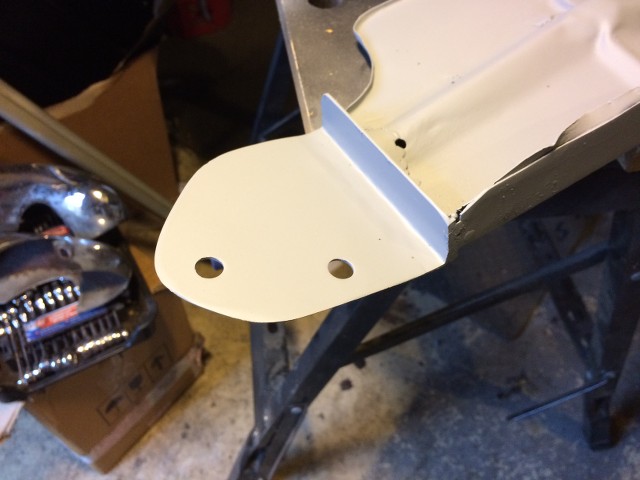
Not exactly stock, but it fits, and is more than strong enough to support the radiator.
Finally I cleaned up the rear fuel line that runs from the tank, through the boot floor to the pipe on the chassis.
This came up much better than the brake lines, and looks to be fairly new. I've already got the replacement rubber hose connections for this to go back in.
At this point the pace will slacken again, as it's back to work tomorrow.
Karl
** 26/02/23 Heading Up ** Probably how not to restore a Herald!
in My Triumph Restoration Project
Posted
Paul, thanks for that.
I won't be touching the jets as these are working fine, there's just no pressure in the system due to the lack of a non-return valve.
I'll take a look at my local aquatics store for a non-return valve.
Karl