

Bordfunker
-
Posts
1,005 -
Joined
-
Last visited
-
Days Won
17
Content Type
Profiles
Forums
Blogs
Gallery
Downloads
Store
Events
Posts posted by Bordfunker
-
-
After yesterday's painting session, more painting was required but this time at the front of the car.
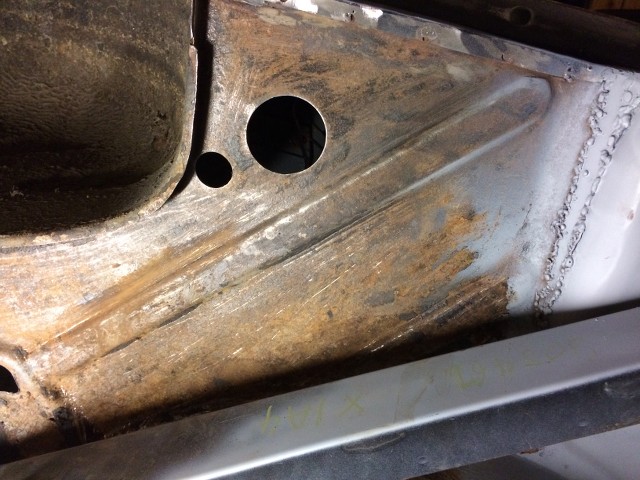
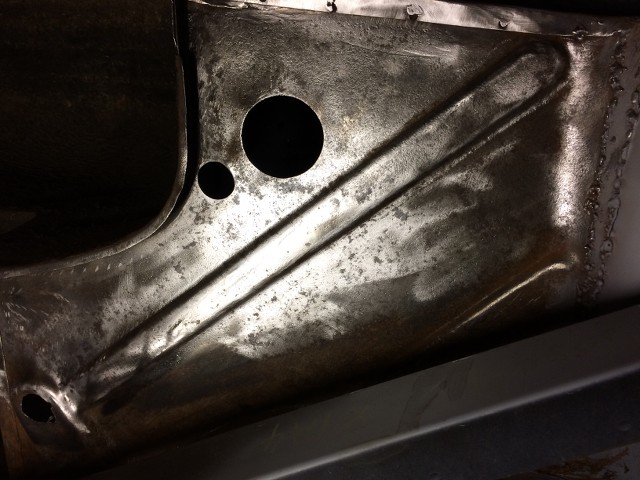
Last year I stripped the bulkhead around the clutch and brake master cylinders back to bare metal as there had been numerous spillages of brake fluid and the area was looking pretty grotty.
Roll on 12 months and with the persistent leak from the brake master cylinder, now hopefully cured, the area was looking pretty cruddy again, cue stripping disks and wire brushes.
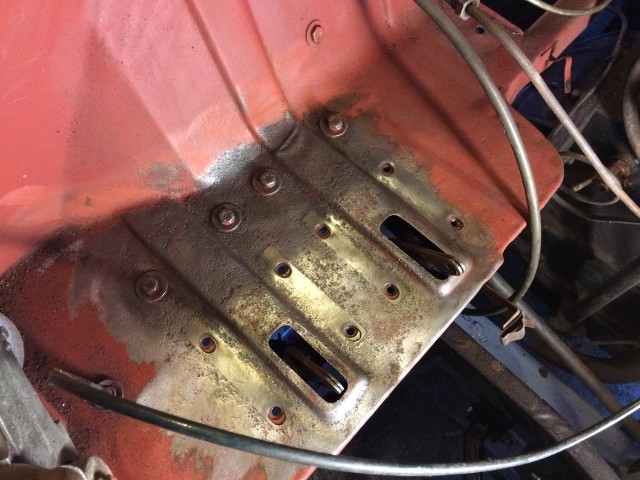
There is quite a lot of pitting as the metal has obviously seen quite a lot of abuse and neglect over the years.
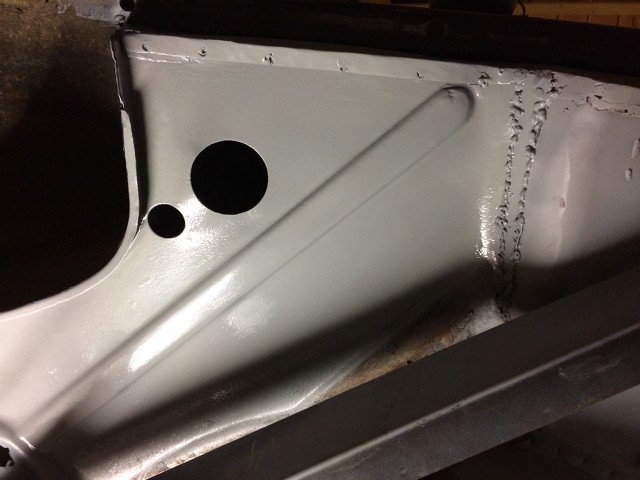
Therefore first step was a coat of etch primer from the rattle can.
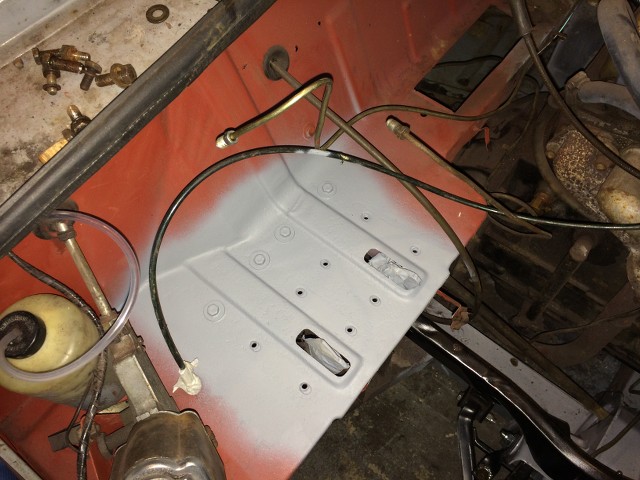
To address the pitting I'll pick up some high-build primer and give the area a couple of coats, before flatting back, and then I'll apply a coat of red oxide.
As well as improving the area around the master cylinders, I've also cleaned up and re-painted the brackets themselves.
Here they are resting in position.
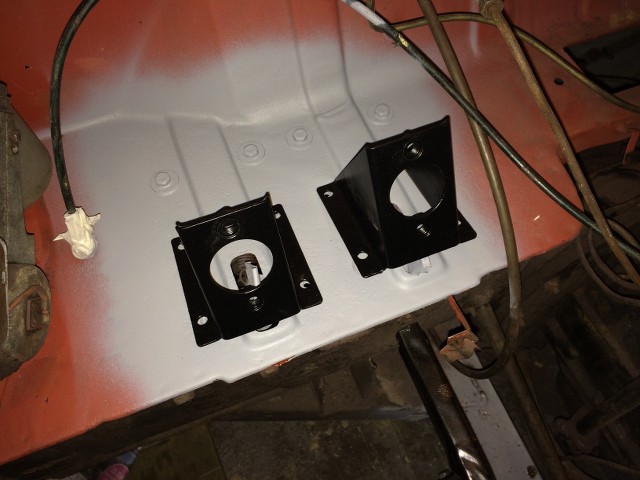
The master cylinders have had a spruce up externally, so the whole ensemble ought to look a lot nicer, and with the move to silicone fluid, there will be no more peeling paint if there are any further leaks.
Remaining on the theme of brakes, it was time to install the new copper brake lines that my local garage had made up.
Here's the view under the passenger side rear wheel arch, with the brass union in place, and the feeds to the rear wheels already installed.
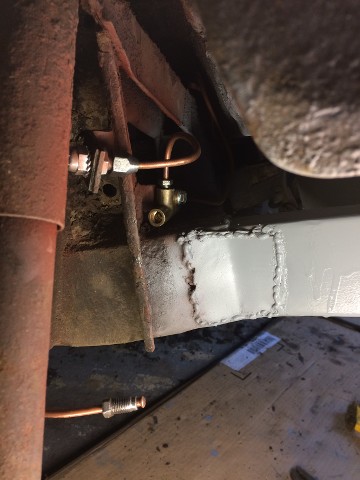
Now the observant of you might have spotted an issue here.
Yes, the bloody pipe that runs front to back is too short!!!
To say I was a little miffed is an understatement as I was looking forward to getting the brakes at the rear of the car all buttoned up this weekend.
I guess I shall be paying my local garage another visit this week.
From reading my exploits so far in this thread, you would be forgiven for thinking that I only ever work on the underside of my car, but to prove that, that is not the case, work has commenced on the interior, namely the driver's seat which was looking very tired.
The seat base cover had split along one of the seams, as you can see here.
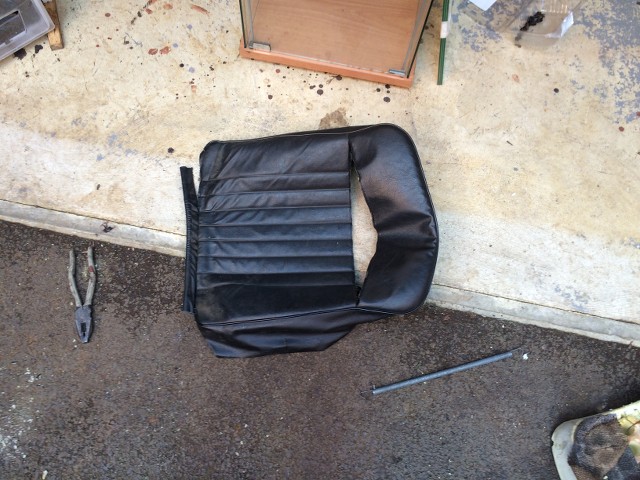
The cover came off without too much of a fight and will be handed over to the tender mercies of Mrs B and her sewing skills.
This left me with this lot.
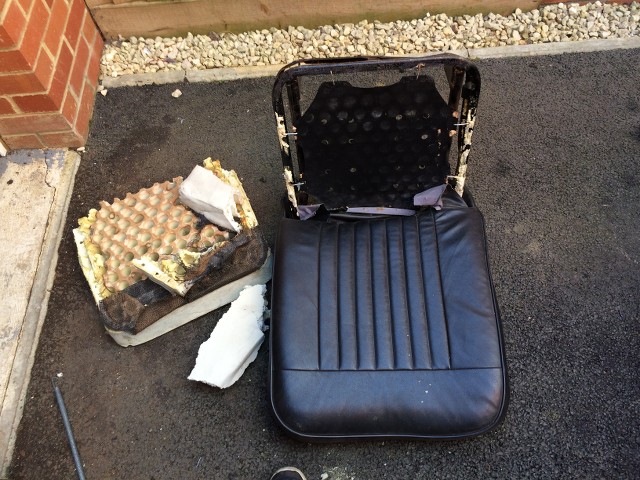
As you can see the foam has seen better days, and is starting to crumble, so I have ordered a replacement from Paddocks.
Aside from that, the bulk of the interior is OK, it needs new carpets, and the headlining will need to be replaced, but the seats are good, as is the dash, just requiring a rub down and a fresh coat of varnish.
Karl
-
After a break of couple of weeks of seeming to do nothing but drive around the country dropping my sons off at university, or bringing them back home for hospital appointments, time for an update on progress on the Herald, because there has actually been some.
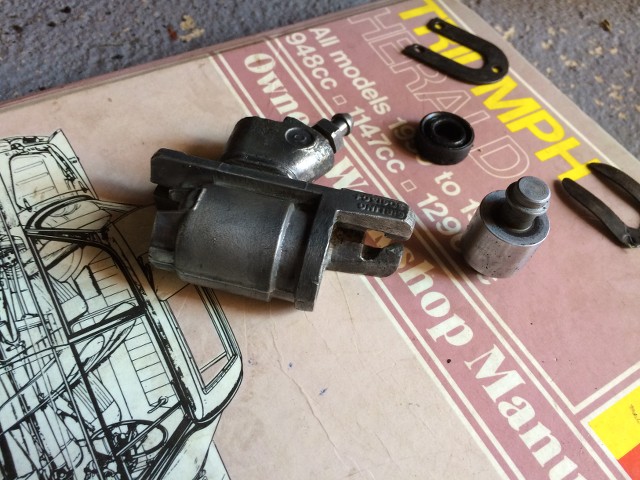
After my rebuild of the passenger side rear drum, attention turned to it's opposite number on the driver's side with the expectation of a quick strip down and clean up, followed by replacement of the seals and reassembly, however this was not to be.
Here's the piston after I finally extracted it from the cylinder.
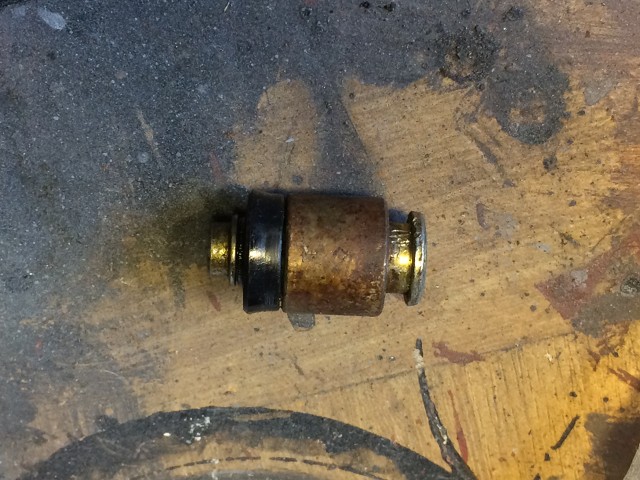
Not looking particularly healthy, so a candidate for replacement, along with the cylinder, and here we are with everything reassembled.
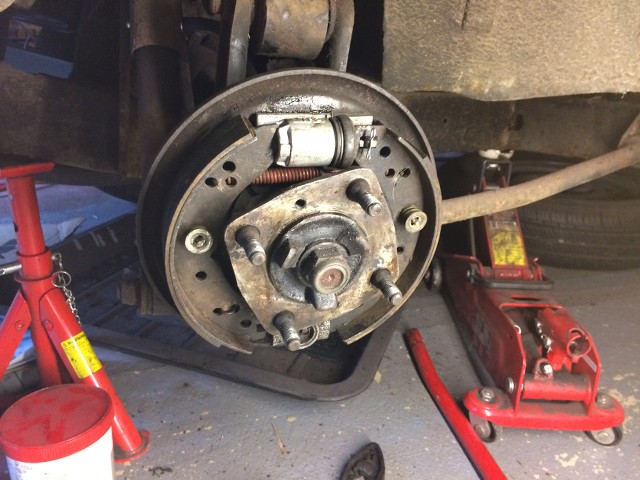
As part of the general refresh of the braking system, I also replaced the brake hose.
Along with the rear drums the front callipers have been stripped, cleaned and reassembled so that they are ready for their transfusion of silicone brake fluid.
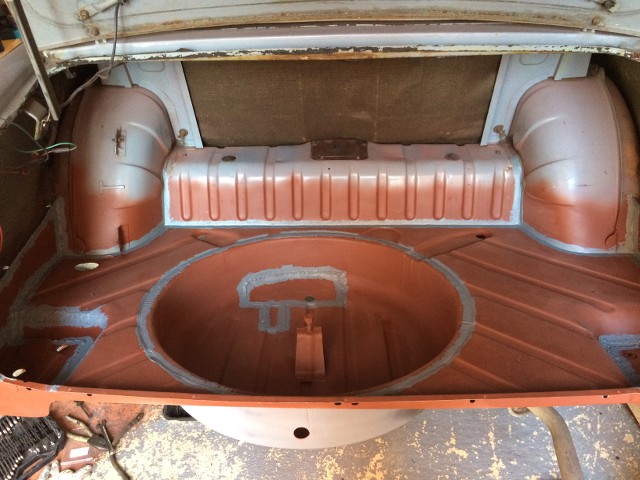
Next step will be the re-installation of the brake lines at the rear of the car, which have been re-made in copper, but that will have to wait until the boot and under boot area have been painted, which is where my efforts have gone over the last week.
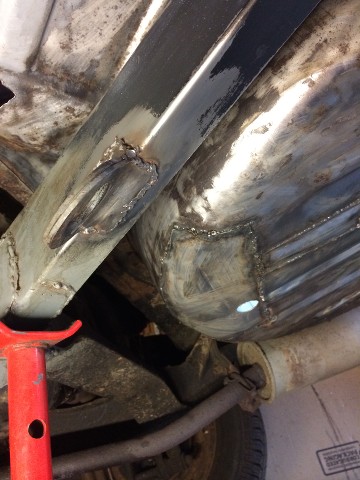
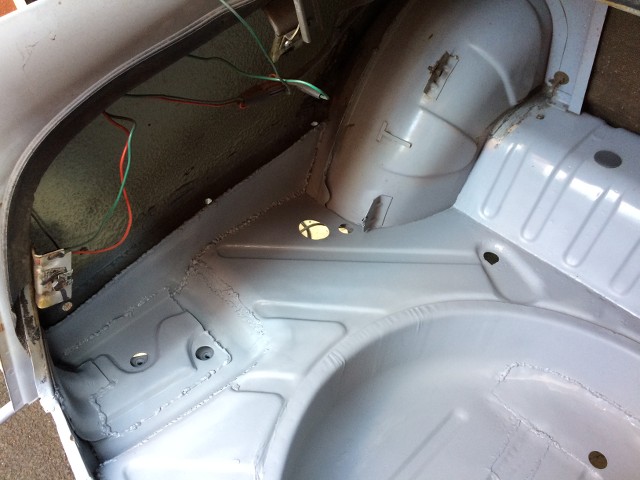
First up was applying a coat of red oxide primer, followed by seam sealant on all of the external seams.

As you can see I didn't hold back on the sealant, as I wanted to ensure that the seams would remain rust free, and properly sealed on both sides.
The primer then got a rub down with 600 grade wet and dry ahead of application of the top coats.
The interior of the boot also got a rub down.
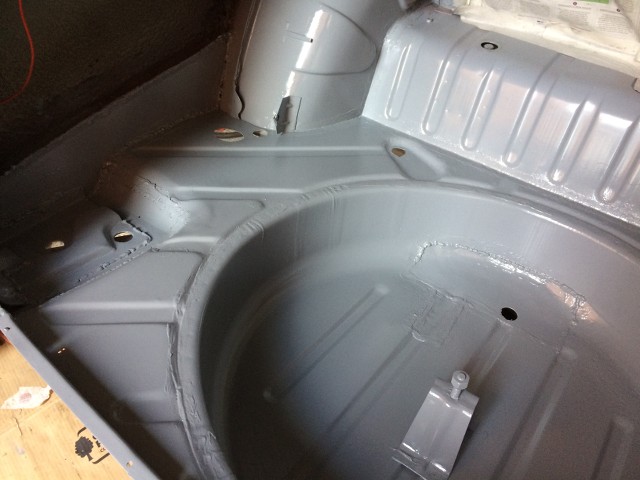
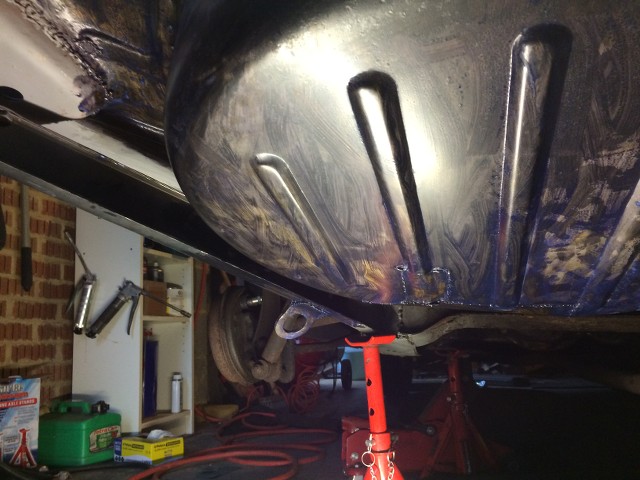
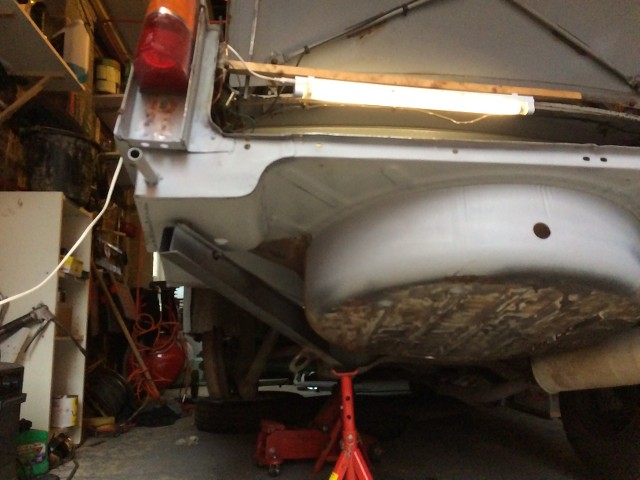
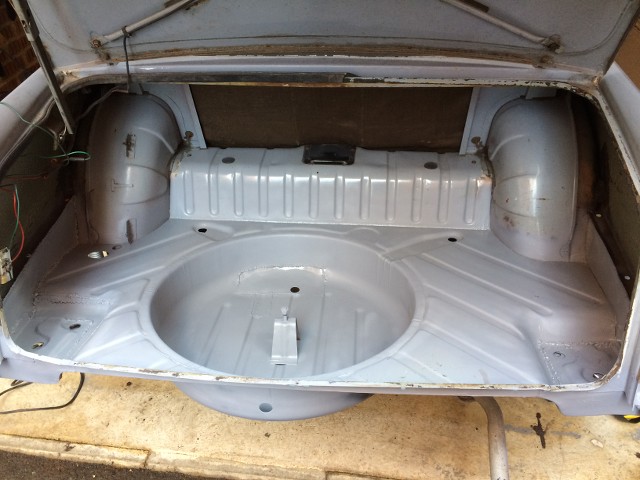
Then, making the most of today's lovely weather, I cracked on with the spraying of the top coats.
I must admit that the painting of the underside of the boot floor was a bit of a nightmare, even with the back end of the car a foot off the ground, as there is precious little access around some of the areas of the wheel well and boot out rigger, which is going to be my excuse for the various sags and runs.
But I figure no one is ever going to see then apart from me.
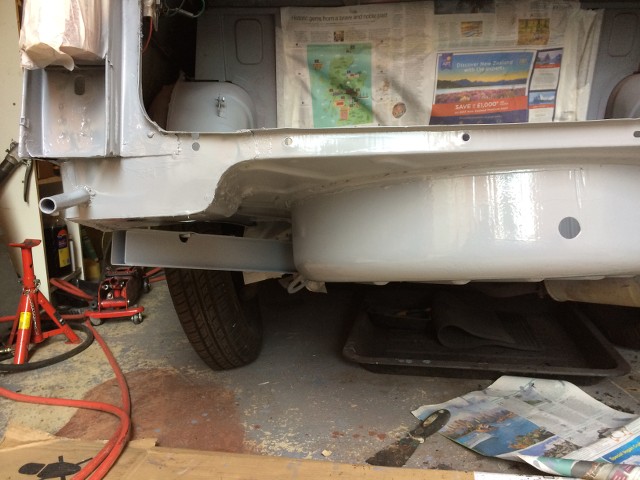
I've only painted the passenger side so far as I'm still stripping the under seal off the driver's side, but I can continue to do that even after the petrol tank is in, so less urgent from my perspective.
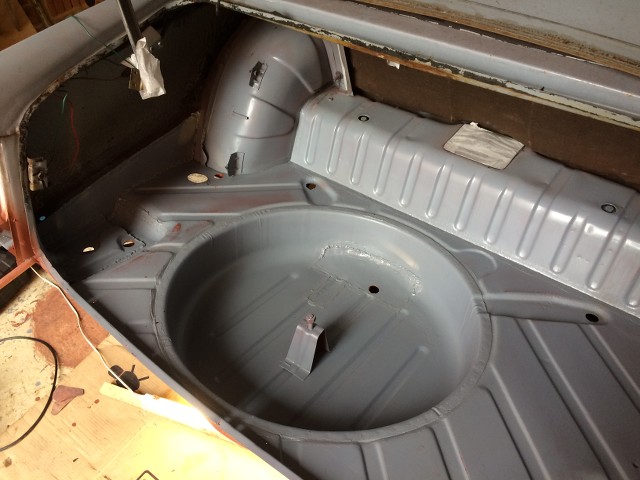
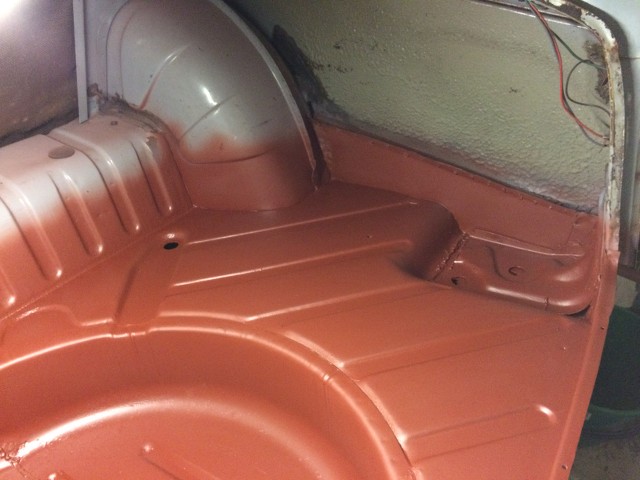
The interior of the boot proved much easier to paint, with no sags or runs, leaving me with an acceptable finish straight from the gun.
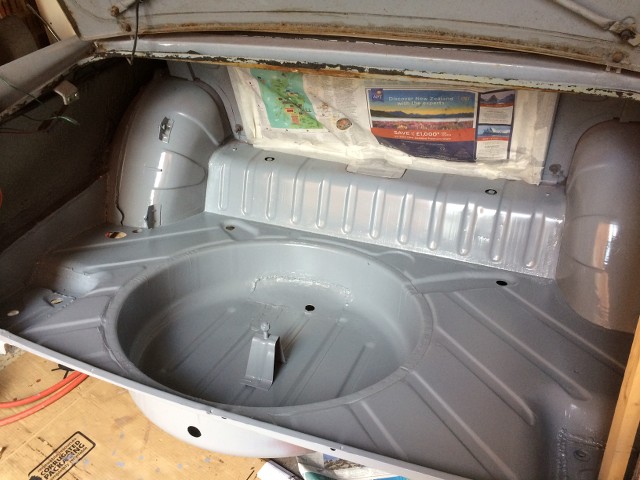
I certainly won't be polishing this up anytime soon.
I'll let that little lot harden off overnight, and then I will start re-installing the brake pipes to the rear of the car.
Karl
-
 1
1
-
-
I'm going with satin black on mine as I reckon it will look smart against the Dolphin Grey of the rest of the car.
Also the black looks good against the alloy of the cylinders themselves.
Karl
-
1 hour ago, Pete Lewis said:
If it wont go back,,,, how did it get removed
Pete
With much swearing and scraping of paint!
Karl
-
Colin, I have removed the boot stay mounting bracket, but it seems that there is just a few mm too little in terms of wiggle room.
I might give it another go with the drain plug left in, and see if I can't get it to fit.
I've heard horror stories about the tank drain plug before.
Paul my tank should be clean as it's been empty of fuel, and stored outside with all the openings open since April, so ought to be fume free, but I don't feel like applying heat to my newly painted tank!
I'll let you know how I get on.
Karl
-
Thanks guys.
Sounds like I am not the only one to have struggled with this one.
I might try removing the drain plug, as that would give me another 5-6mm to play with, which is what looks to stopping the tank dropping in.
That is of course if I can remove the plug!
Karl
-
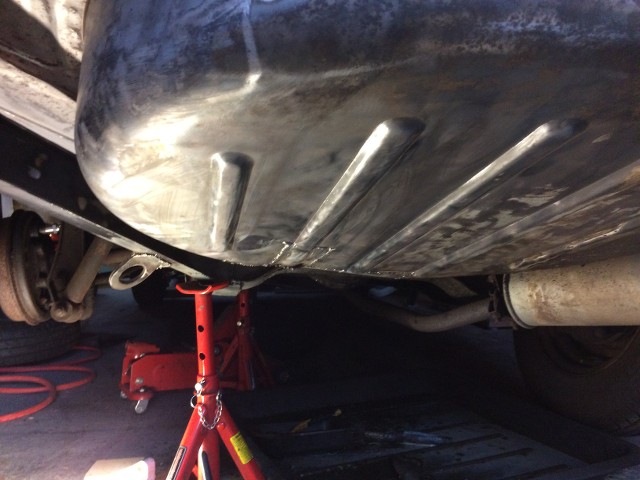
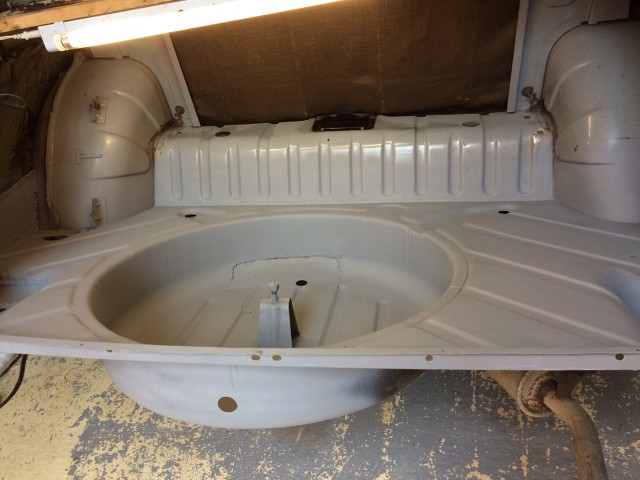
I'm getting close to that point where I can put the petrol tank back in my Herald, having had to replace both boot corners.
Now getting it out was a faff, so I thought I would try a trial run before completing the paintwork in the boot, and I could not get it to fit.
It kept hanging up on the fuel drain at the bottom rear of the tank.
Do I need to remove the blanking screw from the drain spout in order to get it to fit?
If that isn't the solution, is there a knack to get a tank back in without scratching the living daylights out of your paintwork?
Thanks
Karl
-
After a break for a couple of weeks due to having to ferry both sons to university, one to Cornwall, the other to Lancashire, the last one twice as he wasn't feeling well the first time, and had to be brought back home again!
So with son number 2 safely deposited in Lancashire yesterday, time to get back to the Herald, which means unfortunately an afternoon on my back, stripping under seal, paint & rust off of the underside of the boot floor.
What fun!
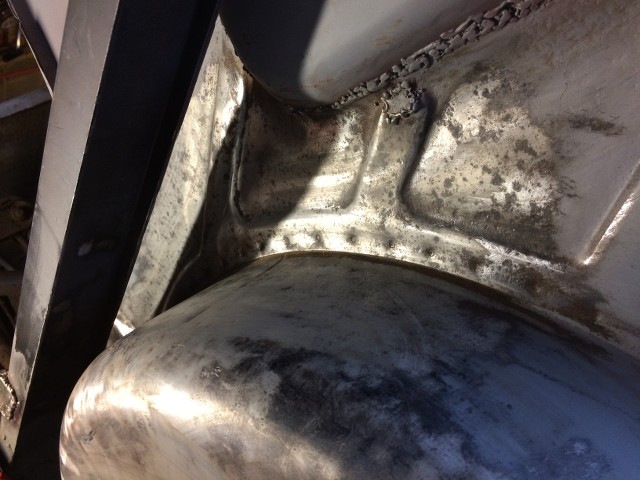
Now I really wish that I had done this before I replaced the passenger side boot out rigger, as there is very little room between the out rigger and the wheel well to get tools in to remove paint and rust.
As per the usual, the under seal was tackled with white spirit, brushed on, and then scraped off with a paint scraper and wood chisel.
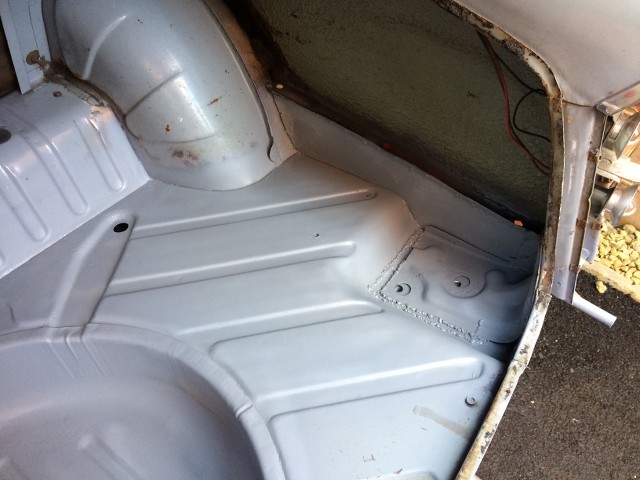
This was followed by several hours of sanding, scraping, brushing etc. to remove the paint and rust over the passenger half of the boot. I will do the driver's side, but at the moment I need to do the passenger side so that I can get the fuel tank back in, as with the tank in I can't get access to all the bolts that hold the valances on.
So here we are.....
You can see how little space there is between the boot out rigger and wheel well here.
Next up was a coat of Kurust, paying particular attention to the seams to ensure that the rust inhibitor got into all the nooks and crannies.
I know a lot of people don't think much of Kurust, but I must admit it has kept the rust at bay wherever I have used it.
Unlike Triumph I will be applying seam sealant to all of the external seams, which will hopefully further keep the rust at bay.
That lot is now drying off with the help of a heater in the garage, and with a bit of luck may well get a coat of etch primer this evening.
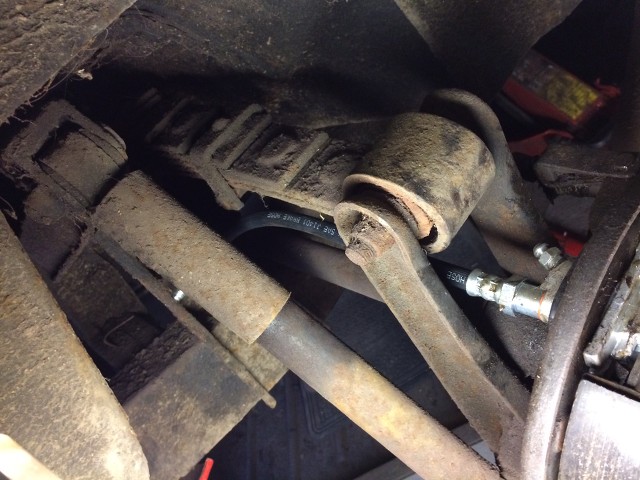
While I was under the car and covered in filth, I thought I would attack the diff with some Gunk, and the steam cleaner, which left me with this.
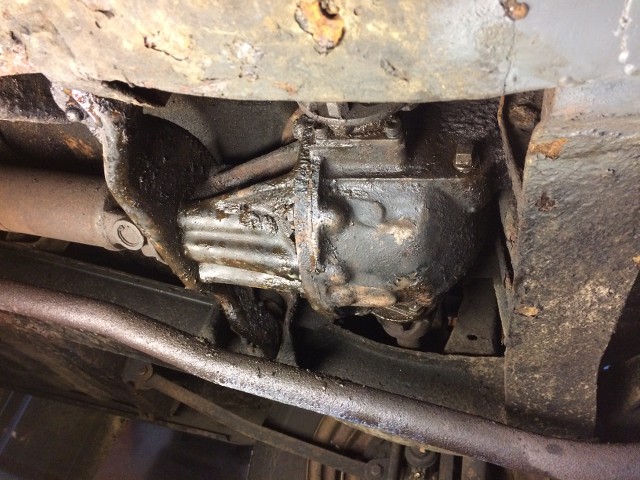
My main reason for doing this wasn't cosmetic, so much as making sure that I could determine exactly where the oil leak was coming from, and not just assuming that it was the nose oil seal.
This should also make topping up the diff oil a little less horrible!
Karl
-
And I bought one of them!
Karl
-
Colin, it wouldn't be a Triumph without a few challenges along the way!
Now I wasn't expecting to get any time on the car this weekend as my youngest son is supposed to be starting university this weekend, and therefore I was expecting to spend the weekend getting him packed, and then driving him up to Lancashire, however he's come down with an infection, so although the packing is done, he's staying home for a few days while the antibiotics kick in.
Which meant I was left with a few hours to myself to work on the car, having fixed the mower and mowed the lawn, with the added bonus that the weather cleared up, and the temperature rose enough to consider some spraying.
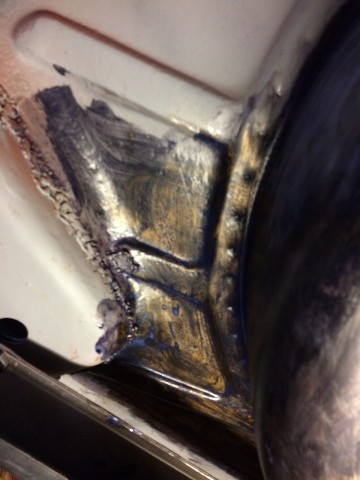
But before I could break out the spray gun I needed to apply the seam sealant to all of the internal seams ahead of the top coat. I've never used seam sealant before, but it was pretty straight forward, just painting the gloopy sealant on with a paint brush, leaving me with this.
I like seam sealant it helps cover up my messy welding!

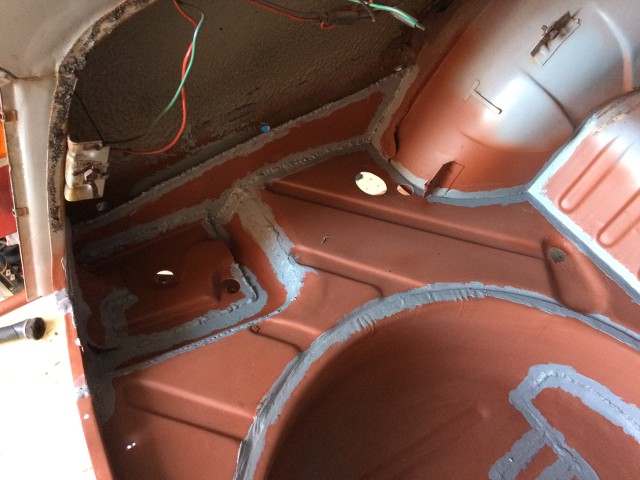
Hopefully this will last almost 50 years like that applied by the factory!
With that lot daubed on, it was time to let it dry off before applying top coat, so I turned my attention to the near side rear brakes which I had started looking at last weekend.
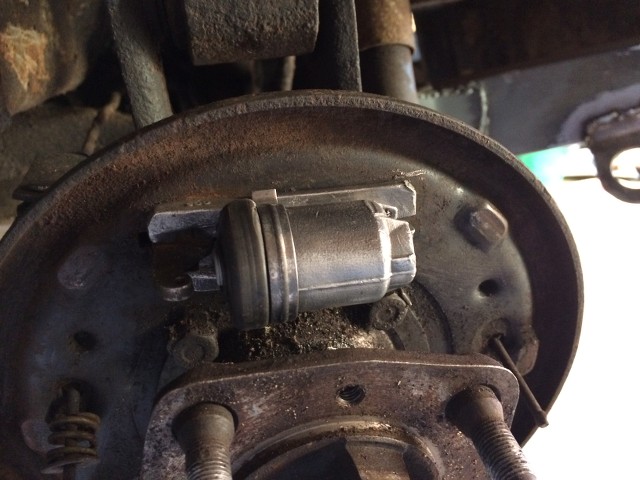
The cylinder itself was fine, but both the external dust cover over the rear of the cylinder and the handbrake actuator, and the internal ones were torn, so I ordered new ones from Paddocks, assuming that the driver's side will be in a similar condition when I get to it.
Here's the cylinder and piston stripped out and cleaned up.
And here we are 5 minutes later with a new seal fitted to the piston, and dust cover fitted to the cylinder.
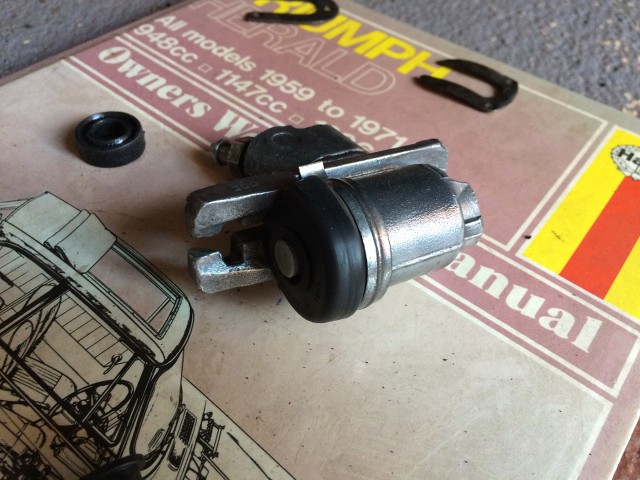
At this point I also cleaned up the retaining clips from the back plate and the bleed nipple, before reattaching the whole lot to the back plate.
This just left me to re-install the brake shoes themselves, which should have been a straightforward piece of work, but I'd forgotten just how fiddly it can be to put brake shoes in.
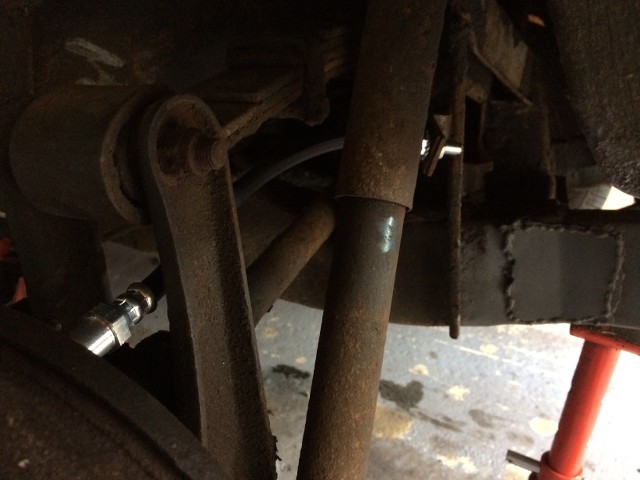
After much swearing, and installing one of the shoes the wrong way round, I finally got everything back together, the drum back on, and the brakes adjusted, which then allowed me to install one of the new brake hoses that I'd also purchased, having decided to replace all the flexible hoses in one go.
Here's the passenger side one peaking out from between the rear suspension.
With that finally out of the way, it was time to start applying the top coat to the boot area, starting with a mist coat, and then a heavier coat over the recessed portions of the boot such as reinforcing ribs, and the edges of any panels.
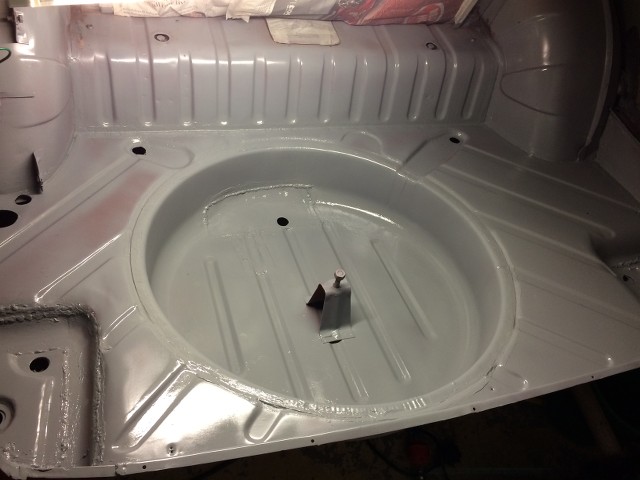
I'll let that lot harden off for a few days before flatting it back and applying another couple of coats, which should see the paintwork inside the boot completed.
I did have some fun and games with the paint gun while trying to paint the boot, with the gun refusing to apply a decent coat of paint, despite increasing the fan setting, backing off the needle, all of which should have provided a healthy supply of paint, but no.
Eventually I realised that the breather hole in the top of the paint cup was blocked, creating a vacuum within the cup, and stopping all paint flow! 2 minutes with a drill and I have a breather hole that won't block, and which the allowed me to get on with applying the paint.
Next weekend it's time to take my eldest off to university in Cornwall, so that will be Saturday wiped out, so progress will be slow over the new few weeks.
Karl
-
Thanks Colin.
Are you going to document your rebuild on the forum?
It would be good see how an expert does it.
Karl
-
Sunday saw me make more progress on the boot, applying a second coat of etch primer, following a quick rub down with a fine sanding pad, leaving me with this:
Then it was onto the area under the boot again, starting from this:
Half an hour of work with an angle grinder and the stripping discs, left me with a much cleaner under boot area:
This then received a coat of Kurust, followed by etch primer, leaving me with this:
Much better, and just leaves me with a small portion to clean up on the underside of the boot on the passenger side.
Yes I know I still have to do the underside of spare wheel well to do, but at least that isn't covered in under seal and rust.
While under there I took a look at the diff...
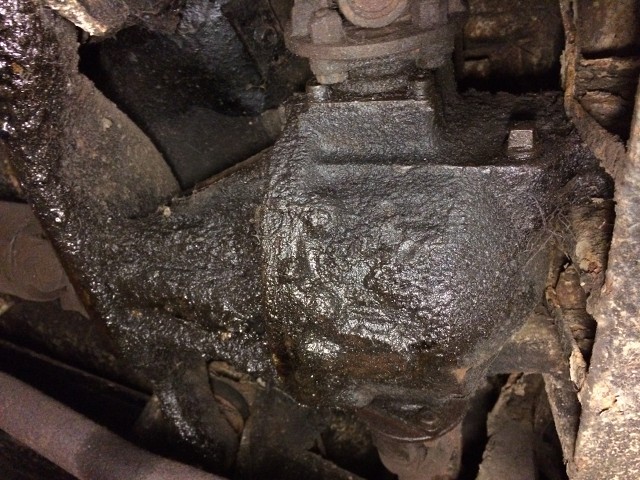
....I think I might have an oil leak!
Amazingly I managed to get an hour in the garage tonight, which left me with no excuses not to get a coat of red oxide primer on the interior of the boot.
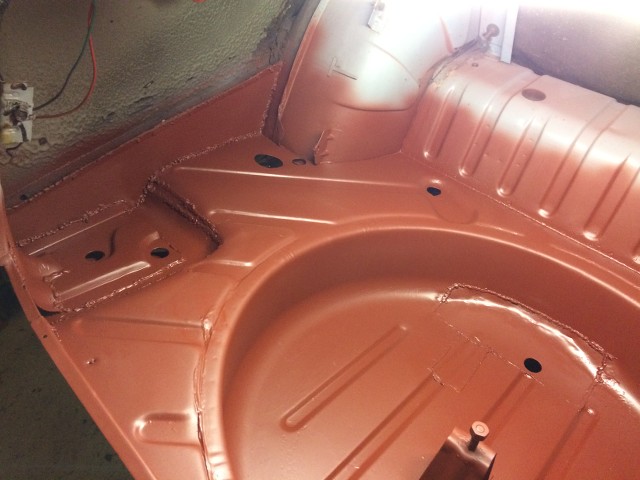
I'll let that little lot dry off for a couple of days before I apply the seam sealant to all of the panel joints.
Overall a good weekend's work, and definitely getting closer to a working Herald.
Karl
-
Thanks for all the feedback guys, looks like in the market for another non-return valve.
Badwolf I'm going in the opposite direction to you, converting back from electric to mandraulic!
Karl
-
Pete, thanks for that, that's makes perfect sense now I think about it.
I did connect the new set up in the car, and it didn't work then, so I can only assume that the T-piece currently in situ doesn't have a non-return valve fitted.
Thanks again.
Karl
-
When I bought my herald it had an aftermarket electric washer pump fitted, which promptly fell off the bulkhead as both of the plastic mounting brackets had cracked, so the aim has always been to replace it with a proper mandraulic pump as would have been fitted originally.
Having baulked at the cost of the pump that Rimmers sell, I went for the cheaper option from Paddocks which looks like it should do exactly the same job.
I also ordered a non-return valve to go in the washer bottle as the original one in the car has long since lost its ball bearing, however having assembled everything, I can't get this ensemble to actually work.
Here it is set up for testing in my home lab(read kitchen).
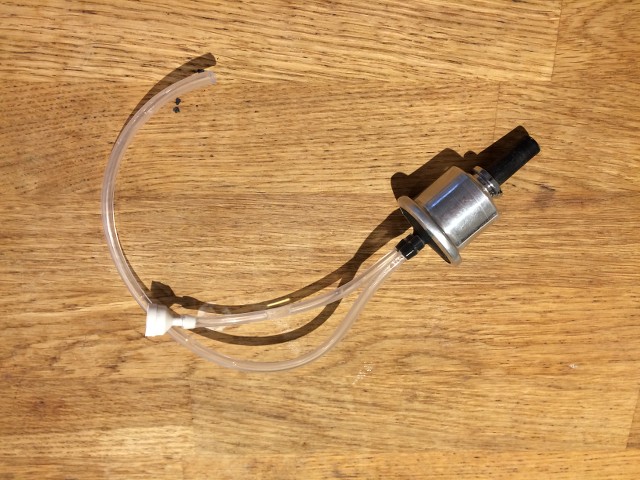
The white item on the end of the tubing is a non-return valve, and the tubes are set up with the feed from the washer bottle going to the feed marked 'J', for jar I assume on the back of the pump, and the other feed to the washers themselves attached to the 'S', for screen, feed.
The non-return valve does allow me to suck through it, but not blow, so appears to be working, however it does not allow the pump to draw water through it.
So firstly, have I actually got this set up correctly? I have tried assembling it all the other way around to no avail.
Secondly, if so is the pump just not man enough to overcome the non-return valve?
Has anyone else experienced similar issues, and if so how did you resolve it?
Thanks
Karl
-
The MIG welder got a rest this week, as my attention shifted to the paintwork in the boot itself.
I've never done paintwork on this scale before, so its going to be a bit of a learning curve as I try to get to grips with the whole process.
Before I started painting I had a quick run around with the stripping disk and some wire brushes to remove some of the rust and paint around the bases of the rear lamp clusters as these were a little crusty.
Here is one after a quick squirt of primer from a rattle can.

You will have to try and ignore the paint runs, my own fault for not shaking the can for long enough before commencing spraying.
Main focus is the interior of the boot as I need to get the fuel tank back in, and get this car back on the road, so that got a good coat of Halfords' finest etch primer.
I've got some work to do on the front edge of the boot where I've peeled the remains of the original boot seal off. It was stuck very firmly all round the boot lip, and promptly disintegrated as I tried to remove it, leaving chunks of old rubber and glue, which I have started to scrape off with an old wood chisel.
Thankfully my welding will be hidden once the fuel tank goes in, but first it needs a coat of red oxide primer and then Dolphin Grey, which is a fairly close match to Halfords grey etch primer.
Good job my welding improved a bit when I got to the driver's side of the car, as this bit will be exposed for all to see if they take a peak in the boot.
With the topside of the boot floor painted, I had no excuse not to turn my attention to the underside, which I haven't been relishing as it's covered in old under seal which will need to come off before I can paint it, and I need to paint it before the fuel tank and valance go back on the passenger side and I lose decent access.
No pictures of the underside, just what I was left with after half an hour with a wire brush, and a wood chisel.

There was more, but most of that was in my hair and down my back!
Karl
-
Having resprayed my fuel tank as part of the restoration of the boot area on my Herald, I need to reinstall the fuel gauge sender unit.
Mine is the type with the 6 screws holding it in, and has a cork gasket sandwiched between the sender unit and the tank itself.
Having consulted the WSM a sealant is recommended, however I tried a couple of auto factors today and couldn't find a sealant that was fuel proof.
Can anyone recommend a suitable sealant?
Karl
-
No movement on the windscreen washers this weekend as attention has focussed on the engine bay, and the boot as usual.
Now I had intended to start with the last of the welding in the boot having failed to finish this last week, but couldn't wait to try the newly painted driver's side engine bay valance, so decided to install this first instead.
The valance itself is held on to the top of the suspension tower by two bolts which sit directly above the upper wishbones, which is where I realised that I had a problem, as if the bolts are installed from above, they fowl the upper wishbones on full compression.
With the wishbones in place I couldn't get the bolts in , and to make matters worse, I had already installed the bolts on the passenger side the wrong way round!!!!
Nothing else to do but drop the springs and dampers, to allow the upper wishbones to be removed, as you can't remove the bolts retaining the upper wishbones with the spring and damper in place.
Long story short most of Saturday, and a chunk of today was spent sorting out my schoolboy error, which did at least mean I was left with both the engine bay valances back in, and the radiator fitted as well, as you can see from the pictures below.
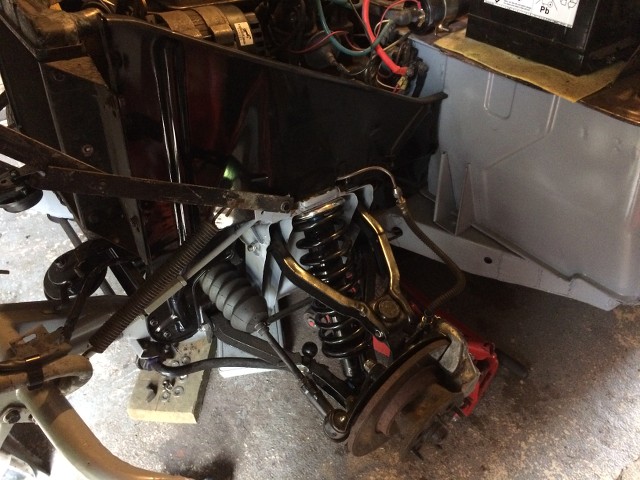
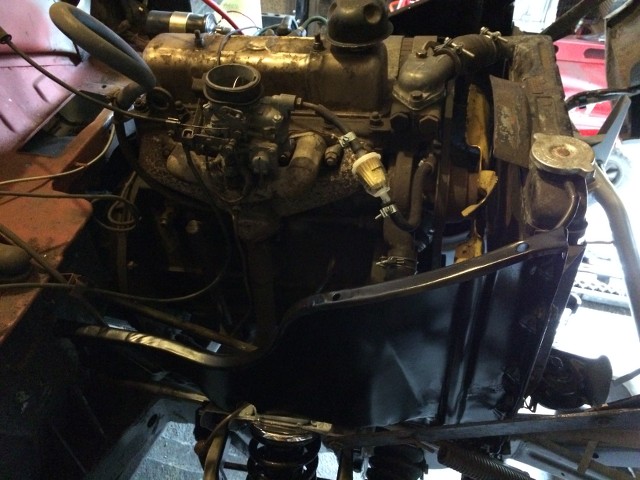
I haven't got around to cleaning up and re-painting the radiator and the two flanking support panels, which rather let the side down, but given the fact that the engine is still filthy its in good company.
When I was installing the horn bar to the driver's side engine bay valance, I realised that I had forgotten to drill the holes for the horn bar! Schoolboy error number 2!
In order to drill the holes I dropped the front valance to improve access, no big issue as I needed to sort out the brackets on the ends of the valance.
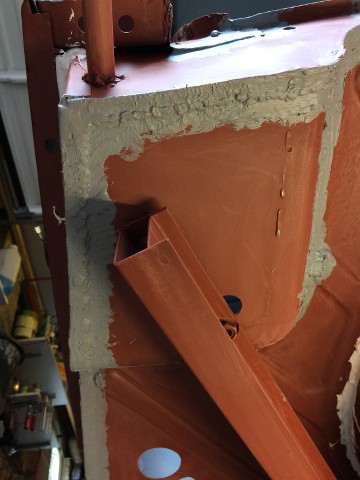
Oh dear! Another bodger has been here before me. This is the driver's side bracket that I took off, a crappy bit of galv held on with fibreglass resin!!
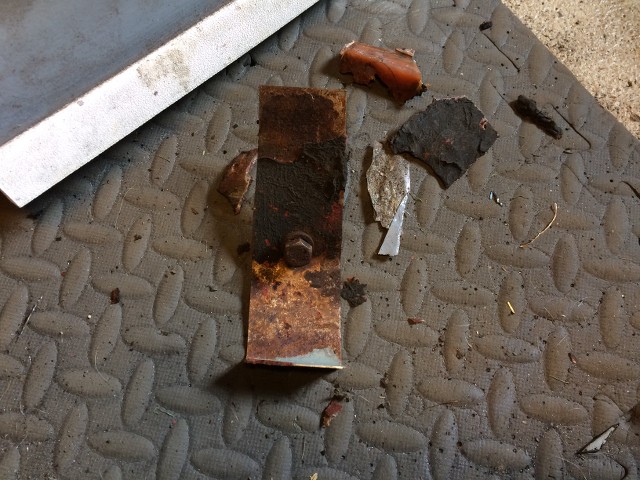
The other side is no better, so I'll need to remove that bit of bodgery as well, and then make up some new brackets which I can weld on. Just when I thought I could put the welder away for a bit!
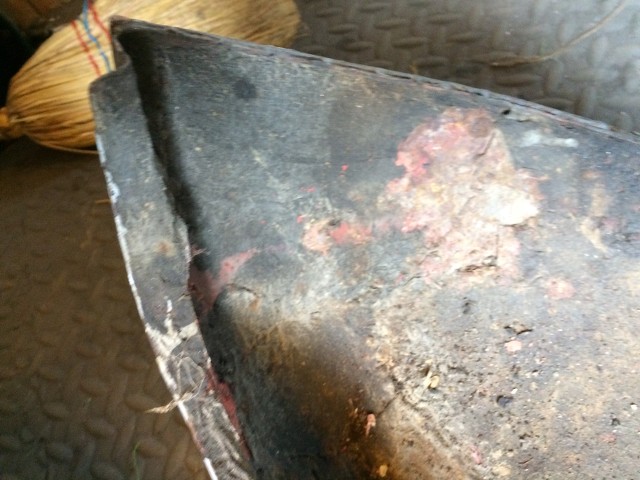
Where the bracket is supposed to be.
That's a job for another day, as the boot won't weld itself.
First up was drilling out the drain hole in the back of the spare wheel well, and the reason I invested in this.
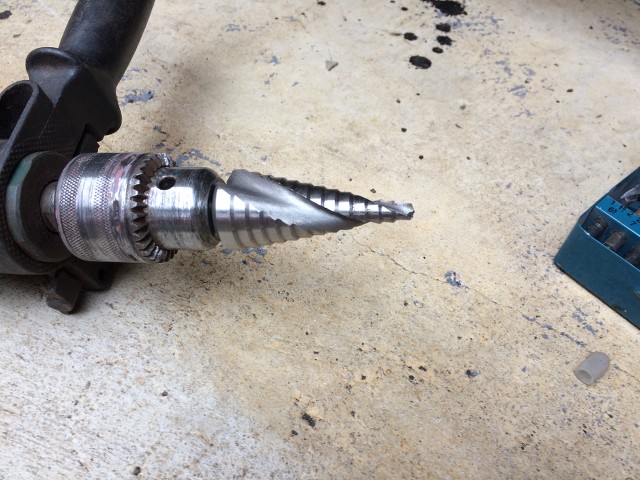
I picked this up from Screwfix during the week, and while it wasn't cheap, I'm sure I'll get plenty of value out of it, and it certainly made short work of the drain plug hole.
I used the section of old panel to mark out the location of the drain hole, before consigning the old lacy bit of steel to the bin.
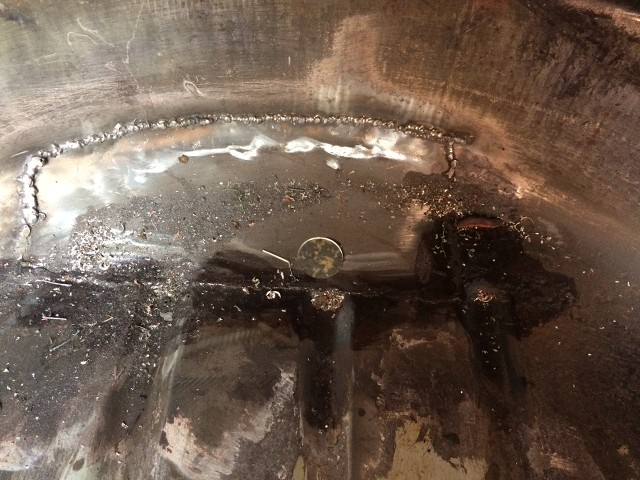
This just left the last bit of welding, a smattering of pin holes just in front of the new section that I had inserted last week.
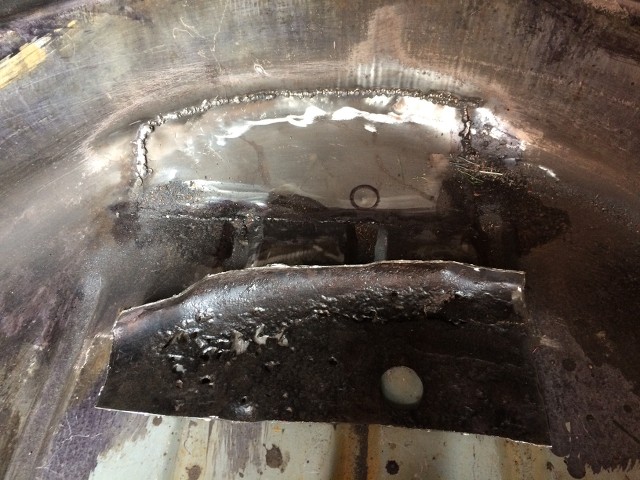
Initially I thought I could get away with just a small patch, roughly the size of a two pence piece, however further investigation showed that I needed to go for a larger patch, and one which would need to incorporate the longitudinal reinforcing pressings.
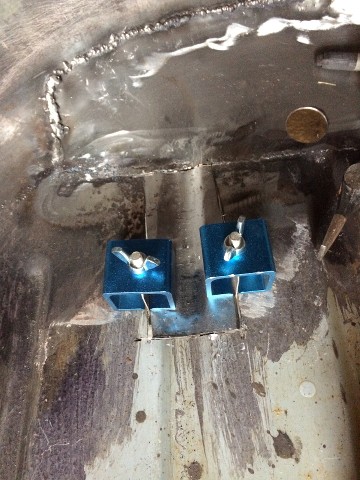
I therefore had to make up a new section from 1mm sheet steel, which I shaped over the vice jaws with hammers and an old socket to create the recessed portion, before cutting it to shape and holding it in place with welding clamps.
This was promptly welded in place with my usual applomb....
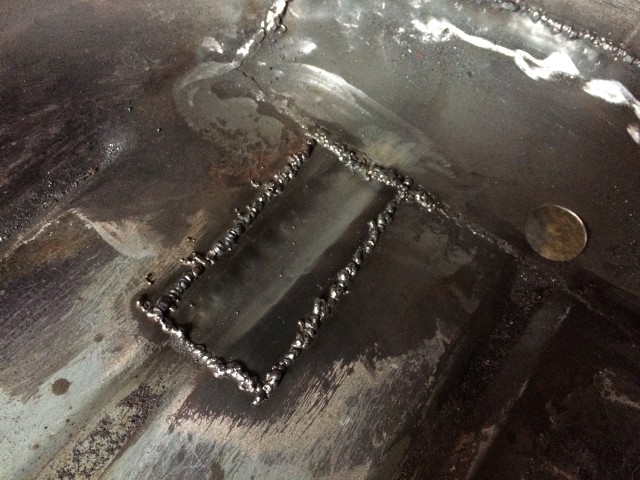
....before being cleaned up with the angle grinder.
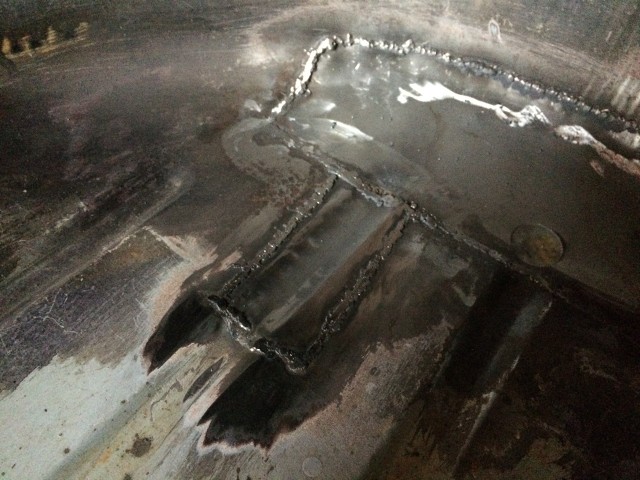
That's the boot welding completed, so I can now start the painting of the boot, and then finally get the fuel tank back in.
Definitely feels like progress.
Karl
-
Roger, good to know that you have had a good experience with silicone.
I've just had the passenger front calliper and pistons off and they look to be brand new, much like the seals on the rear cylinders, and the master cylinder is new as well, so I'm fairly confident that the system should be able to cope with silicone fluid when the new brake lines turn up next week.
Just need to order some silicone fluid now.
Karl
-
Thanks all.
Having read through the Buckeye article I'm inclined to blow through all the old lines with compressed air, strip and clean the calliper pistons and rear brake cylinders, as well as the master cylinder.
I have yet to check the flexible hoses, so these may yet require replacement, but I know the seals on all the other components are either already new, or in good condition.
So it looks like I've made the decision to go silicone.
Karl
-
From experience with mine it's much easier to get bonnet pivot bolts set up without the front valance in place, as you have unfettered access to the pivot plates and bolts.
The front valance can then be slid into place and bolted up, then the grill and overiders fitted.
Mine is an original valance, so not sure if that makes things easier.
Karl
-
Now before anyone gets the wrong idea I am not considering implants, but whether it is worth switching over from DOT 4 glycol based fluid to DOT 5 silicone based.
My main reason for thinking of swapping is because I'm looking to repaint the bulkhead at some point in time, and having seen the mess that DOT 4 spills can have on paintwork, I want to try and avoid that in future.
I know there are some fairly strong views on the pros and cons of silicone, but what I am interested in understanding is whether the swap can only be made to a freshly rebuilt system, or a system that has already used DOT4?
Further to that, how do you flush all of the old DOT4 out of the system?
My brake system has been sitting pretty much drained for the last 6 months, and roughly 50% of the pipes are new.
Karl
-
I figure I'm not the first person to encounter this problem, and I'm sure that I won't be the last, but someone ought to experience from my erratic learning curve.
Karl
-
I always try and weld outside where fumes can dissipate quickly, as it's generall breezey on my drive, or if indo have to weld in the garage, then I leave both the main garage door, and the side door open to promote a draft through the space.
Not sure whether a filter mask would even fit under a welding helmet, and would probably be extremely uncomfortable.
Karl

** 26/02/23 Heading Up ** Probably how not to restore a Herald!
in My Triumph Restoration Project
Posted
I was hoping to get the fuel tank back in this weekend, but I have been stricken by the lurg so don't feel much like working in a cold and drafty garage, however I don't want to waste the weekend either so decided to tackle some low hassle tasks that can be done indoors.
First up was cleaning the rear over riders, and the associated stainless steel strips which sit above them either side of the rear light clusters.
The over riders are not in great nick, but will have to do, having obviously had a very hard life with a number of impacts evident.
The stainless steel strips are in far better condition, and have responded well to a clean up with some metal polish.
One of the over riders is in worse condition than the other, with lots of rust pitting, and general signs of distress.
At some point I will replace it, but that will have to wait for now.
The other one, while not pristine is in better condition, and came up quiet respectably after a polish.
With those done, I turned my attention to re-uniting the brake and clutch master cylinders with their respective brackets.
Much smarter, with the cylinders cleaned up and the brackets re-painted ready to go back on.
I just need to sort out that brake line that was too short, and finish painting the bulkhead under the brackets, and then this lot can go back it, and I will have a working clutch and brake system.
Karl