

Bordfunker
-
Posts
1,005 -
Joined
-
Last visited
-
Days Won
17
Content Type
Profiles
Forums
Blogs
Gallery
Downloads
Store
Events
Posts posted by Bordfunker
-
-
I’ve heard good things about Rustbusters products, so have just ordered FE 123, which is their rust converter.
http://www.rust.co.uk/fe-123-rust-converter/c28125/
I’ll also be going with their epoxy mastic paint for the chassis and undersides.
Karl
-
Currently I'm waiting on a full set of out riggers to arrive from Chic Doig, which should happen on Thursday with a bit of luck.
In the interim it's time to start stripping back the chassis, and measuring up so that the new components go back in the same place as the old.
And below are some reminders of what the 'old' looks like.
This is the driver's side rear outrigger, not welded on top, and with the remains of the old out rigger left in situ beneath!
Here's the driver's side outer rail, again not welded on top, and not even looking like it fits a Herald properly.
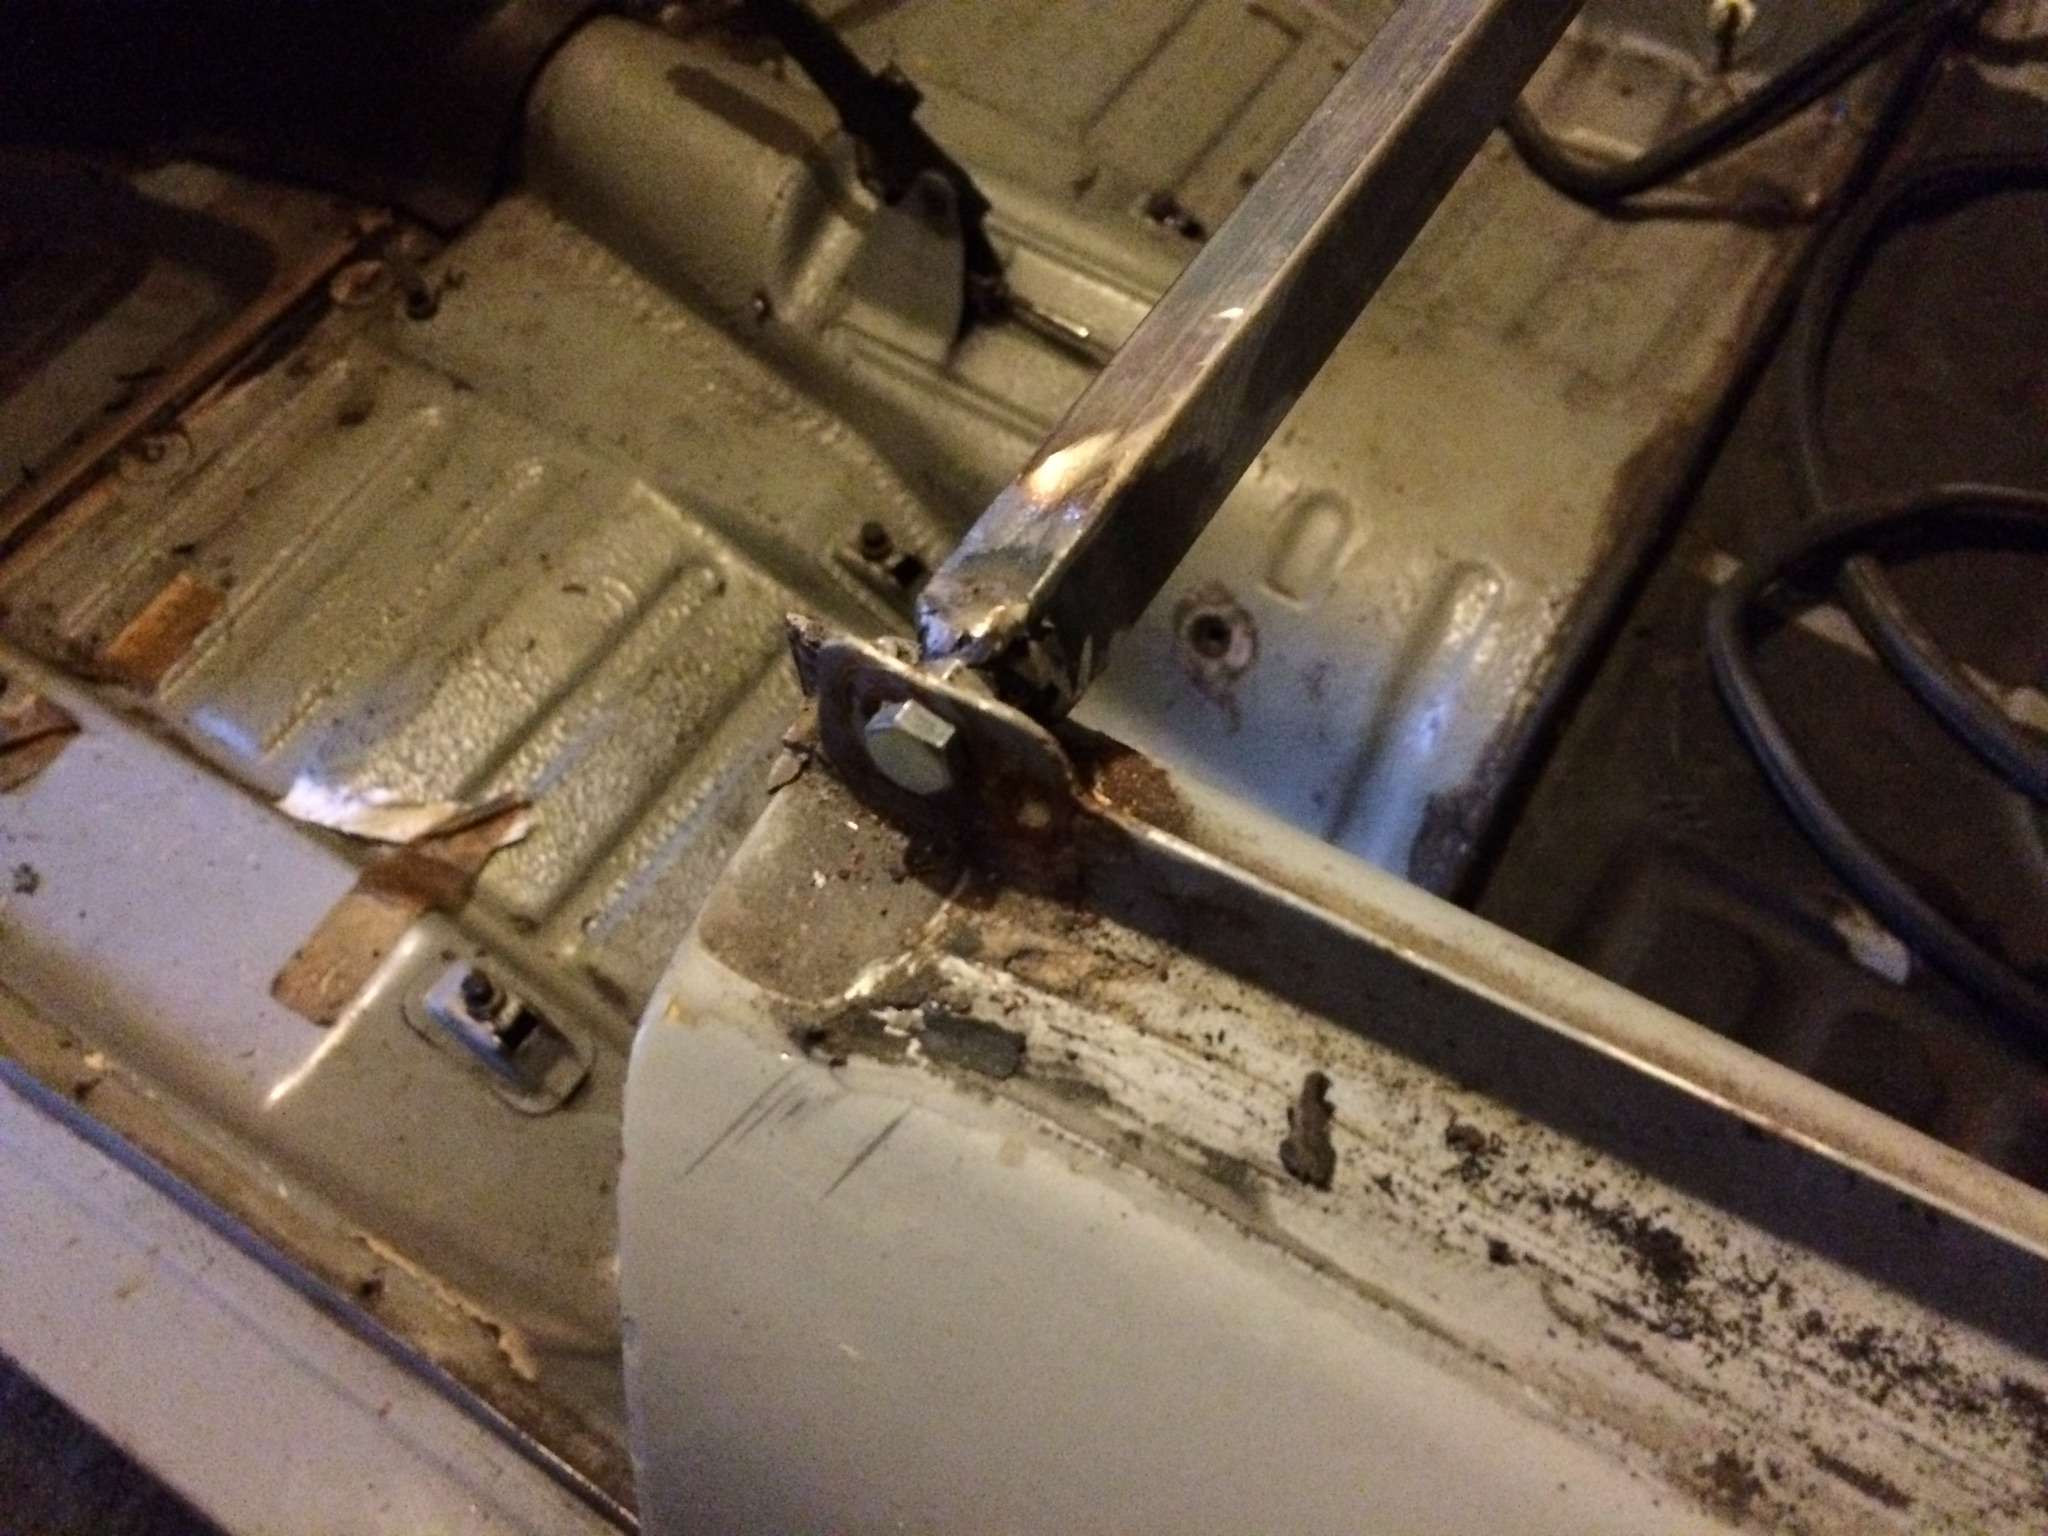
And here's the other end of the driver's side.
This is supposed to be the joint between the front out rigger and the chassis side rail!
What a complete bodge job!
How this car had an MoT is beyond me.
This is the middle out rigger on the driver's side after I had shifted the bulkhead.
As you can see it has a number of holes in it that aren't supposed to be there, which perversely makes me so glad that I bought a full set of out riggers for the central chassis section.
What I didn't buy, and I should have, was the driver's side boot out rigger.

Oops! A new one is now on order, which is good really seeing as this one is no longer attached to the rest of the chassis.
Removing that without a rear tub in the way was so much easier than when I did the passenger side with the tub in place.
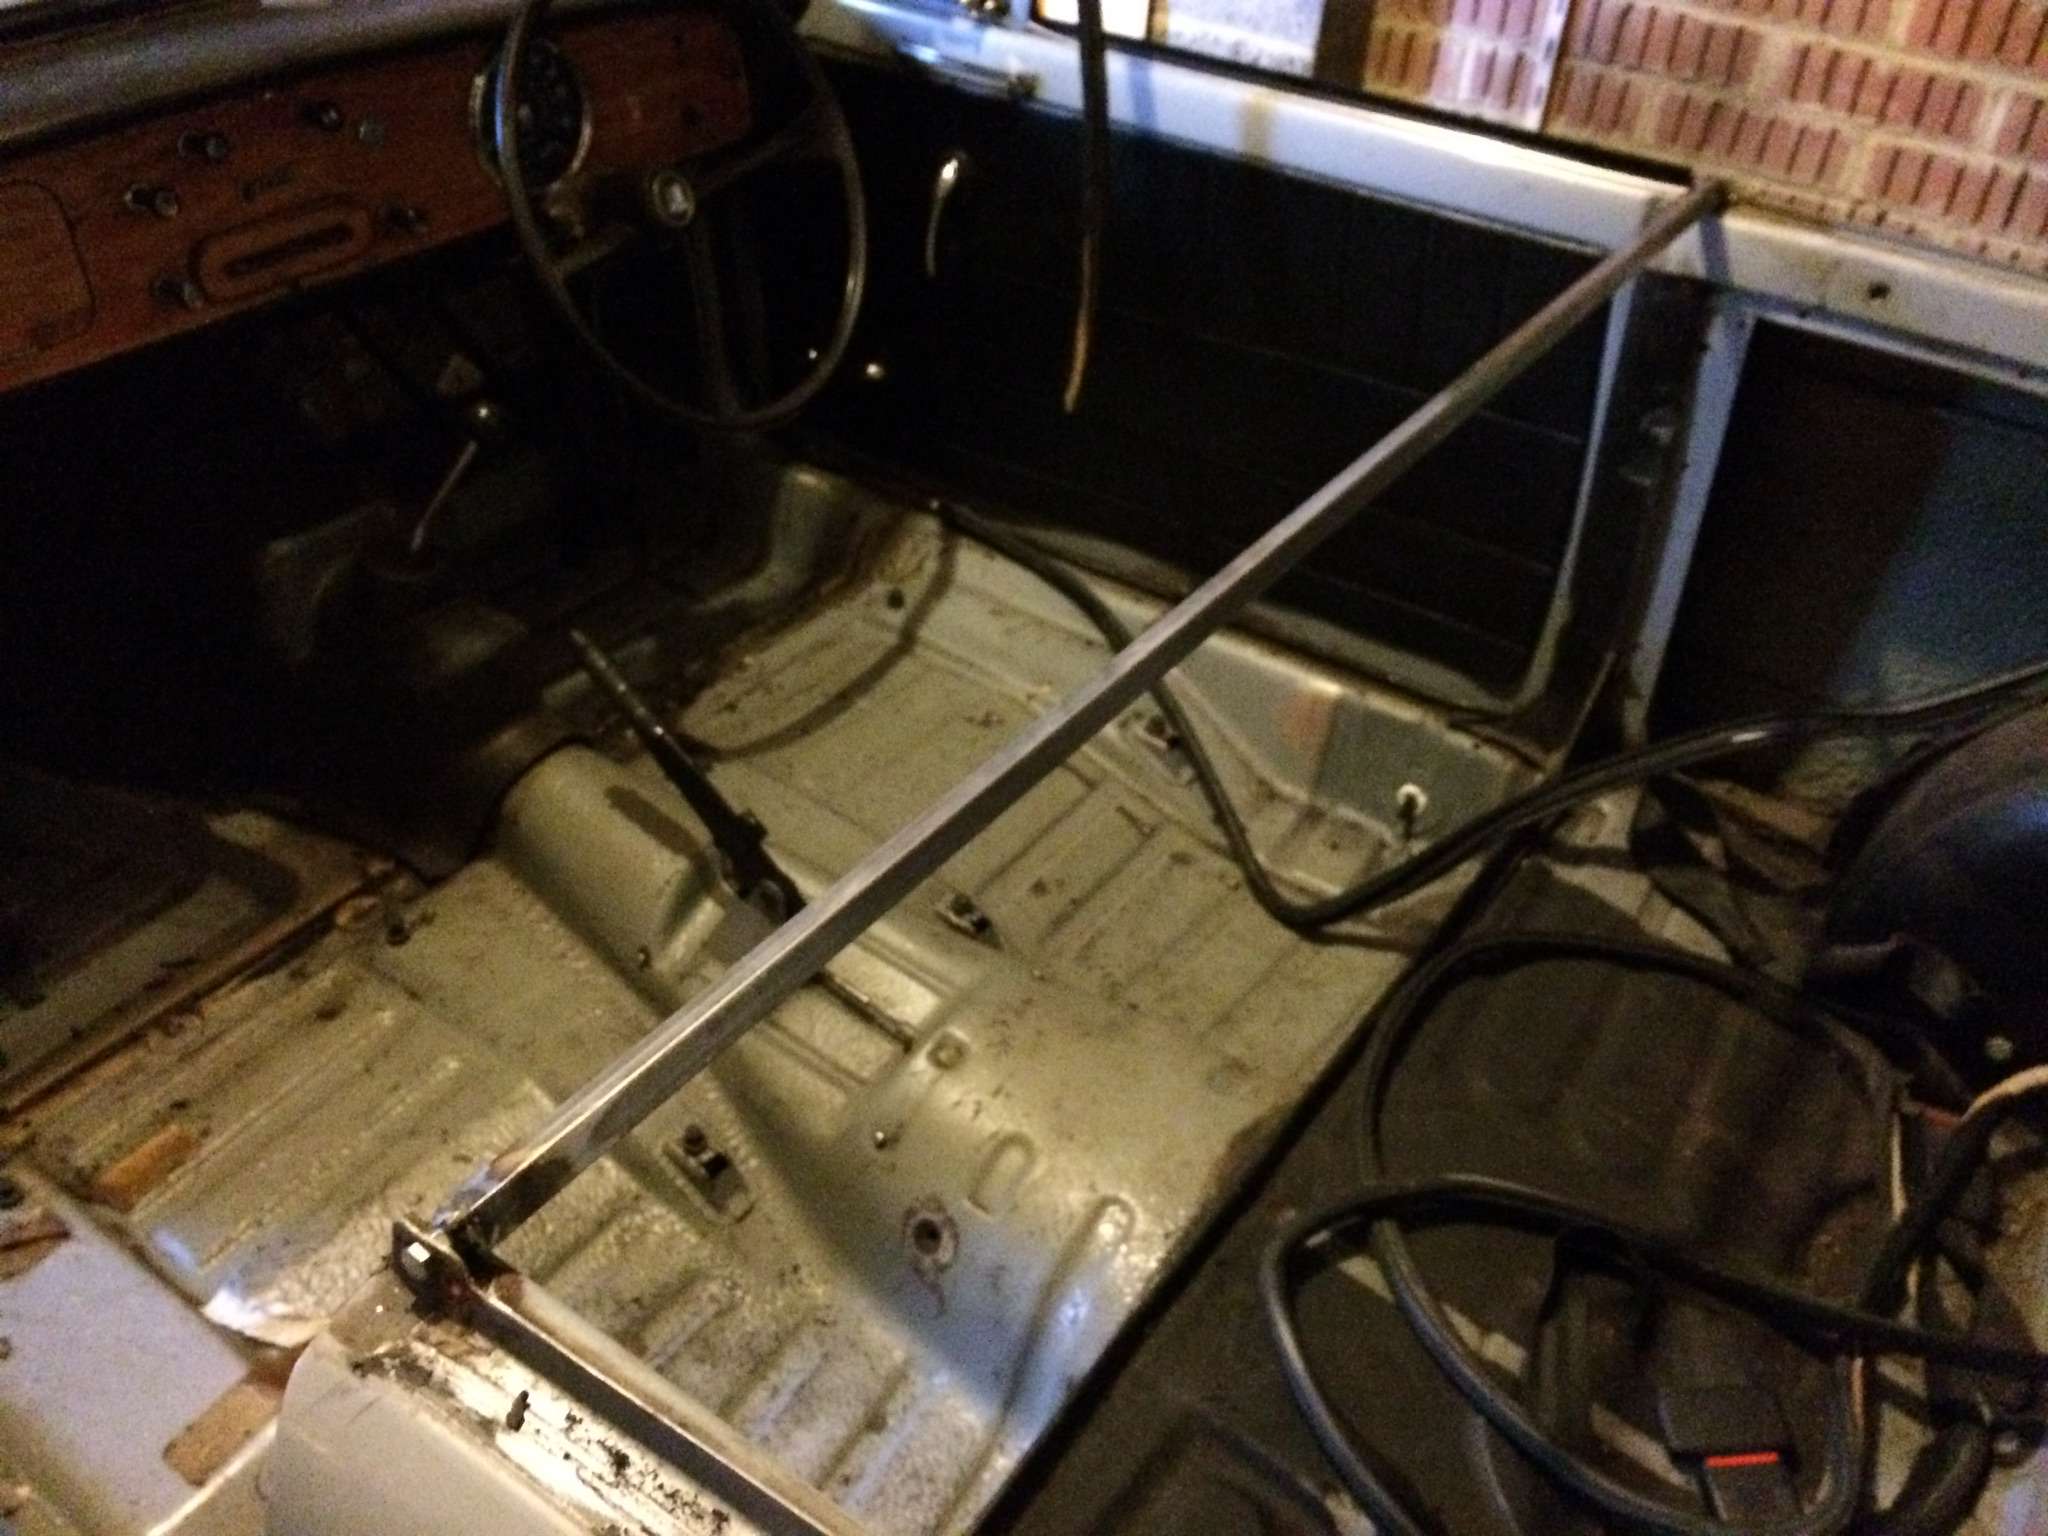
Before I removed the boot out rigger I made sure that the chassis was level, by letting the air out of each tyre until the bubble in my little spirit level was dead centre.
I then introduced my handy measuring stick, which I will be using to check a number of key dimensions across the chassis as I reassemble it.
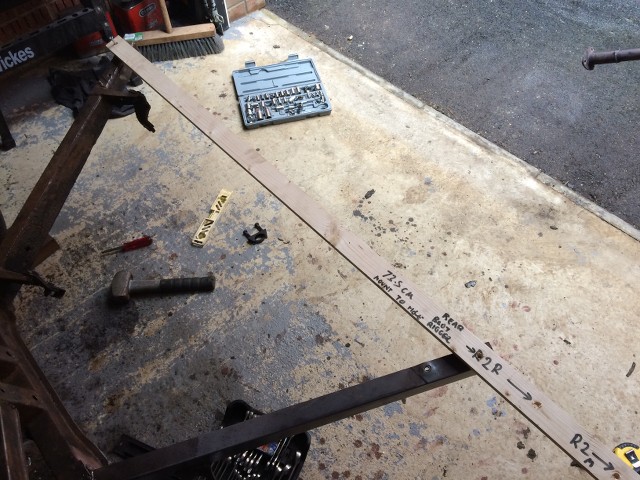
This has a series of holes drilled through which correspond to the key dimensions, which will come in handy later.
With my old, and very defunct angle grinder swapped for a shiny, and fully operational, new one, I set to removing the rear passenger side outrigger.
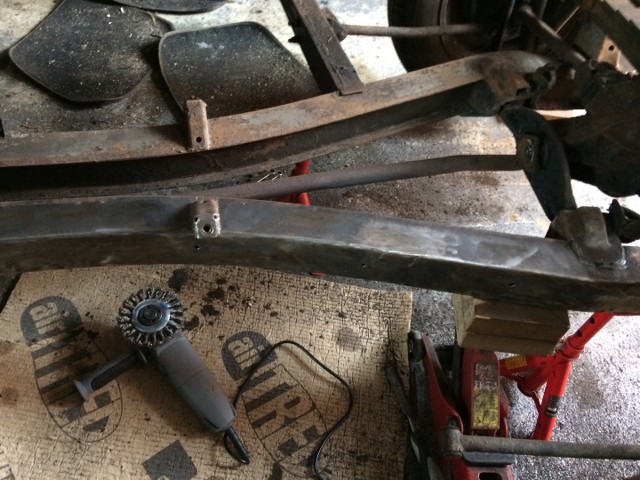
And here it is all cleaned up and ready for the replacement.
There are a couple of gouges which will need a bit of weld, but no hardship considering how much welding I have ahead of me anyway.
Karl
-
You should be fine with 3 of you to lift the tub, I had the 2 boys, MrsB and me for the lift today and it very easy.
I’m hoping the frame will help speed things up by allowing me more flexibility in what I can work on.
MrsB won’t let me have it in bits for too long, so the aim is to have the chassis welded and painted over the next couple of months, and then the boys can help me put the tub back on when they’re back from university.
The aim being to get the car back on the road for summer, then use winter to sort out the rest of the bodywork, and then respray it all next spring.
Well that’s the theory at least!
Karl
-
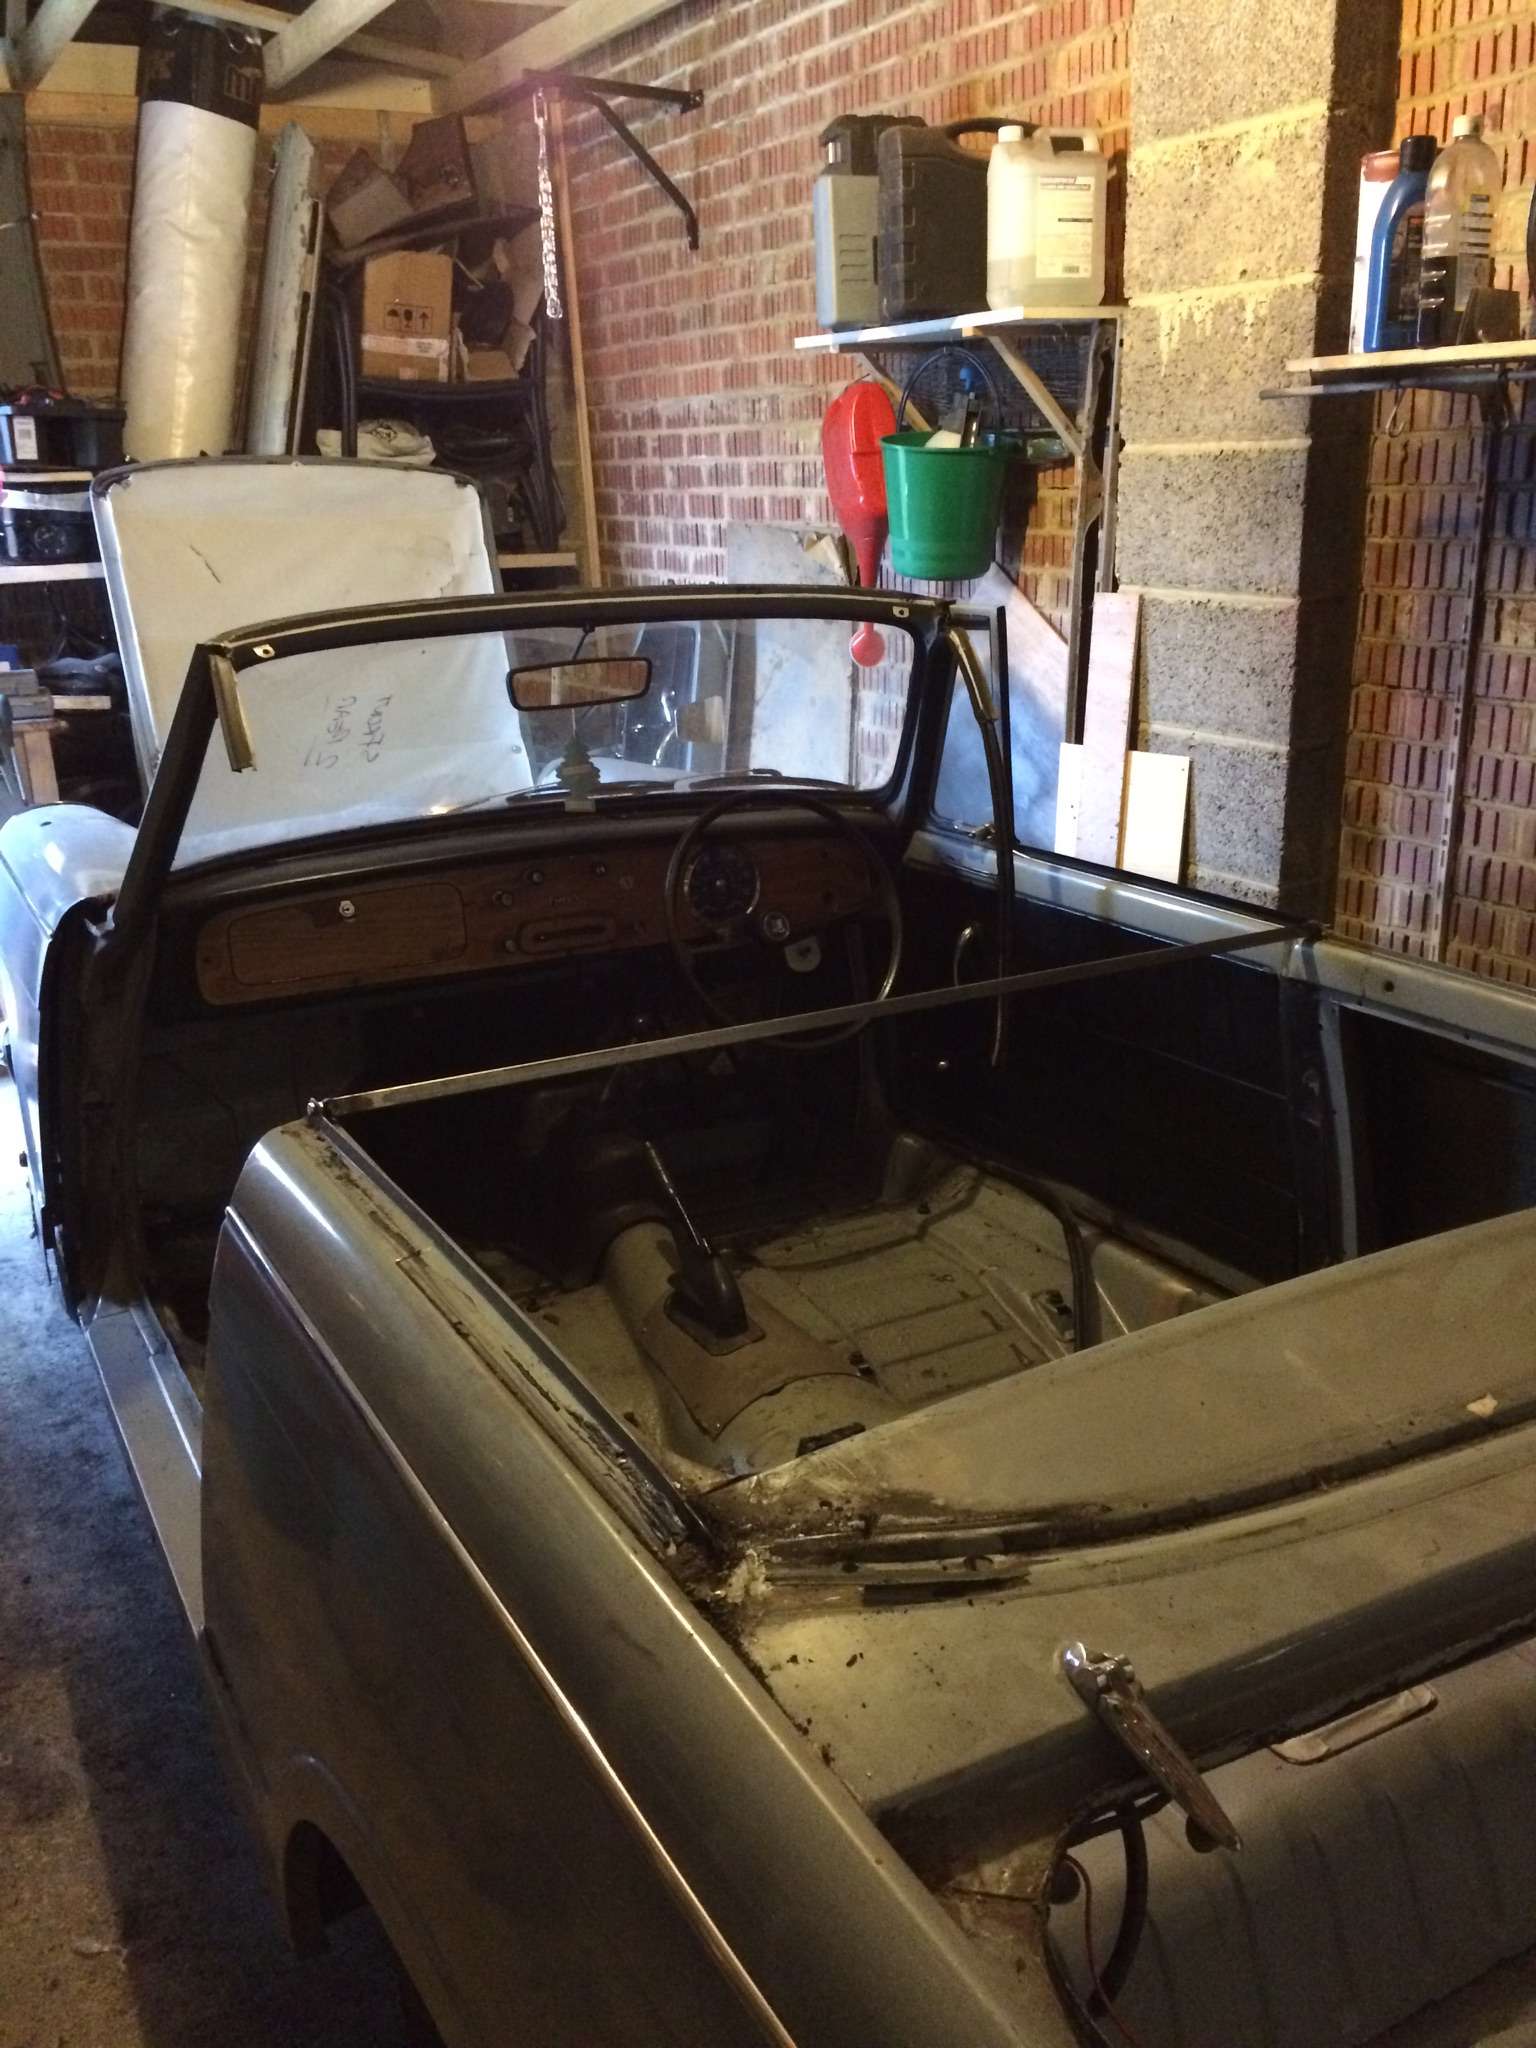
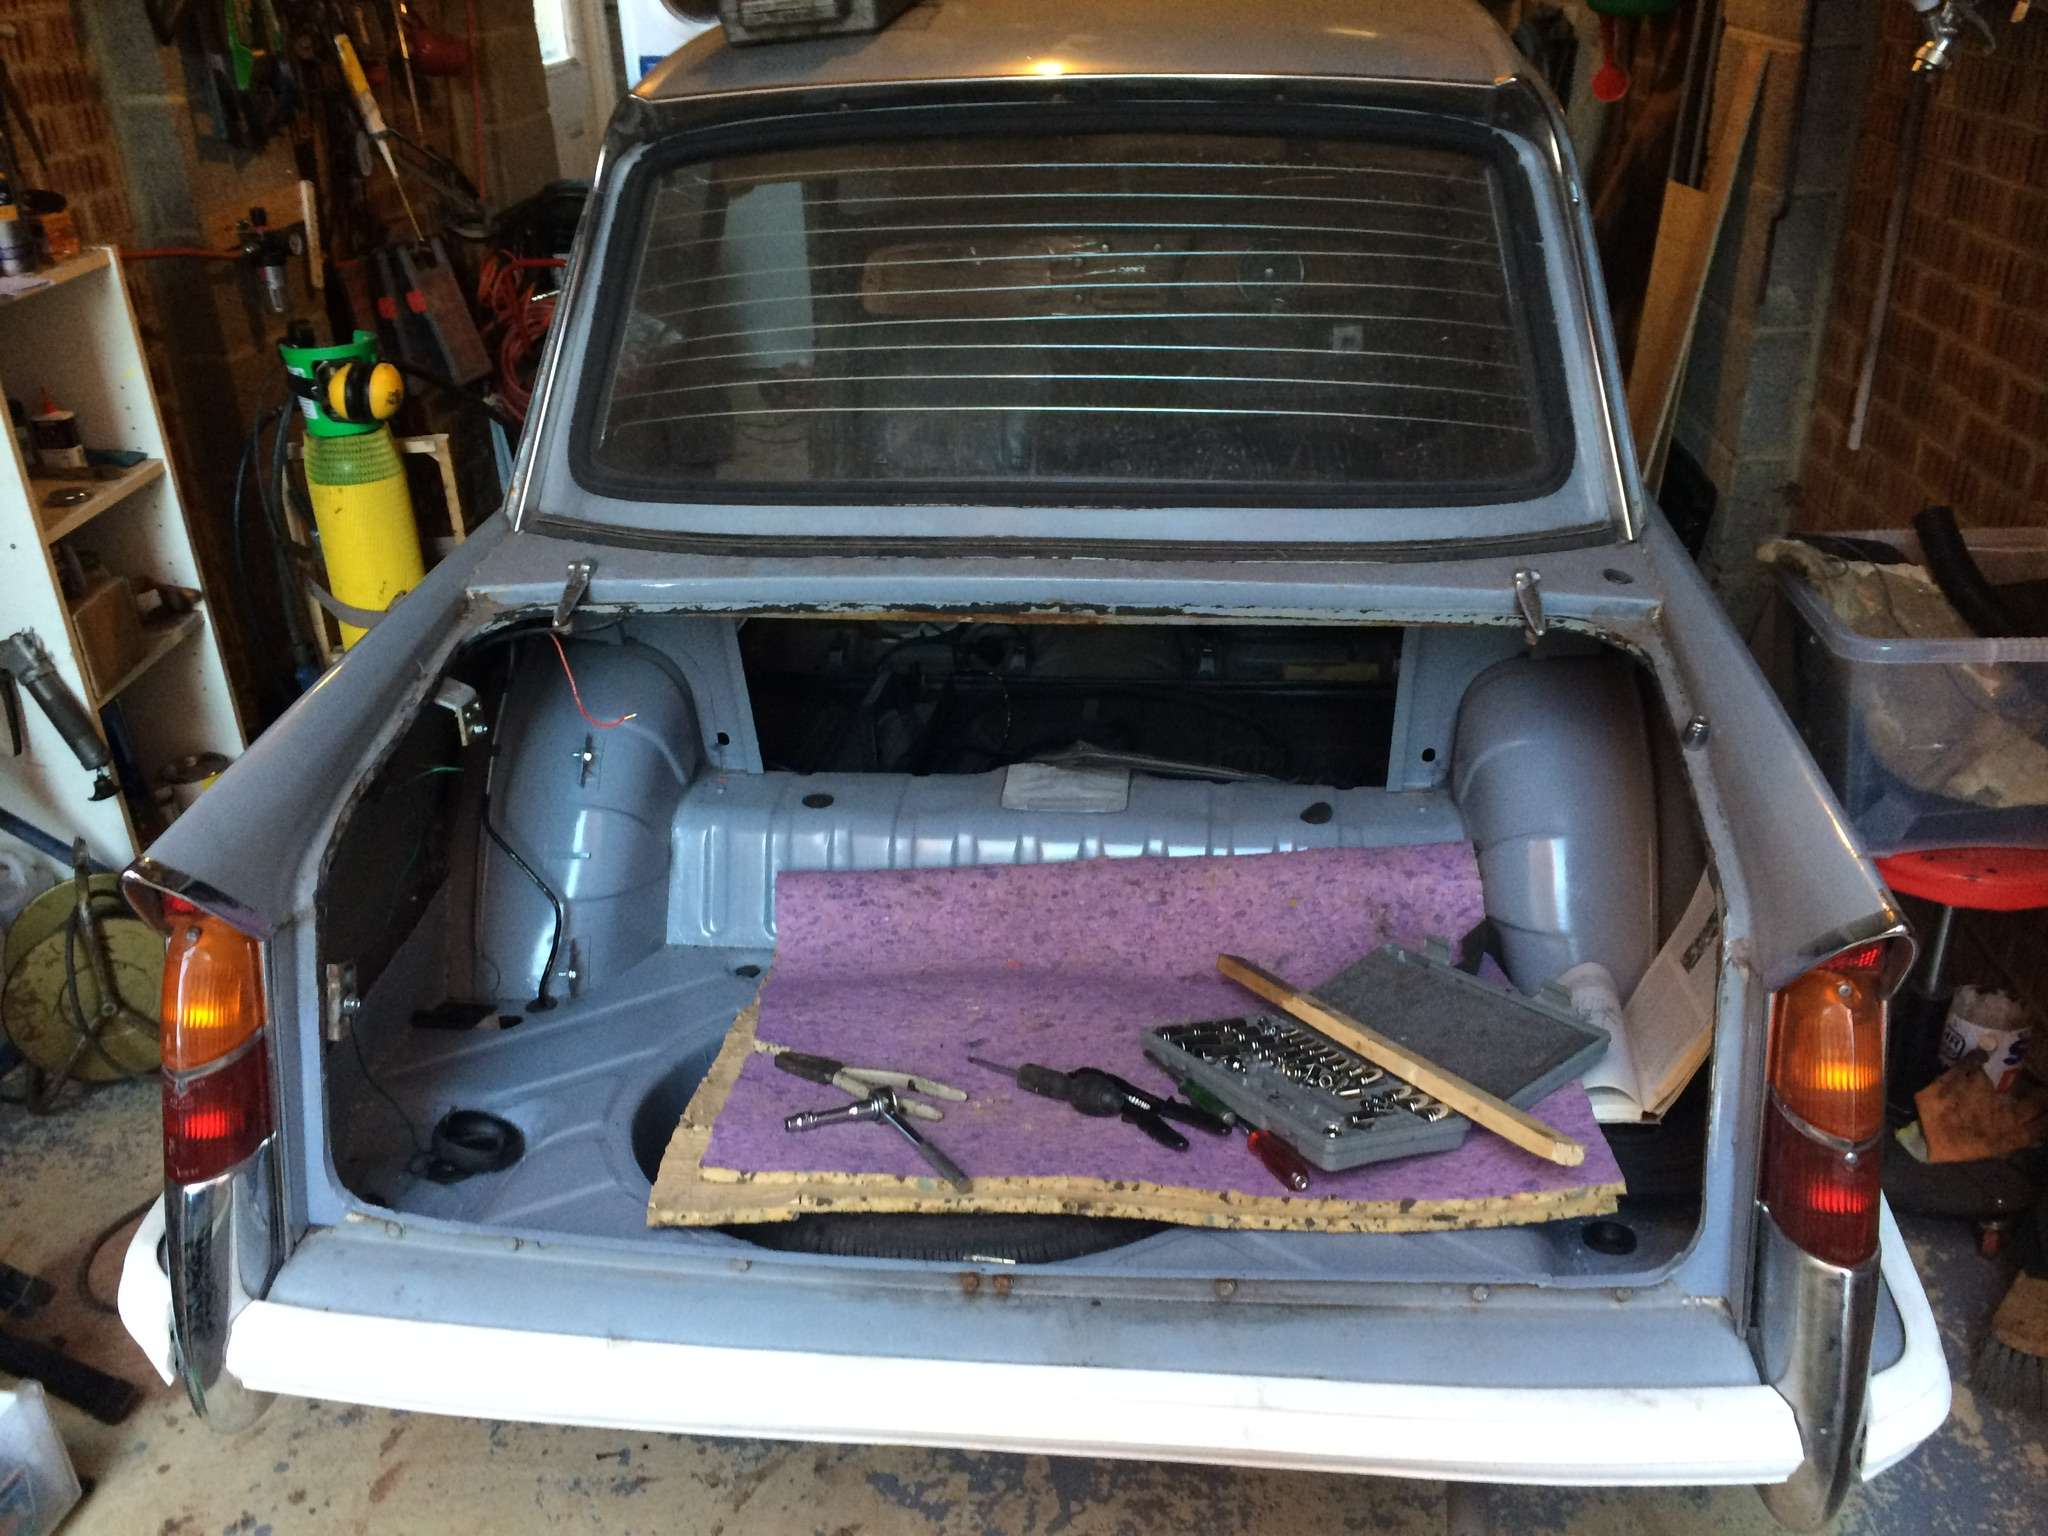
Both sons are now back from university for Easter, so no shortage of muscle to lift the rear body tub onto the frame.
Here it is, with the tub flipped over and placed on the cross braces that I added to the frame yesterday afternoon.
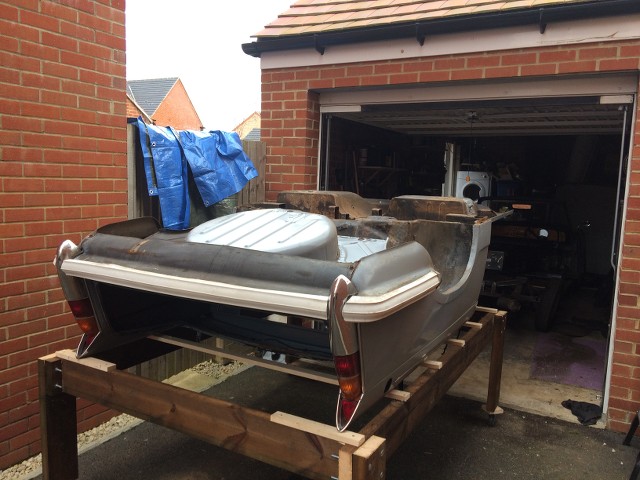
It's actually quite a nice height to work on, and here it is doing what it's supposed do, wheeled over the chassis in the garage.

Note blue tarpaulin for those days when I need to wheel it out of the garage, but it's raining, which it appears to have done a lot recently!
Now at this point in the weekend I had expected to have removed the out riggers on the passenger side, however yesterday afternoon my angry grinder decided to go 'phutt', with a cloud of grey smoke and a nasty grinding noise!
I've never dropped anything so quick in my life!
Luckily it's still under warranty, so tomorrow it's going back to ScrewFix for a replacement!
So with that off the menu, I decided to drain the brakes, and remove all of the pipework to the rear of the car along with the fuel line, as I don't fancy waving a welding torch near the fuel line, empty or not!!!!
Also out came the handbrake cable, with me carefully removing all the nuts and fixings in order to thread it through the quadrants, before realising that it was frayed in the middle, and fit for the bin only anyway!
And to add insult to injury, the frayed portion managed to dig itself into my hand! Owwwwww!!!
Everything on the front bulkhead has now been disconnected, including the steering column and loom, which just leaves the mounting bolts to be ground off with the new angle grinder.
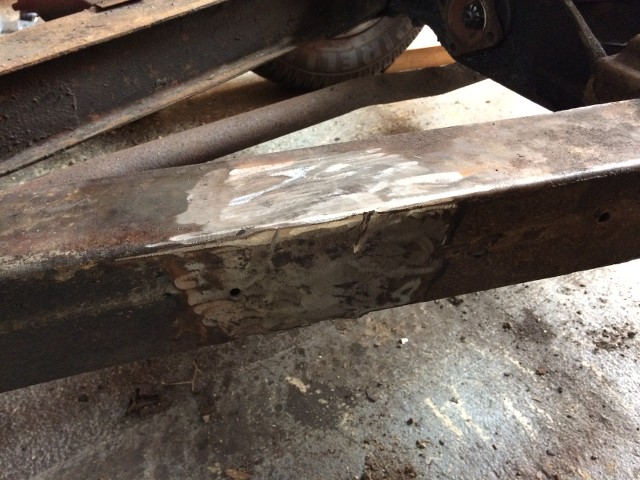
With that lot done, I decided to have a look at the rear tub, specifically the rear arches and the area behind the B-post.
Now I knew this area was a bit rotten, no shock there, it's a Herald after all!

Note the bubbling.
This was attacked with a strip wheel in the power drill......
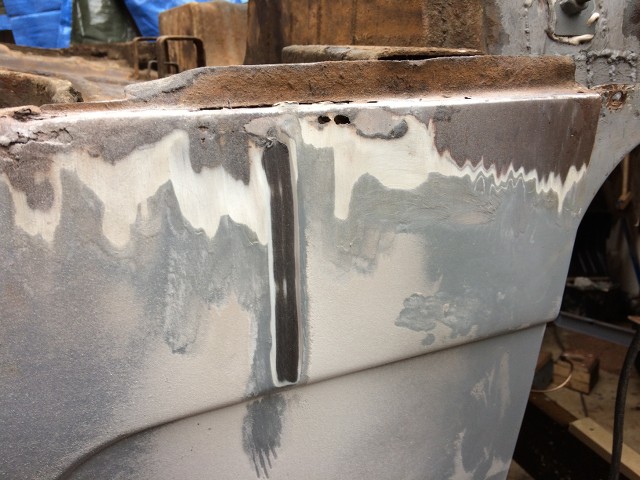
That vertical strip is a cut through the filler to the metal beneath, a whopping 5mm below the level of the paint on top!!!
Whoever did this didn't even try to patch the holes, just slapped filler on.
It was like this over the entire section, but after half an hour, I was left with this.
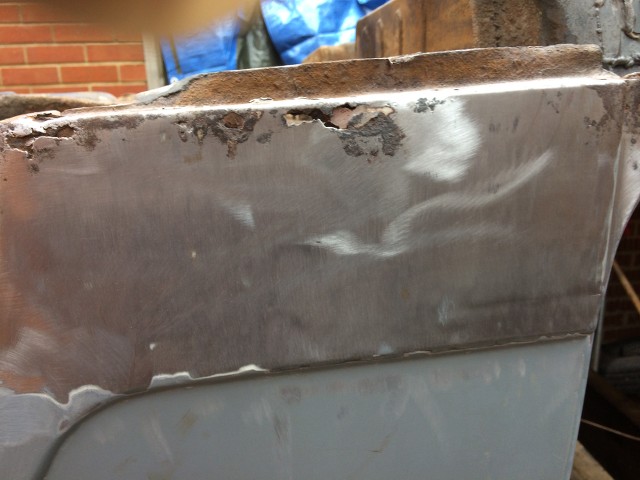
Nothing I wasn't expecting, and the repair panels are already on order from Paddocks.
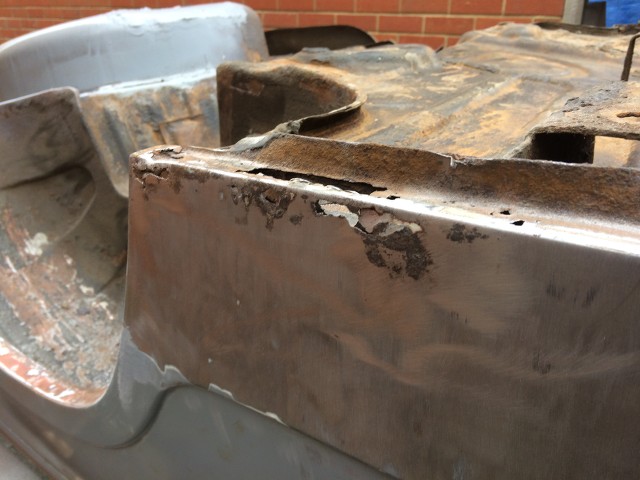
While I was there, I decided to take a look at the passenger side rear arch as well, as it was showing signs of corrosion, and possible bodgery, if that's a word.
Where the outer arch lip is folded over the inner arch lip, corrosion has got in between the two and blown the joint, so remedial work will be required here.
Here's an overall view of the underside, you can see where the under seal has started to peel off, taking the paint with it, and leaving patches of bare metal.
Looks like I might have caught this just in time, before terminal rot set in.
The good news is that I've got the rest of the week of, so plenty of time to make some headway on the Herald.
Karl
-
5 hours ago, Chris A said:
The version with a "z" is American English, the version with an "s" is English English. The interesting point would be to know why the difference, there are a lot of American English words or grammatical styles that are "old" English that went to the States and remained unchanged whereas English evolved. Look at 17th & 18th, or even for that matter 19th century, spellings in English literature of the same word.
School over for today.

Chris, you beat me to it!
One of the few times a degree in Linguistics actually proves pertinent, and I miss it!
Karl
-
Agreed! That looks far to good to hide away!
Makes me want to rebuild my engine now!
Karl
-
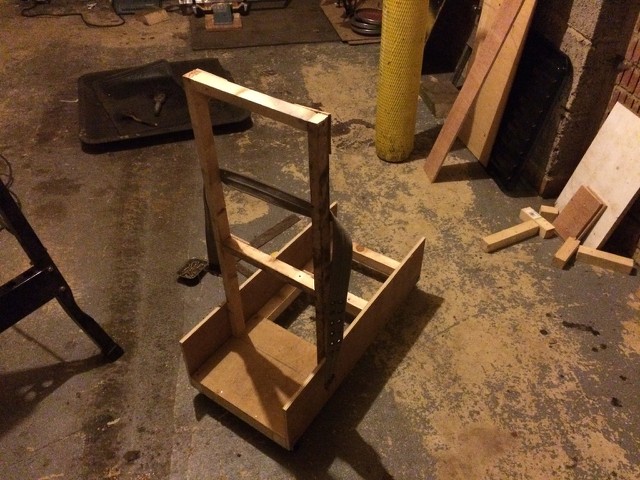
In a repeat of last Saturday's woodworking binge, I decided to build a frame for the tub to sit on while I repair it.
The idea being that the frame with the tub on can be wheeled in and out of the garage to allow me to work on the chassis as well.
This will hopefully free up some space in the garage, as it's getting a bit tight in their with everything in pieces.
I had to liberate the timber from the pile set aside for Mrs B's new flower beds, so I have some making up to do!
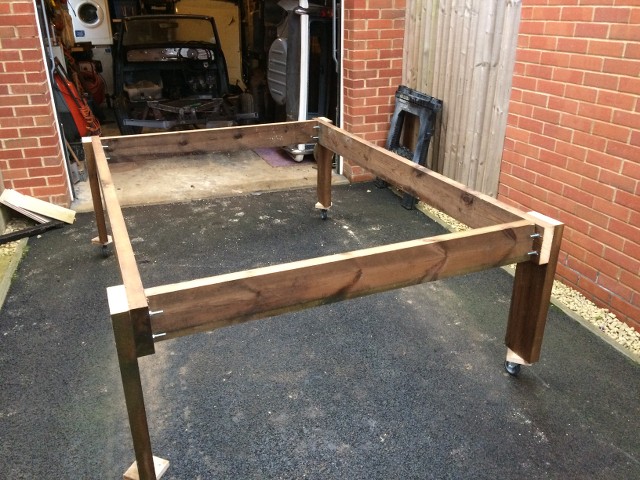
It does rather look like a large bed at the moment!
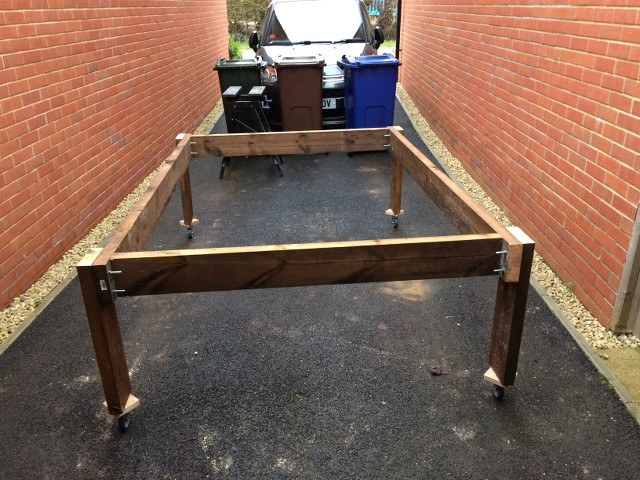
There's still some work to do to add a central brace to support the tub better, but that'll have to wait until next week as tomorrow I'm off to the NEC for the Practical Classics show.
Which means hopefully next week, with both sons home from university, they can help me lift the tub onto the frame.
Karl
-
Pete, that’s very kind of you, I’m always interested in more tools, as I’m a great believer in the right tool for the job.
Though generally I’m the tool doing a right job of it!
At the moment I’m planning a wooden frame on castors that I can pop the tub on, so that I can move it in and out of the garage.
Karl
-
It's been a couple of weeks without an update, mainly because all I managed last week was to remove the driver's door.
This was pretty straightforward, aside from the removal of that bloody rivet on the door check strap. Why could Triumph not used a clevis pin?
Luckily I picked up an air grinder from Lidl the other week, which allowed me to grind the top of the rivet away. Well worth the £12 it cost me.
This week the aim was to get the tub off the chassis, with only 4 mounting bolts to remove, two over the rear spring, and two at the rear of the driver's side out riggers.
However before I could do that I had to remove the handbrake cable, simple right?
OMG what a faff!
I spent yesterday making up two pairs of heavy duty chocks, as I didn't fancy working under the car with my existing set up, and a jack block as the lift height on my trolley jack doesn't get the car high enough to utilise the top settings on my axle stands, and I needed all the room I could get to sort out the hand brake cable.
With yesterday taken up with playing chippie rather than grease monkey, today I set about jacking the car up to a decent height, and setting up the axle stands, leaving me room to get underneath properly.
Now, I'd done a bit of thinking on this, and decided to drop the prop shaft to improve access to the handbrake compensator.
Not really a hardship as I need to replace both the gearbox rear seal, and the nose seal on the diff, so it was going to happen anyway.
I did remember to mark up the prop shaft and gearbox & diff flanges so as to retain the original orientation when it's time to reassemble it all.
After which the handbrake compensator came out without a fight, I removed the two bolts over the spring, and ground out the two on the driver's side.
It was at this point I found out one of the ones on the driver's side wasn't actually attached to anything!!!
This was just the first of a number of bodges that would come to light.
Then it was time to remove the tub, and store it along side the chassis, allowing room for working on the underside.

It's a bit of a squeeze, but it works. Just!
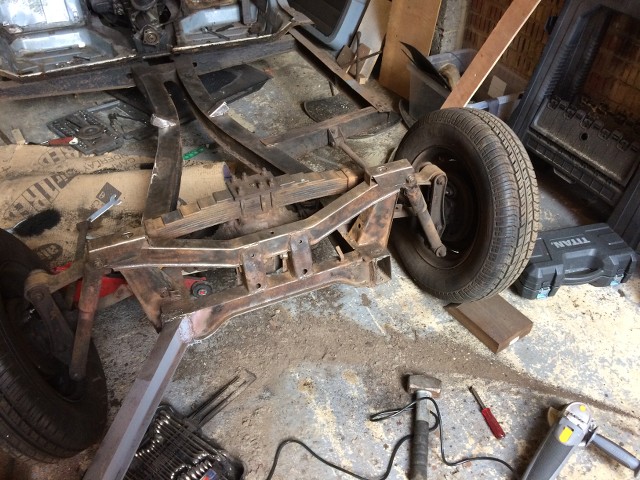
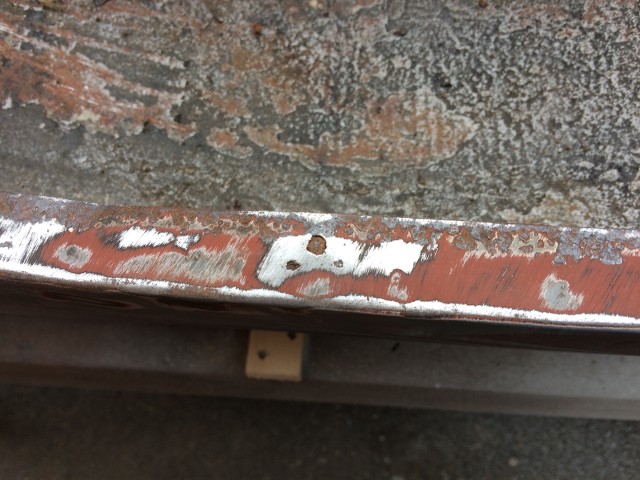
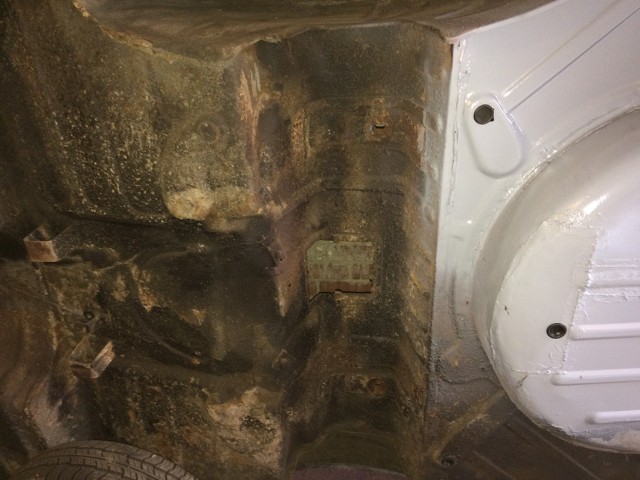
With that off, I set about the chassis with a wire brush in the angle grinder, which gave me this.
The lower rail has been cleaned back, the upper just brushed off, but it looks pretty good, with no serious rust.
Now did I mention bodges?
Here is the passenger side rear out rigger.....

So much for fully seam welding the out rigger to the main rail.
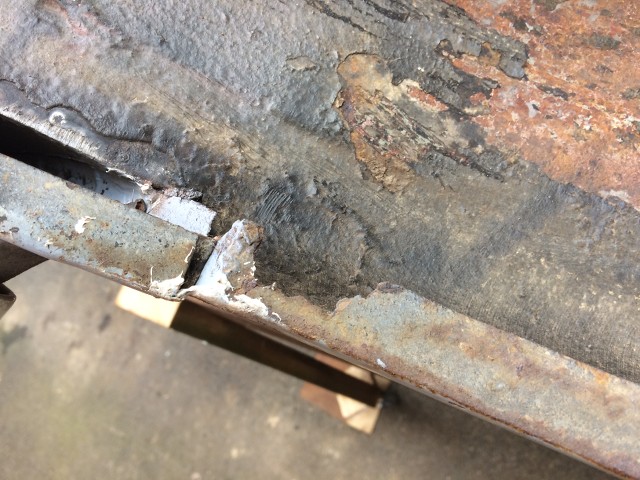
The driver's side one is the same, if not worse as there is a 4mm gap between the lip that fits over the main rail, and the rail itself!
I then had a go at the rear saddle that sits over the diff, which also showed no serious corrosion, just a lot of very flaky under seal.
Needless to say I was fully kitted up with face mask, goggles and ear defenders while doing this, as even with the garage door open there was a ton of dust swirling about.
Which also meant that the garage was bloody freezing!
By this time I was starting to lose all feeling in my feet, so had a quick go at the underside of the tub.
The wire brush in an angle grinder really does make short work of old under seal and paint, which is good news as there's loads of it!
I know what I'm doing for the next few weeks!
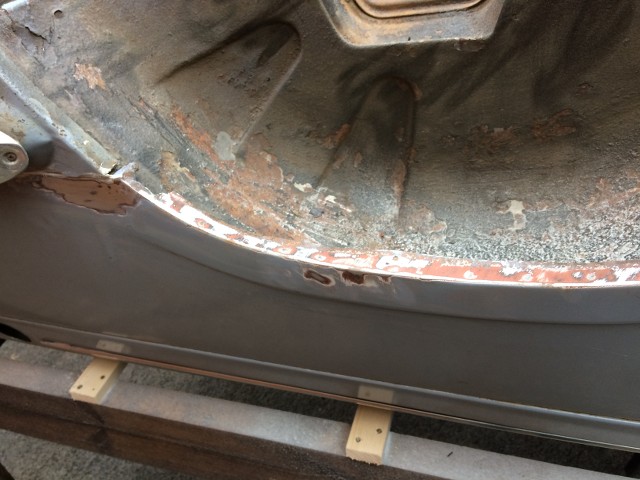
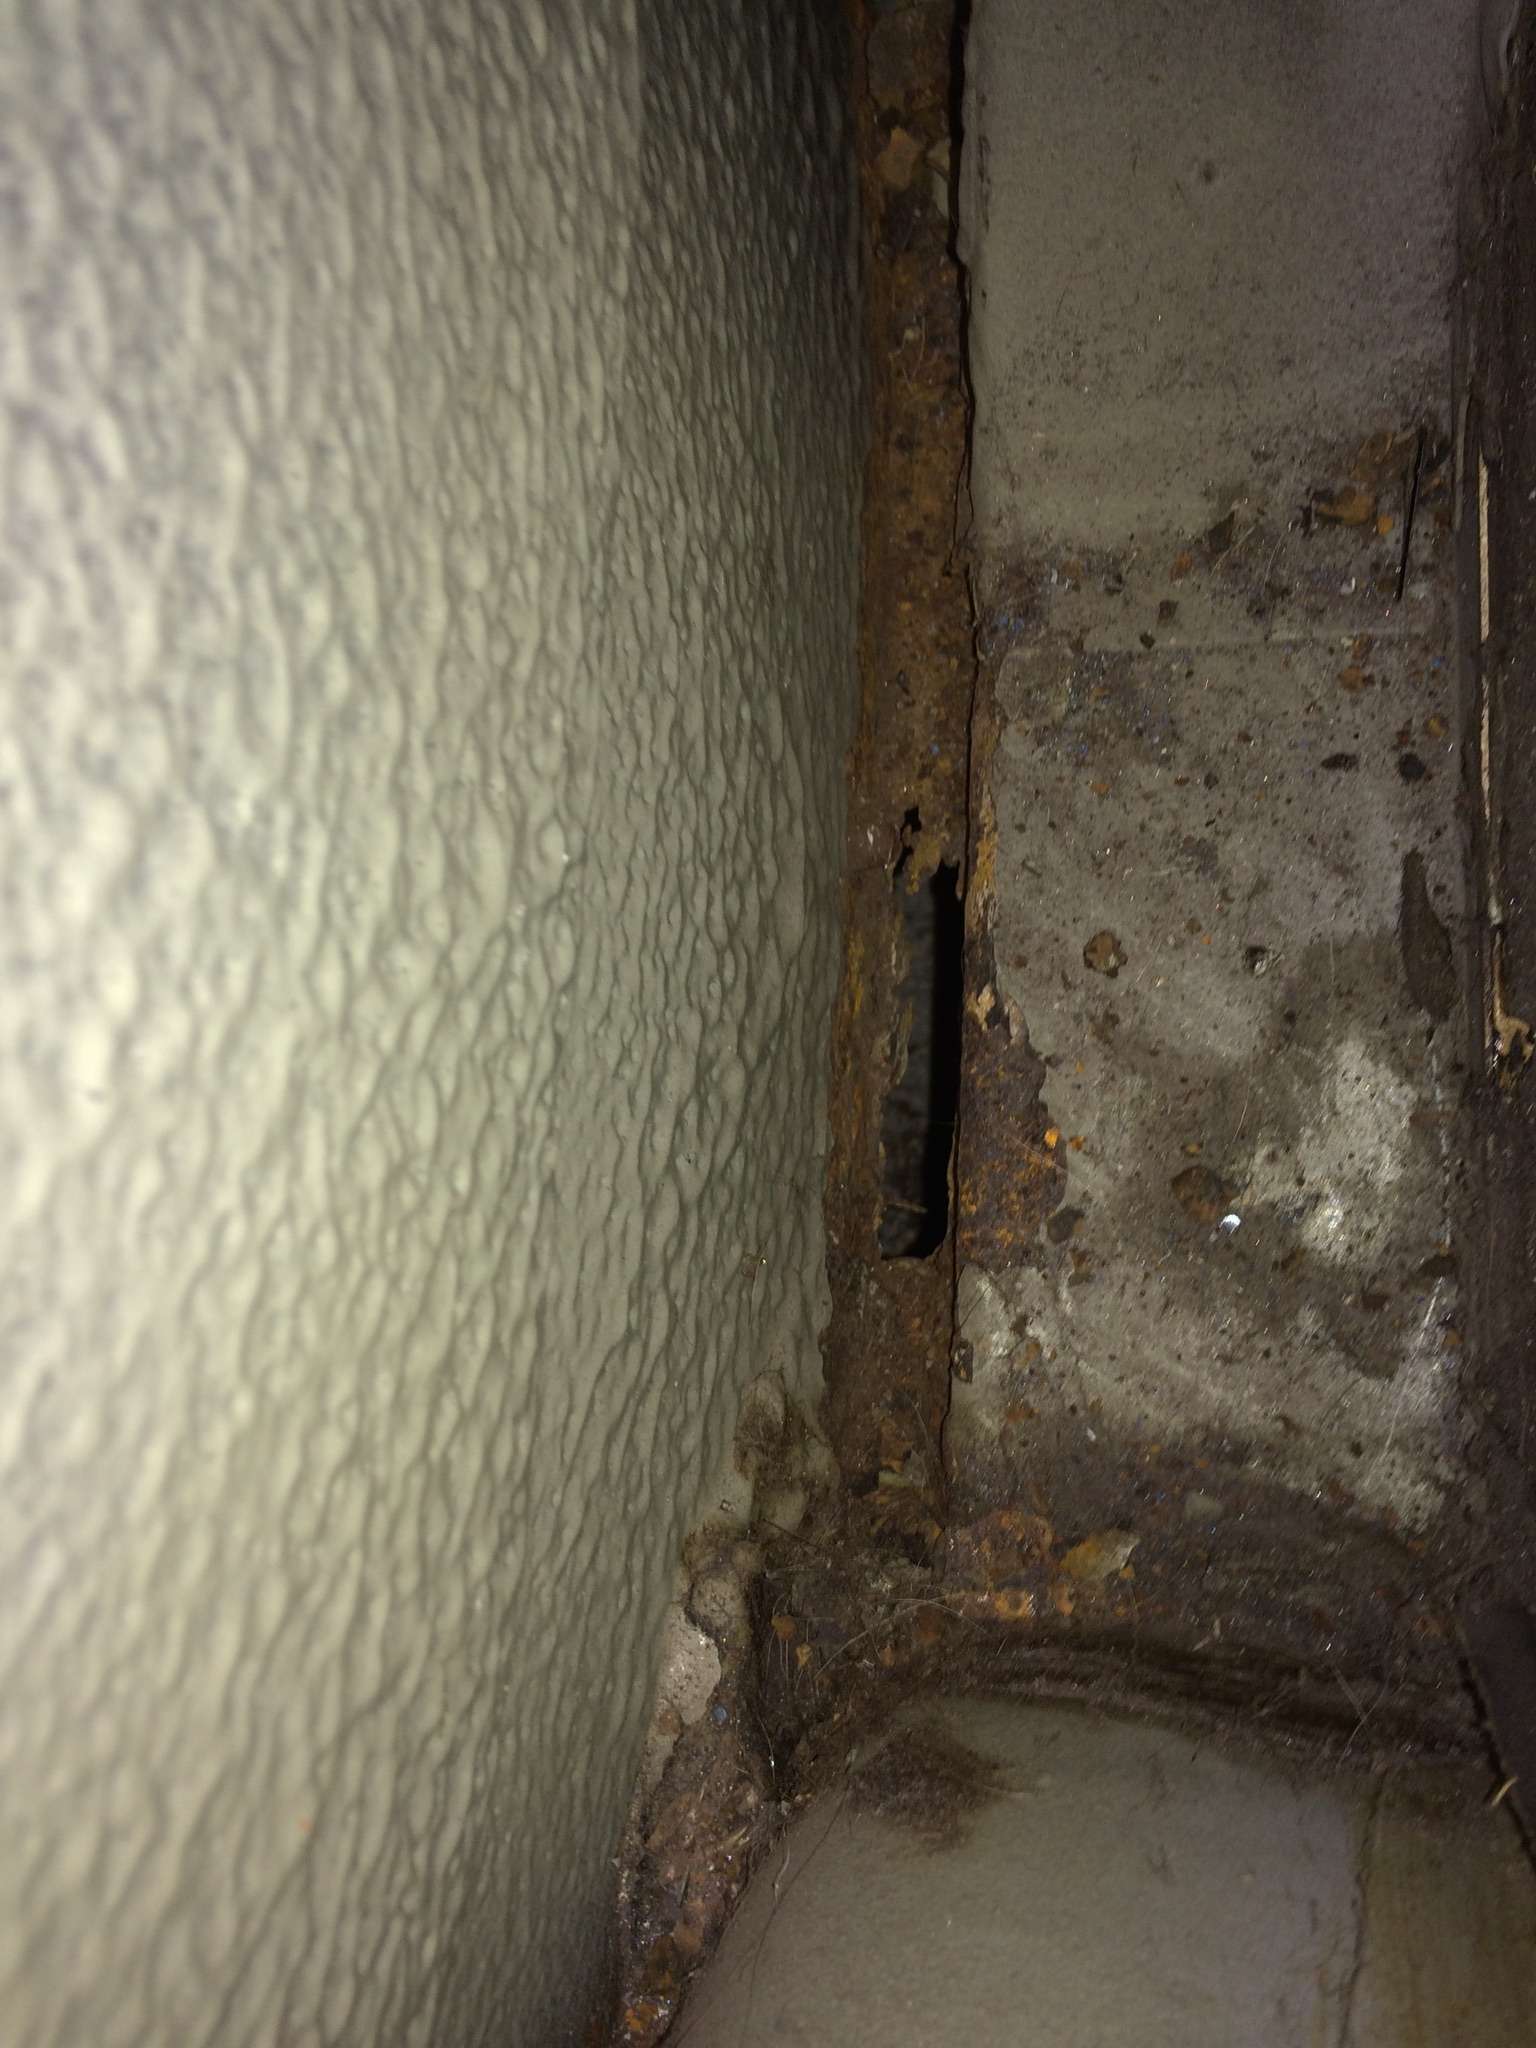
Finally a shot of the rot at the base of the B pillar between the pillar and the rear arch.
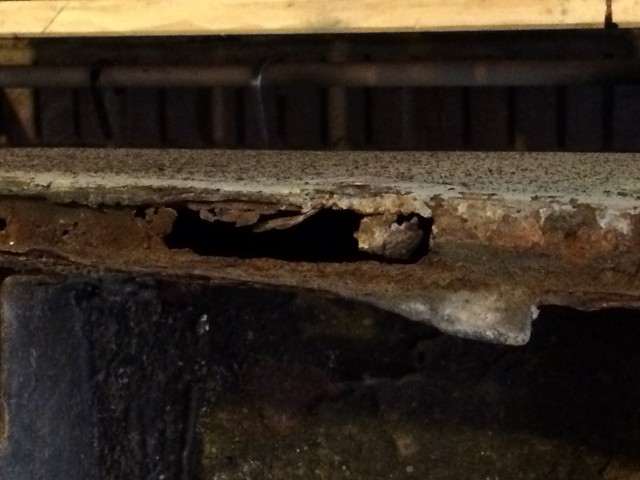
It looks awful, but should be a fairly straight forward fix, which is good as I need to do both sides.
I think I will end up stripping the rear of the chassis down completely, and then cleaning and repainting it all, and refitting with poly bushes, much like I did the front end, after which I should be left with a solid basis to work from.
Karl
-
 1
1
-
-
I’ve already got a piece of very thick carpet underlay set aside for when I tip the tub over.
I won’t be taking the overiders off, I’ll just tape them over for now.
I did think about propping it up against the side of the house on the drive, but figure that if I can fit in the garage out of the weather, I think that’s a better option all round.
Karl
-
Thanks Pete.
Mulling it over today I’m inclined to leave any body repairs until I’ve flipped the tub over, as I need to check the condition of the wheel arch to rear wing, as both seams look like there’s rust between the two panels.
In which case I may end up drilling out the spot welds, and either replacing the arch, or more likely just cleaning up the rust and then welding the two panels back together again.
I’ve also worked out that I can fit both the car and the tub in the garage if I turn the tub sideways, which will save storing it outside, while I work on it.
Karl
-
Despite the sub-zero temperatures in the garage, I decided to put my big boy pants on and do some work on the Herald.
The aim this week was to remove the roof, which meant taking out the rear side windows and the B-pillars.
The rubbers on the windows are hard, and perished, so I just cut them out, rather than trying to coax them out, and these were rapidly followed by the B-pillars.
The headlining on my car is shot, and when I tried to peel back the lining from the B-pillars it simply ripped. No big deal as a new headlining is on the To Do list anyway.
Having heard horror stories of tub spread on cars where the rear tub has been removed I decided to make up a spacer bar to go between the B-pillar mounts, from 12mm square tube and some spare nuts and bolts.
It's nothing fancy, just a bit of welding, but should help keep the tub straight.
The roof actually came off fairly easily with a firm shove from both feet on the front of the roof, while I lay on my back.
Which leaves me with a pseudo convertible.

As part of the tub strip out, I removed the rear interior trim, which revealed the expected rot in the rear wing between the B-pillar and rear arch on both sides of the car.
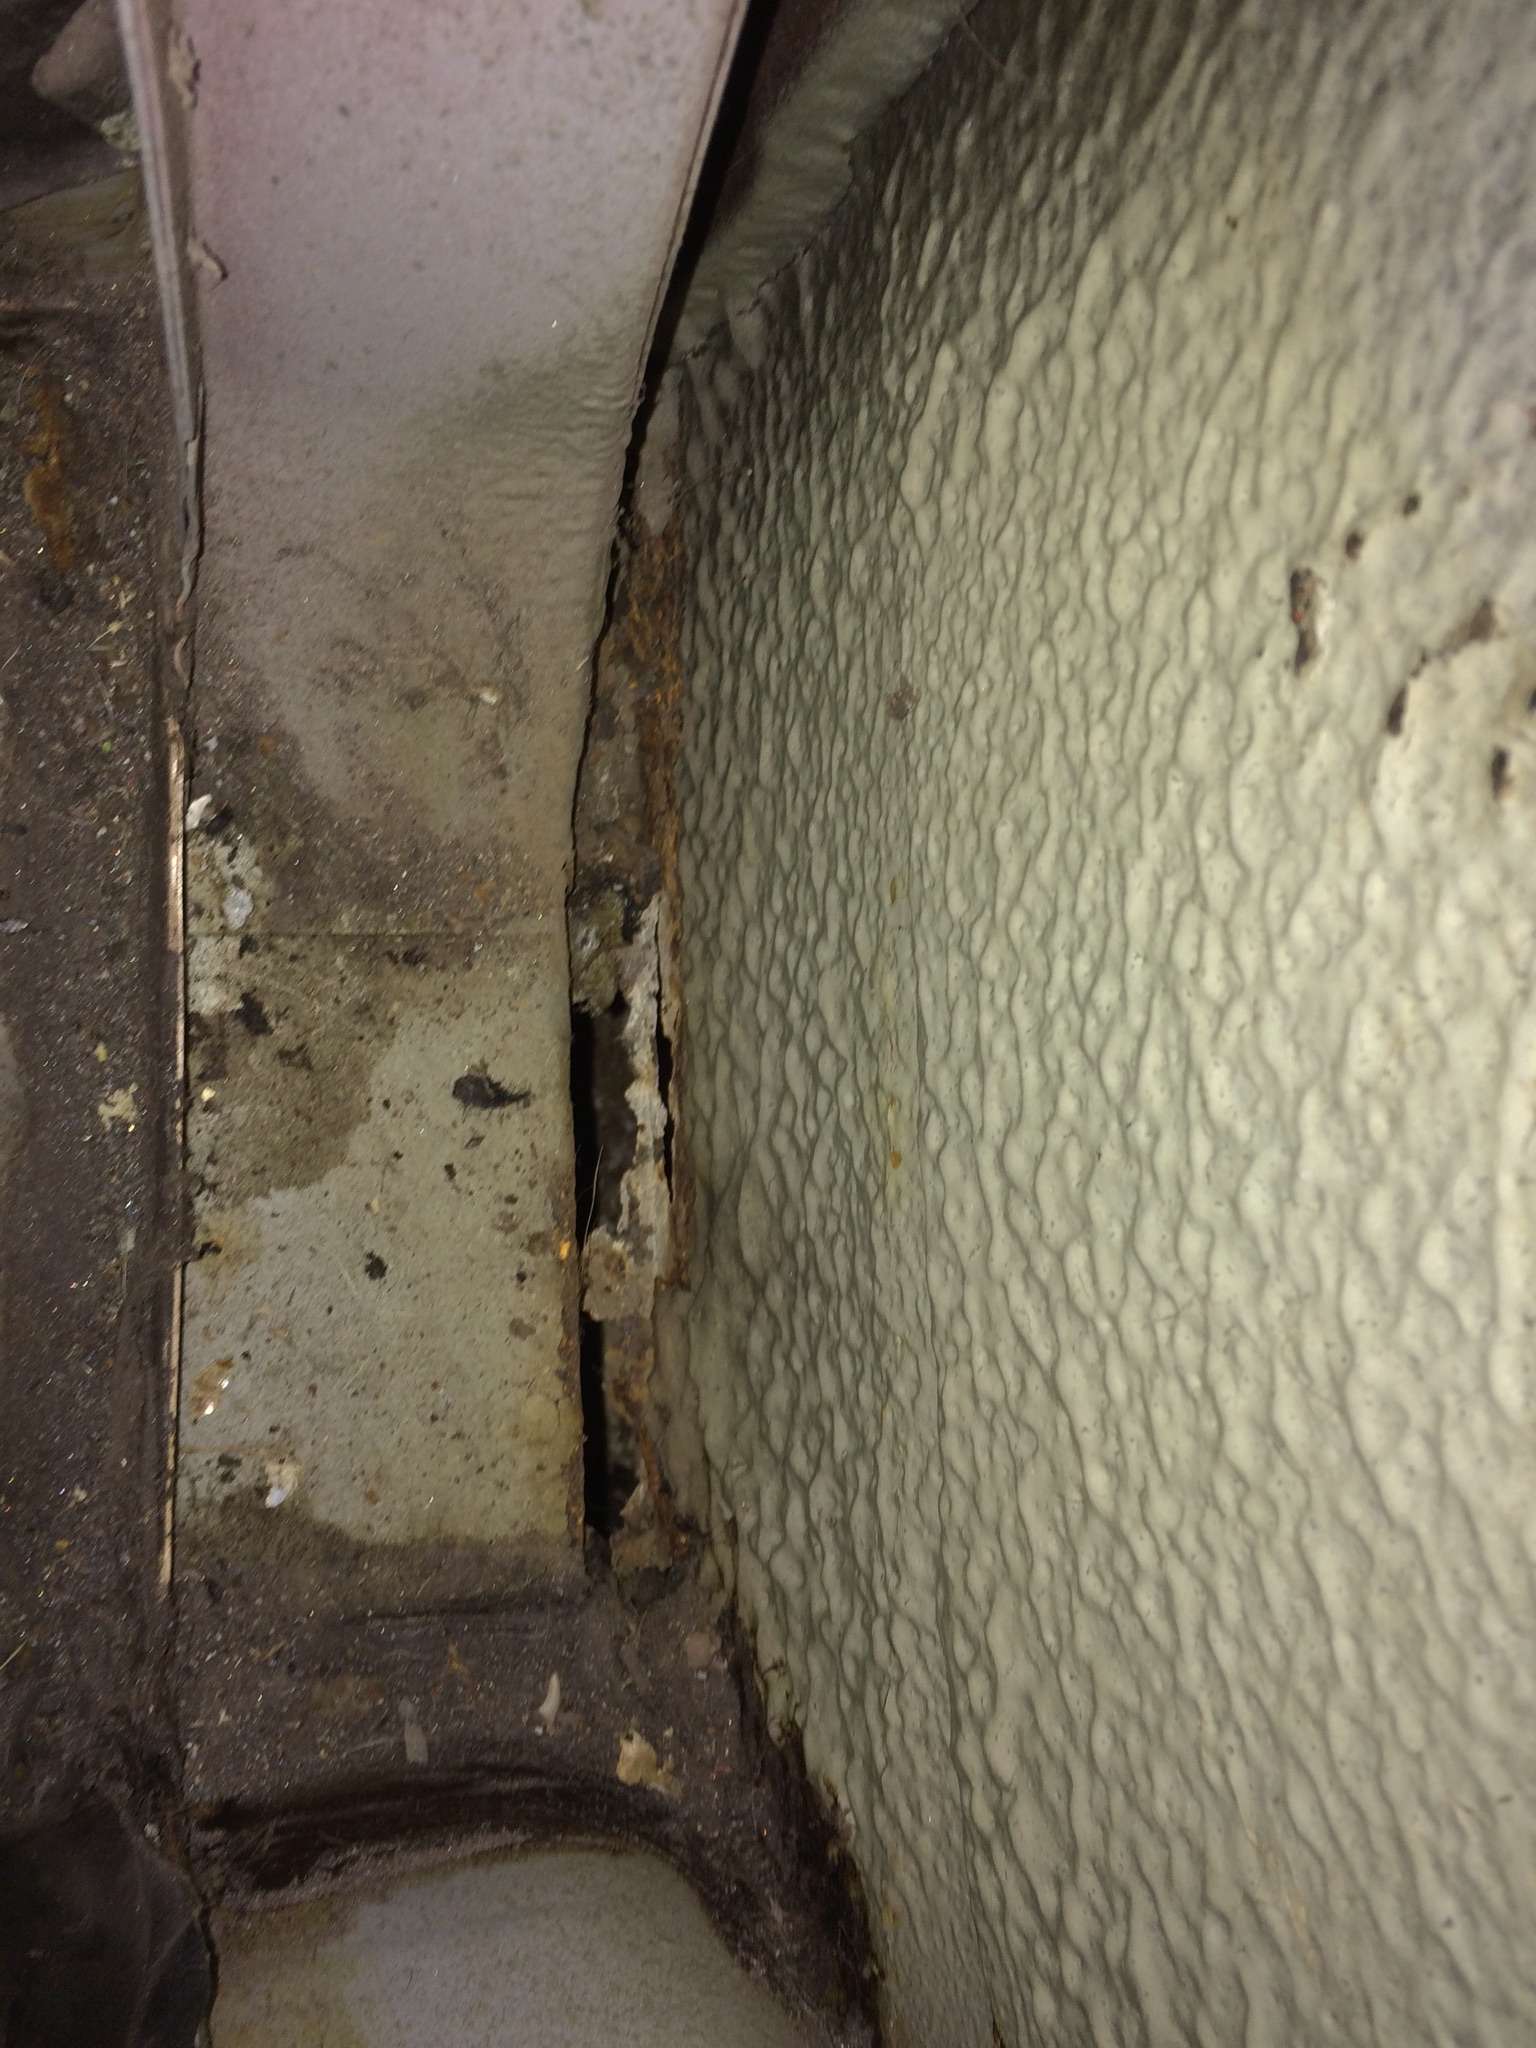
Now its a question of whether I repair this before I take the tub off or leave it until the tub goes back on after the chassis repairs.
My gut feeling is to do this ahead of removing the body to avoid any possible distortion issues which may later impact the fit of the tub to the chassis.
Karl
-
I’m glad to say mine didn’t shatter, and is now tucked away in the garage loft so I don’t drop anything on it!
When I get a chance, and the when the garage has thawed out, I’ll see about taking the heat gun too it.
If that doesn’t work, particularly if I break the screen, I might be in the market for a new screen!
Thanks
Karl
-
1
-
-
I’m liking the idea of the hot air gun as Mrs B has hot air gun.
But is the rear screen laminated?
If so, would the heat damage it?
Pete, it looks like it’s been epoxied on! So not sure a scraper will cut it, so to speak.
Karl
-
The plan for this week had been to finish up the welding on the bulkhead patch and then start cutting out the A-pillar, so that I could tackle the repair to the floor beneath the A-pillar.
First up I started welding up the patch, an inch at a time to prevent distortion, followed by a blast with the airline to cool it all off.

As per my usual welding style, not pretty, but I am pleased to say, very strong!
Here it all is from the inside, thankfully all of this will be covered by the foot well trim panel.
Confession time : I thought I would clean up the bulkhead weld a bit more with the angle grinder, and went a bit too far. I ended up going through the metal, and had to make up a new small patch and weld that in.
I'm going to treat myself to a die grinder, which I can then use to clean up the welds which are inaccessible to the angle grinder, so for now I'll be leaving this as is, before I do anymore damage!
With that as far as it was going to go for the weekend, I turned my attention drilling out the spot welds on the A-pillar.
First up I hit it with a 120 grit flap disc in the angle grinder, which removed the paint from the flat of the panel, just leaving it in the recesses of the spot welds.
Simple, now just drill out the spot welds.
It was at this point that I found out that all my drills are too blunt for steel!
Of course nowhere local stocks spot weld drills, so I'll have to order one online, and have another go next weekend.
With that plan stymied, what to do next?
Given that the rear body and roof will be coming off shortly so that I can tackle the out rigger repairs, I thought I might as well make a start on disassembling the rear of the car.
First up was the boot lid.
Simple, undo the number plate light cable, and then unbolt the hinge bolts?
No. Never simple.
Some numpty had soldered the cable directly to the bulb holder!!!
So I decided that rather than muck around with the light fitting itself, as it looked somewhat fragile, I'd simply install a bullet connector between the loom in the boot and the branch to the number plate light.
With that little surprise sorted, I removed the boot lid, rapidly followed by the petrol tank, which came out without a struggle.
I was trying to work out why the car wouldn't start last week, turned out the tank was empty, which was a blessing given this weekend's activities!
Next up was the rear screen, which I wanted to remove as the screen rubbers are shot, as you can see below.
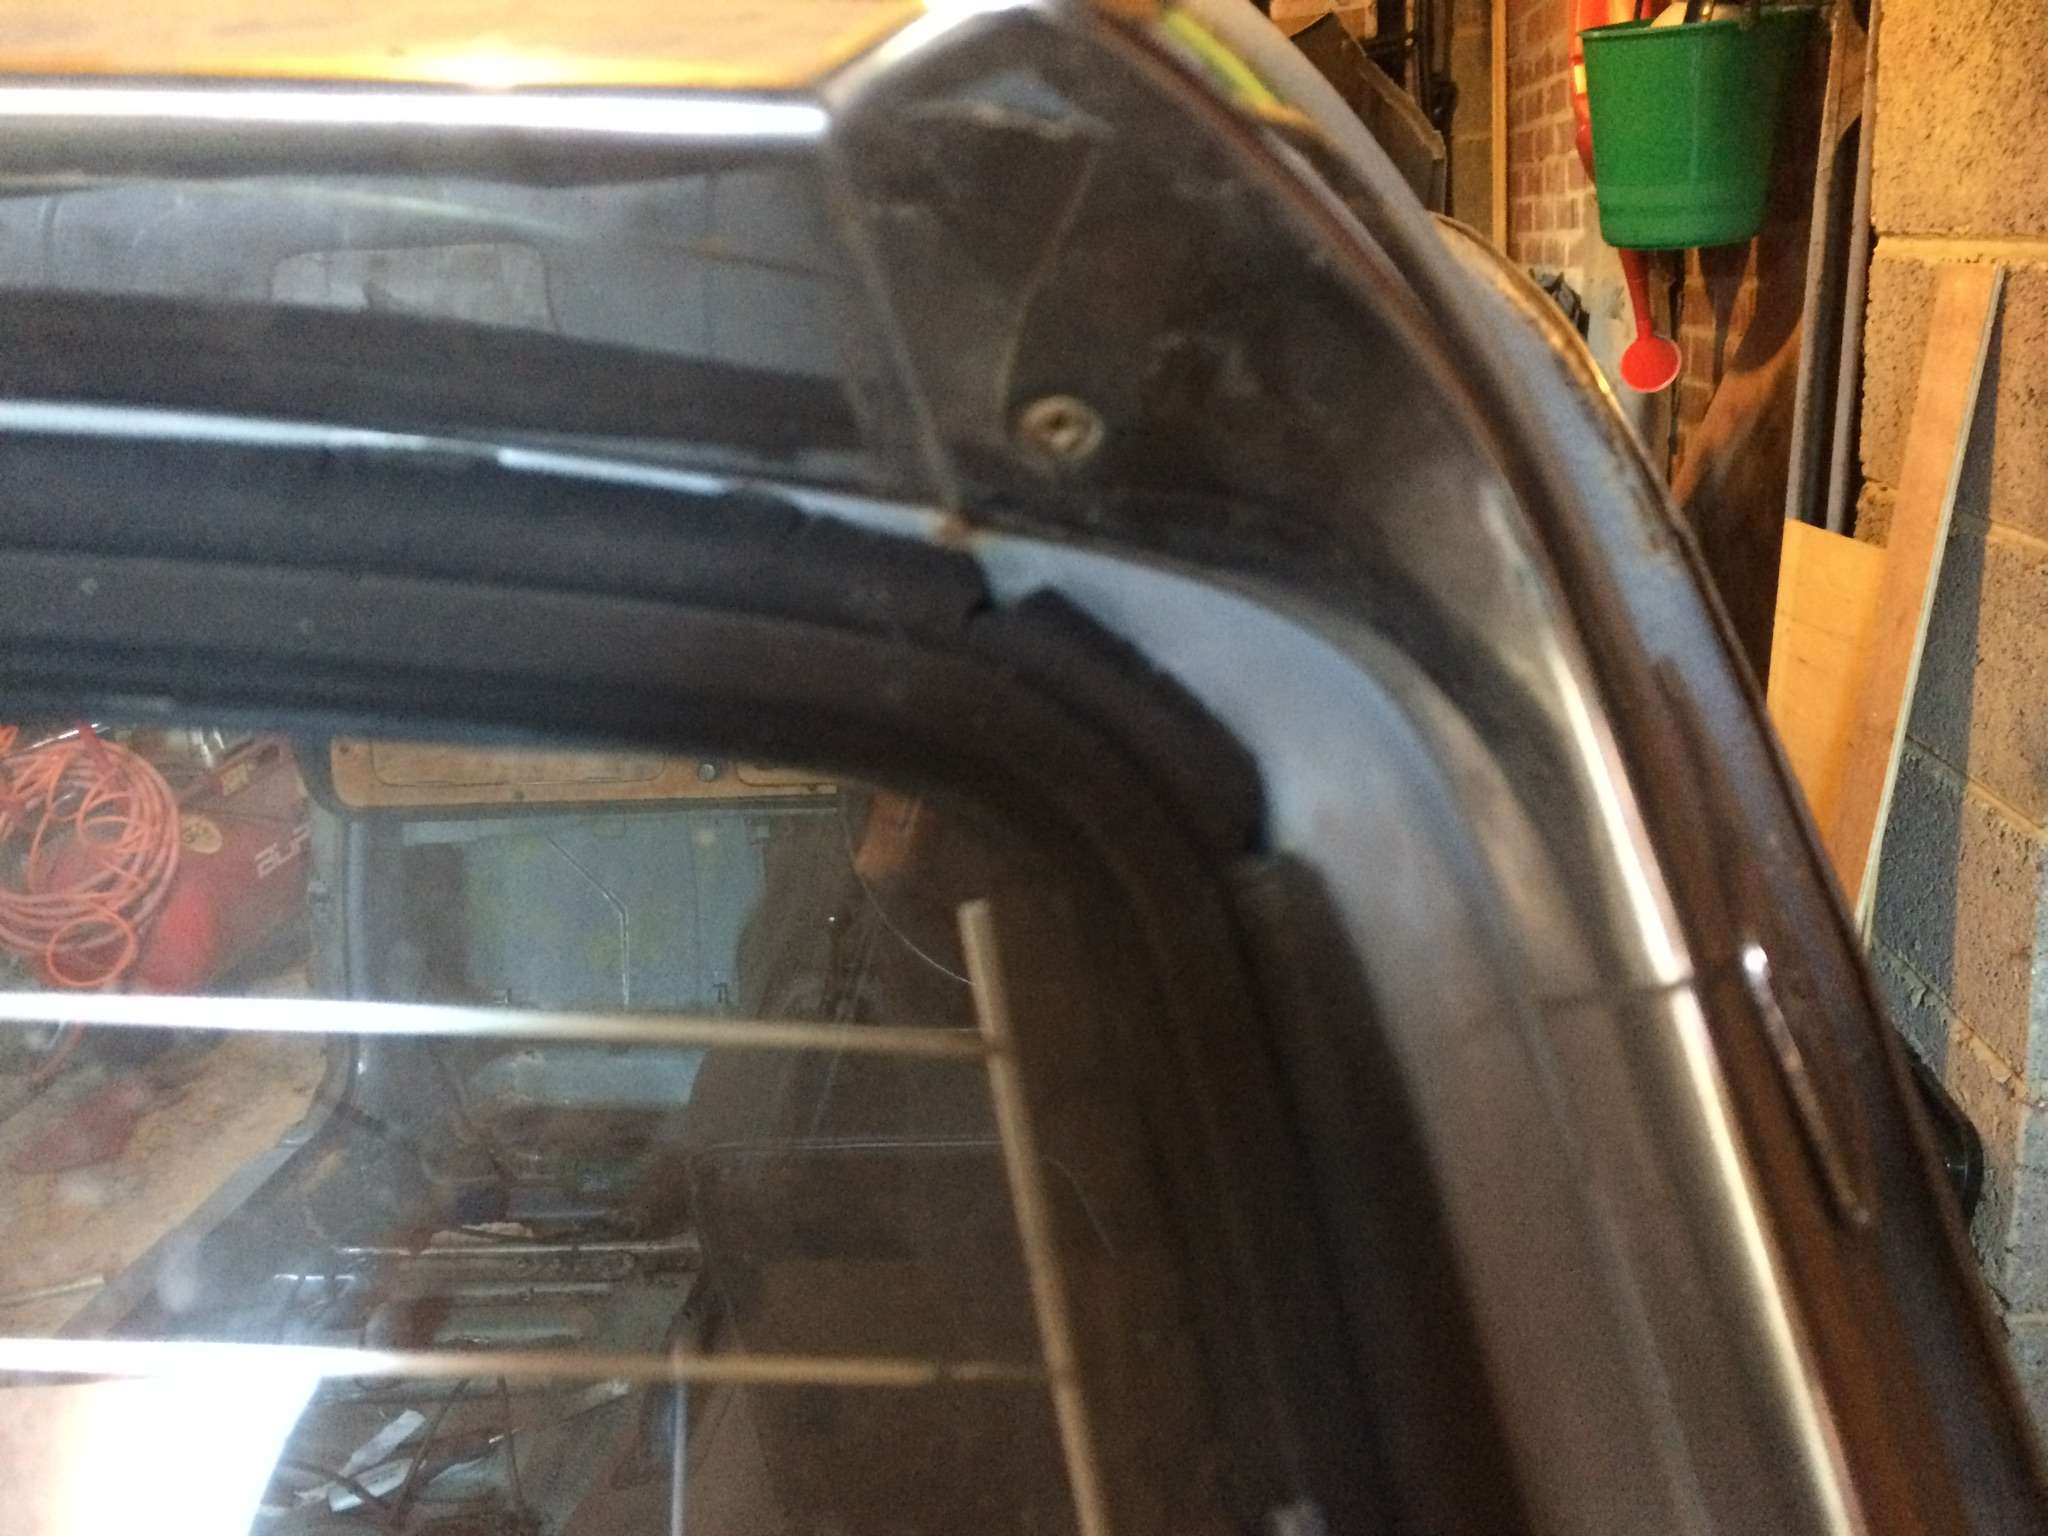
Needless to say, given the state of the rubbers, the screen came out without a fight!
The screen itself has a stick on demister fitted which I thought I could just peel off, however there are two bars, one at either side of the screen which look to have been bonded to the rear screen.
Has anyone got any tips for removing these?
Karl
-
I did actually manage to get the welder set up last weekend, but spent what time I did get in the garage playing with the welder as I haven't welded with gas before, and my first attempts on scrap steel were completely pants.
They looked OK, but had the holding power of chewing gum! More practice required.
Therefore although I managed about 6 hours on the car over this weekend, progress may not reflect that, as I spent at least 2 hours playing with the welder settings, and my technique.
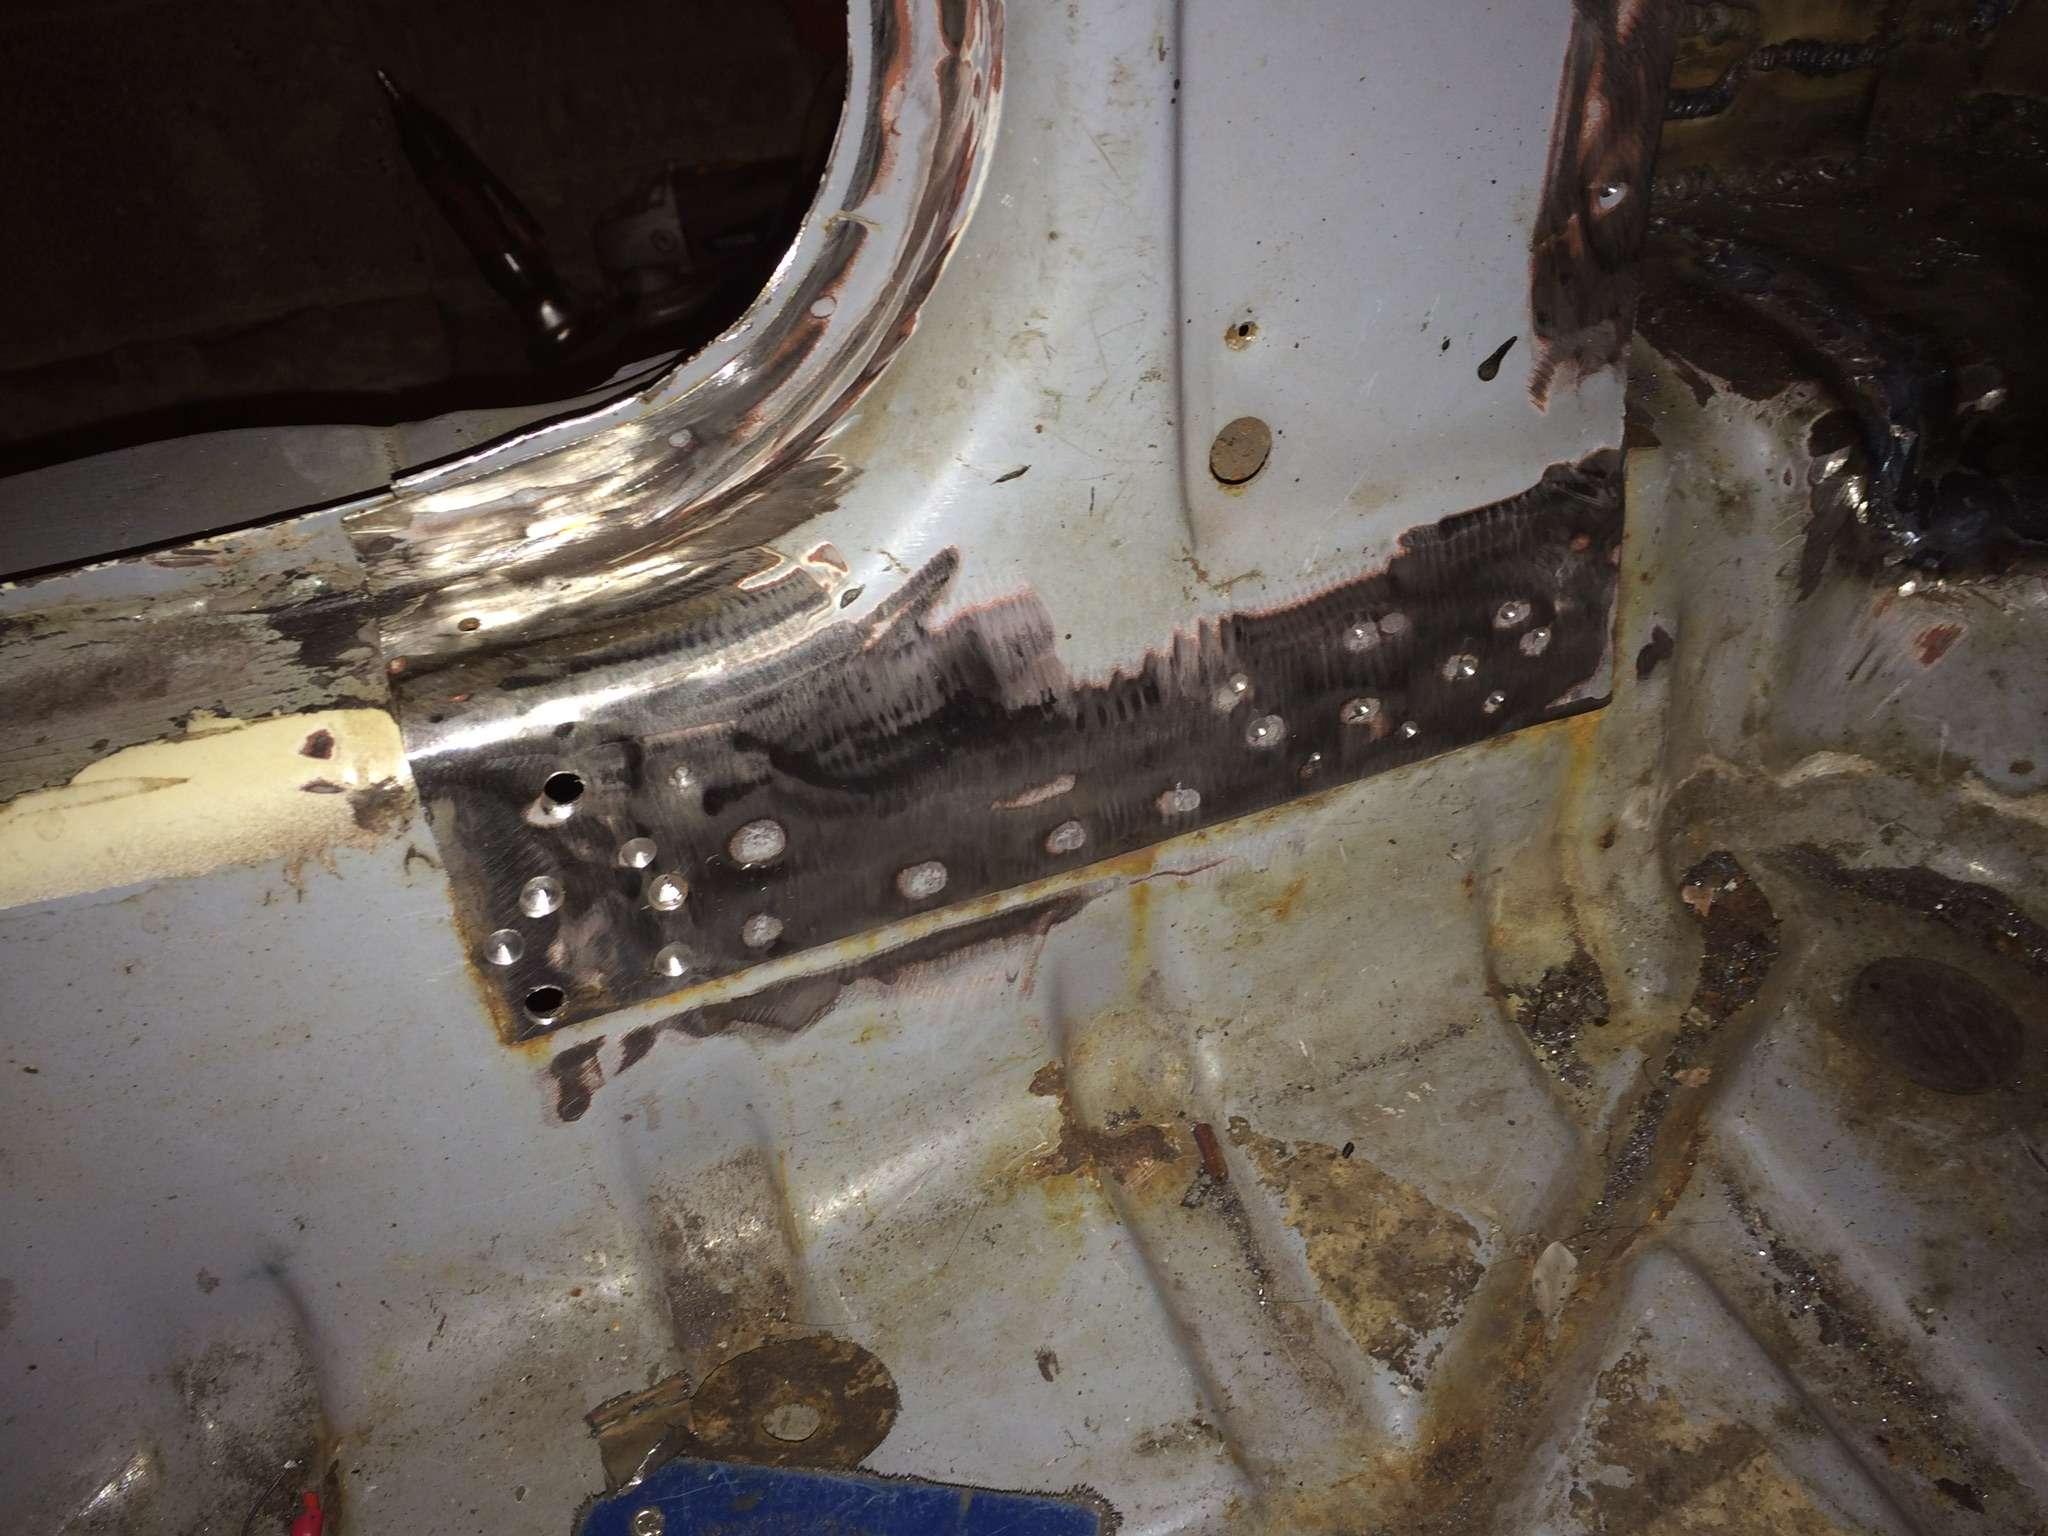
First up was attaching the mounting bracket to the underside of the repair section that I made last month.
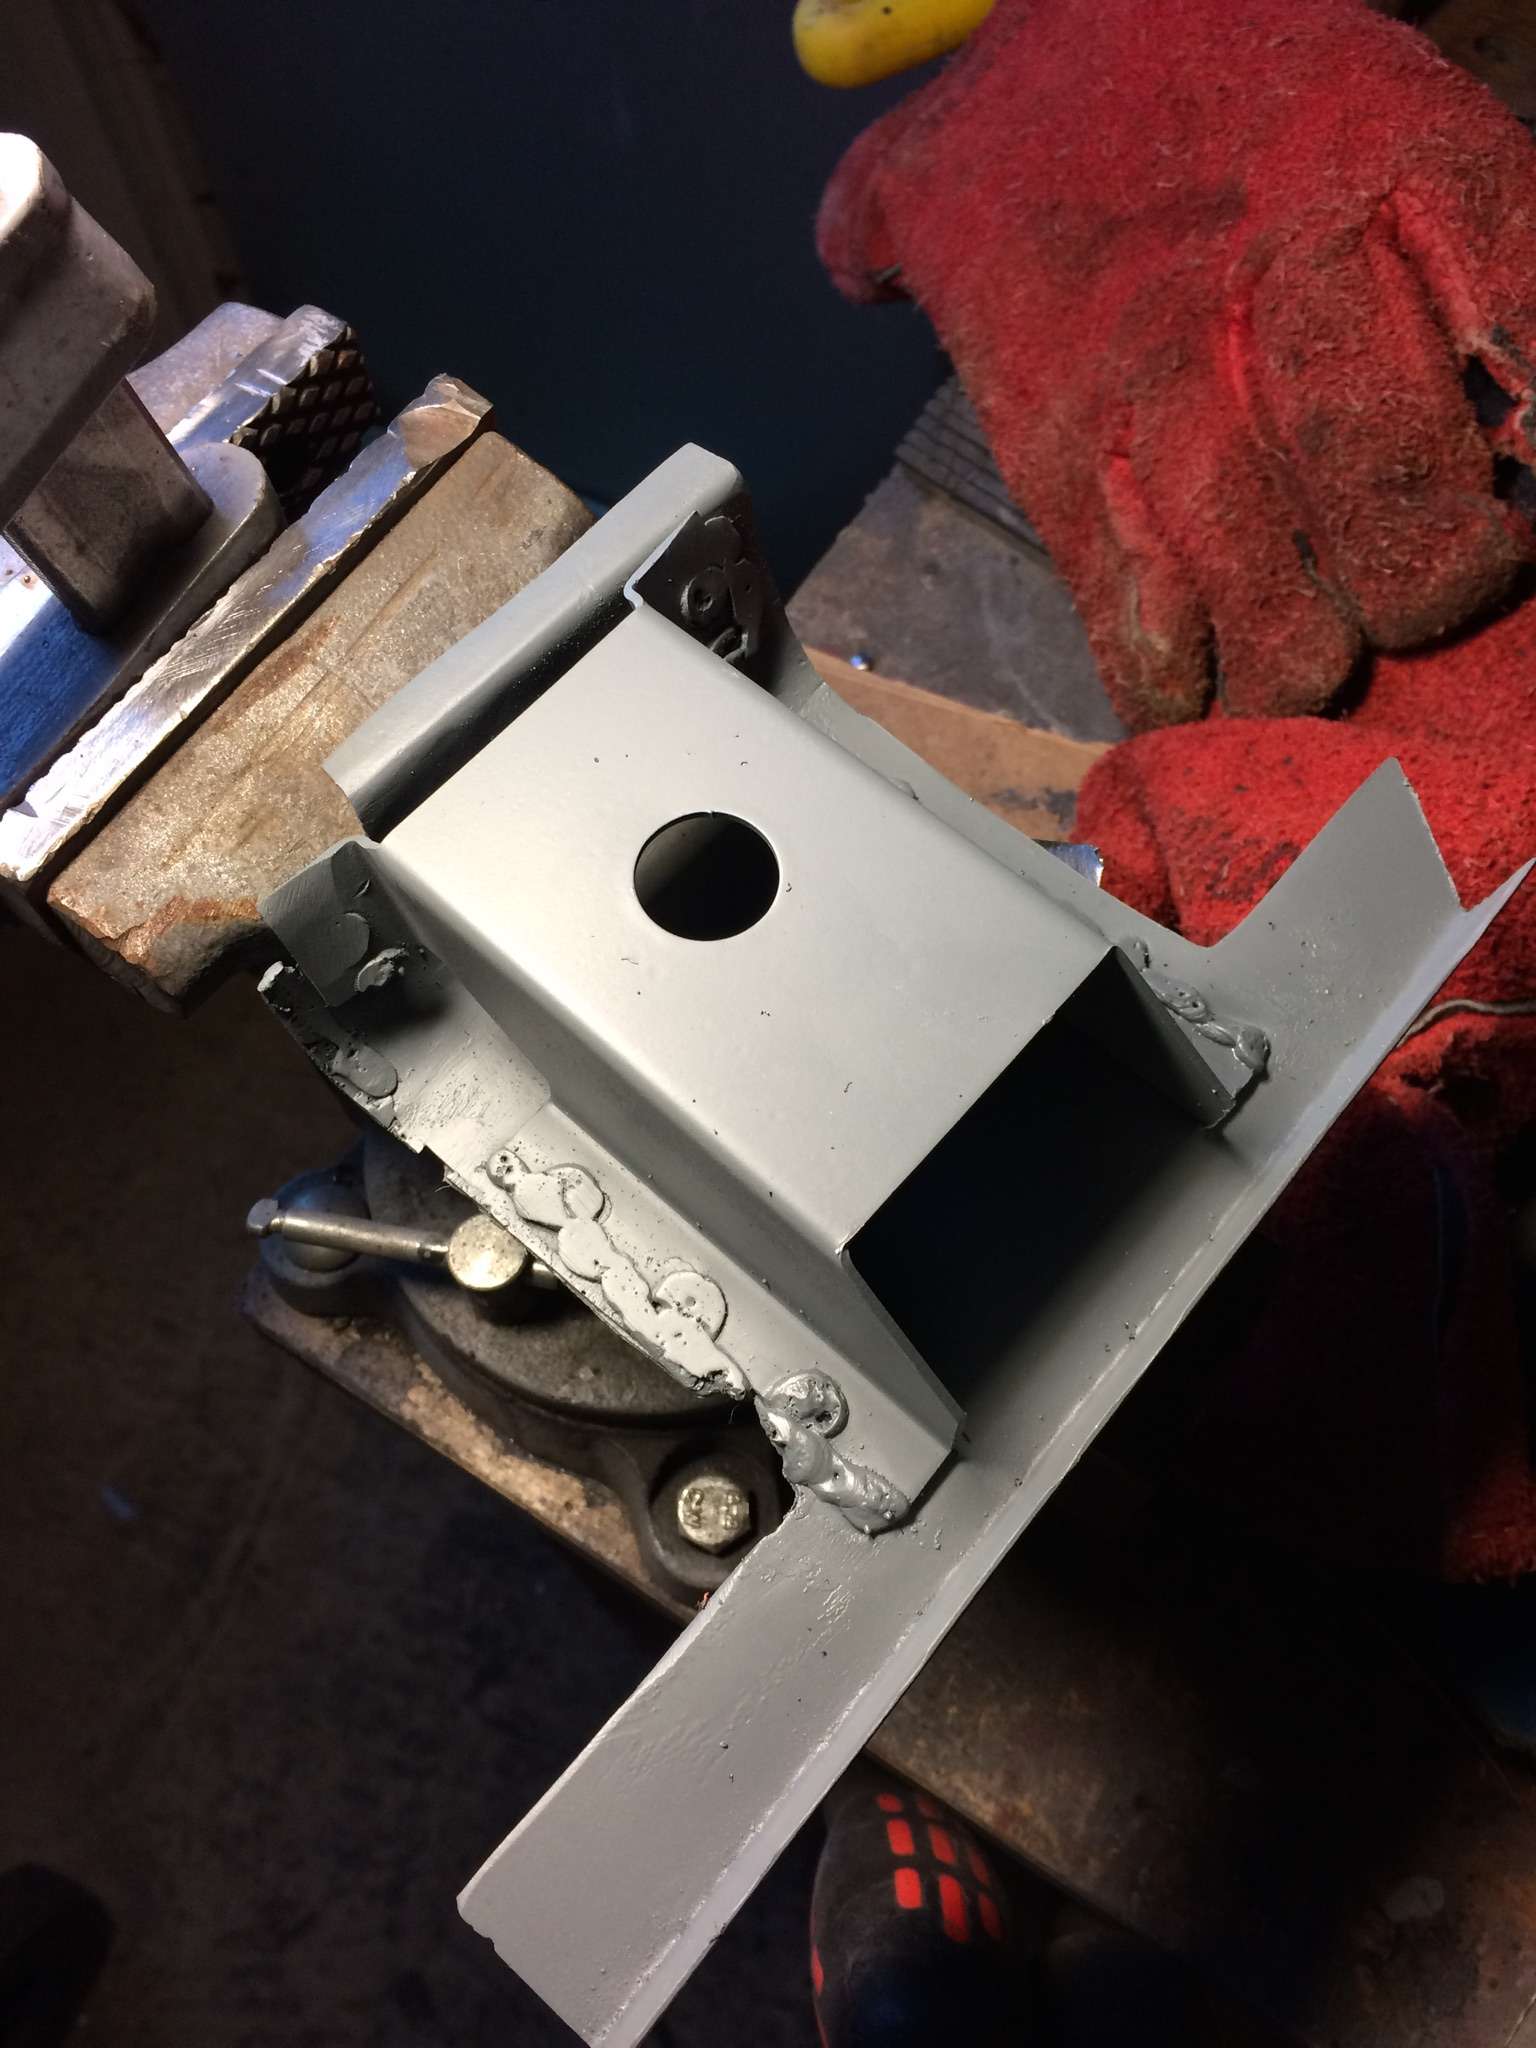
Here it is with a coat of weld through primer.
This was second attempt at attaching the bracket as the first one just fell off due to lack of weld penetration!!!!!
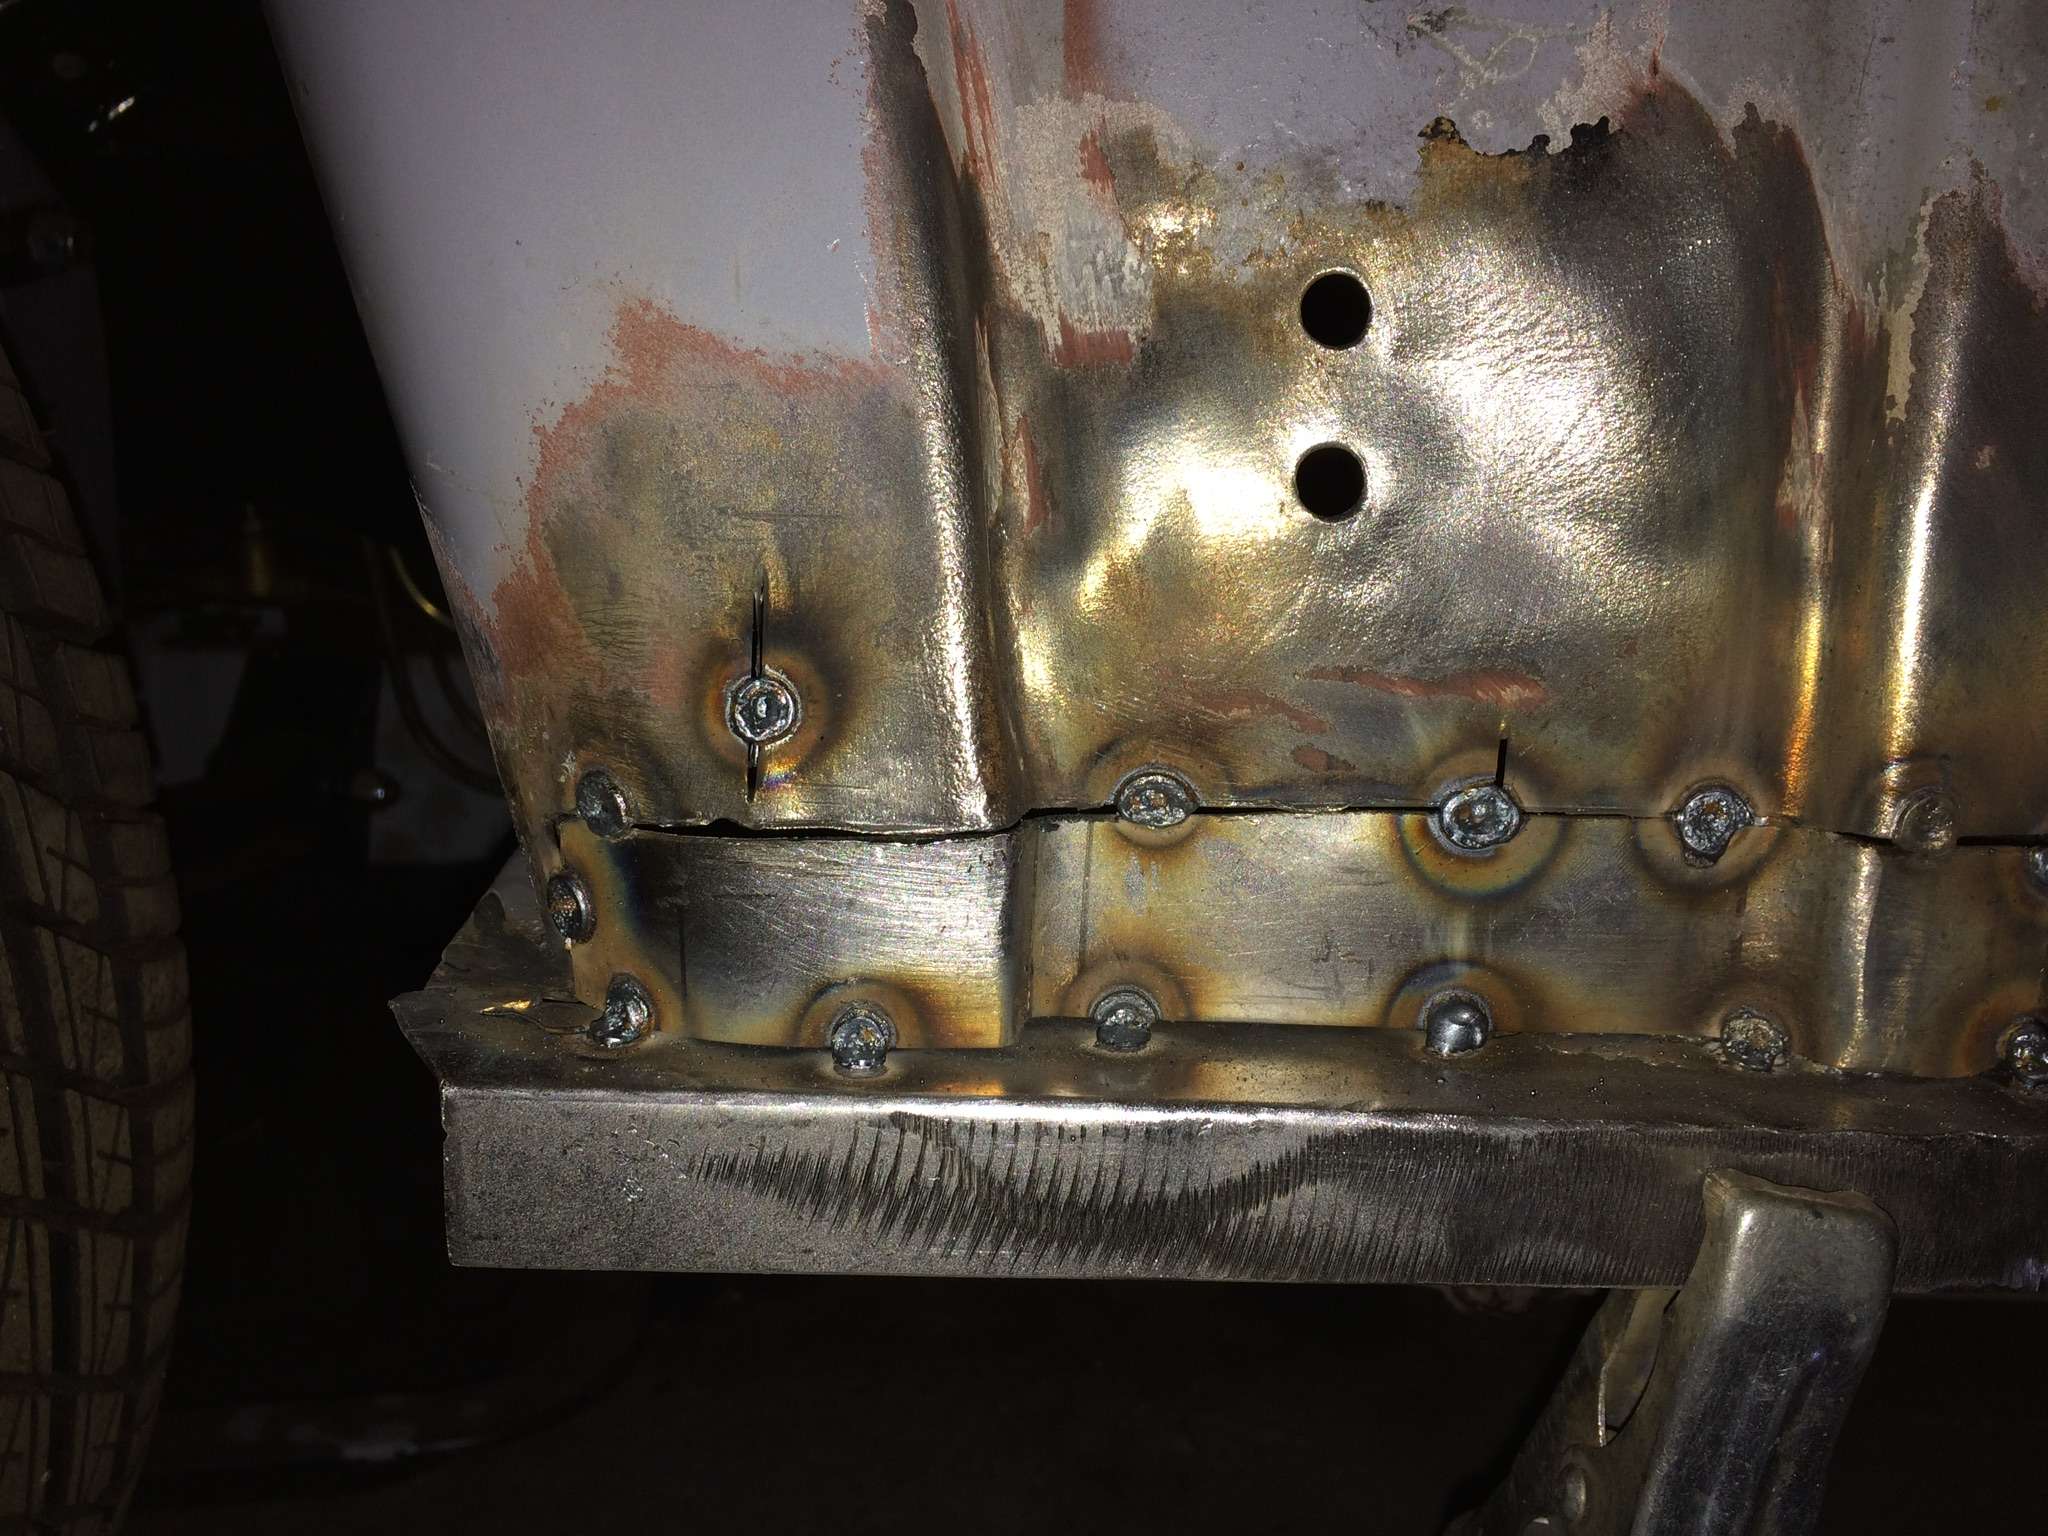
Next up was installing the repair section.......
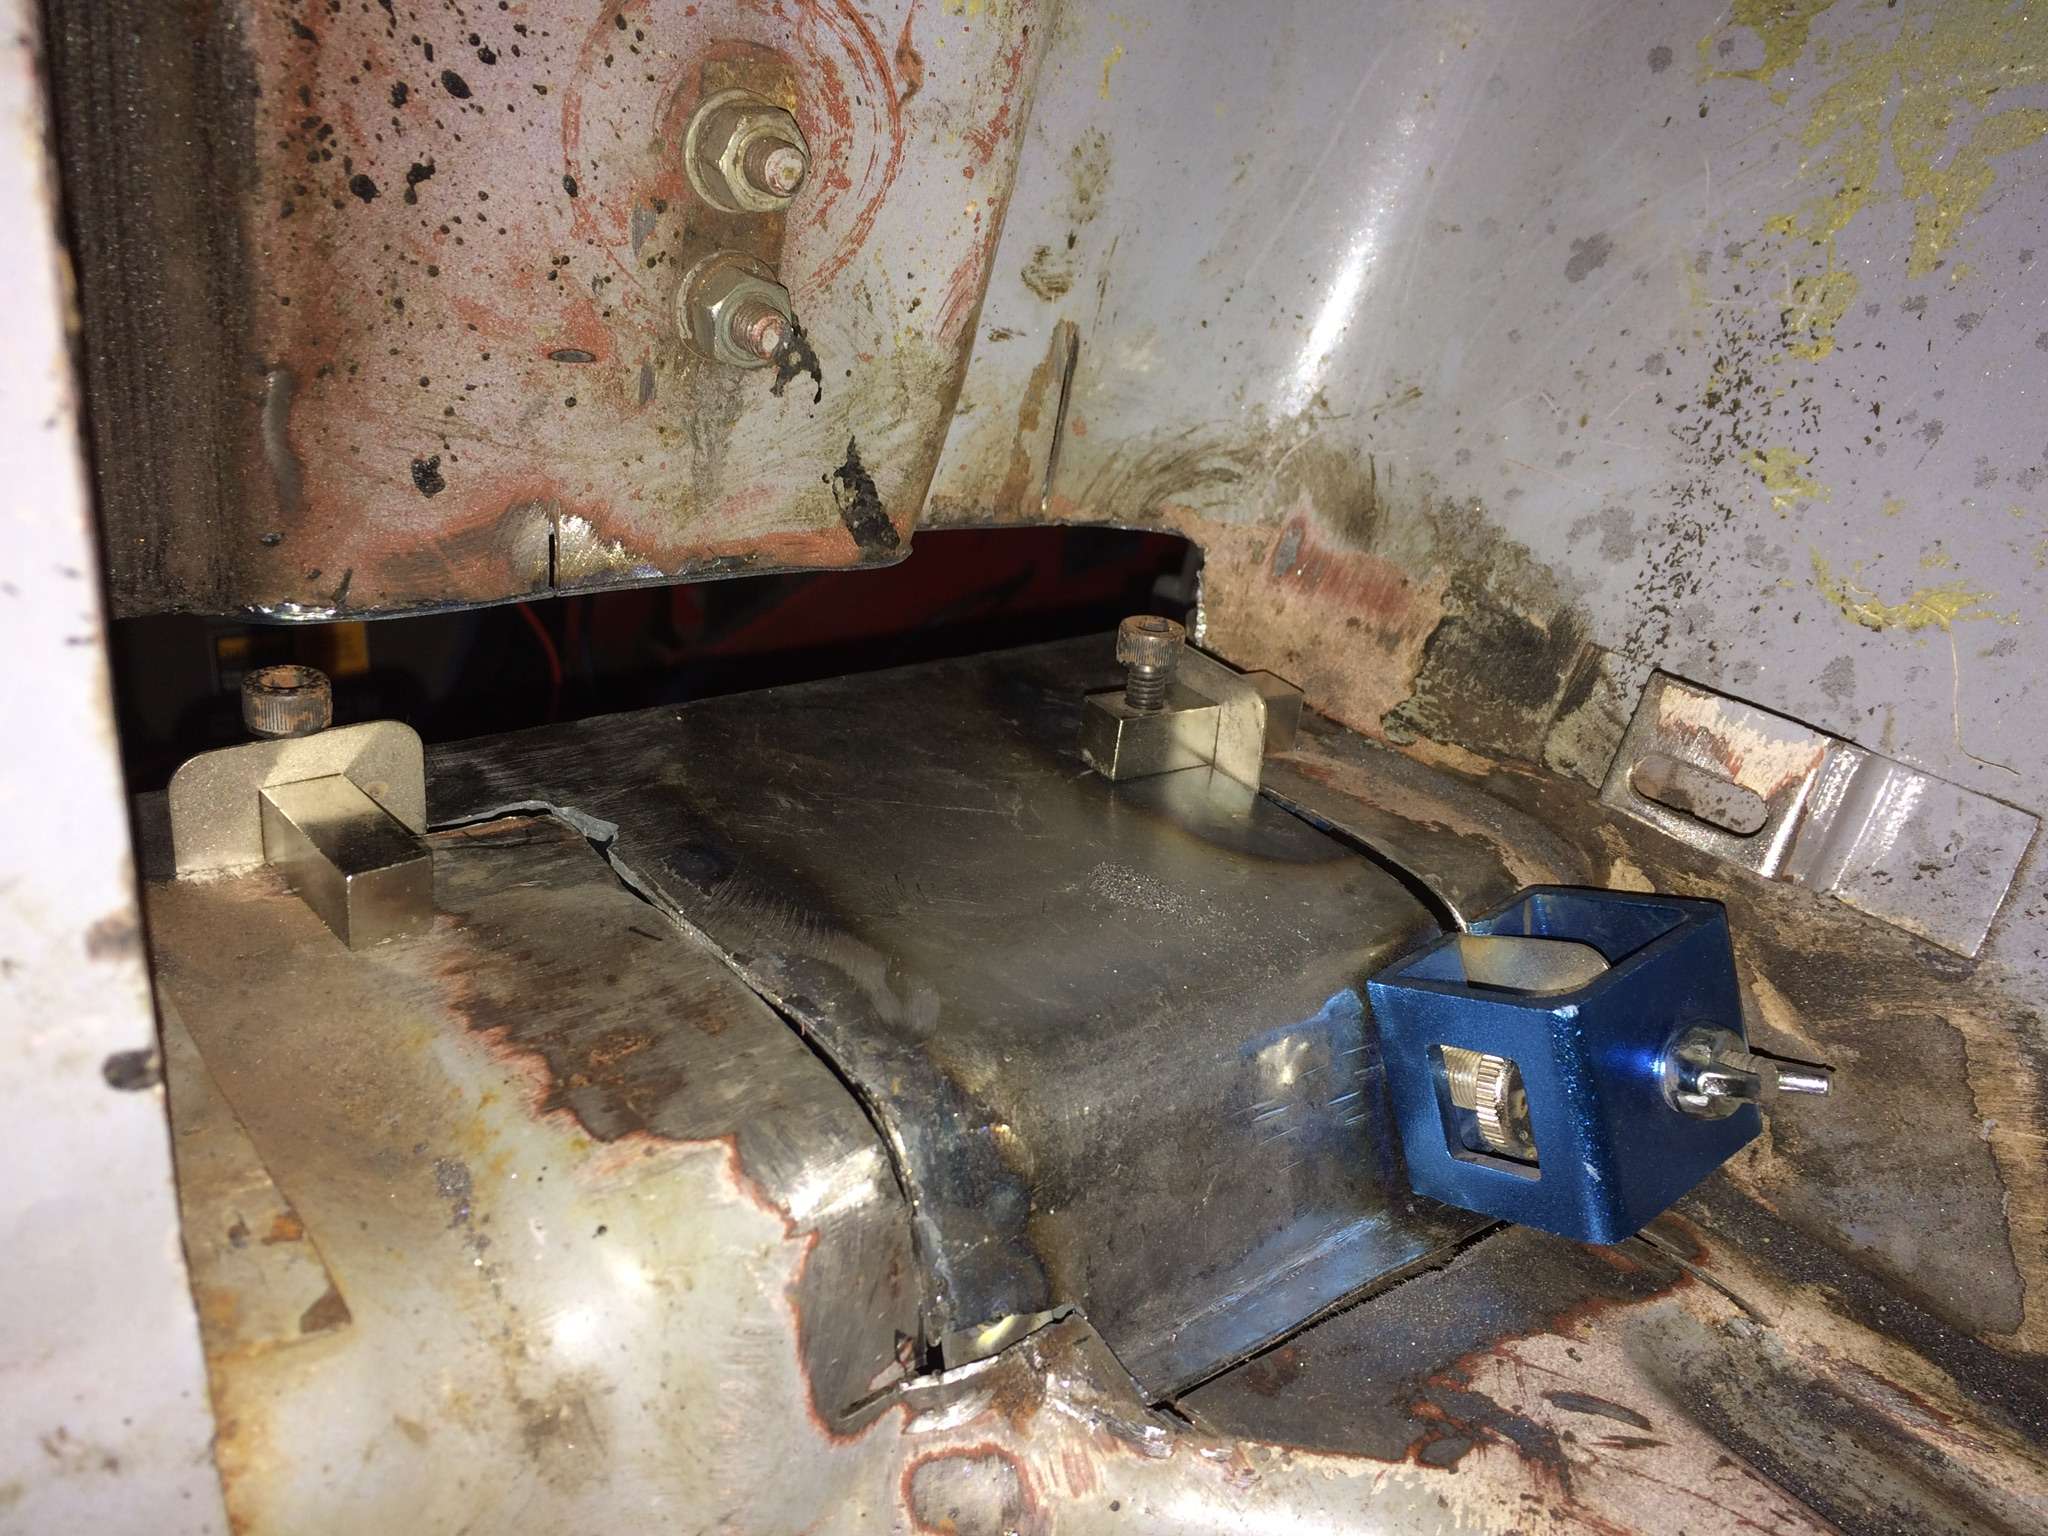
......this is the view from the foot well, with the panel held in with 3 welding clamps.
These clamps really are an essential aid in getting everything aligned.
Here's the view from the outside.....
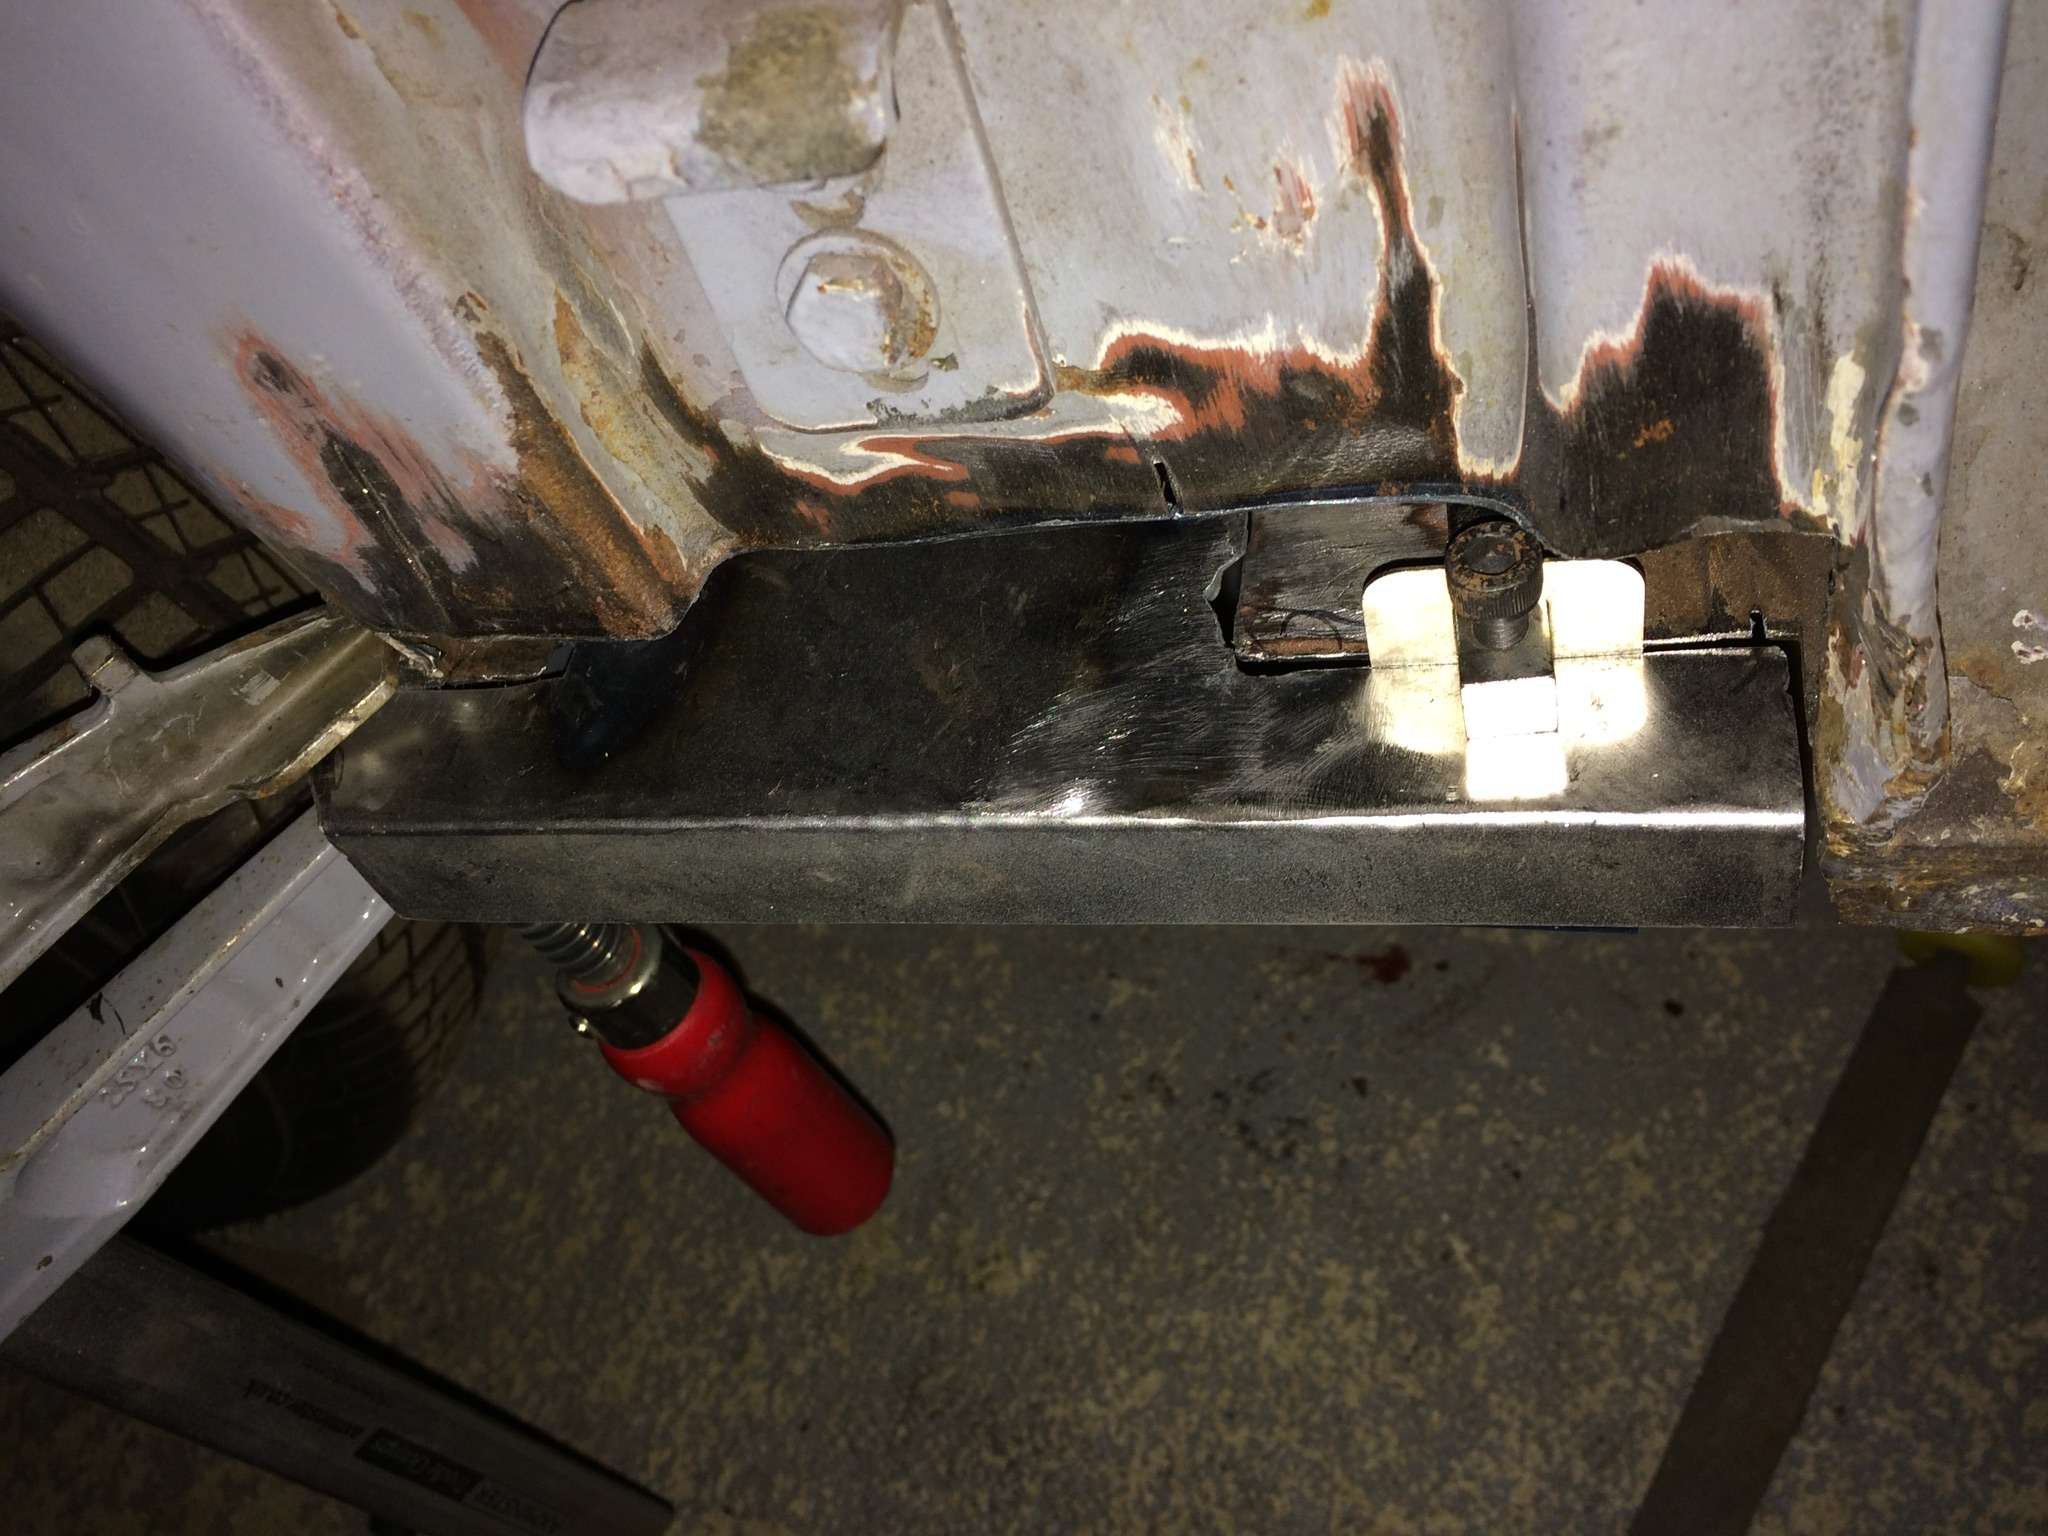
This is the outer lip along the lower body to which the valance mounts.
This was welded up, which proved a real faff as access from inside the car is very limited.
It looks OK until you put a bloody great welding helmet on, at which point that footwell is suddenly very small!
Luckily I still had the hand held welding mask that came with the welder, which allowed me to actually weld successfully in the foot well.
Which left me with the vertical section of the repair to complete......
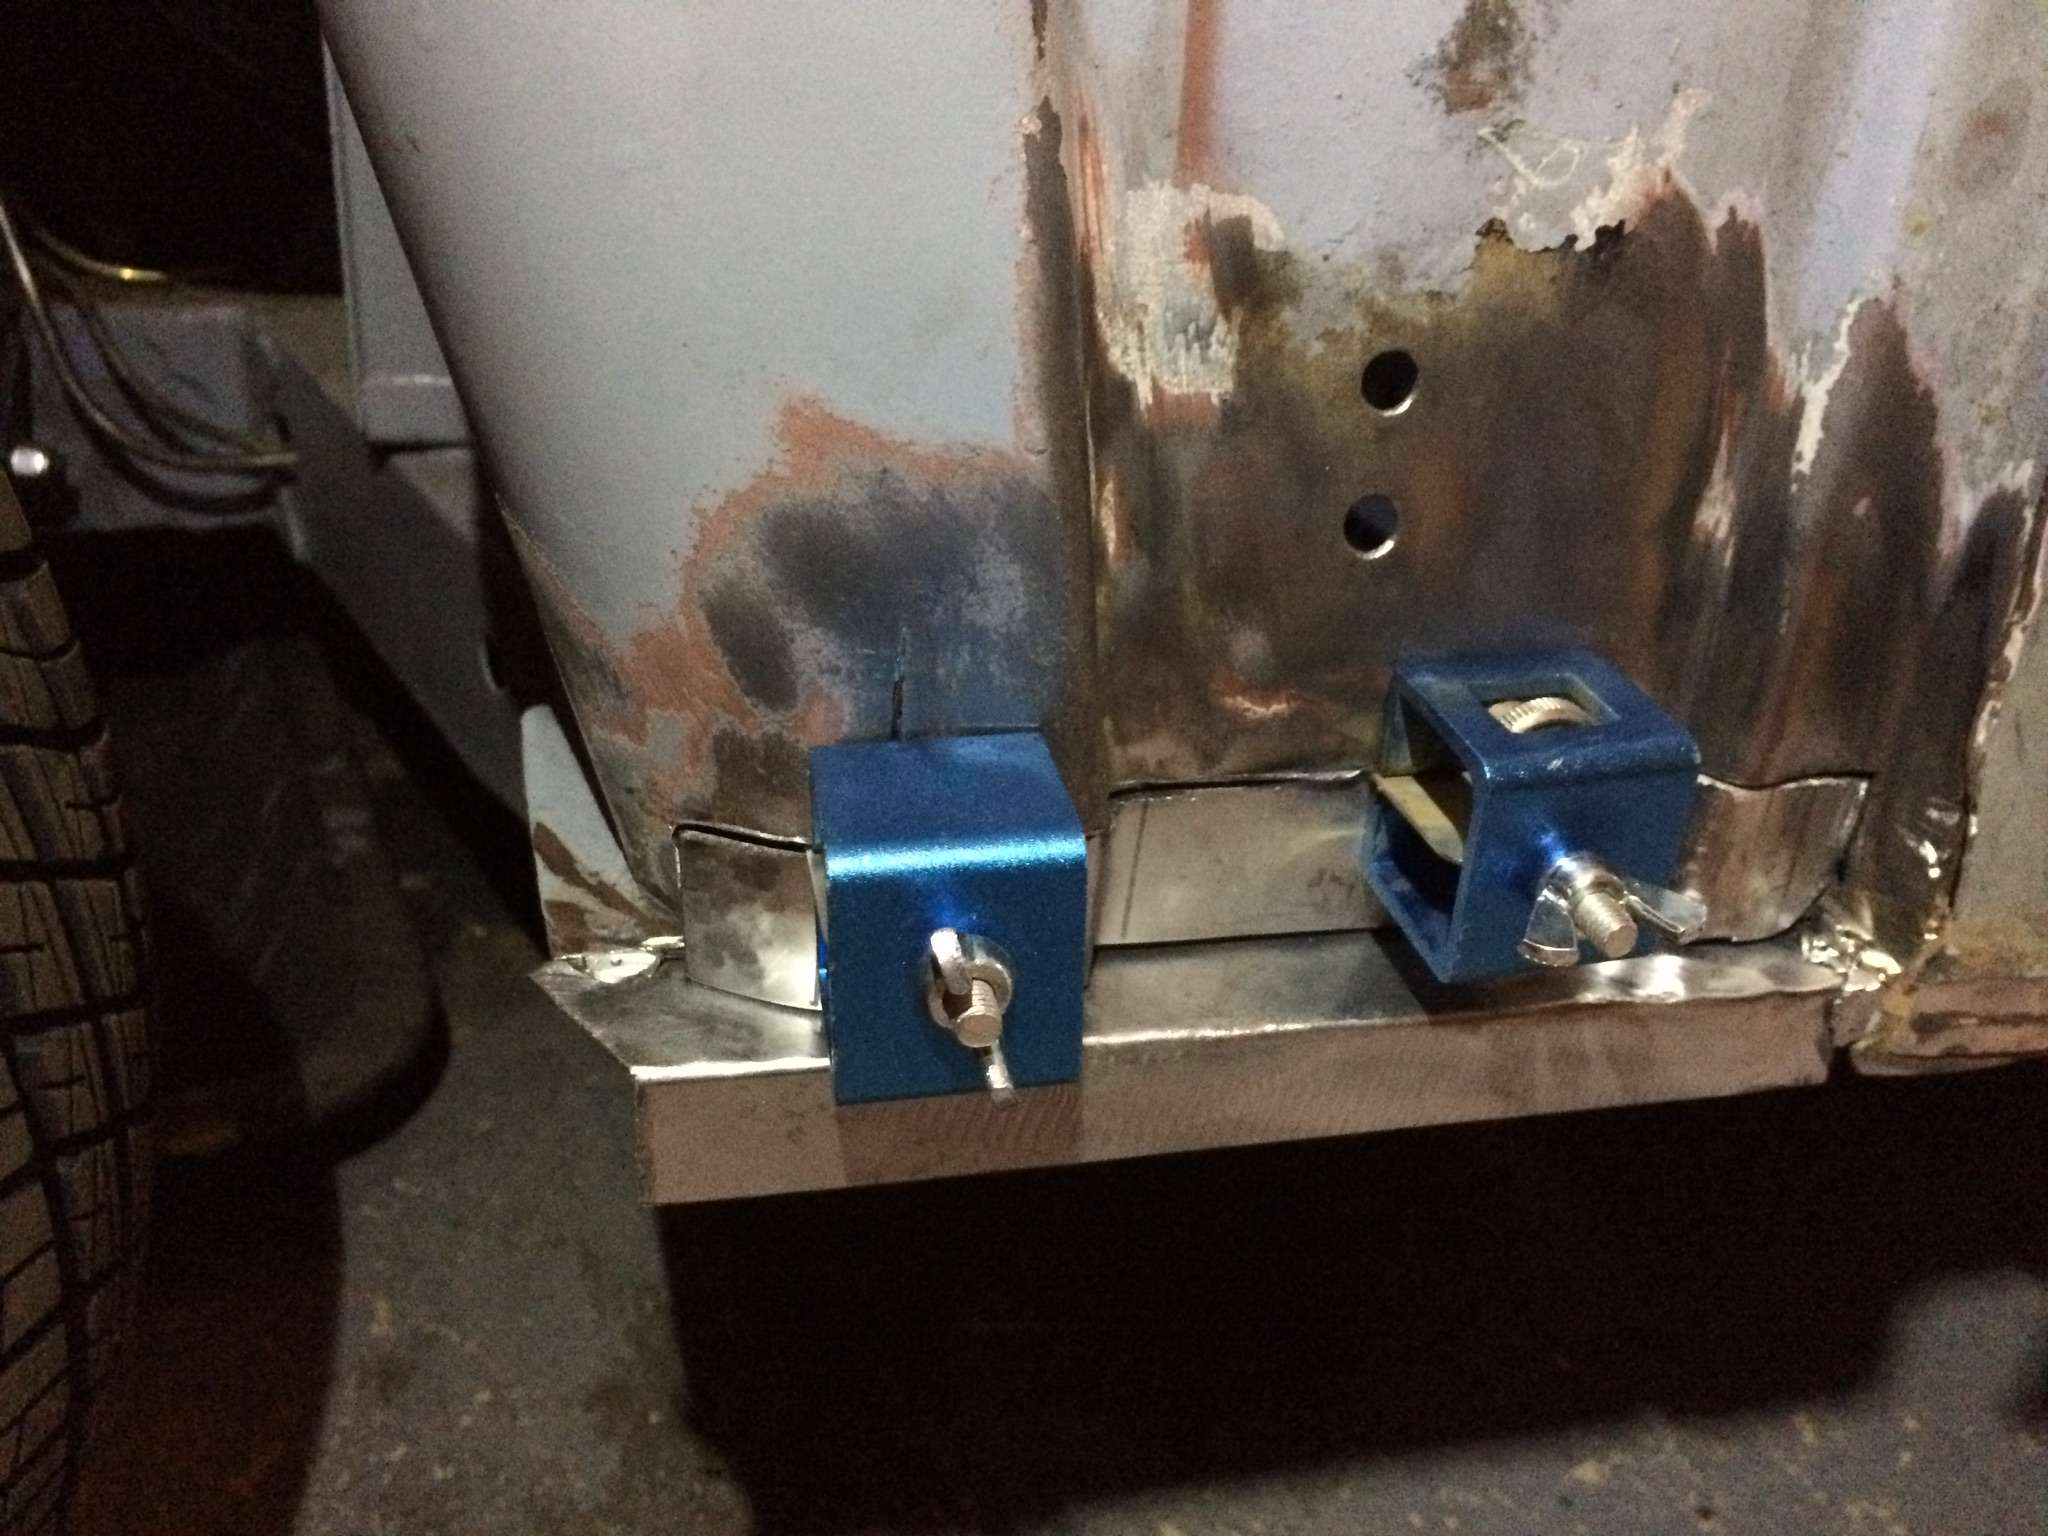
I had to remove the bonnet locking bracket as it was getting in the way.
Here it is after the first tack welds.....
.....and following welding and a bit of clean up with the angle grinder and a flap disc.
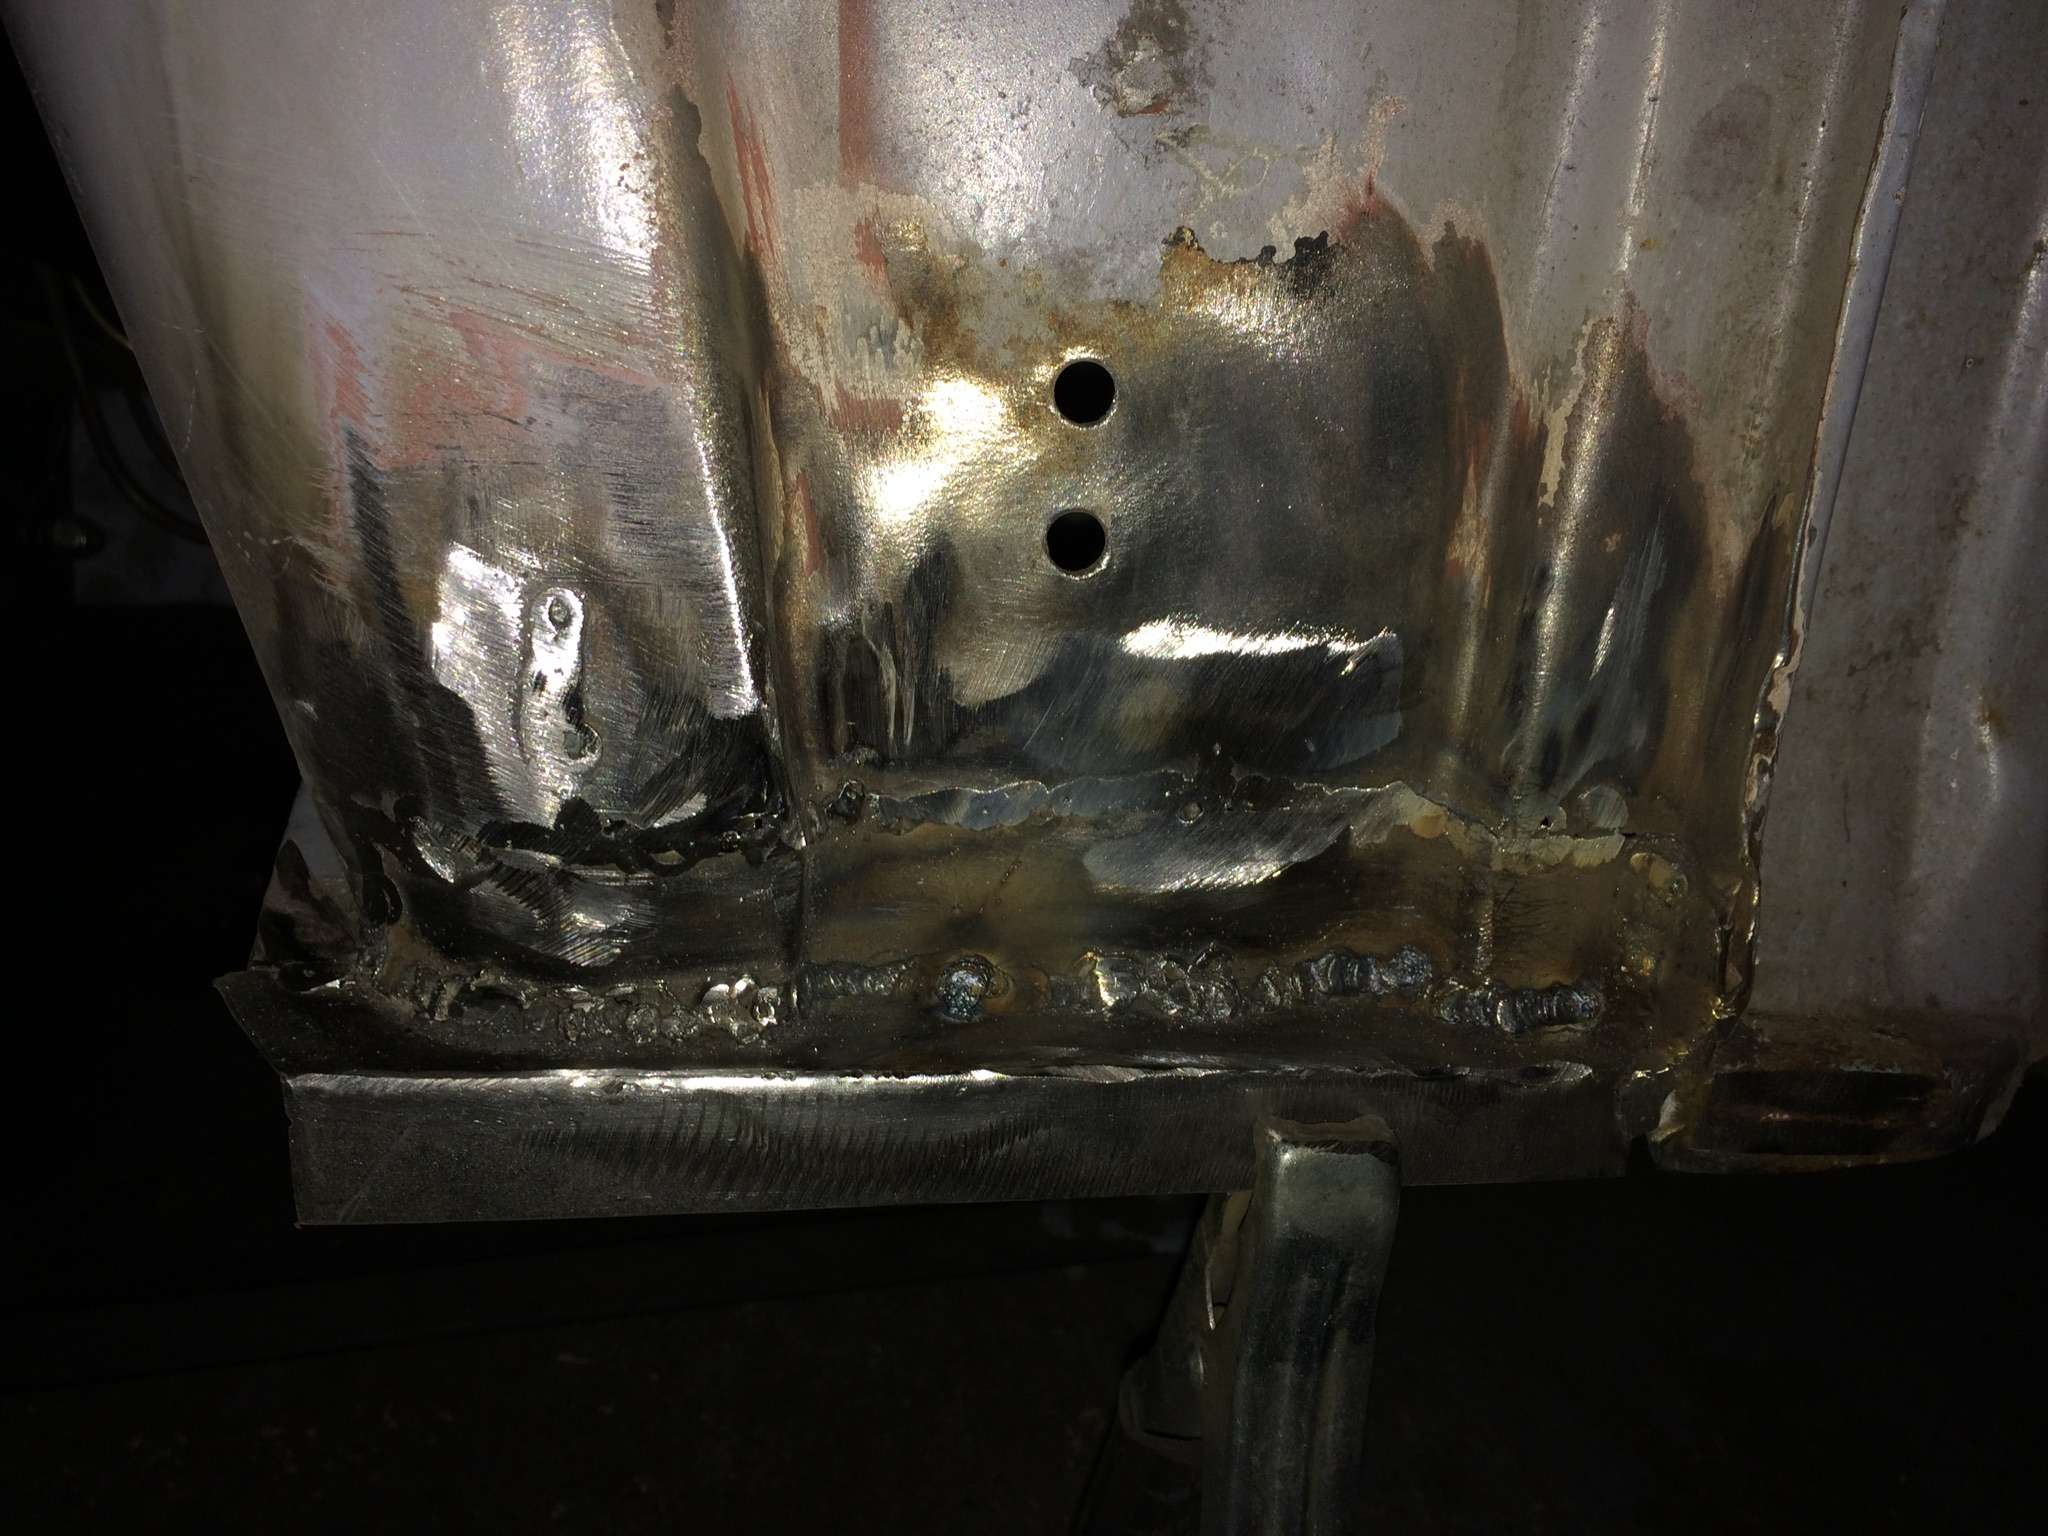
I know it's not pretty, I had to stitch weld it to prevent blowing through, however with a bit more work with the angle grinder I should end up with something that is acceptable, particularly after a smear of filler.
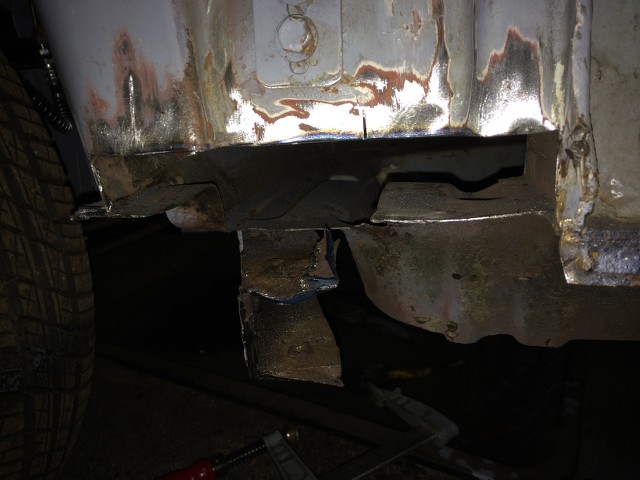
Now I had thought this was perhaps the last of the rot in the footwell, dream on!!!!
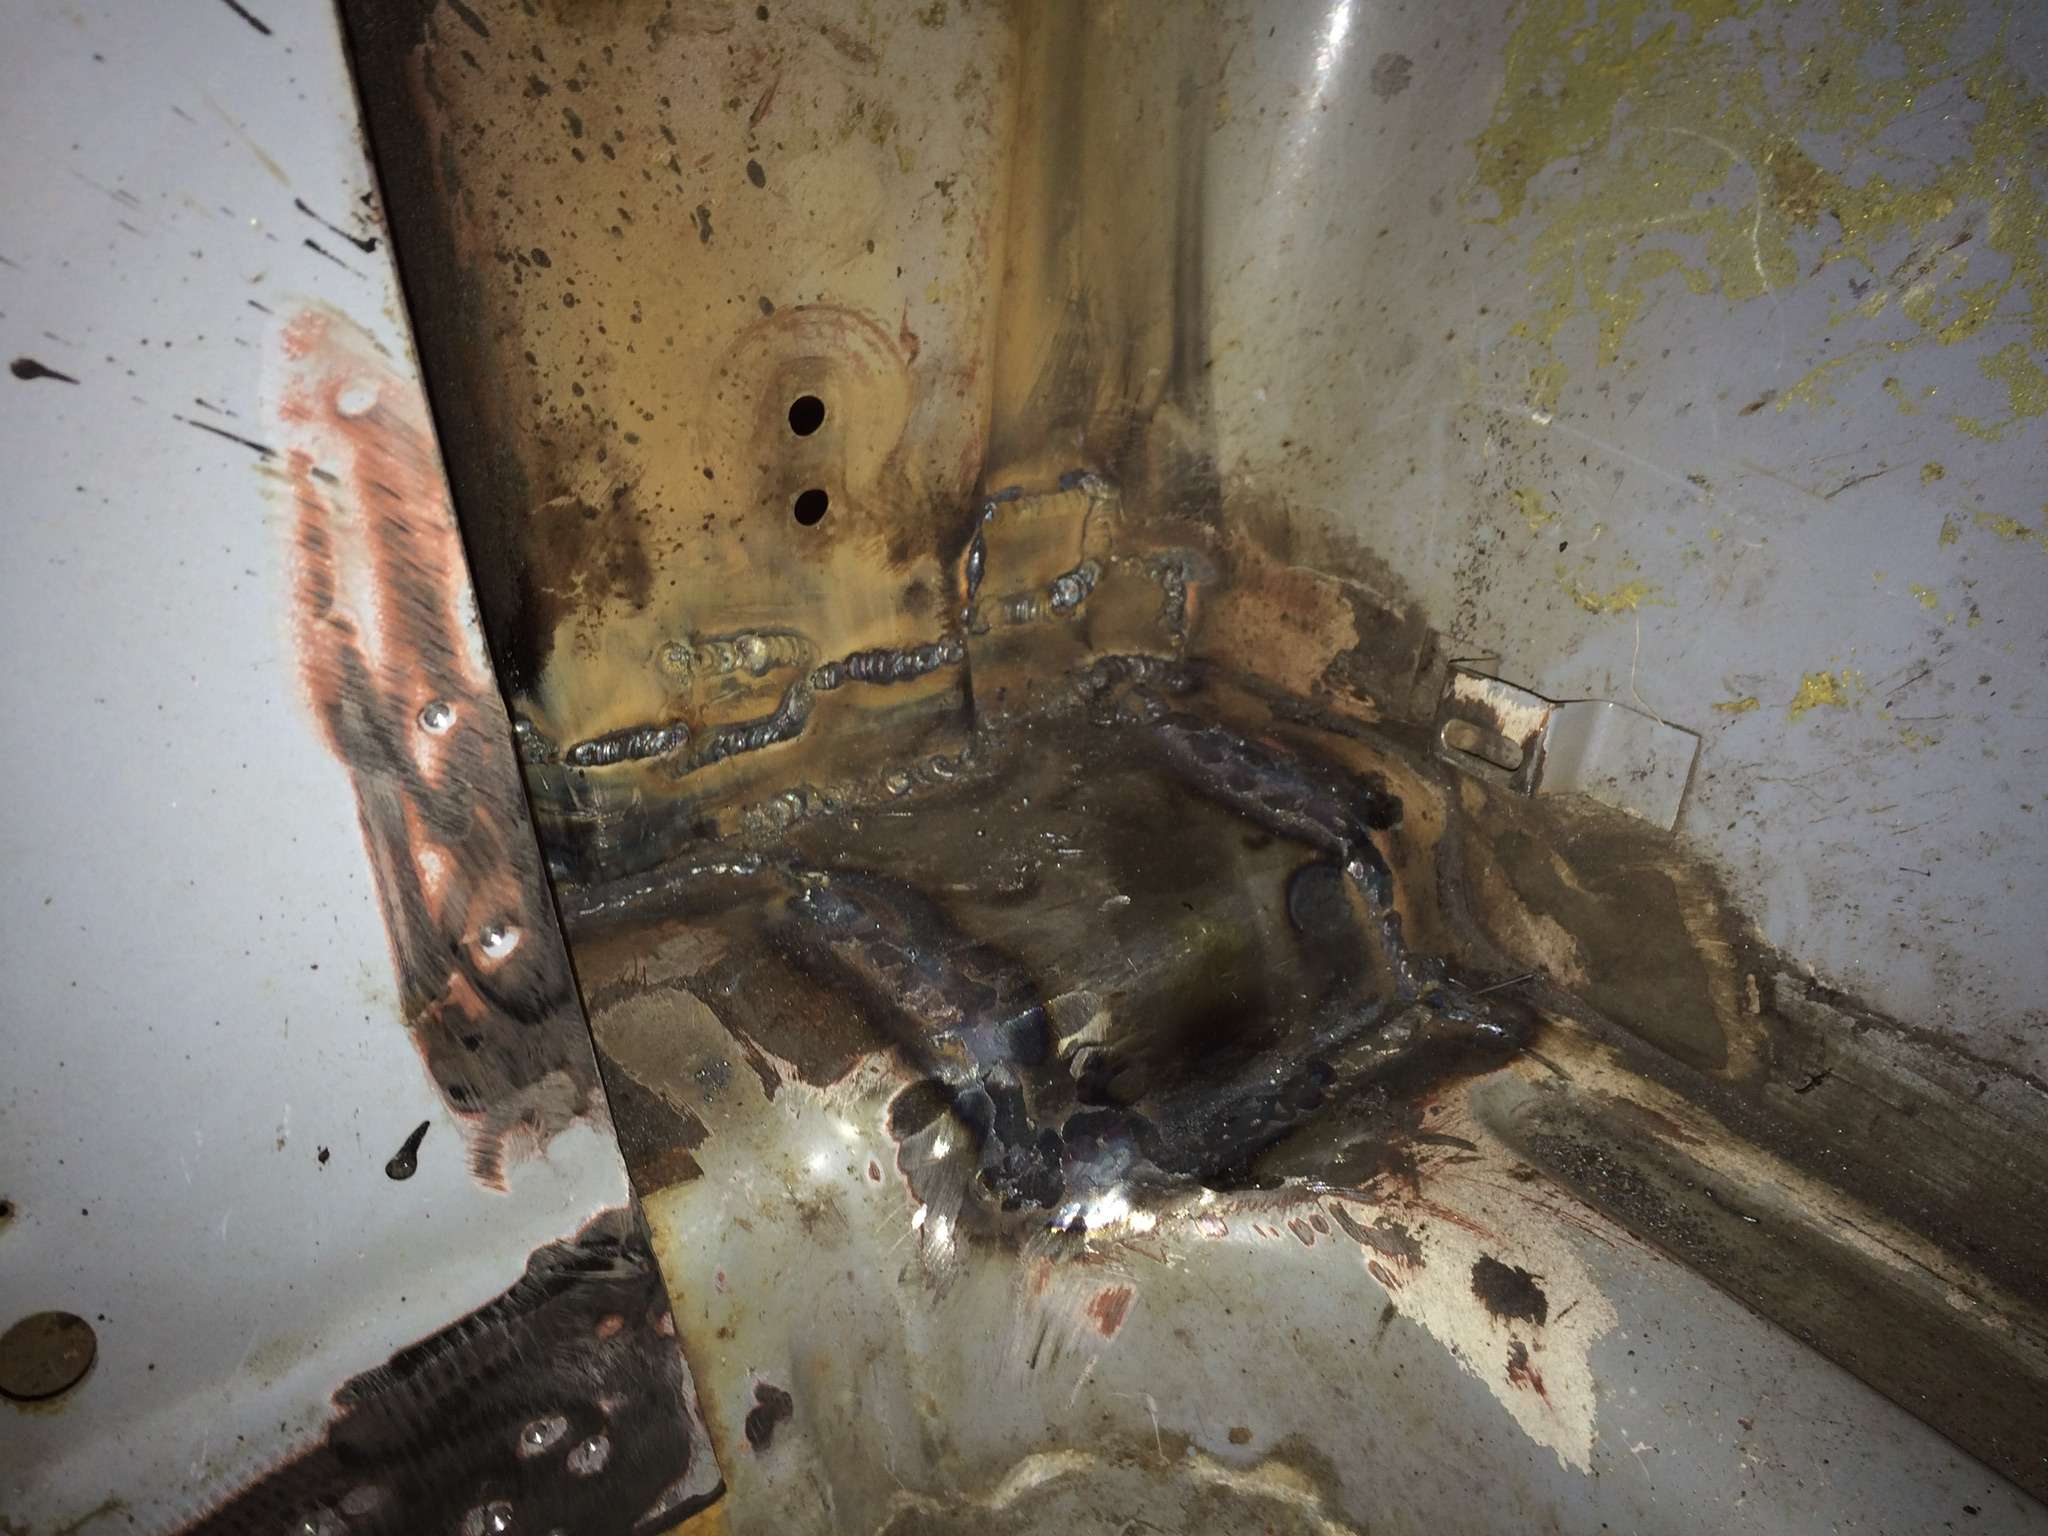
This is the underside of the base of the A pillar.
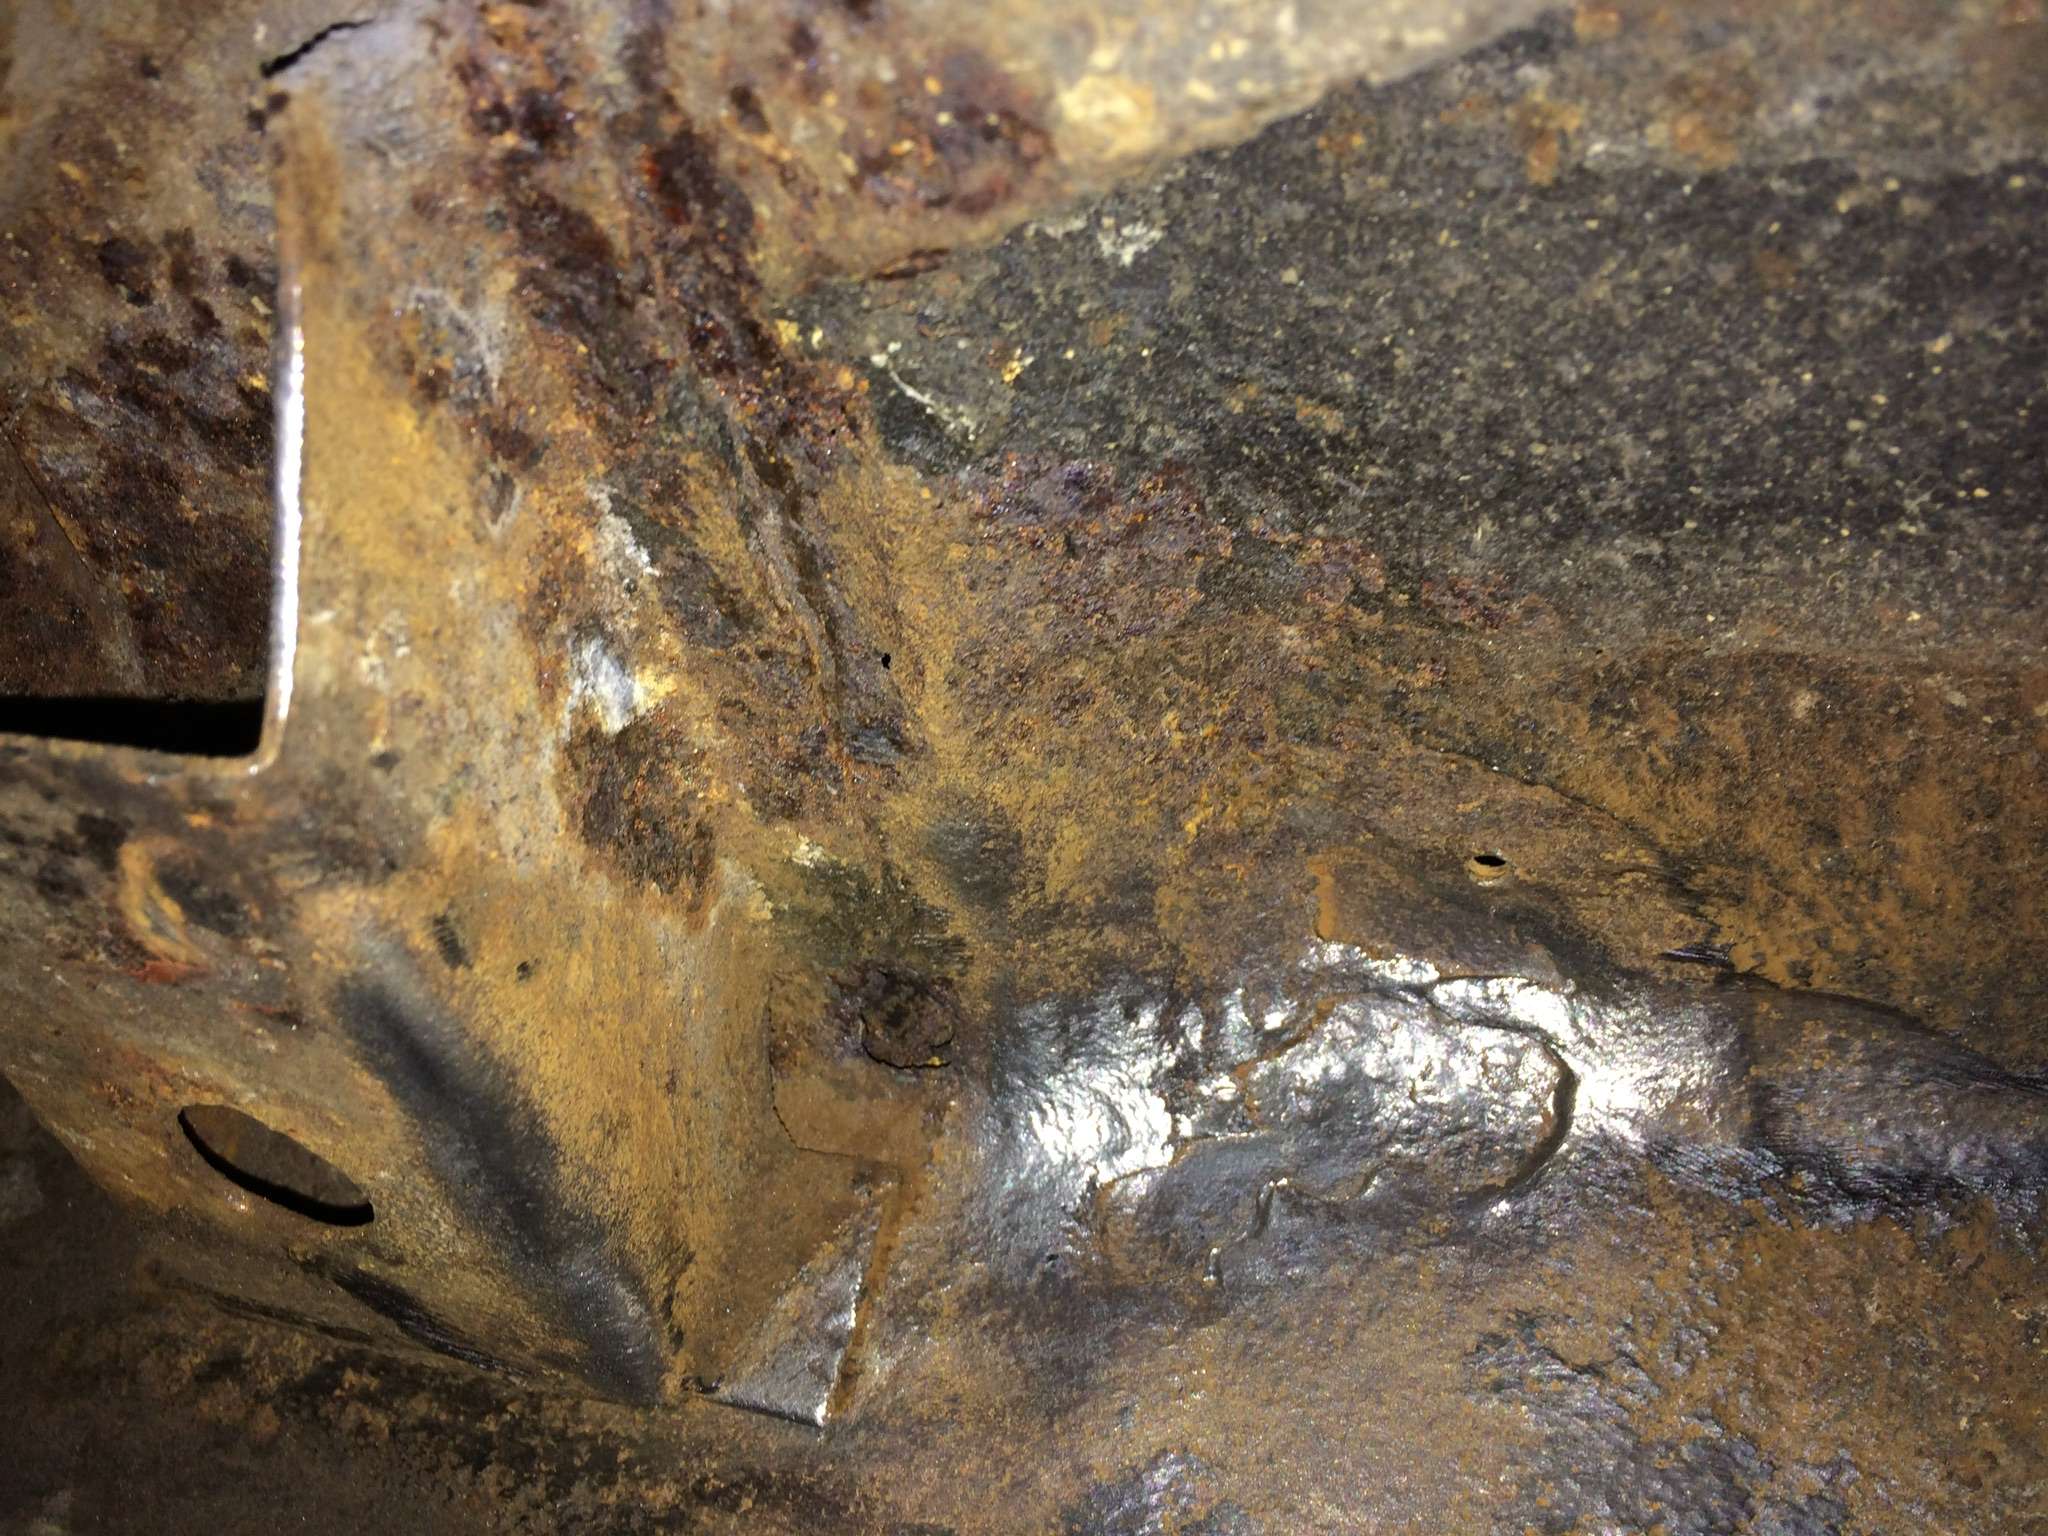
You can see where the outer skin has rotted out just to the right of the mounting bracket, as well as the larger shiny patch, which is actually the rear of the A pillar pressing!!
What you can't see is the hole hiding above the mounting bracket which comes out in the box section behind the A pillar.
To fix this I'm going to have to cut a section out of the lower A pillar pressing inside the car, so that I can access the rot from above, after which I'll cut it out and weld in a repair section, before replacing the section of the A pillar that was removed initially.
Given that I'll be mucking around with the A pillar, and therefore potentially weakening it while it's repaired, I decided to remove the passenger side door, giving me this.
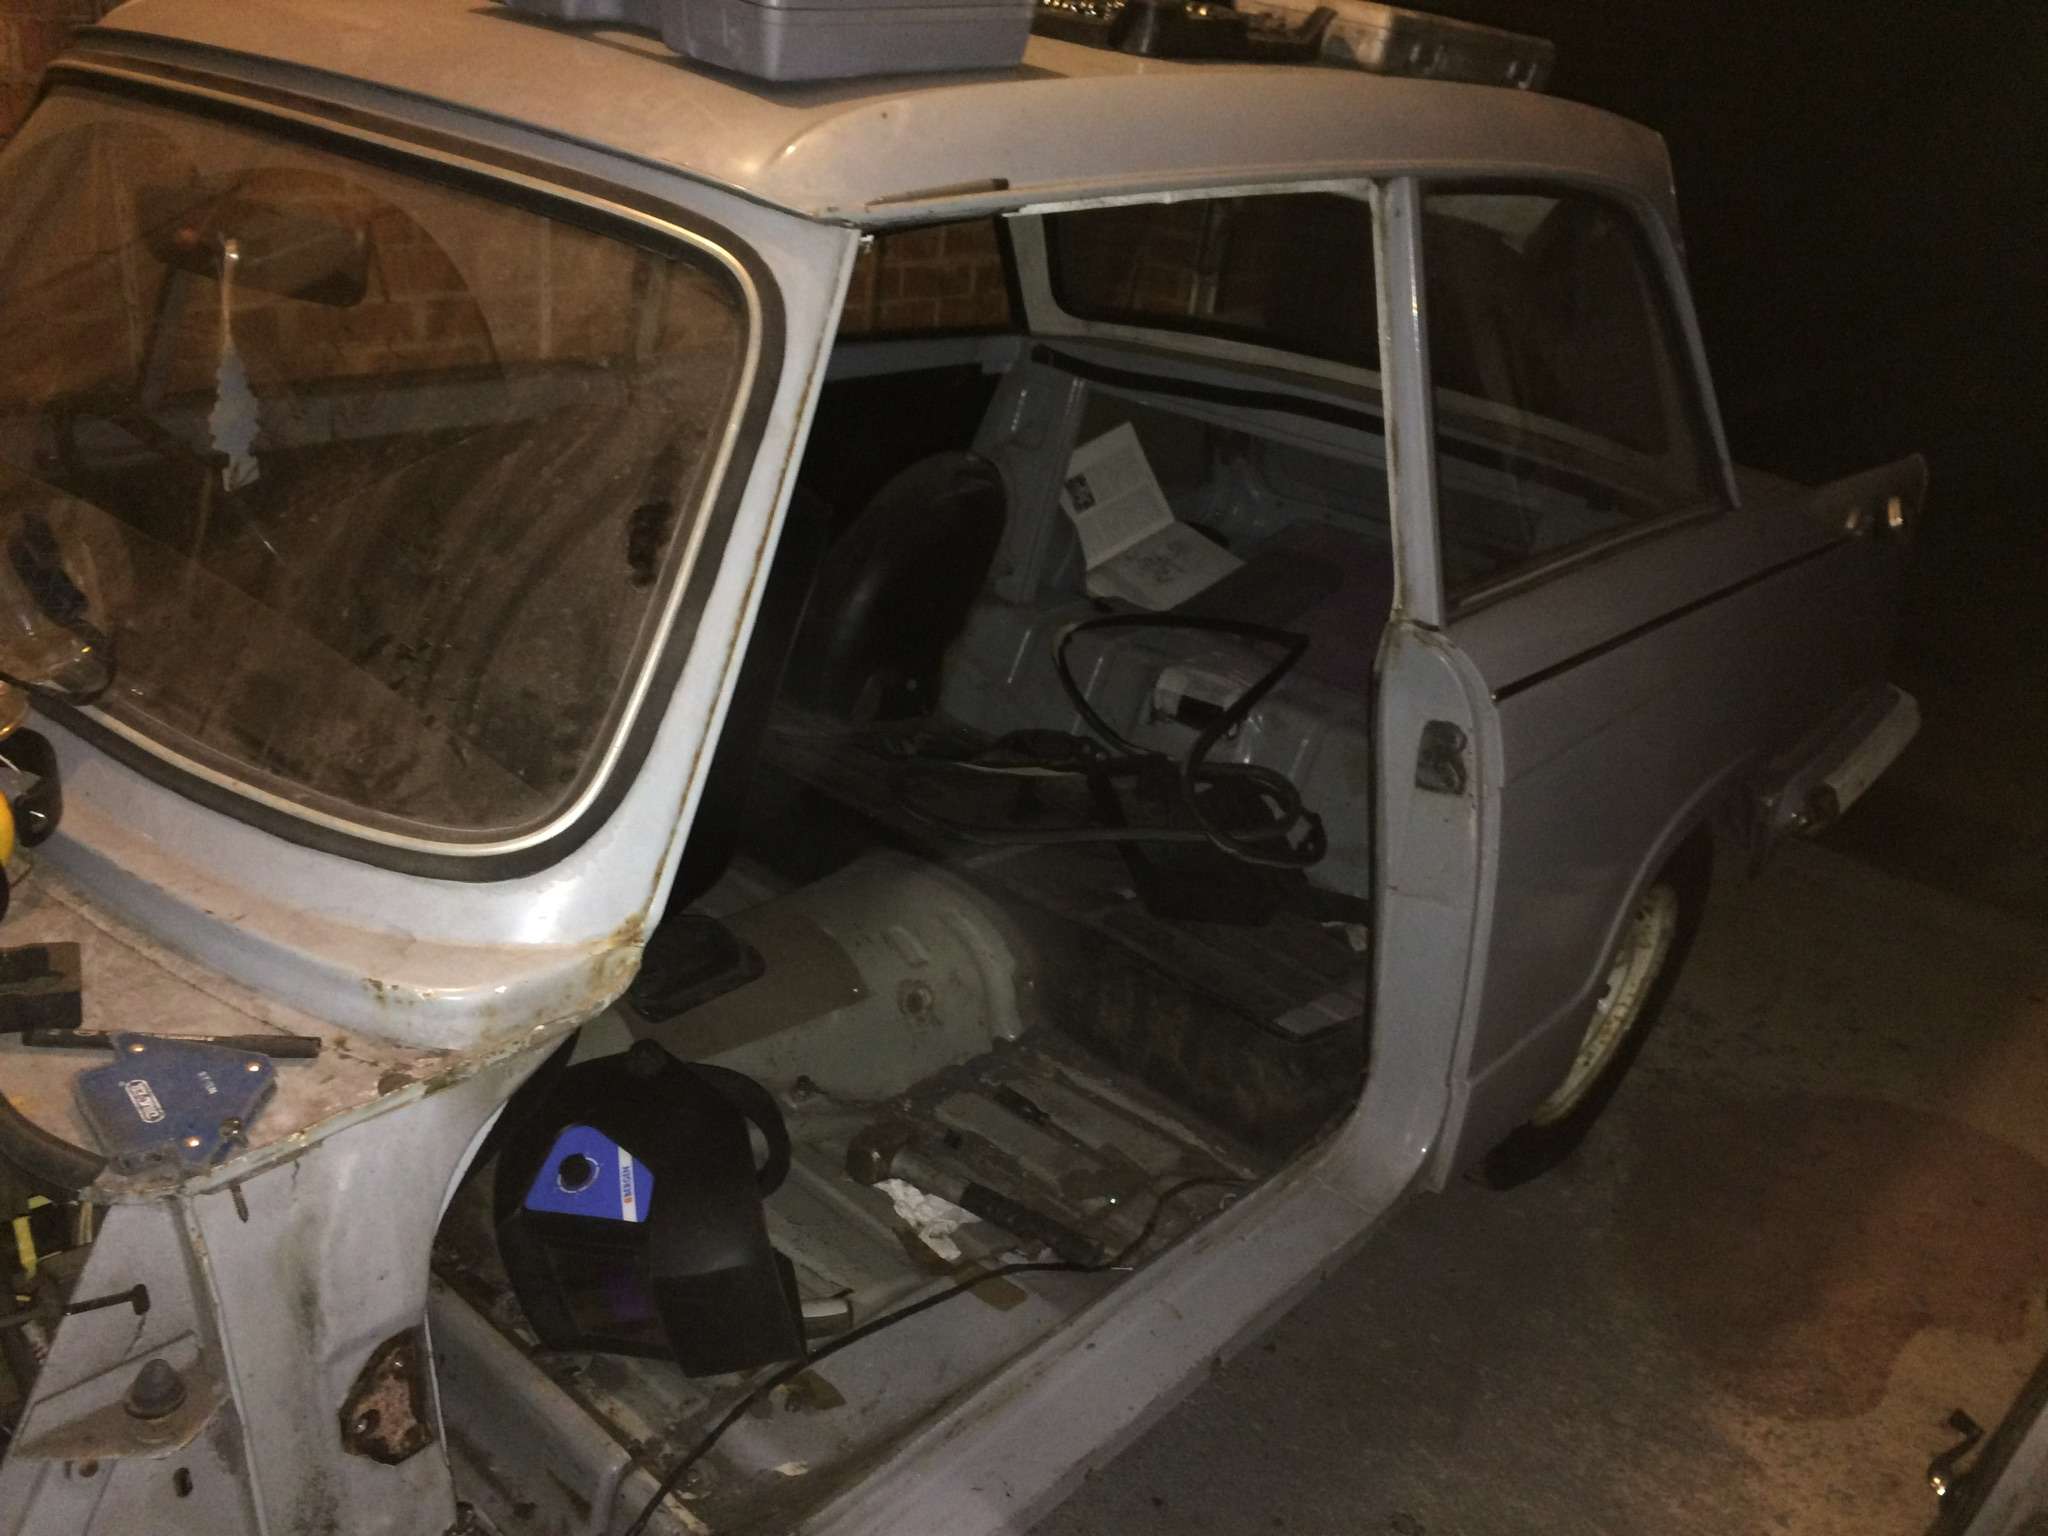
The doors are going to have to come off before I remove the body, so it was already on the to do list.
Still, looks like I know what I'll be doing next weekend........
........now where did I put the angle grinder?
Karl
-
I’d definitely support it.
Karl
-
Following on from last week's tidying of the garage, I decided to start work on a small wooden framed vehicle, no not a Morgan, but a welding trolley.
This was prompted by me finally getting around to picking up a bottle of welding gas from the local farm shop, after which I really couldn't put off building a welding trolley.
Now I know most people make a welding trolley out of steel, after all they own a welder, but I've got very little steel, and being tight, decided to use some of the bits of wood I have lying around the garage.
The welder and the gas bottle are none too light, so I made up a framework from 1 x 1 inch timber, with 6 inch deep sides made up of 9mm ply, and a couple of 1 x 0.5 inch timber uprights to support the bottle, et voila!

Alright, it's not exactly Chippendale, I'll give you that.
Note cleverly repurposed old belt as a means of restraining the gas bottle.
And here it is all loaded up.
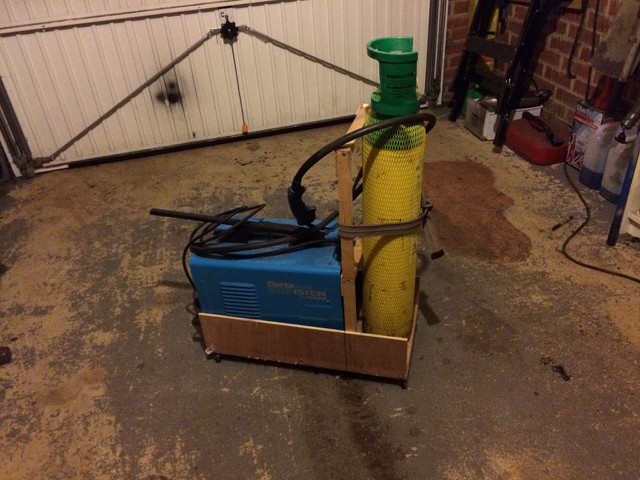
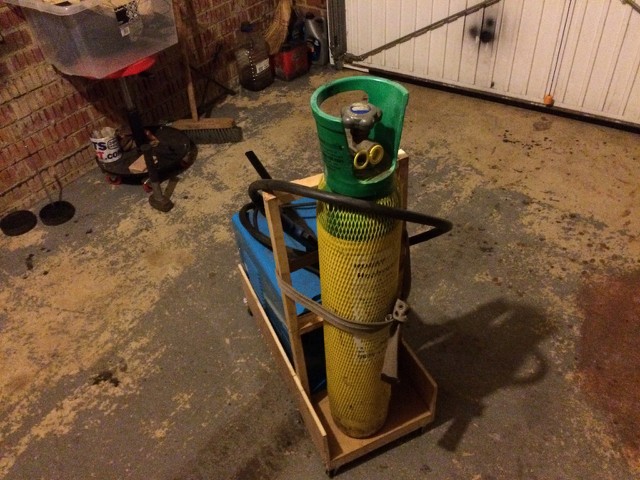
There are still a few more things to do, such as adding some bracing for the uprights, and a lip at the front of the trolley, in front of the cylinder.
Now I just need to attach the gas regulator on the cylinder, followed by the feed to the welder itself, swap the leads over for the welding torch and earth lead, and I should be good to go next week.
You may have noticed that the garage is empty, leaving me plenty of space to build the trolley, an emptiness facilitated by the Herald starting on the button this afternoon, despite not being charged for a week, and then running beautifully for 20 minutes parked on the drive.
It looks like last week's work on the choke has been successful, as I subsequently got the car to restart a number of times this afternoon, all without drama.
Karl
-
Not a lot of visible progress to report this week, and therefore no pictures, as pics don’t really show freshly bled brakes and a hopefully sorted slow running problem.
First up was the brakes which were bled a couple of months back before I started on the seatbelt mounting points, but there was still air in the system.
This time I had the expert assistance of Mrs B to pump the pedal while I worked my way around the car.
Result, one set of fully bled brakes which stop the car nicely.
After that I spent the rest of Saturday afternoon tidying the garage, including finally mounting the fire extinguisher on the wall by the garage personnel door.
I didn’t get into the garage until late today, so decided to try and sort out the slow running issue which has bugged me for a few months now.
I know the carburettor is working fine, but the car refused to run consistently, and kept ‘oiling’ up the plugs with unburnt fuel, which suggested that the choke was not working properly.
Checking the choke cable showed it to be dry as a bone, and notchy as hell, so out came the 3 in 1, which was applied liberally to the length of the cable, and then the cable worked back and forth until the action became smooth again.
All the plugs were then removed and cleaned before I tried starting the engine.
I am happy to say that the engine stated first time, and after 5 minutes to warm up, and a bit of tinkering with the idle speed and idle adjustment screw, seems be OK.
So not a lot to show for 4 hours work, but the Herald now starts and stops, and the garage is actually fairly tidy for once!
Karl
-
I bought this one last year and it’s proved it worth repeatedly.
https://gtair.co.uk/air-compressors/1-burisch-bt-390t-90-litre-3hp-belt-drive-air-compressor.html
You can find the same compressor under a number of brands, but this was the cheapest I could find at the time.
Would definitely recommend.
Karl
-
The spring is trapped by the shock absorber, so can go nowhere sideways, an£ is obviously retained top and bottom by the compressor itself.
Dead easy to use, and safe, which is the most important thing.
Karl
-
Pete, that looks like Frankenstein’s Herald!
I was thinking of un-picking the interior vertical panel at the bottom, and cutting further up, allowing me access to the rear for patching, before welding it all back together.
The alternative would be to remove the bulkhead and go in from underneath, but I don’t really want to do that at the moment.
As for the rest of the chassis I agree with both you and Aidan, if I want to do this properly, it’s probably going to require removal of the rear tub, as I can still replace the front outriggers without having to remove the bulkhead.
Tub removal may have to wait until Easter when both boys are back from university, but first I’ll need to build a moveable frame for the tub to sit on while I work on the chassis.
Thanks guys
Karl
-
Just when you think you can see light at the end of the tunnel, you realise it's a train!
I didn't get anything done last week, so yesterday was my first few hours back in the garage for a couple of weeks.
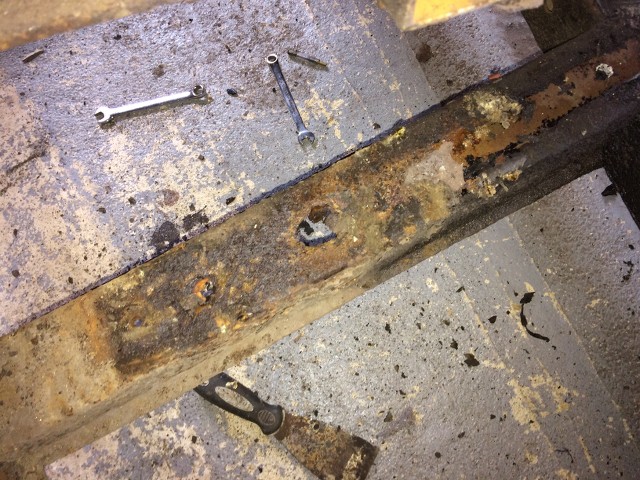
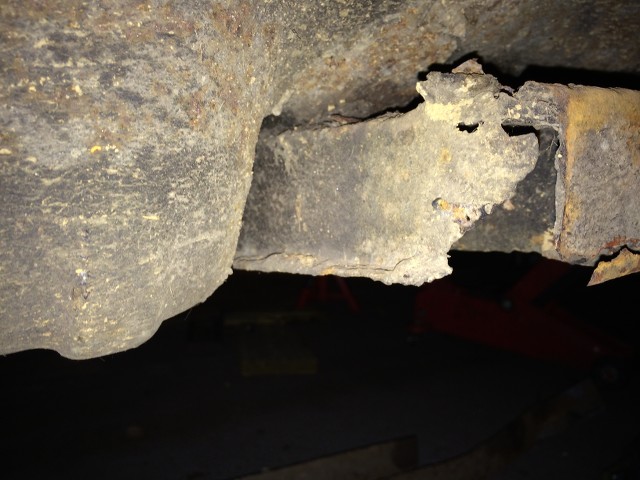
First order of business was the remains of the mounting bolt stuck in the front outrigger, which despite 3 weeks of soaking in Plus Gas, simply refused to budge, even with persuasion.
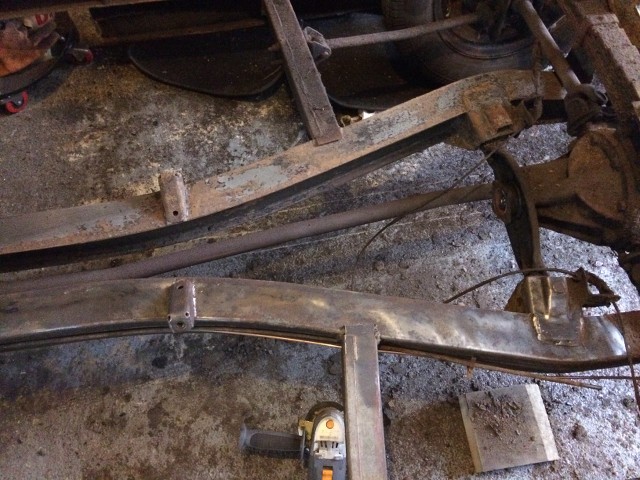
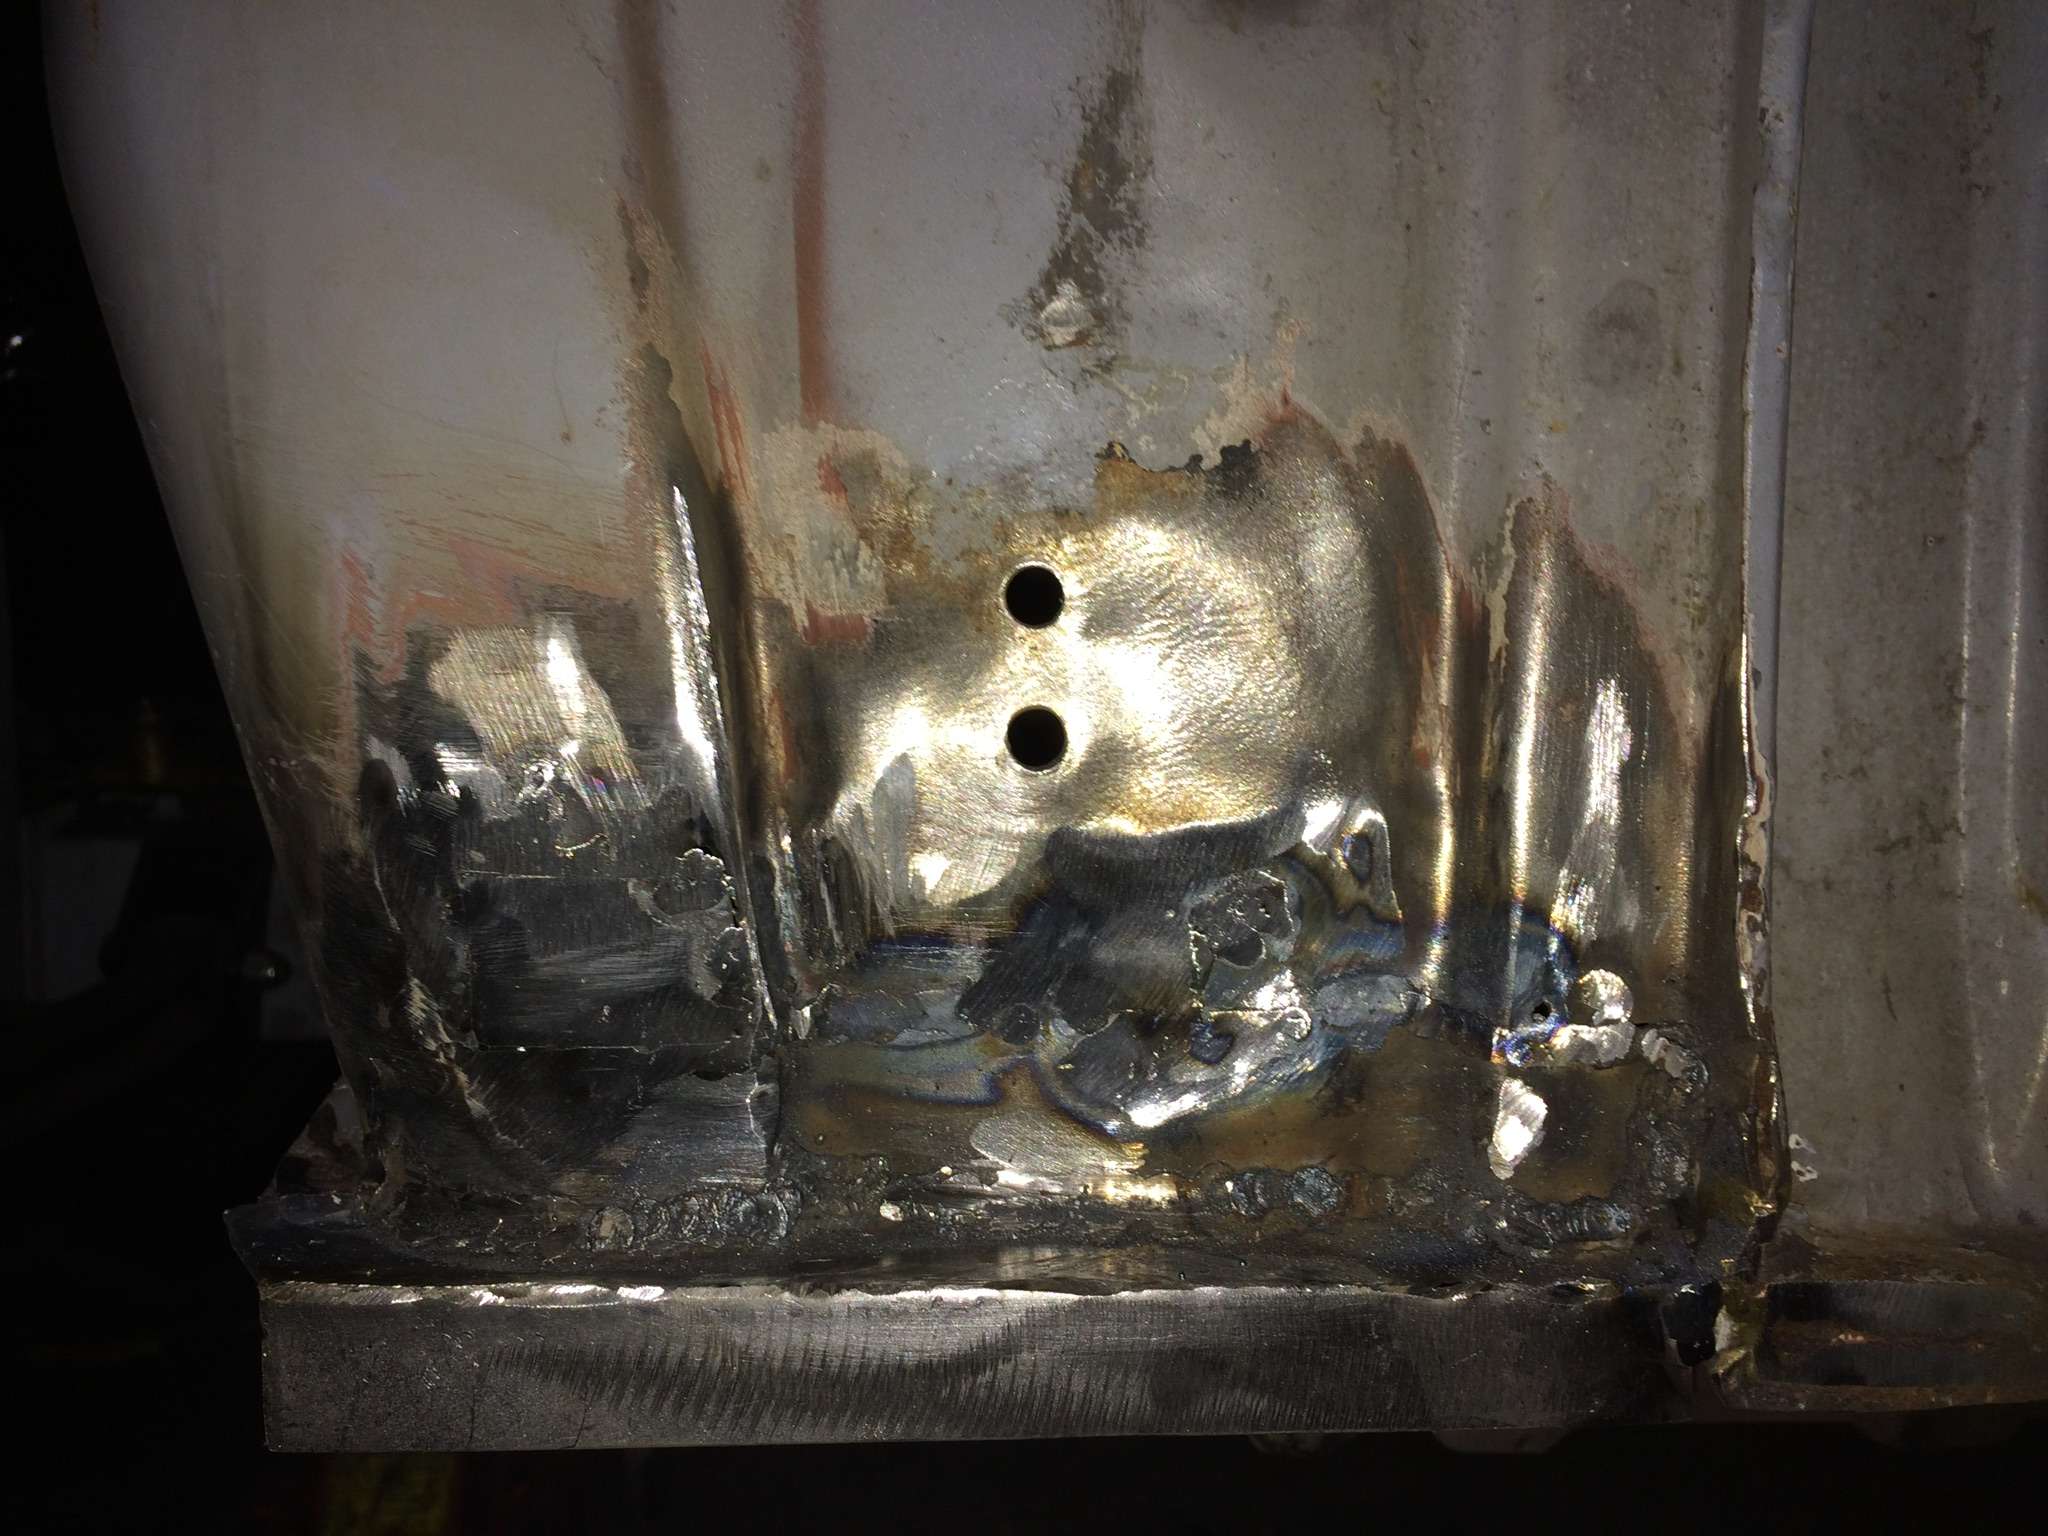
While looking at the end of the front outrigger, and the side rail, trying to figure out how to get the bolt out, it became clear that there were holes in the side rail that shouldn't be there, both at the front and rear!
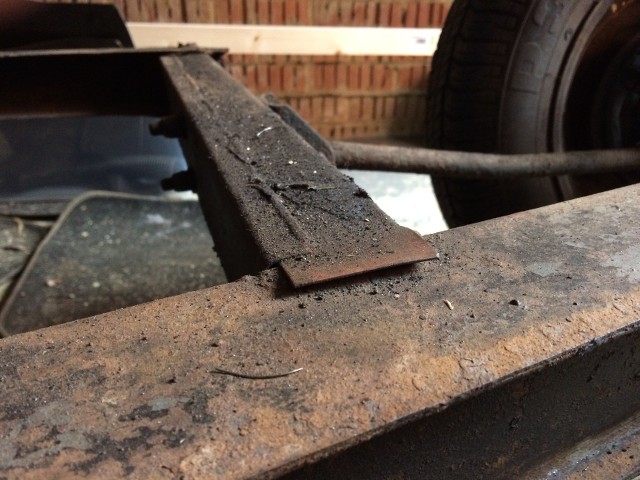
Here's the front outrigger after removal of the side rail.
Note several layers of metal!
Obviously the previous bodger couldn't be bothered to remove the remains of the original rail, and just welded the other over the top!
No wonder it rusted.
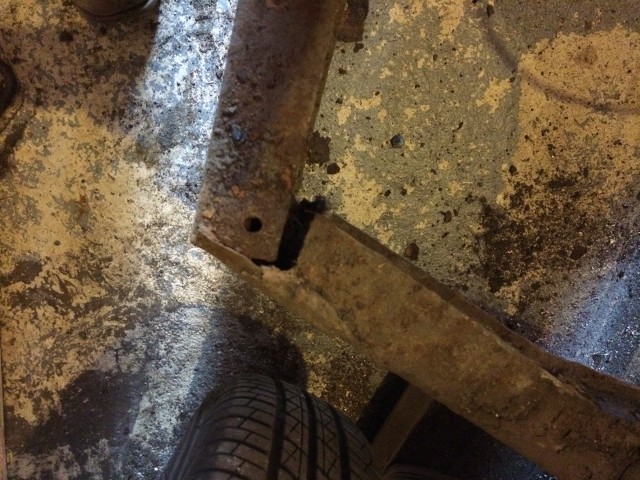
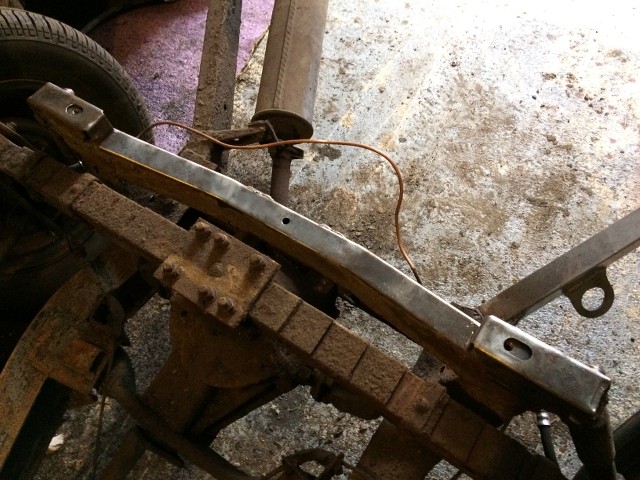
The back end was no better.

With rust between the rail and the outrigger, and a number of patches.
The side rail wasn't even welded to the central outrigger, probably because of this.

You can see the remains of the old, original rail still welded to the top of the outrigger!
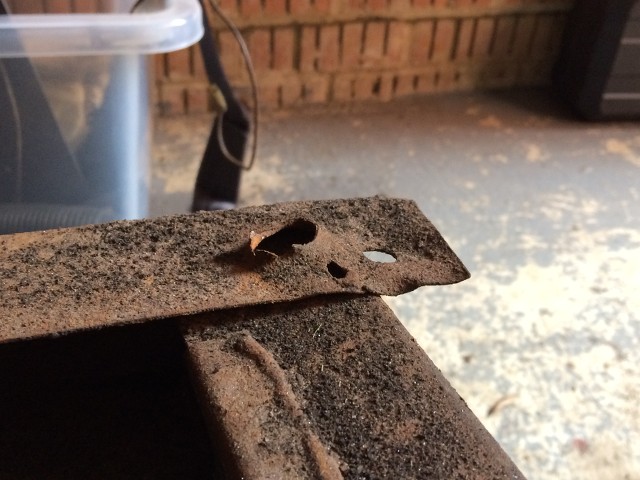
A quick look at the other side of the car showed that the side rail on the driver's side hadn't even been cleanly cut to length!

That's a ragged edge on the side rail!!!!!
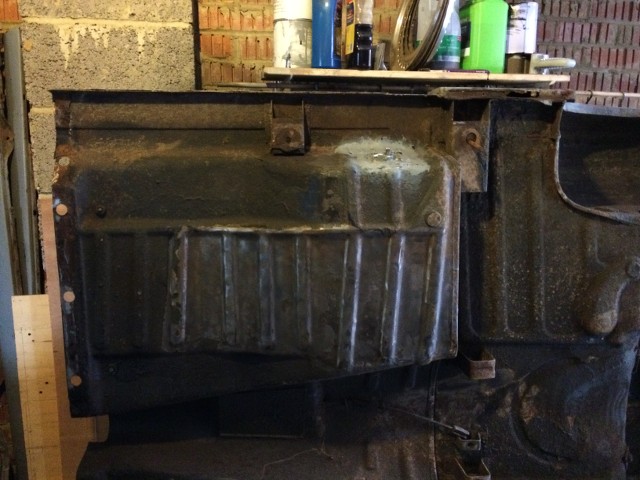
I also found another hole in the front bulkhead floor plan above the second mounting bracket on the passenger side. You can't see it from the inside as it's hidden behind the A pillar.
I found all this in the space of about an hour, and I'm now left wondering whether I should just bite the bullet and take the body off and sort out that chassis once and for all?
Karl
-
Paul I’ve just picked up one of these from Weldquip.
http://www.weldequip.com/argonmix-conversion-kit.htm
Next step is to get is to pick up a Hobbyweld cylinder from the local farm shop, but before that I need to make a welding trolley for the welder and cylinder to sit on.
The 151 EN just needs the leads for the torch and earth clamp switched over for welding with gas and I’m good to go.
Karl

Face protector and cutting disc
in Tools
Posted
Try Machine Mart or ScrewFix for both mask and cutting discs.
A decent full face mask shouldn’t be more than a tenner.
With regard cutting discs I get mine from ScrewFix, and have never had any problems with them, whatever the brand.
Karl